DirectX11 With Windows SDK--10 基于Transform的摄像机类与GameObject类
前言
注意:本教程仅针对代码版本1.27.2及更高版本的项目,仍在使用旧版本代码的用户请留意更新项目代码
在本教程中,以前的第一人称摄像机实现是源自龙书的做法。考虑到摄像机的观察矩阵和物体的世界矩阵实质上是有一定的联系,因此可以将这部分变换给剥离出来,使用统一的Transform类,然后摄像机类与游戏对象类都使用Transform类来分别完成观察变换、世界变换。
DirectX11 With Windows SDK完整目录
欢迎加入QQ群: 727623616 可以一起探讨DX11,以及有什么问题也可以在这里汇报。
Transform类
世界矩阵和观察矩阵的联系
若已知物体所在位置\(\mathbf{Q} = (Q_{x}, Q_{y}, Q_{z})\)以及三个互相垂直的坐标轴 \(\mathbf{u} = (u_{x}, u_{y}, u_{z})\), \(\mathbf{v} = (v_{x}, v_{y}, v_{z})\), \(\mathbf{w} = (w_{x}, w_{y}, w_{z})\),并且物体的xyz缩放比例都为1,则我们可以得到对应的世界矩阵:
我们可以把上述变换看作:将物体从世界坐标原点搬移到世界坐标系对应的位置,并按其坐标轴做对应朝向和大小的调整。
然而现在我们需要做的是从世界坐标系转换到观察空间坐标系,如果把摄像机看做物体的话,实际上观察空间坐标系就是摄像机物体的局部坐标系(右方向为X轴,上方向为Y轴,目视方向为Z轴)。因此我们现在做的是从世界坐标系变换回摄像机的局部坐标系,即世界矩阵的逆变换:
世界变换的复合
假设在初始化阶段,物体经历了初始旋转变换和平移变换,则此时的变换矩阵为
若每一帧都产生缩放、旋转和位移,把当前帧的缩放、旋转和位移矩阵分别记为\(S_{n}\)、\(R_{n}\)和\(T_{n}\),有的人会认为当前帧的世界变换为:
然而这种复合变换可能会导致异常的变换,在前面的变换一章我们就举了一个例子。归根结底在于矩阵乘法不满足交换律,且缩放操作如果不先进行(前面还有旋转或平移)的话会导致物体产生畸变。所以要先让缩放进行:
此时旋转和平移操作就可以自行指定顺序了。如果先平移再旋转,离开原点的物体会绕原点旋转。如果先旋转再平移,就是先改变物体的朝向再放到指定的位置上。
通常对物体修改旋转是基于原点位置的旋转,因此它的世界变换复合为:
而如果涉及到具有父子关系物体的世界变换,则会更复杂一些。以Unity的为例,设父级物体的缩放矩阵、旋转矩阵和位移矩阵分别为\(S_{0}\)、\(R_{0}\)和\(T_{0}\),子一级物体的缩放矩阵、旋转矩阵和位移矩阵为\(S_{1}\)、\(R_{1}\)和\(T_{1}\)。。。那么子N级物体的世界变换复合为:
变换的分解更新
根据上面的复合形式,我们可以将缩放、旋转和平移部分拆开来分别更新,其中缩放和平移部分都可以使用一个向量来保存,然后缩放矩阵的连乘相当于缩放向量的分量乘法,平移矩阵的连乘相当于平移向量的分量加法。至于旋转矩阵的表示形式有三种:旋转四元数、基于特定的坐标轴顺序进行旋转的三个旋转欧拉角、三个相互正交的坐标轴向量。这三种表示形式是可以相互转换的。由于到目前旋转四元数在教程中还没涉及,因此为了节省存储空间,我们使用旋转欧拉角的形式保存。等学到四元数之后就可以用它替换欧拉角存储了。
Transform类的定义如下:
class Transform
{
public:
    Transform() = default;
    Transform(const DirectX::XMFLOAT3& scale, const DirectX::XMFLOAT3& rotation, const DirectX::XMFLOAT3& position);
    ~Transform() = default;

    Transform(const Transform&) = default;
    Transform& operator=(const Transform&) = default;

    Transform(Transform&&) = default;
    Transform& operator=(Transform&&) = default;

    // 获取对象缩放比例
    DirectX::XMFLOAT3 GetScale() const;
    // 获取对象缩放比例
    DirectX::XMVECTOR GetScaleXM() const;

    // 获取对象欧拉角(弧度制)
    // 对象以Z-X-Y轴顺序旋转
    DirectX::XMFLOAT3 GetRotation() const;
    // 获取对象欧拉角(弧度制)
    // 对象以Z-X-Y轴顺序旋转
    DirectX::XMVECTOR GetRotationXM() const;

    // 获取对象位置
    DirectX::XMFLOAT3 GetPosition() const;
    // 获取对象位置
    DirectX::XMVECTOR GetPositionXM() const;

    // 获取右方向轴
    DirectX::XMFLOAT3 GetRightAxis() const;
    // 获取右方向轴
    DirectX::XMVECTOR GetRightAxisXM() const;

    // 获取上方向轴
    DirectX::XMFLOAT3 GetUpAxis() const;
    // 获取上方向轴
    DirectX::XMVECTOR GetUpAxisXM() const;

    // 获取前方向轴
    DirectX::XMFLOAT3 GetForwardAxis() const;
    // 获取前方向轴
    DirectX::XMVECTOR GetForwardAxisXM() const;

    // 获取世界变换矩阵
    DirectX::XMFLOAT4X4 GetLocalToWorldMatrix() const;
    // 获取世界变换矩阵
    DirectX::XMMATRIX GetLocalToWorldMatrixXM() const;

    // 获取逆世界变换矩阵
    DirectX::XMFLOAT4X4 GetWorldToLocalMatrix() const;
    // 获取逆世界变换矩阵
    DirectX::XMMATRIX GetWorldToLocalMatrixXM() const;

    // 设置对象缩放比例
    void SetScale(const DirectX::XMFLOAT3& scale);
    // 设置对象缩放比例
    void SetScale(float x, float y, float z);

    // 设置对象欧拉角(弧度制)
    // 对象将以Z-X-Y轴顺序旋转
    void SetRotation(const DirectX::XMFLOAT3& eulerAnglesInRadian);
    // 设置对象欧拉角(弧度制)
    // 对象将以Z-X-Y轴顺序旋转
    void SetRotation(float x, float y, float z);

    // 设置对象位置
    void SetPosition(const DirectX::XMFLOAT3& position);
    // 设置对象位置
    void SetPosition(float x, float y, float z);

    // 指定欧拉角旋转对象
    void Rotate(const DirectX::XMFLOAT3& eulerAnglesInRadian);
    // 指定以原点为中心绕轴旋转
    void RotateAxis(const DirectX::XMFLOAT3& axis, float radian);
    // 指定以point为旋转中心绕轴旋转
    void RotateAround(const DirectX::XMFLOAT3& point, const DirectX::XMFLOAT3& axis, float radian);

    // 沿着某一方向平移
    void Translate(const DirectX::XMFLOAT3& direction, float magnitude);

    // 观察某一点
    void LookAt(const DirectX::XMFLOAT3& target, const DirectX::XMFLOAT3& up = { 0.0f, 1.0f, 0.0f });
    // 沿着某一方向观察
    void LookTo(const DirectX::XMFLOAT3& direction, const DirectX::XMFLOAT3& up = { 0.0f, 1.0f, 0.0f });

private:
    // 从旋转矩阵获取旋转欧拉角
    DirectX::XMFLOAT3 GetEulerAnglesFromRotationMatrix(const DirectX::XMFLOAT4X4& rotationMatrix);

private:
    DirectX::XMFLOAT3 m_Scale = { 1.0f, 1.0f, 1.0f };                // 缩放
    DirectX::XMFLOAT3 m_Rotation = {};                                // 旋转欧拉角(弧度制)
    DirectX::XMFLOAT3 m_Position = {};                                // 位置
};
部分实现如下:
XMFLOAT3 Transform::GetScale() const
{
    return m_Scale;
}

XMFLOAT3 Transform::GetRotation() const
{
    return m_Rotation;
}

XMFLOAT3 Transform::GetPosition() const
{
    return m_Position;
}

XMFLOAT3 Transform::GetRightAxis() const
{
    XMMATRIX R = XMMatrixRotationRollPitchYawFromVector(XMLoadFloat3(&m_Rotation));
    XMFLOAT3 right;
    XMStoreFloat3(&right, R.r[0]);
    return right;
}

XMFLOAT3 Transform::GetUpAxis() const
{
    XMMATRIX R = XMMatrixRotationRollPitchYawFromVector(XMLoadFloat3(&m_Rotation));
    XMFLOAT3 up;
    XMStoreFloat3(&up, R.r[1]);
    return up;
}

XMFLOAT3 Transform::GetForwardAxis() const
{
    XMMATRIX R = XMMatrixRotationRollPitchYawFromVector(XMLoadFloat3(&m_Rotation));
    XMFLOAT3 forward;
    XMStoreFloat3(&forward, R.r[2]);
    return forward;
}

void Transform::SetScale(const XMFLOAT3& scale)
{
    m_Scale = scale;
}

void Transform::SetRotation(const XMFLOAT3& eulerAnglesInRadian)
{
    m_Rotation = eulerAnglesInRadian;
}

void Transform::SetPosition(const XMFLOAT3& position)
{
    m_Position = position;
}

void Transform::Translate(const XMFLOAT3& direction, float magnitude)
{
    XMVECTOR directionVec = XMVector3Normalize(XMLoadFloat3(&direction));
    XMVECTOR newPosition = XMVectorMultiplyAdd(XMVectorReplicate(magnitude), directionVec, XMLoadFloat3(&m_Position));
    XMStoreFloat3(&m_Position, newPosition);
}

void Transform::LookAt(const XMFLOAT3& target, const XMFLOAT3& up)
{
    XMMATRIX View = XMMatrixLookAtLH(XMLoadFloat3(&m_Position), XMLoadFloat3(&target), XMLoadFloat3(&up));
    XMMATRIX InvView = XMMatrixInverse(nullptr, View);
    XMFLOAT4X4 rotMatrix;
    XMStoreFloat4x4(&rotMatrix, InvView);
    m_Rotation = GetEulerAnglesFromRotationMatrix(rotMatrix);
}

void Transform::LookTo(const XMFLOAT3& direction, const XMFLOAT3& up)
{
    XMMATRIX View = XMMatrixLookToLH(XMLoadFloat3(&m_Position), XMLoadFloat3(&direction), XMLoadFloat3(&up));
    XMMATRIX InvView = XMMatrixInverse(nullptr, View);
    XMFLOAT4X4 rotMatrix;
    XMStoreFloat4x4(&rotMatrix, InvView);
    m_Rotation = GetEulerAnglesFromRotationMatrix(rotMatrix);
}
规定旋转顺序
在决定X轴、Y轴、Z轴旋转的先后顺序时,可以产生出6种不同的组合。而在DirectXMath中,存在这样一系列旋转矩阵构造函数,采用的是Roll-Pitch-Yaw的旋转形式,实际上说的就是先绕Z轴旋转,再绕X轴旋转,最后再绕Y轴旋转。选择这样的旋转顺序,首先考虑到的是要最大限度避免万向节死锁的出现(简单来说,就是在进行第二步旋转时旋转了+-90度,会导致第一步旋转和第三步旋转看起来是绕方向相反的两个轴进行旋转,丢失了一个旋转自由度。具体不展开),而物体+Z轴竖直朝上或朝下的情况都是非常少见的。
旋转欧拉角与旋转矩阵的相互转化
在Z-X-Y的旋转顺序下,由旋转欧拉角产生的旋转矩阵为:
在DirectXMath中我们可以调用XMMatrixRotationRollPitchYaw或XMMatrixRotationRollPitchYawFromVector函数来获取变换矩阵。
通过该矩阵,我们可以还原出欧拉角。规定\(m_{11}\)为矩阵第一行第一列元素,则有:
但在还原欧拉角的时候,若\(\theta_x\)为\(\pi/2\)或\(-\pi/2\),则会导致万向节死锁的问题。以\(\theta_x=\pi/2\)为例:
此时取\(\theta_z = 0\),则:
同理,\(\theta_x=-\pi/2\)时:
此时取\(\theta_z=0\),则:
因此我们的欧拉角还原函数如下:
XMFLOAT3 Transform::GetEulerAnglesFromRotationMatrix(const XMFLOAT4X4& rotationMatrix)
{
    DirectX::XMFLOAT3 rotation{};
    // 死锁特殊处理
    if (fabs(1.0f - fabs(rotationMatrix(2, 1))) < 1e-5f)
    {
        rotation.x = copysignf(DirectX::XM_PIDIV2, -rotationMatrix(2, 1));
        rotation.y = -atan2f(rotationMatrix(0, 2), rotationMatrix(0, 0));
        return rotation;
    }

    // 通过旋转矩阵反求欧拉角
    float c = sqrtf(1.0f - rotationMatrix(2, 1) * rotationMatrix(2, 1));
    // 防止r[2][1]出现大于1的情况
    if (isnan(c))
        c = 0.0f;

    rotation.z = atan2f(rotationMatrix(0, 1), rotationMatrix(1, 1));
    rotation.x = atan2f(-rotationMatrix(2, 1), c);
    rotation.y = atan2f(rotationMatrix(2, 0), rotationMatrix(2, 2));
    return rotation;
}
旋转相关的函数
首先最简单的就是基于旋转欧拉角的旋转了,只需要更新欧拉角即可:
void Transform::Rotate(const XMFLOAT3& eulerAnglesInRadian)
{
    XMVECTOR newRotationVec = XMVectorAdd(XMLoadFloat3(&m_Rotation),
        XMLoadFloat3(&eulerAnglesInRadian));
    XMStoreFloat3(&m_Rotation, newRotationVec);
}
接着是绕轴旋转,先根据当前欧拉角得到旋转矩阵,然后更新,最后还原欧拉角:
void Transform::RotateAxis(const XMFLOAT3& axis, float radian)
{
    XMVECTOR rotationVec = XMLoadFloat3(&m_Rotation);
    XMMATRIX R = XMMatrixRotationRollPitchYawFromVector(rotationVec) *
        XMMatrixRotationAxis(XMLoadFloat3(&axis), radian);
    XMFLOAT4X4 rotMatrix;
    XMStoreFloat4x4(&rotMatrix, R);
    m_Rotation = GetEulerAnglesFromRotationMatrix(rotMatrix);
}
基于某一点为旋转中心进行绕轴旋转的实现过程稍微有点复杂。首先根据已有变换算出旋转矩阵*平移矩阵,然后将旋转中心平移到原点(这两步平移可以合并),再进行旋转,最后再平移回旋转中心:
void Transform::RotateAround(const XMFLOAT3& point, const XMFLOAT3& axis, float radian)
{
    XMVECTOR rotationVec = XMLoadFloat3(&m_Rotation);
    XMVECTOR positionVec = XMLoadFloat3(&m_Position);
    XMVECTOR centerVec = XMLoadFloat3(&point);

    // 以point作为原点进行旋转
    XMMATRIX RT = XMMatrixRotationRollPitchYawFromVector(rotationVec) * XMMatrixTranslationFromVector(positionVec - centerVec);
    RT *= XMMatrixRotationAxis(XMLoadFloat3(&axis), radian);
    RT *= XMMatrixTranslationFromVector(centerVec);
    XMFLOAT4X4 rotMatrix;
    XMStoreFloat4x4(&rotMatrix, RT);
}
构造变换矩阵
完成更新后,我们就可以获取变换矩阵了。
其中GetLocalToWorldMatrix系列函数用于从局部坐标系变换到世界坐标系,而GetWorldToLocalMatrix系列函数用于从世界坐标系变换到局部坐标系,当Scale=(1,1,1)时,它可以表示为观察矩阵。
XMFLOAT4X4 Transform::GetLocalToWorldMatrix() const
{
    XMFLOAT4X4 res;
    XMStoreFloat4x4(&res, GetLocalToWorldMatrixXM());
    return res;
}

XMMATRIX Transform::GetLocalToWorldMatrixXM() const
{
    XMVECTOR scaleVec = XMLoadFloat3(&m_Scale);
    XMVECTOR rotationVec = XMLoadFloat3(&m_Rotation);
    XMVECTOR positionVec = XMLoadFloat3(&m_Position);
    XMMATRIX World = XMMatrixScalingFromVector(scaleVec) * XMMatrixRotationRollPitchYawFromVector(rotationVec) * XMMatrixTranslationFromVector(positionVec);
    return World;
}

XMFLOAT4X4 Transform::GetWorldToLocalMatrix() const
{
    XMFLOAT4X4 res;
    XMStoreFloat4x4(&res, GetWorldToLocalMatrixXM());
    return res;
}

XMMATRIX Transform::GetWorldToLocalMatrixXM() const
{
    XMMATRIX InvWorld = XMMatrixInverse(nullptr, GetLocalToWorldMatrixXM());
    return InvWorld;
}
Camera类
摄像机抽象基类
现在的摄像机将基于Transform实现。Camera类的定义如下(删去了一些用不上的函数):
class Camera
{
public:
    Camera() = default;
    virtual ~Camera() = 0;

    //
    // 获取摄像机位置
    //

    DirectX::XMVECTOR GetPositionXM() const;
    DirectX::XMFLOAT3 GetPosition() const;

    //
    // 获取摄像机旋转
    //

    // 获取绕X轴旋转的欧拉角弧度
    float GetRotationX() const;
    // 获取绕Y轴旋转的欧拉角弧度
    float GetRotationY() const;

    //
    // 获取摄像机的坐标轴向量
    //

    DirectX::XMVECTOR GetRightAxisXM() const;
    DirectX::XMFLOAT3 GetRightAxis() const;
    DirectX::XMVECTOR GetUpAxisXM() const;
    DirectX::XMFLOAT3 GetUpAxis() const;
    DirectX::XMVECTOR GetLookAxisXM() const;
    DirectX::XMFLOAT3 GetLookAxis() const;

    //
    // 获取矩阵
    //

    DirectX::XMMATRIX GetViewXM() const;
    DirectX::XMMATRIX GetProjXM() const;
    DirectX::XMMATRIX GetViewProjXM() const;

    // 获取视口
    D3D11_VIEWPORT GetViewPort() const;


    // 设置视锥体
    void SetFrustum(float fovY, float aspect, float nearZ, float farZ);

    // 设置视口
    void SetViewPort(const D3D11_VIEWPORT& viewPort);
    void SetViewPort(float topLeftX, float topLeftY, float width, float height, float minDepth = 0.0f, float maxDepth = 1.0f);

protected:

    // 摄像机的变换
    Transform m_Transform = {};

    // 视锥体属性
    float m_NearZ = 0.0f;
    float m_FarZ = 0.0f;
    float m_Aspect = 0.0f;
    float m_FovY = 0.0f;

    // 当前视口
    D3D11_VIEWPORT m_ViewPort = {};

};
可以看到,无论是什么类型的摄像机,都一定需要包含观察矩阵、投影矩阵以及设置这两个坐标系所需要的一些相关信息。
第一人称/自由视角摄像机
FirstPersonCamera类的定义如下:
class FirstPersonCamera : public Camera
{
public:
    FirstPersonCamera() = default;
    ~FirstPersonCamera() override;

    // 设置摄像机位置
    void SetPosition(float x, float y, float z);
    void SetPosition(const DirectX::XMFLOAT3& pos);
    // 设置摄像机的朝向
    void LookAt(const DirectX::XMFLOAT3& pos, const DirectX::XMFLOAT3& target,const DirectX::XMFLOAT3& up);
    void LookTo(const DirectX::XMFLOAT3& pos, const DirectX::XMFLOAT3& to, const DirectX::XMFLOAT3& up);
    // 平移
    void Strafe(float d);
    // 直行(平面移动)
    void Walk(float d);
    // 前进(朝前向移动)
    void MoveForward(float d);
    // 上下观察
    // 正rad值向上观察
    // 负rad值向下观察
    void Pitch(float rad);
    // 左右观察
    // 正rad值向左观察
    // 负rad值向右观察
    void RotateY(float rad);
};
该第一人称摄像机没有实现碰撞检测,它具有如下功能:
- 设置摄像机的朝向、位置
- 朝摄像机的正前方进行向前/向后移动(自由视角)
- 在水平地面上向前/向后移动(第一人称视角)
- 左/右平移
- 视野左/右旋转(绕Y轴)
- 视野上/下旋转(绕摄像机的右方向轴),并限制了旋转角度防止旋转角度过大
具体实现如下:
FirstPersonCamera::~FirstPersonCamera()
{
}

void FirstPersonCamera::SetPosition(float x, float y, float z)
{
    SetPosition(XMFLOAT3(x, y, z));
}

void FirstPersonCamera::SetPosition(const XMFLOAT3& pos)
{
    m_Transform.SetPosition(pos);
}

void FirstPersonCamera::LookAt(const XMFLOAT3 & pos, const XMFLOAT3 & target,const XMFLOAT3 & up)
{
    m_Transform.SetPosition(pos);
    m_Transform.LookAt(target, up);
}

void FirstPersonCamera::LookTo(const XMFLOAT3 & pos, const XMFLOAT3 & to, const XMFLOAT3 & up)
{
    m_Transform.SetPosition(pos);
    m_Transform.LookTo(to, up);
}

void FirstPersonCamera::Strafe(float d)
{
    m_Transform.Translate(m_Transform.GetRightAxis(), d);
}

void FirstPersonCamera::Walk(float d)
{
    XMVECTOR rightVec = XMLoadFloat3(&m_Transform.GetRightAxis());
    XMVECTOR frontVec = XMVector3Normalize(XMVector3Cross(rightVec, g_XMIdentityR1));
    XMFLOAT3 front;
    XMStoreFloat3(&front, frontVec);
    m_Transform.Translate(front, d);
}

void FirstPersonCamera::MoveForward(float d)
{
    m_Transform.Translate(m_Transform.GetForwardAxis(), d);
}

void FirstPersonCamera::Pitch(float rad)
{
    XMFLOAT3 rotation = m_Transform.GetRotation();
    // 将绕x轴旋转弧度限制在[-7pi/18, 7pi/18]之间
    rotation.x += rad;
    if (rotation.x > XM_PI * 7 / 18)
        rotation.x = XM_PI * 7 / 18;
    else if (rotation.x < -XM_PI * 7 / 18)
        rotation.x = -XM_PI * 7 / 18;

    m_Transform.SetRotation(rotation);
}

void FirstPersonCamera::RotateY(float rad)
{
    XMFLOAT3 rotation = m_Transform.GetRotation();
    rotation.y = XMScalarModAngle(rotation.y + rad);
    m_Transform.SetRotation(rotation);
}
其中上下视野角度由旋转欧拉角x分量决定,将其限制在+-70°的范围内避免过度抬头和低头。
第三人称摄像机
ThirdPersonCamera类的定义如下:
class ThirdPersonCamera : public Camera
{
public:
    ThirdPersonCamera() = default;
    ~ThirdPersonCamera() override;

    // 获取当前跟踪物体的位置
    DirectX::XMFLOAT3 GetTargetPosition() const;
    // 获取与物体的距离
    float GetDistance() const;
    // 绕物体垂直旋转(注意绕x轴旋转欧拉角弧度限制在[0, pi/3])
    void RotateX(float rad);
    // 绕物体水平旋转
    void RotateY(float rad);
    // 拉近物体
    void Approach(float dist);
    // 设置初始绕X轴的弧度(注意绕x轴旋转欧拉角弧度限制在[0, pi/3])
    void SetRotationX(float rad);
    // 设置初始绕Y轴的弧度
    void SetRotationY(float rad);
    // 设置并绑定待跟踪物体的位置
    void SetTarget(const DirectX::XMFLOAT3& target);
    // 设置初始距离
    void SetDistance(float dist);
    // 设置最小最大允许距离
    void SetDistanceMinMax(float minDist, float maxDist);

private:
    DirectX::XMFLOAT3 m_Target = {};
    float m_Distance = 0.0f;
    // 最小允许距离,最大允许距离
    float m_MinDist = 0.0f, m_MaxDist = 0.0f;
};
该第三人称摄像机同样没有实现碰撞检测,它具有如下功能:
- 设置观察目标的位置
- 设置与观察目标的距离(限制在合理范围内)
- 绕物体进行水平旋转
- 绕物体Y轴进行旋转
上述部分具体实现如下:
XMFLOAT3 ThirdPersonCamera::GetTargetPosition() const
{
    return m_Target;
}

float ThirdPersonCamera::GetDistance() const
{
    return m_Distance;
}

void ThirdPersonCamera::RotateX(float rad)
{
    XMFLOAT3 rotation = m_Transform.GetRotation();
    // 将绕x轴旋转弧度限制在[0, pi/3]之间
    rotation.x += rad;
    if (rotation.x < 0.0f)
        rotation.x = 0.0f;
    else if (rotation.x > XM_PI / 3)
        rotation.x = XM_PI / 3;

    m_Transform.SetRotation(rotation);
    m_Transform.SetPosition(m_Target);
    m_Transform.Translate(m_Transform.GetForwardAxis(), -m_Distance);
}

void ThirdPersonCamera::RotateY(float rad)
{
    XMFLOAT3 rotation = m_Transform.GetRotation();
    rotation.y = XMScalarModAngle(rotation.y + rad);

    m_Transform.SetRotation(rotation);
    m_Transform.SetPosition(m_Target);
    m_Transform.Translate(m_Transform.GetForwardAxis(), -m_Distance);
}

void ThirdPersonCamera::Approach(float dist)
{
    m_Distance += dist;
    // 限制距离在[m_MinDist, m_MaxDist]之间
    if (m_Distance < m_MinDist)
        m_Distance = m_MinDist;
    else if (m_Distance > m_MaxDist)
        m_Distance = m_MaxDist;

    m_Transform.SetPosition(m_Target);
    m_Transform.Translate(m_Transform.GetForwardAxis(), -m_Distance);
}

void ThirdPersonCamera::SetRotationX(float rad)
{
    XMFLOAT3 rotation = m_Transform.GetRotation();
    // 将绕x轴旋转弧度限制在[-pi/3, 0]之间
    rotation.x = rad;
    if (rotation.x > 0.0f)
        rotation.x = 0.0f;
    else if (rotation.x < -XM_PI / 3)
        rotation.x = -XM_PI / 3;

    m_Transform.SetRotation(rotation);
    m_Transform.SetPosition(m_Target);
    m_Transform.Translate(m_Transform.GetForwardAxis(), -m_Distance);
}

void ThirdPersonCamera::SetRotationY(float rad)
{
    XMFLOAT3 rotation = m_Transform.GetRotation();
    rotation.y = XMScalarModAngle(rad);
    m_Transform.SetRotation(rotation);
    m_Transform.SetPosition(m_Target);
    m_Transform.Translate(m_Transform.GetForwardAxis(), -m_Distance);
}

void ThirdPersonCamera::SetTarget(const XMFLOAT3 & target)
{
    m_Target = target;
}

void ThirdPersonCamera::SetDistance(float dist)
{
    m_Distance = dist;
}

void ThirdPersonCamera::SetDistanceMinMax(float minDist, float maxDist)
{
    m_MinDist = minDist;
    m_MaxDist = maxDist;
}
这里唯一要讨论的讨论就是如何根据旋转欧拉角x和y分量、距离dist信息来构造出摄像机的最终位置和朝向。实际上就是先利用欧拉角进行旋转变换,得到摄像机局部坐标系的三个坐标轴朝向,然后利用Look方向轴向后移动dist个单位得到最终位置。
合理对常量缓冲区进行分块
由于项目正在逐渐变得更加庞大,常量缓冲区会频繁更新,但是每次更新常量缓冲区都必须将整个块的内容都刷新一遍,如果只是为了更新里面其中一个变量就要进行一次块的刷新,这样会导致性能上的损耗。所以将常量缓冲区根据刷新频率和类别来进行更细致的分块,尽可能(但不一定能完全做到)保证每一次更新都不会有变量在进行无意义的刷新。因此HLSL常量缓冲区的变化如下:
cbuffer CBChangesEveryDrawing : register(b0)
{
    matrix g_World;
    matrix g_WorldInvTranspose;
}

cbuffer CBChangesEveryFrame : register(b1)
{
    matrix g_View;
    float3 g_EyePosW;
}

cbuffer CBChangesOnResize : register(b2)
{
    matrix g_Proj;
}

cbuffer CBChangesRarely : register(b3)
{
    DirectionalLight g_DirLight[10];
    PointLight g_PointLight[10];
    SpotLight g_SpotLight[10];
    Material g_Material;
    int g_NumDirLight;
    int g_NumPointLight;
    int g_NumSpotLight;
}
对应的C++结构体如下:
struct CBChangesEveryDrawing
{
    DirectX::XMMATRIX world;
    DirectX::XMMATRIX worldInvTranspose;
};

struct CBChangesEveryFrame
{
    DirectX::XMMATRIX view;
    DirectX::XMFLOAT4 eyePos;
};

struct CBChangesOnResize
{
    DirectX::XMMATRIX proj;
};

struct CBChangesRarely
{
    DirectionalLight dirLight[10];
    PointLight pointLight[10];
    SpotLight spotLight[10];
    Material material;
    int numDirLight;
    int numPointLight;
    int numSpotLight;
    float pad;        // 打包保证16字节对齐
};
这里主要更新频率从快到慢分成了四种:每次绘制物体时、每帧更新时、每次窗口大小变化时、从不更新。然后根据当前项目的实际需求将变量存放在合理的位置上。当然这样子可能会导致不同着色器需要的变量放在了同一个块上。不过着色器绑定常量缓冲区的操作可以在一开始初始化的时候就完成,所以问题不大。
GameObject类
场景中的物体也在逐渐变多,为了尽可能方便地去管理每一个物体,这里实现了GameObject类:
class GameObject
{
public:
    GameObject();

    // 获取位置
    DirectX::XMFLOAT3 GetPosition() const;
    // 设置缓冲区
    template<class VertexType, class IndexType>
    void SetBuffer(ID3D11Device * device, const Geometry::MeshData<VertexType, IndexType>& meshData);
    // 设置纹理
    void SetTexture(ID3D11ShaderResourceView * texture);
    // 设置矩阵
    void SetWorldMatrix(const DirectX::XMFLOAT4X4& world);
    void XM_CALLCONV SetWorldMatrix(DirectX::FXMMATRIX world);
    // 绘制
    void Draw(ID3D11DeviceContext * deviceContext);

    // 设置调试对象名
    // 若缓冲区被重新设置,调试对象名也需要被重新设置
    void SetDebugObjectName(const std::string& name);
private:
    Transform m_Transform                               // 世界矩阵
    ComPtr<ID3D11ShaderResourceView> m_pTexture;        // 纹理
    ComPtr<ID3D11Buffer> m_pVertexBuffer;               // 顶点缓冲区
    ComPtr<ID3D11Buffer> m_pIndexBuffer;                // 索引缓冲区
    UINT m_VertexStride;                                // 顶点字节大小
    UINT m_IndexCount;                                  // 索引数目
};
然而目前的GameObject类还需要依赖GameApp类中的几个常量缓冲区,到13章的时候就可以独立出来了。
最后再生成世界矩阵。
原来GameApp::InitResource方法中创建顶点和索引缓冲区的操作都转移到了GameObject::SetBuffer上:
template<class VertexType, class IndexType>
void GameApp::GameObject::SetBuffer(ID3D11Device * device, const Geometry::MeshData<VertexType, IndexType>& meshData)
{
    // 释放旧资源
    m_pVertexBuffer.Reset();
    m_pIndexBuffer.Reset();

    // 设置顶点缓冲区描述
    m_VertexStride = sizeof(VertexType);
    D3D11_BUFFER_DESC vbd;
    ZeroMemory(&vbd, sizeof(vbd));
    vbd.Usage = D3D11_USAGE_IMMUTABLE;
    vbd.ByteWidth = (UINT)meshData.vertexVec.size() * m_VertexStride;
    vbd.BindFlags = D3D11_BIND_VERTEX_BUFFER;
    vbd.CPUAccessFlags = 0;
    // 新建顶点缓冲区
    D3D11_SUBRESOURCE_DATA InitData;
    ZeroMemory(&InitData, sizeof(InitData));
    InitData.pSysMem = meshData.vertexVec.data();
    HR(device->CreateBuffer(&vbd, &InitData, m_pVertexBuffer.GetAddressOf()));


    // 设置索引缓冲区描述
    m_IndexCount = (UINT)meshData.indexVec.size();
    D3D11_BUFFER_DESC ibd;
    ZeroMemory(&ibd, sizeof(ibd));
    ibd.Usage = D3D11_USAGE_IMMUTABLE;
    ibd.ByteWidth = m_IndexCount * sizeof(IndexType);
    ibd.BindFlags = D3D11_BIND_INDEX_BUFFER;
    ibd.CPUAccessFlags = 0;
    // 新建索引缓冲区
    InitData.pSysMem = meshData.indexVec.data();
    HR(device->CreateBuffer(&ibd, &InitData, m_pIndexBuffer.GetAddressOf()));


}
ID3D11DeviceContext::XXGetConstantBuffers系列方法--获取某一着色阶段的常量缓冲区
这里的XX可以是VS, DS, CS, GS, HS, PS,即顶点着色阶段、域着色阶段、计算着色阶段、几何着色阶段、外壳着色阶段、像素着色阶段。它们的形参基本上都是一致的,这里只列举ID3D11DeviceContext::VSGetConstantBuffers方法的形参含义:
void ID3D11DeviceContext::VSGetConstantBuffers(
    UINT StartSlot,     // [In]指定的起始槽索引
    UINT NumBuffers,    // [In]常量缓冲区数目
    ID3D11Buffer **ppConstantBuffers) = 0;    // [Out]常量固定缓冲区数组
最后GameObject::Draw方法如下,由于内部已经承担了转置,因此在外部设置世界矩阵的时候不需要预先进行转置。在绘制一个对象时,需要更新的数据有常量缓冲区,而需要切换的数据有纹理、顶点缓冲区和索引缓冲区:
void GameApp::GameObject::Draw(ID3D11DeviceContext * deviceContext)
{
    // 设置顶点/索引缓冲区
    UINT strides = m_VertexStride;
    UINT offsets = 0;
    deviceContext->IASetVertexBuffers(0, 1, m_pVertexBuffer.GetAddressOf(), &strides, &offsets);
    deviceContext->IASetIndexBuffer(m_pIndexBuffer.Get(), DXGI_FORMAT_R32_UINT, 0);

    // 获取之前已经绑定到渲染管线上的常量缓冲区并进行修改
    ComPtr<ID3D11Buffer> cBuffer = nullptr;
    deviceContext->VSGetConstantBuffers(0, 1, cBuffer.GetAddressOf());
    CBChangesEveryDrawing cbDrawing;

    // 内部进行转置
    XMMATRIX W = m_Transform.GetLocalToWorldMatrixXM();
    cbDrawing.world = XMMatrixTranspose(W);
    cbDrawing.worldInvTranspose = XMMatrixTranspose(InverseTranspose(W));

    // 更新常量缓冲区
    D3D11_MAPPED_SUBRESOURCE mappedData;
    HR(deviceContext->Map(cBuffer.Get(), 0, D3D11_MAP_WRITE_DISCARD, 0, &mappedData));
    memcpy_s(mappedData.pData, sizeof(CBChangesEveryDrawing), &cbDrawing, sizeof(CBChangesEveryDrawing));
    deviceContext->Unmap(cBuffer.Get(), 0);

    // 设置纹理
    deviceContext->PSSetShaderResources(0, 1, m_pTexture.GetAddressOf());
    // 可以开始绘制
    deviceContext->DrawIndexed(m_IndexCount, 0, 0);
}
这里会对每次绘制需要更新的常量缓冲区进行修改。
GameApp类的变化
GameApp::OnResize方法的变化
由于摄像机保留有设置视锥体和视口的方法,并且需要更新常量缓冲区中的投影矩阵,因此该部分操作需要转移到这里进行:
void GameApp::OnResize()
{
    // 省略...
    D3DApp::OnResize();
    // 省略...

    // 摄像机变更显示
    if (m_pCamera != nullptr)
    {
        m_pCamera->SetFrustum(XM_PI / 3, AspectRatio(), 0.5f, 1000.0f);
        m_pCamera->SetViewPort(0.0f, 0.0f, (float)m_ClientWidth, (float)m_ClientHeight);
        m_CBOnResize.proj = XMMatrixTranspose(m_pCamera->GetProjXM());

        D3D11_MAPPED_SUBRESOURCE mappedData;
        HR(m_pd3dImmediateContext->Map(m_pConstantBuffers[2].Get(), 0, D3D11_MAP_WRITE_DISCARD, 0, &mappedData));
        memcpy_s(mappedData.pData, sizeof(CBChangesOnResize), &m_CBOnResize, sizeof(CBChangesOnResize));
        m_pd3dImmediateContext->Unmap(m_pConstantBuffers[2].Get(), 0);
    }
}
GameApp::InitResource方法的变化
该方法创建了墙体、地板和木箱三种游戏物体,然后还创建了多个常量缓冲区,最后渲染管线的各个阶段按需要绑定各种所需资源。这里设置了一个平行光和一盏点光灯:
bool GameApp::InitResource()
{
    // ******************
    // 设置常量缓冲区描述
    D3D11_BUFFER_DESC cbd;
    ZeroMemory(&cbd, sizeof(cbd));
    cbd.Usage = D3D11_USAGE_DYNAMIC;
    cbd.BindFlags = D3D11_BIND_CONSTANT_BUFFER;
    cbd.CPUAccessFlags = D3D11_CPU_ACCESS_WRITE;
    // 新建用于VS和PS的常量缓冲区
    cbd.ByteWidth = sizeof(CBChangesEveryDrawing);
    HR(m_pd3dDevice->CreateBuffer(&cbd, nullptr, m_pConstantBuffers[0].GetAddressOf()));
    cbd.ByteWidth = sizeof(CBChangesEveryFrame);
    HR(m_pd3dDevice->CreateBuffer(&cbd, nullptr, m_pConstantBuffers[1].GetAddressOf()));
    cbd.ByteWidth = sizeof(CBChangesOnResize);
    HR(m_pd3dDevice->CreateBuffer(&cbd, nullptr, m_pConstantBuffers[2].GetAddressOf()));
    cbd.ByteWidth = sizeof(CBChangesRarely);
    HR(m_pd3dDevice->CreateBuffer(&cbd, nullptr, m_pConstantBuffers[3].GetAddressOf()));
    // ******************
    // 初始化游戏对象
    ComPtr<ID3D11ShaderResourceView> texture;
    // 初始化木箱
    HR(CreateDDSTextureFromFile(m_pd3dDevice.Get(), L"Texture\\WoodCrate.dds", nullptr, texture.GetAddressOf()));
    m_WoodCrate.SetBuffer(m_pd3dDevice.Get(), Geometry::CreateBox());
    m_WoodCrate.SetTexture(texture.Get());

    // 初始化地板
    HR(CreateDDSTextureFromFile(m_pd3dDevice.Get(), L"Texture\\floor.dds", nullptr, texture.ReleaseAndGetAddressOf()));
    m_Floor.SetBuffer(m_pd3dDevice.Get(),
        Geometry::CreatePlane(XMFLOAT2(20.0f, 20.0f), XMFLOAT2(5.0f, 5.0f)));
    m_Floor.SetTexture(texture.Get());
    m_Floor.GetTransform().SetPosition(0.0f, -1.0f, 0.0f);


    // 初始化墙体
    m_Walls.resize(4);
    HR(CreateDDSTextureFromFile(m_pd3dDevice.Get(), L"Texture\\brick.dds", nullptr, texture.ReleaseAndGetAddressOf()));
    // 这里控制墙体四个面的生成
    for (int i = 0; i < 4; ++i)
    {
        m_Walls[i].SetBuffer(m_pd3dDevice.Get(),
            Geometry::CreatePlane(XMFLOAT2(20.0f, 8.0f), XMFLOAT2(5.0f, 1.5f)));
        Transform& transform = m_Walls[i].GetTransform();
        transform.SetRotation(-XM_PIDIV2, XM_PIDIV2 * i, 0.0f);
        transform.SetPosition(i % 2 ? -10.0f * (i - 2) : 0.0f, 3.0f, i % 2 == 0 ? -10.0f * (i - 1) : 0.0f);
        m_Walls[i].SetTexture(texture.Get());
    }

    // 初始化采样器状态
    D3D11_SAMPLER_DESC sampDesc;
    ZeroMemory(&sampDesc, sizeof(sampDesc));
    sampDesc.Filter = D3D11_FILTER_MIN_MAG_MIP_LINEAR;
    sampDesc.AddressU = D3D11_TEXTURE_ADDRESS_WRAP;
    sampDesc.AddressV = D3D11_TEXTURE_ADDRESS_WRAP;
    sampDesc.AddressW = D3D11_TEXTURE_ADDRESS_WRAP;
    sampDesc.ComparisonFunc = D3D11_COMPARISON_NEVER;
    sampDesc.MinLOD = 0;
    sampDesc.MaxLOD = D3D11_FLOAT32_MAX;
    HR(m_pd3dDevice->CreateSamplerState(&sampDesc, m_pSamplerState.GetAddressOf()));


    // ******************
    // 初始化常量缓冲区的值
    // 初始化每帧可能会变化的值
    m_CameraMode = CameraMode::FirstPerson;
    auto camera = std::shared_ptr<FirstPersonCamera>(new FirstPersonCamera);
    m_pCamera = camera;
    camera->SetViewPort(0.0f, 0.0f, (float)m_ClientWidth, (float)m_ClientHeight);
    camera->LookAt(XMFLOAT3(), XMFLOAT3(0.0f, 0.0f, 1.0f), XMFLOAT3(0.0f, 1.0f, 0.0f));

    // 初始化仅在窗口大小变动时修改的值
    m_pCamera->SetFrustum(XM_PI / 3, AspectRatio(), 0.5f, 1000.0f);
    m_CBOnResize.proj = XMMatrixTranspose(m_pCamera->GetProjXM());

    // 初始化不会变化的值
    // 环境光
    m_CBRarely.dirLight[0].ambient = XMFLOAT4(0.5f, 0.5f, 0.5f, 1.0f);
    m_CBRarely.dirLight[0].diffuse = XMFLOAT4(0.8f, 0.8f, 0.8f, 1.0f);
    m_CBRarely.dirLight[0].specular = XMFLOAT4(0.5f, 0.5f, 0.5f, 1.0f);
    m_CBRarely.dirLight[0].direction = XMFLOAT3(0.0f, -1.0f, 0.0f);
    // 灯光
    m_CBRarely.pointLight[0].position = XMFLOAT3(0.0f, 10.0f, 0.0f);
    m_CBRarely.pointLight[0].ambient = XMFLOAT4(0.5f, 0.5f, 0.5f, 1.0f);
    m_CBRarely.pointLight[0].diffuse = XMFLOAT4(0.8f, 0.8f, 0.8f, 1.0f);
    m_CBRarely.pointLight[0].specular = XMFLOAT4(0.5f, 0.5f, 0.5f, 1.0f);
    m_CBRarely.pointLight[0].att = XMFLOAT3(0.0f, 0.1f, 0.0f);
    m_CBRarely.pointLight[0].range = 25.0f;
    m_CBRarely.numDirLight = 1;
    m_CBRarely.numPointLight = 1;
    m_CBRarely.numSpotLight = 0;
    // 初始化材质
    m_CBRarely.material.ambient = XMFLOAT4(0.5f, 0.5f, 0.5f, 1.0f);
    m_CBRarely.material.diffuse = XMFLOAT4(0.6f, 0.6f, 0.6f, 1.0f);
    m_CBRarely.material.specular = XMFLOAT4(0.1f, 0.1f, 0.1f, 50.0f);


    // 更新不容易被修改的常量缓冲区资源
    D3D11_MAPPED_SUBRESOURCE mappedData;
    HR(m_pd3dImmediateContext->Map(m_pConstantBuffers[2].Get(), 0, D3D11_MAP_WRITE_DISCARD, 0, &mappedData));
    memcpy_s(mappedData.pData, sizeof(CBChangesOnResize), &m_CBOnResize, sizeof(CBChangesOnResize));
    m_pd3dImmediateContext->Unmap(m_pConstantBuffers[2].Get(), 0);

    HR(m_pd3dImmediateContext->Map(m_pConstantBuffers[3].Get(), 0, D3D11_MAP_WRITE_DISCARD, 0, &mappedData));
    memcpy_s(mappedData.pData, sizeof(CBChangesRarely), &m_CBRarely, sizeof(CBChangesRarely));
    m_pd3dImmediateContext->Unmap(m_pConstantBuffers[3].Get(), 0);

    // ******************
    // 给渲染管线各个阶段绑定好所需资源
    // 设置图元类型,设定输入布局
    m_pd3dImmediateContext->IASetPrimitiveTopology(D3D11_PRIMITIVE_TOPOLOGY_TRIANGLELIST);
    m_pd3dImmediateContext->IASetInputLayout(m_pVertexLayout3D.Get());
    // 默认绑定3D着色器
    m_pd3dImmediateContext->VSSetShader(m_pVertexShader3D.Get(), nullptr, 0);
    // 预先绑定各自所需的缓冲区,其中每帧更新的缓冲区需要绑定到两个缓冲区上
    m_pd3dImmediateContext->VSSetConstantBuffers(0, 1, m_pConstantBuffers[0].GetAddressOf());
    m_pd3dImmediateContext->VSSetConstantBuffers(1, 1, m_pConstantBuffers[1].GetAddressOf());
    m_pd3dImmediateContext->VSSetConstantBuffers(2, 1, m_pConstantBuffers[2].GetAddressOf());

    m_pd3dImmediateContext->PSSetConstantBuffers(1, 1, m_pConstantBuffers[1].GetAddressOf());
    m_pd3dImmediateContext->PSSetConstantBuffers(3, 1, m_pConstantBuffers[3].GetAddressOf());
    m_pd3dImmediateContext->PSSetShader(m_pPixelShader3D.Get(), nullptr, 0);
    m_pd3dImmediateContext->PSSetSamplers(0, 1, m_pSamplerState.GetAddressOf());

    // ******************
    // 设置调试对象名
    //
    D3D11SetDebugObjectName(m_pVertexLayout2D.Get(), "VertexPosTexLayout");
    D3D11SetDebugObjectName(m_pVertexLayout3D.Get(), "VertexPosNormalTexLayout");
    D3D11SetDebugObjectName(m_pConstantBuffers[0].Get(), "CBDrawing");
    D3D11SetDebugObjectName(m_pConstantBuffers[1].Get(), "CBFrame");
    D3D11SetDebugObjectName(m_pConstantBuffers[2].Get(), "CBOnResize");
    D3D11SetDebugObjectName(m_pConstantBuffers[3].Get(), "CBRarely");
    D3D11SetDebugObjectName(m_pVertexShader2D.Get(), "Basic_VS_2D");
    D3D11SetDebugObjectName(m_pVertexShader3D.Get(), "Basic_VS_3D");
    D3D11SetDebugObjectName(m_pPixelShader2D.Get(), "Basic_PS_2D");
    D3D11SetDebugObjectName(m_pPixelShader3D.Get(), "Basic_PS_3D");
    D3D11SetDebugObjectName(m_pSamplerState.Get(), "SSLinearWrap");
    m_Floor.SetDebugObjectName("Floor");
    m_WoodCrate.SetDebugObjectName("WoodCrate");
    m_Walls[0].SetDebugObjectName("Walls[0]");
    m_Walls[1].SetDebugObjectName("Walls[1]");
    m_Walls[2].SetDebugObjectName("Walls[2]");
    m_Walls[3].SetDebugObjectName("Walls[3]");


    return true;
}
GameApp::UpdateScene的变化
使用Mouse类的相对模式
在使用摄像机模式游玩时,鼠标是不可见的。这时候可以将鼠标模式设为相对模式。
首先使用GetSystemMetrics函数来获取当前屏幕分辨率,在CreateWindow的时候将窗口居中。
下面是D3DApp::InitMainWindow的变化:
bool D3DApp::InitMainWindow()
{
    // 省略不变部分...

    int screenWidth = GetSystemMetrics(SM_CXSCREEN);
    int screenHeight = GetSystemMetrics(SM_CYSCREEN);

    // Compute window rectangle dimensions based on requested client area dimensions.
    RECT R = { 0, 0, m_ClientWidth, m_ClientHeight };
    AdjustWindowRect(&R, WS_OVERLAPPEDWINDOW, false);
    int width = R.right - R.left;
    int height = R.bottom - R.top;

    m_hMainWnd = CreateWindow(L"D3DWndClassName", m_MainWndCaption.c_str(),
        WS_OVERLAPPEDWINDOW, (screenWidth - width) / 2, (screenHeight - height) / 2, width, height, 0, 0, m_hAppInst, 0);

    // 省略不变部分...

    return true;
}
然后GameApp::Init方法设置相对模式:
bool GameApp::Init()
{
    if (!D3DApp::Init())
        return false;

    if (!InitEffect())
        return false;

    if (!InitResource())
        return false;


    // 初始化鼠标,键盘不需要
    m_pMouse->SetWindow(m_hMainWnd);
    m_pMouse->SetMode(DirectX::Mouse::MODE_RELATIVE);
    return true;
}
最后就可以开始获取相对位移,并根据当前摄像机的模式和键鼠操作的状态来进行对应操作:
void GameApp::UpdateScene(float dt)
{
    // 更新鼠标事件,获取相对偏移量
    Mouse::State mouseState = m_pMouse->GetState();
    Mouse::State lastMouseState = m_MouseTracker.GetLastState();

    Keyboard::State keyState = m_pKeyboard->GetState();
    m_KeyboardTracker.Update(keyState);

    // 获取子类
    auto cam1st = std::dynamic_pointer_cast<FirstPersonCamera>(m_pCamera);
    auto cam3rd = std::dynamic_pointer_cast<ThirdPersonCamera>(m_pCamera);

    Transform& woodCrateTransform = m_WoodCrate.GetTransform();

    if (m_CameraMode == CameraMode::FirstPerson || m_CameraMode == CameraMode::Free)
    {
        // 第一人称/自由摄像机的操作

        // 方向移动
        if (keyState.IsKeyDown(Keyboard::W))
        {
            if (m_CameraMode == CameraMode::FirstPerson)
                cam1st->Walk(dt * 3.0f);
            else
                cam1st->MoveForward(dt * 3.0f);
        }
        if (keyState.IsKeyDown(Keyboard::S))
        {
            if (m_CameraMode == CameraMode::FirstPerson)
                cam1st->Walk(dt * -3.0f);
            else
                cam1st->MoveForward(dt * -3.0f);
        }
        if (keyState.IsKeyDown(Keyboard::A))
            cam1st->Strafe(dt * -3.0f);
        if (keyState.IsKeyDown(Keyboard::D))
            cam1st->Strafe(dt * 3.0f);

        // 将摄像机位置限制在[-8.9, 8.9]x[-8.9, 8.9]x[0.0, 8.9]的区域内
        // 不允许穿地
        XMFLOAT3 adjustedPos;
        XMStoreFloat3(&adjustedPos, XMVectorClamp(cam1st->GetPositionXM(), XMVectorSet(-8.9f, 0.0f, -8.9f, 0.0f), XMVectorReplicate(8.9f)));
        cam1st->SetPosition(adjustedPos);

        // 仅在第一人称模式移动摄像机的同时移动箱子
        if (m_CameraMode == CameraMode::FirstPerson)
            woodCrateTransform.SetPosition(adjustedPos);
        // 在鼠标没进入窗口前仍为ABSOLUTE模式
        if (mouseState.positionMode == Mouse::MODE_RELATIVE)
        {
            cam1st->Pitch(mouseState.y * dt * 2.5f);
            cam1st->RotateY(mouseState.x * dt * 2.5f);
        }

    }
    else if (m_CameraMode == CameraMode::ThirdPerson)
    {
        // 第三人称摄像机的操作

        cam3rd->SetTarget(woodCrateTransform.GetPosition());

        // 绕物体旋转
        cam3rd->RotateX(mouseState.y * dt * 2.5f);
        cam3rd->RotateY(mouseState.x * dt * 2.5f);
        cam3rd->Approach(-mouseState.scrollWheelValue / 120 * 1.0f);
    }

    // 更新观察矩阵
    XMStoreFloat4(&m_CBFrame.eyePos, m_pCamera->GetPositionXM());
    m_CBFrame.view = XMMatrixTranspose(m_pCamera->GetViewXM());

    // 重置滚轮值
    m_pMouse->ResetScrollWheelValue();

    // 摄像机模式切换
    if (m_KeyboardTracker.IsKeyPressed(Keyboard::D1) && m_CameraMode != CameraMode::FirstPerson)
    {
        if (!cam1st)
        {
            cam1st.reset(new FirstPersonCamera);
            cam1st->SetFrustum(XM_PI / 3, AspectRatio(), 0.5f, 1000.0f);
            m_pCamera = cam1st;
        }

        cam1st->LookTo(woodCrateTransform.GetPosition(),
            XMFLOAT3(0.0f, 0.0f, 1.0f),
            XMFLOAT3(0.0f, 1.0f, 0.0f));

        m_CameraMode = CameraMode::FirstPerson;
    }
    else if (m_KeyboardTracker.IsKeyPressed(Keyboard::D2) && m_CameraMode != CameraMode::ThirdPerson)
    {
        if (!cam3rd)
        {
            cam3rd.reset(new ThirdPersonCamera);
            cam3rd->SetFrustum(XM_PI / 3, AspectRatio(), 0.5f, 1000.0f);
            m_pCamera = cam3rd;
        }
        XMFLOAT3 target = woodCrateTransform.GetPosition();
        cam3rd->SetTarget(target);
        cam3rd->SetDistance(8.0f);
        cam3rd->SetDistanceMinMax(3.0f, 20.0f);

        m_CameraMode = CameraMode::ThirdPerson;
    }
    else if (m_KeyboardTracker.IsKeyPressed(Keyboard::D3) && m_CameraMode != CameraMode::Free)
    {
        if (!cam1st)
        {
            cam1st.reset(new FirstPersonCamera);
            cam1st->SetFrustum(XM_PI / 3, AspectRatio(), 0.5f, 1000.0f);
            m_pCamera = cam1st;
        }
        // 从箱子上方开始
        XMFLOAT3 pos = woodCrateTransform.GetPosition();
        XMFLOAT3 to = XMFLOAT3(0.0f, 0.0f, 1.0f);
        XMFLOAT3 up = XMFLOAT3(0.0f, 1.0f, 0.0f);
        pos.y += 3;
        cam1st->LookTo(pos, to, up);

        m_CameraMode = CameraMode::Free;
    }
    // 退出程序,这里应向窗口发送销毁信息
    if (keyState.IsKeyDown(Keyboard::Escape))
        SendMessage(MainWnd(), WM_DESTROY, 0, 0);

    D3D11_MAPPED_SUBRESOURCE mappedData;
    HR(m_pd3dImmediateContext->Map(m_pConstantBuffers[1].Get(), 0, D3D11_MAP_WRITE_DISCARD, 0, &mappedData));
    memcpy_s(mappedData.pData, sizeof(CBChangesEveryFrame), &m_CBFrame, sizeof(CBChangesEveryFrame));
    m_pd3dImmediateContext->Unmap(m_pConstantBuffers[1].Get(), 0);
}
其中对摄像机位置使用XMVectorClamp函数是为了将X, Y和Z值都限制在范围为[-8.9, 8.9]的立方体活动区域防止跑出场景区域外,但使用第三人称摄像机的时候没有这样的限制,因为可以营造出一种透视观察的效果。

GameApp::DrawScene的变化
该方法变化不大,具体如下:
void GameApp::DrawScene()
{
    assert(m_pd3dImmediateContext);
    assert(m_pSwapChain);

    m_pd3dImmediateContext->ClearRenderTargetView(m_pRenderTargetView.Get(), reinterpret_cast<const float*>(&Colors::Black));
    m_pd3dImmediateContext->ClearDepthStencilView(m_pDepthStencilView.Get(), D3D11_CLEAR_DEPTH | D3D11_CLEAR_STENCIL, 1.0f, 0);

    //
    // 绘制几何模型
    //
    m_WoodCrate.Draw(m_pd3dImmediateContext.Get());
    m_Floor.Draw(m_pd3dImmediateContext.Get());
    for (auto& wall : m_Walls)
        wall.Draw(m_pd3dImmediateContext.Get());

    //
    // 绘制Direct2D部分
    //

    // ...

    HR(m_pSwapChain->Present(0, 0));
}
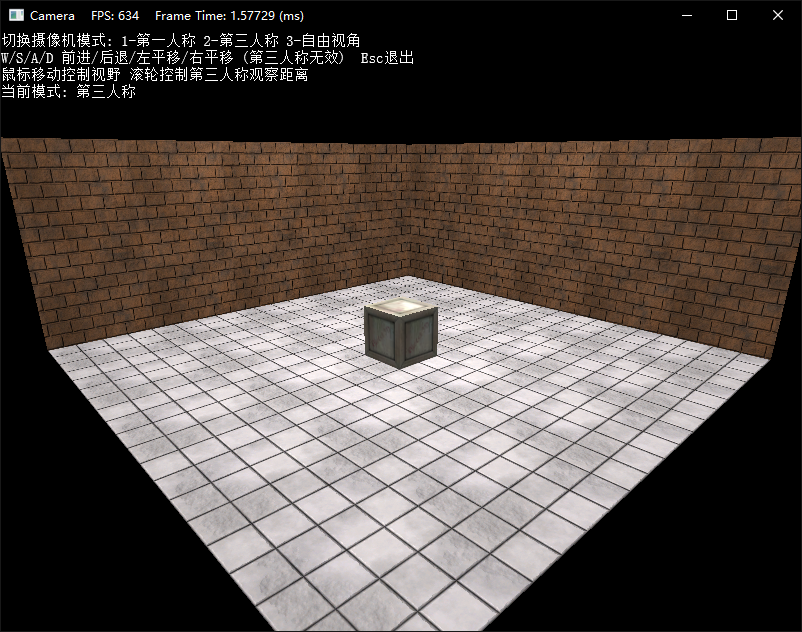
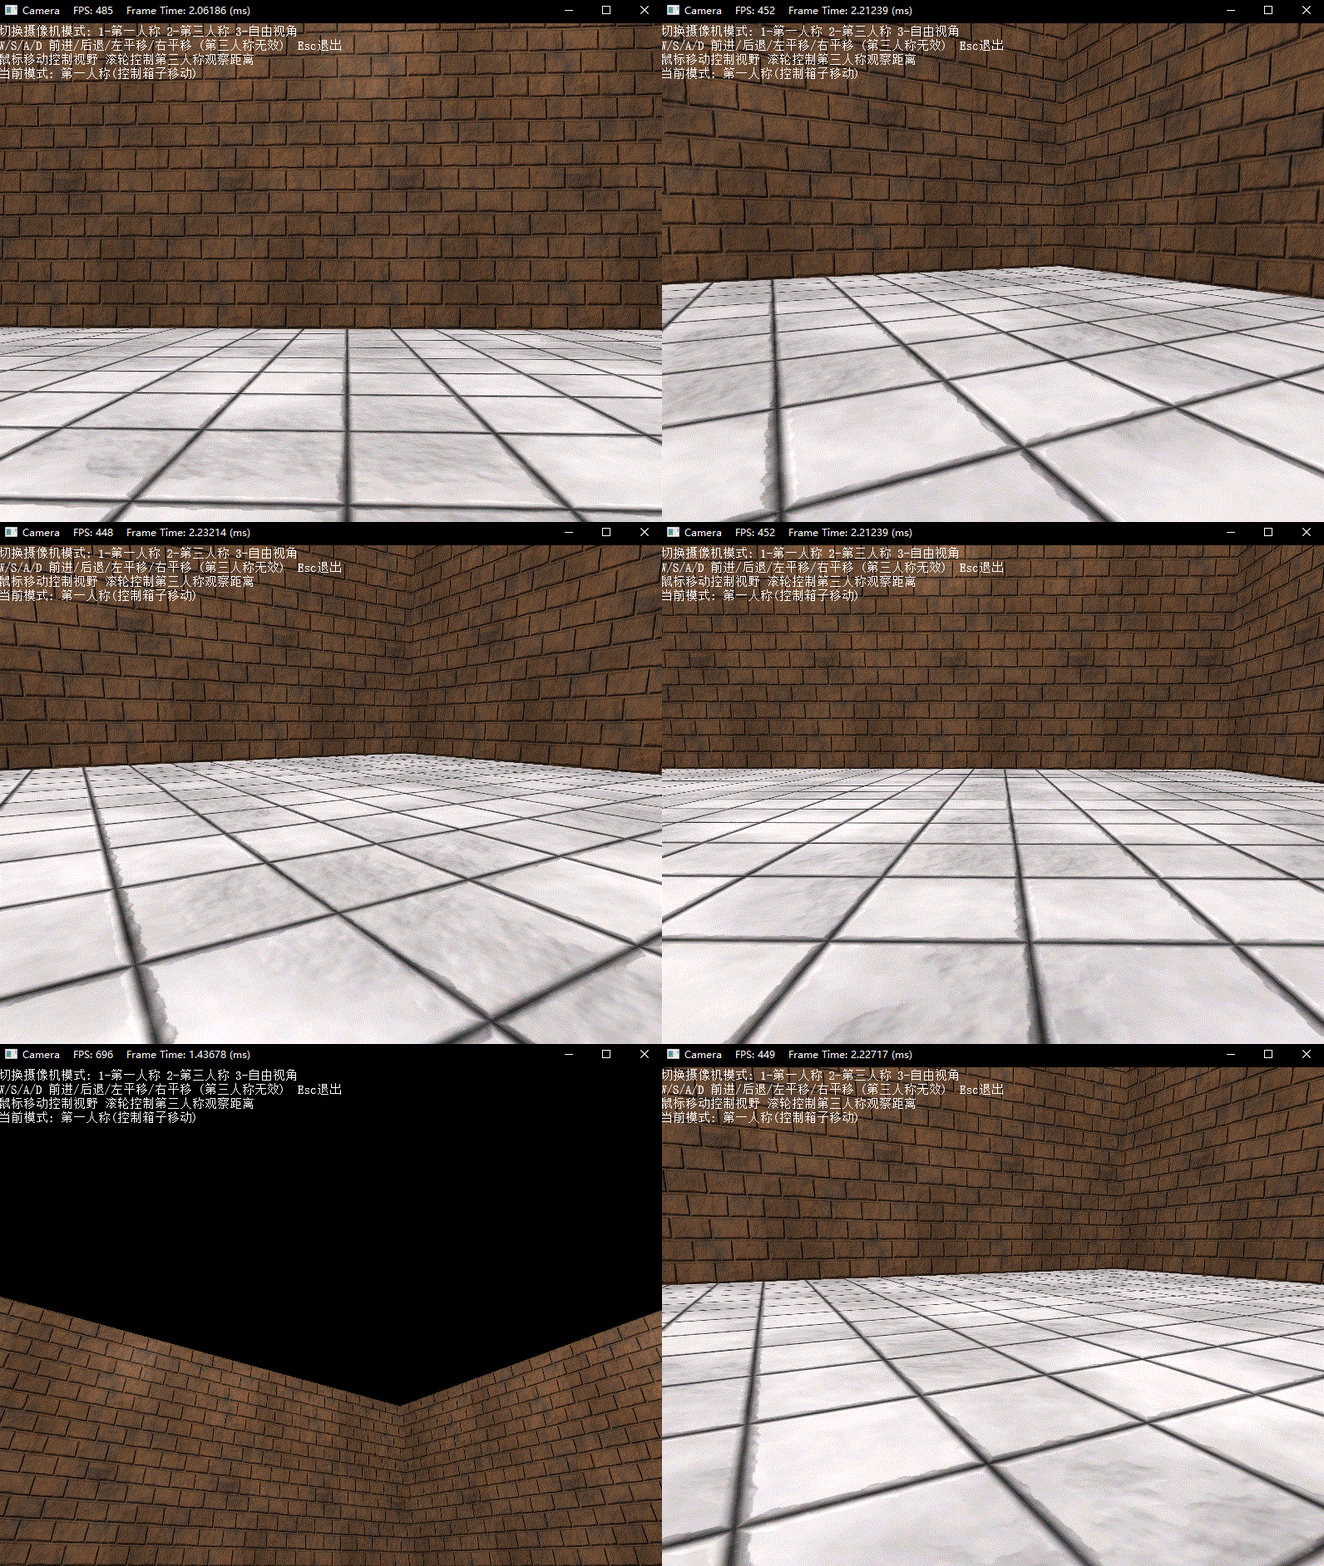
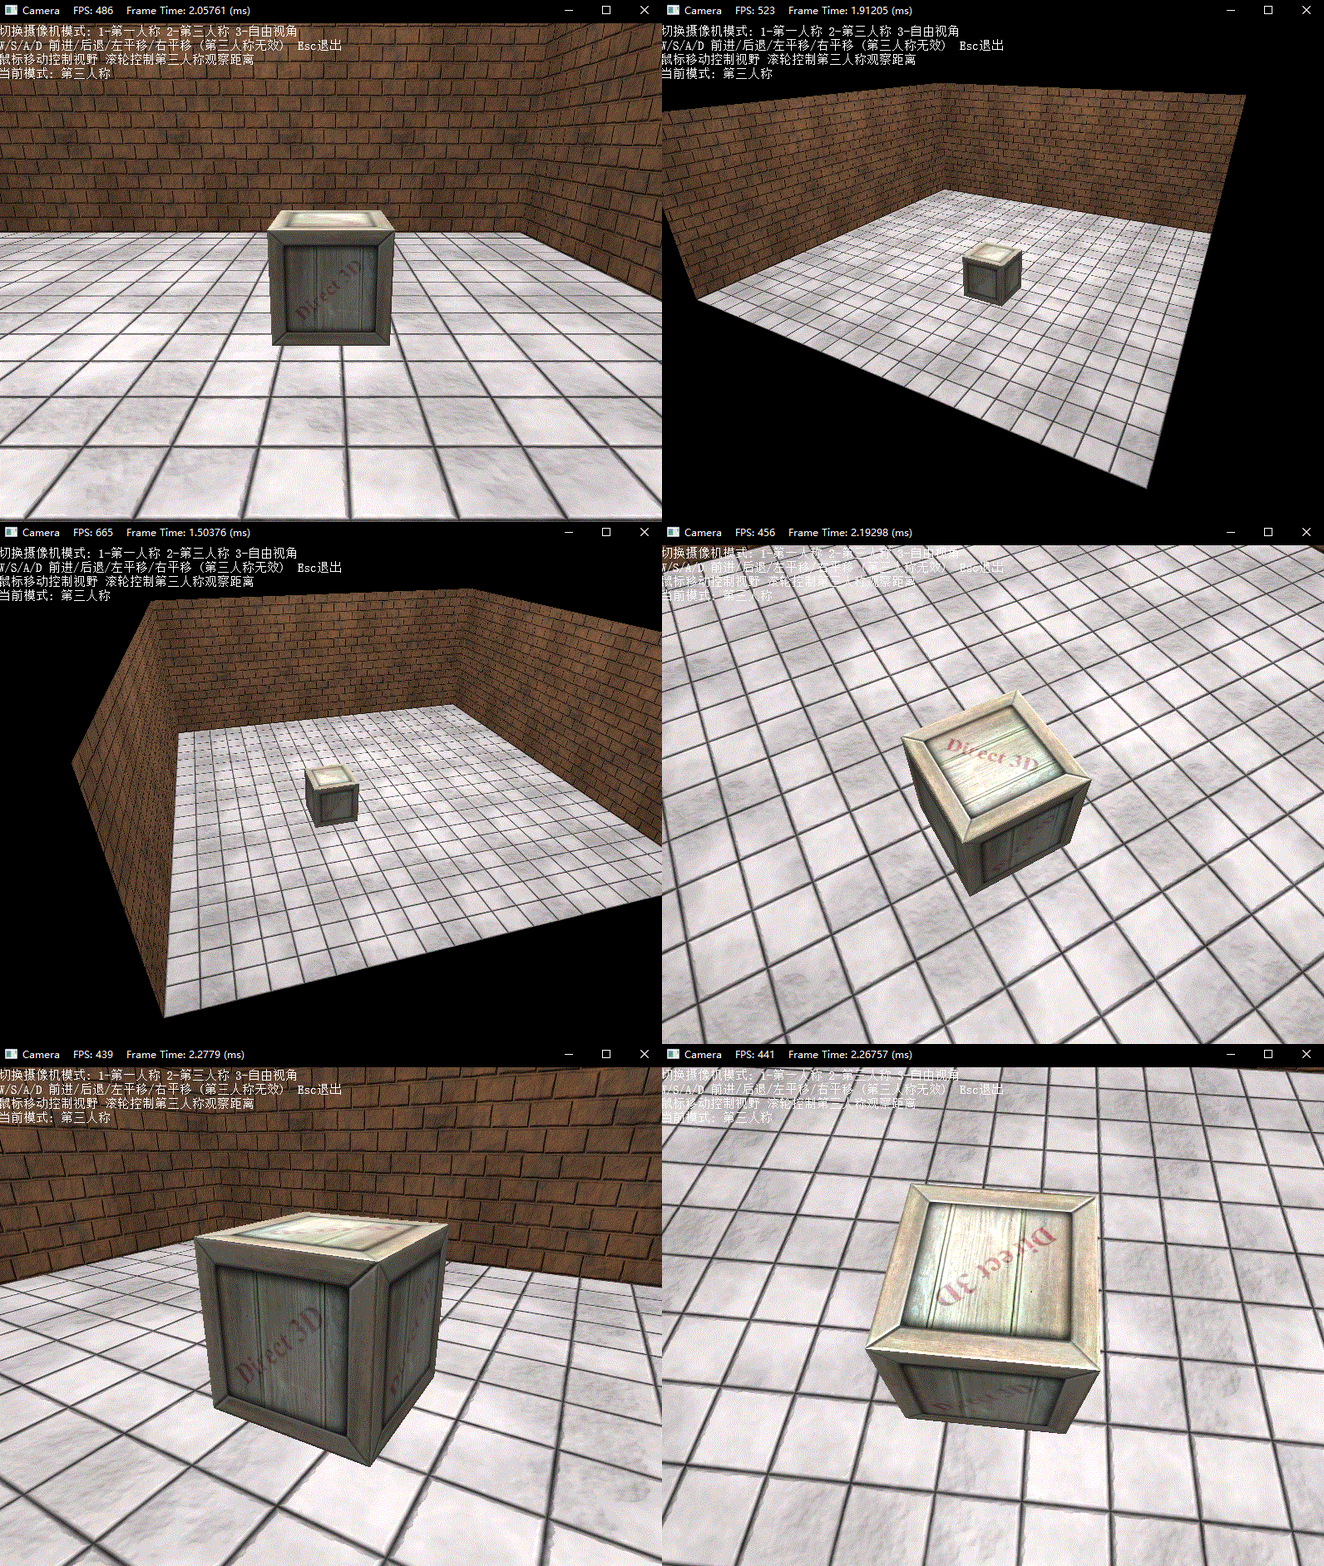
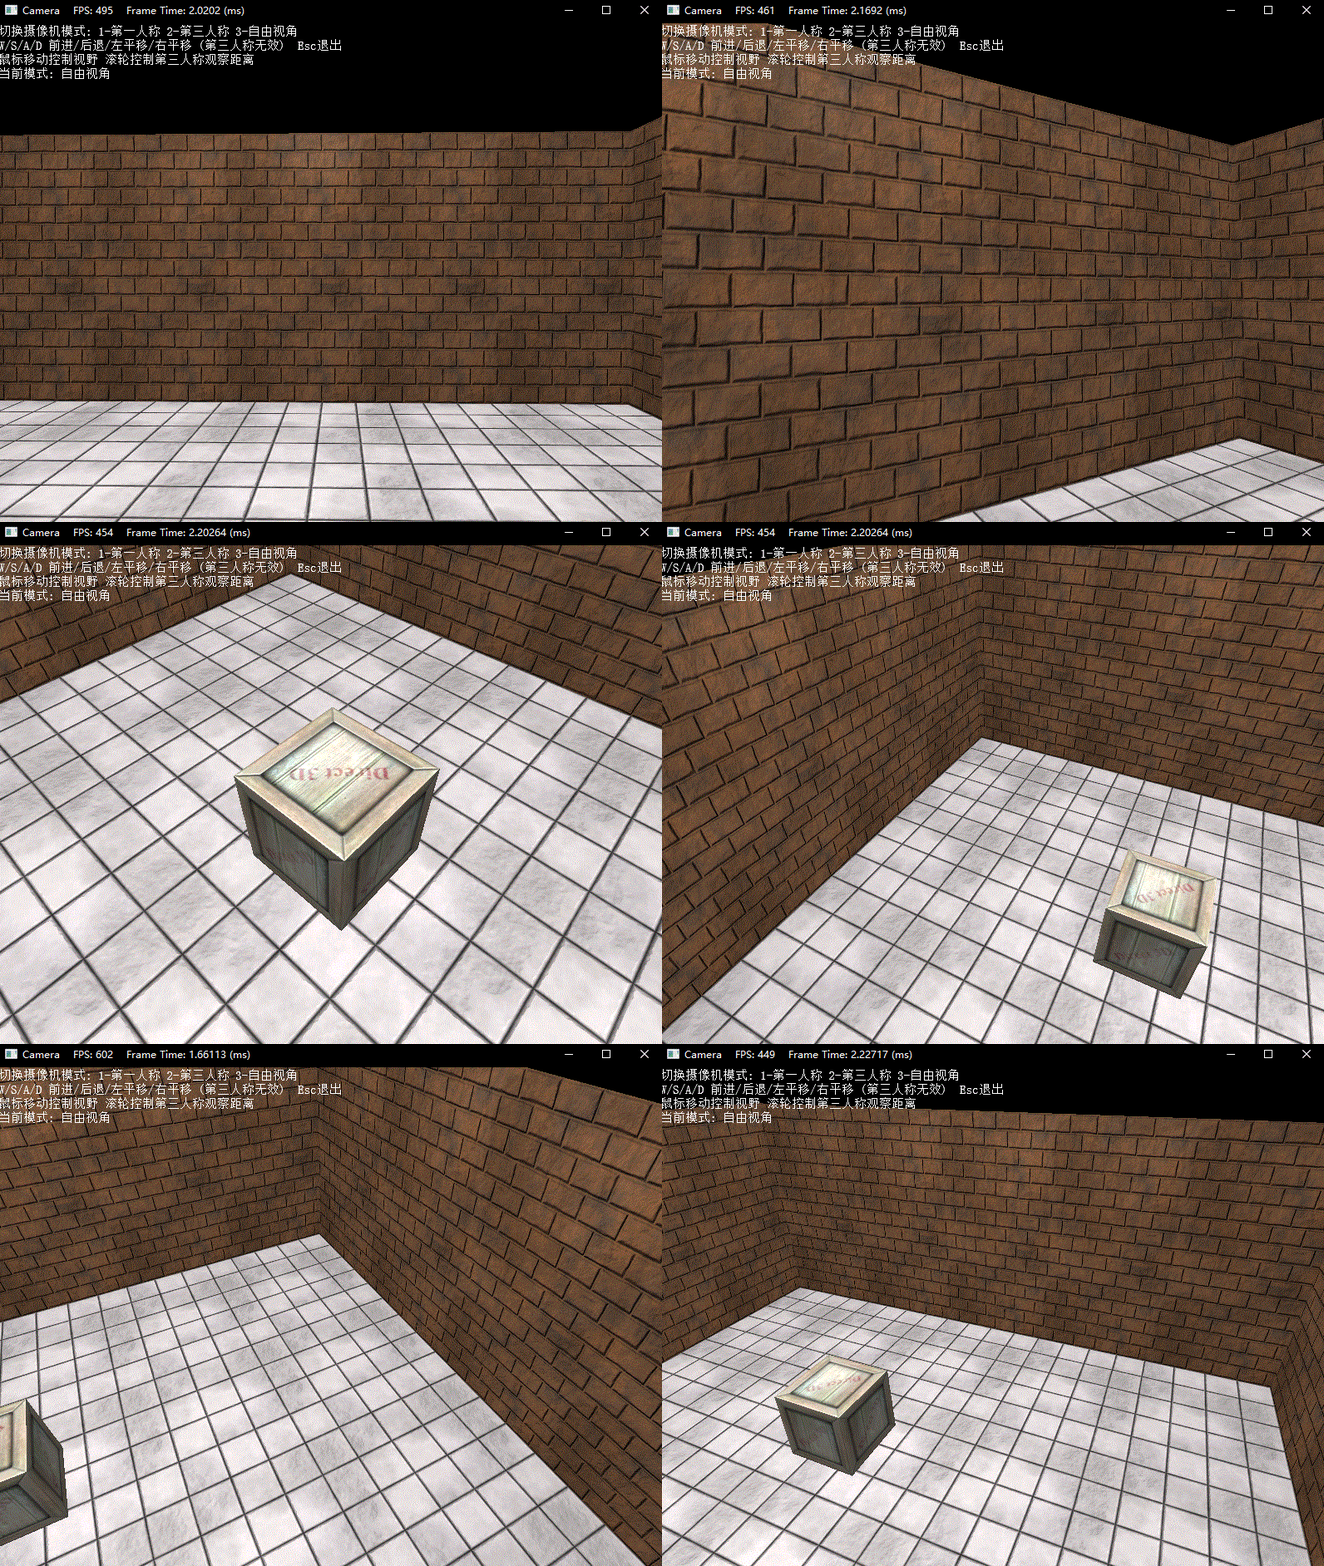
最后下面演示了三种模式下的操作效果:


练习题
- 在第三人称模式下,让物体也能够进行前后、左右的平移运动
- 在第三人称模式下,使用平躺的圆柱体,让其左右平移运动改为左右旋转运动,前后运动改为朝前滚动
- 尝试实现带有父子关系的
Transform变换和GameObject
DirectX11 With Windows SDK完整目录
欢迎加入QQ群: 727623616 可以一起探讨DX11,以及有什么问题也可以在这里汇报。


