
springCloud --Eureka加Ribbon
单台Eureka
1. 首选准备一台Eureka(注册中心-----淘宝电商平台)
pom添加这个依赖文件


        <dependency>
            <groupId>org.springframework.cloud</groupId>
            <artifactId>spring-cloud-starter-netflix-eureka-server</artifactId>
            <version>2.2.0.RELEASE</version>
        </dependency>
yml文件
server:
  port: 9000
eureka:
  instance:
    hostname: localhost
  client:
    register-with-eureka: false #是否将自己注册到注册中心
    fetch-registry: false  #是否从eureka中获取注册信息
    service-url:
      defaultZone: http://localhost:9000/eureka/
主程序入口
@SpringBootApplication
@EnableEurekaServer
public class EurekaApplication {

    public static void main(String[] args) {
        SpringApplication.run(EurekaApplication.class, args);
    }

}
2. 准备一台Eureka服务(服务提供者--------淘宝上的商家)
pom文件
        <dependency>
            <groupId>org.springframework.cloud</groupId>
            <artifactId>spring-cloud-starter-netflix-eureka-client</artifactId>
            <version>2.2.1.RELEASE</version>
        </dependency>
yml文件 (hello很关键和后面使用的地址名相关)
server:
  port: 8001
eureka:
  client:
    service-url:
      defaultZone: http://localhost:9000/eureka
  instance:
    prefer-ip-address: on
spring:
  application:
    name: hello
主程序入口
@SpringBootApplication
@EnableDiscoveryClient
public class EurekaServiceApplication {

    public static void main(String[] args) {
        SpringApplication.run(EurekaServiceApplication.class, args);
    }

}
服务的controller
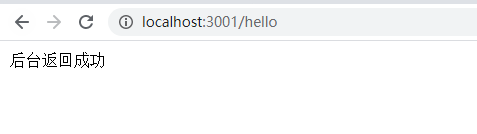
@RestController
public class HelloController {

    @GetMapping("/hello")
    public String hello(String msg) {
        System.out.println(msg);
        return "后台返回成功";
    }

}
服务的service,接口UserService放在common中
@Service
public class UserServiceImpl implements UserService{

    @Override
    public String getString(String msg) {

        try {
            System.out.println(msg);
        } catch (Exception e) {
            e.printStackTrace();
        }

        return "接收成功";
    }

}

3.准备Eureka客户(服务消费者-------各位买家)
pom文件
   <dependency>
            <groupId>org.springframework.cloud</groupId>
            <artifactId>spring-cloud-starter-netflix-eureka-client</artifactId>
            <version>2.2.1.RELEASE</version>
        </dependency>
yml文件
server:
  port: 3001
eureka:
  client:
    service-url:
      defaultZone: http://localhost:9000/eureka
    register-with-eureka: false
主程序入口,这儿的@LoadBalanced 是Ribbon的
@SpringBootApplication
@EnableDiscoveryClient
public class EurekaClientApplication {

    @LoadBalanced //负载均衡注解
    @Bean
    public RestTemplate getRestTemplate() {
        SimpleClientHttpRequestFactory f = new SimpleClientHttpRequestFactory();
        f.setConnectTimeout(1000);
        f.setReadTimeout(1000);
        return new RestTemplate(f);
    }

    public static void main(String[] args) {
        SpringApplication.run(EurekaClientApplication.class, args);
    }

}
客户接受浏览器的请求的controller,这儿的url在没有ribbon时需要用ip+端口的形式使用
@RestController
public class HelloController {

    @Autowired
    private RestTemplate template;


    /**
     *  http://hello/hello?msg={1}  第一个hello是上面的服务提供者的名字,第二个hello是服务提供者的请求的路径/hello,msg是携带的参数,
     *  {1},是后面参数列表的第一个参数映射到这个位置,
     * @return
     */
    @GetMapping("/hello")
    public String hello() {
        System.out.println("hello");
        template.getForObject("http://hello/hello?msg={1}",java.lang.String.class,"测试");
        return "测试成功";
    }

}
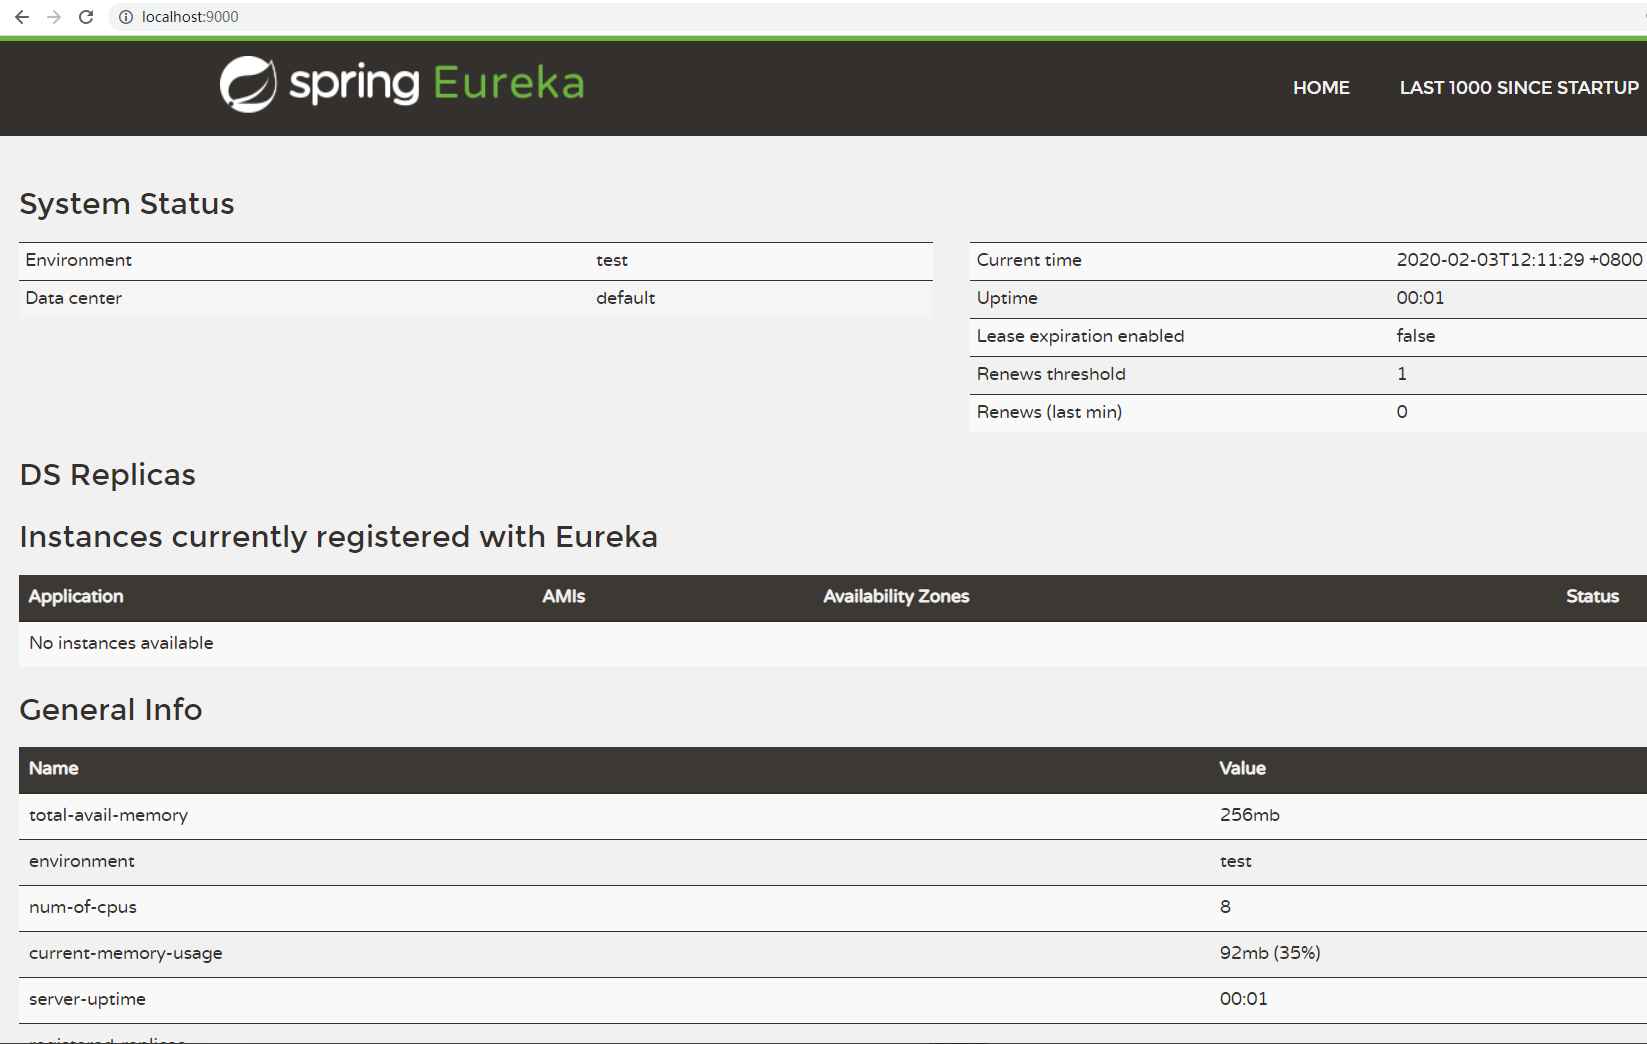
则表示Eureka成功

 浙公网安备 33010602011771号