
Java 系列之spring学习--依赖注入(二)
一、依赖注入的三种方式
接口注入,set注入,构造函数注入
二、构造函数注入
2.1、测试类
1 2 3 4 5 6 7 8 9 10 11 12 13 14 15 16 | package test;public class test01 { public String msg=null; public test01(String msg) { System.out.println(msg); } public void prints() { System.out.println("prints"); }} |
2.2、编辑applicationContext.xml
1 2 3 4 5 6 7 8 9 10 11 12 13 14 15 16 17 18 19 20 21 22 23 24 25 26 | <?xml version="1.0" encoding="UTF-8"?><beans xmlns="http://www.springframework.org/schema/beans" xmlns:xsi="http://www.w3.org/2001/XMLSchema-instance" xmlns:context="http://www.springframework.org/schema/context" xsi:schemaLocation="http://www.springframework.org/schema/beans http://www.springframework.org/schema/beans/spring-beans.xsd http://www.springframework.org/schema/mvc http://www.springframework.org/schema/mvc/spring-mvc.xsd http://www.springframework.org/schema/context http://www.springframework.org/schema/context/spring-context.xsd http://www.springframework.org/schema/aop http://www.springframework.org/schema/aop/spring-aop.xsd http://www.springframework.org/schema/tx http://www.springframework.org/schema/tx/spring-tx.xsd "> <!-- 构造函数注入 --> <bean id="test01" class="test.test01"> <constructor-arg index="0"> <value>dirk</value> </constructor-arg> <constructor-arg index="1"> <value>dirk2</value> </constructor-arg> </bean> </beans> |
2.3、测试
1 2 3 4 5 6 7 8 9 10 11 12 13 14 15 16 17 | package test;public class test01 { public String msg=null; public String msg1=null; public test01(String msg,String msg1) { System.out.println(msg+msg1); } public void prints() { System.out.println("prints"); }} |
1 2 3 4 5 6 7 8 9 10 11 12 13 14 15 16 17 18 19 20 21 22 23 24 | package test;import java.io.IOException;import java.io.PrintWriter;import javax.servlet.ServletException;import javax.servlet.http.HttpServlet;import javax.servlet.http.HttpServletRequest;import javax.servlet.http.HttpServletResponse;import org.springframework.context.ApplicationContext;import org.springframework.context.support.ClassPathXmlApplicationContext;public class aservlet extends HttpServlet { public void doGet(HttpServletRequest request, HttpServletResponse response) throws ServletException, IOException { ApplicationContext context=new ClassPathXmlApplicationContext("applicationContext.xml"); test02 test01=(test02)context.getBean("test02"); test01.getMsg(); }} |

三、set注入
3.1测试类
1 2 3 4 5 6 7 8 9 10 11 12 13 | package test;public class test02 { public String msg; public String getMsg() { return msg; } public void setMsg(String msg) { this.msg = msg; }} |
3.2、配置文件修改
1 2 3 4 5 6 7 8 9 10 11 12 13 14 15 16 17 18 19 20 21 22 | <?xml version="1.0" encoding="UTF-8"?><beans xmlns="http://www.springframework.org/schema/beans" xmlns:xsi="http://www.w3.org/2001/XMLSchema-instance" xmlns:context="http://www.springframework.org/schema/context" xsi:schemaLocation="http://www.springframework.org/schema/beans http://www.springframework.org/schema/beans/spring-beans.xsd http://www.springframework.org/schema/mvc http://www.springframework.org/schema/mvc/spring-mvc.xsd http://www.springframework.org/schema/context http://www.springframework.org/schema/context/spring-context.xsd http://www.springframework.org/schema/aop http://www.springframework.org/schema/aop/spring-aop.xsd http://www.springframework.org/schema/tx http://www.springframework.org/schema/tx/spring-tx.xsd "> <bean id="test02" class="test.test02"> <property name="msg"> <value>drik.wang</value> </property> </bean></beans> |
1 2 3 4 5 6 7 8 9 10 11 12 13 14 15 16 17 18 19 20 21 22 23 24 | package test;import java.io.IOException;import java.io.PrintWriter;import javax.servlet.ServletException;import javax.servlet.http.HttpServlet;import javax.servlet.http.HttpServletRequest;import javax.servlet.http.HttpServletResponse;import org.springframework.context.ApplicationContext;import org.springframework.context.support.ClassPathXmlApplicationContext;public class aservlet extends HttpServlet { public void doGet(HttpServletRequest request, HttpServletResponse response) throws ServletException, IOException { ApplicationContext context=new ClassPathXmlApplicationContext("applicationContext.xml"); test02 test01=(test02)context.getBean("test02"); test01.getMsg(); }} |

3.3、测试
1 2 3 4 5 6 7 8 9 10 11 12 13 14 15 16 17 18 19 20 21 22 23 24 | package test;import java.io.IOException;import java.io.PrintWriter;import javax.servlet.ServletException;import javax.servlet.http.HttpServlet;import javax.servlet.http.HttpServletRequest;import javax.servlet.http.HttpServletResponse;import org.springframework.context.ApplicationContext;import org.springframework.context.support.ClassPathXmlApplicationContext;public class aservlet extends HttpServlet { public void doGet(HttpServletRequest request, HttpServletResponse response) throws ServletException, IOException { ApplicationContext context=new ClassPathXmlApplicationContext("applicationContext.xml"); test02 test02=(test02)context.getBean("test02"); System.out.println(test02.getMsg()); }} |
四、实例
4.1、项目结构

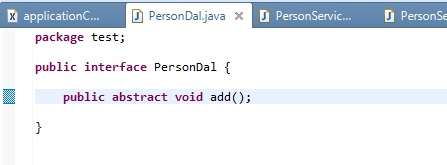
4.2、数据层接口
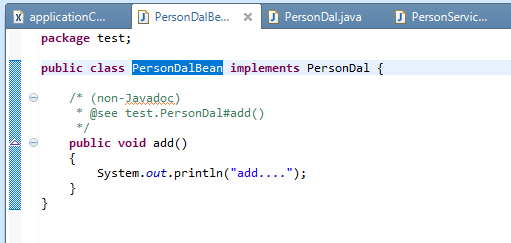
4.2、数据层是实现类
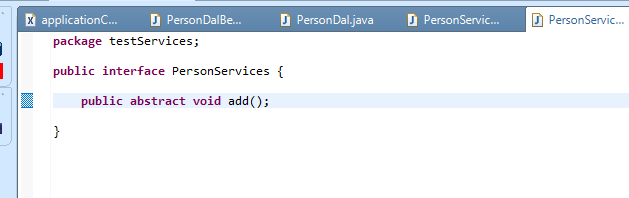
4.4、业务层接口
4.5、业务层实现类
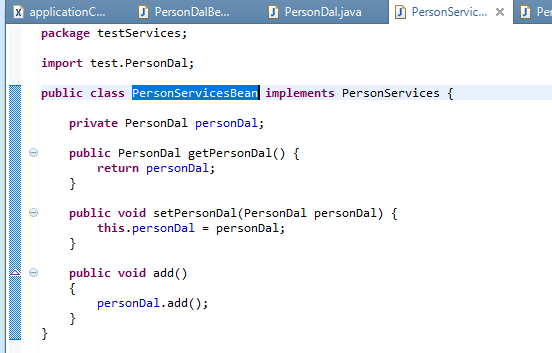
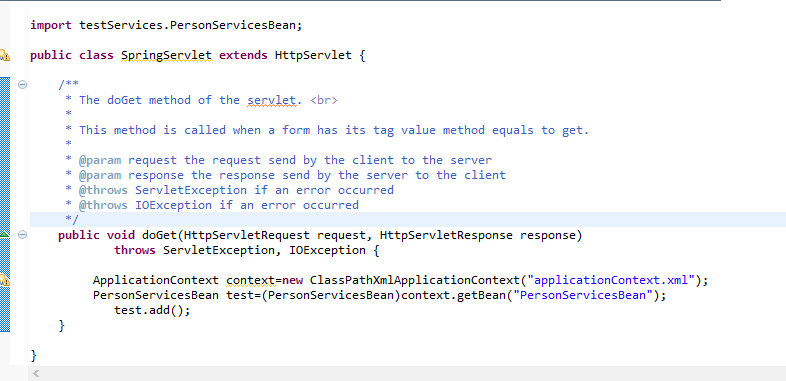
4.5、调用业务层
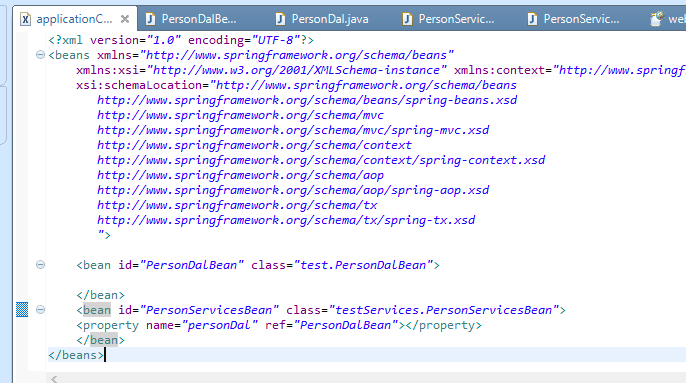
4.6、配置文件
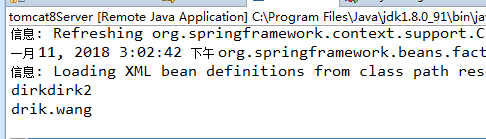
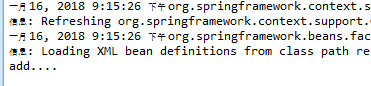
4.7、结果
本文作者:WangJunZzz
本文链接:https://www.cnblogs.com/WangJunZzz/p/8268323.html
版权声明:本作品采用知识共享署名-非商业性使用-禁止演绎 2.5 中国大陆许可协议进行许可。


【推荐】国内首个AI IDE,深度理解中文开发场景,立即下载体验Trae
【推荐】编程新体验,更懂你的AI,立即体验豆包MarsCode编程助手
【推荐】抖音旗下AI助手豆包,你的智能百科全书,全免费不限次数
【推荐】轻量又高性能的 SSH 工具 IShell:AI 加持,快人一步