.Net Core添加分布式Session
一、Session
HTTP是一个无状态协议,Web服务器将每一个请求都视为独立请求。并且不保存之前请求中用户的值。
Session 状态是ASP.NET Core提供的一个功能,它可以在用户通应用访问网络服务器的时候保存和存储用户数据。ASP.NET Core通过包含Session ID的Cookie来维护会话状态,每个请求都会携带此Session ID。
实现分布式Session方法官方提供有Redis、Sql Server等。但是Sql Server效率对于这种以key/value获取值的方式远远不及Redis效率高,所以这里选用Redis来作示例实现分布式Session。
二、安装Redis(Docker方式)
2.1、新建一个Dockerfile和一个redis.conf

Dockerfile内容:
FROM redis
COPY redis.conf /usr/local/etc/redis/redis.conf
CMD [ "redis-server", "/usr/local/etc/redis/redis.conf" ]
redis.conf内容:主要是启用密码登陆redis
protected-mode yes
port 6379
tcp-backlog 511
timeout 0
tcp-keepalive 300
daemonize no
supervised no
pidfile /var/run/redis_6379.pid
loglevel notice
logfile ""
databases 16
always-show-logo yes
save 900 1
save 300 10
save 60 10000
stop-writes-on-bgsave-error yes
rdbcompression yes
rdbchecksum yes
dbfilename dump.rdb
dir ./
slave-serve-stale-data yes
slave-read-only yes
repl-diskless-sync no
repl-diskless-sync-delay 5
repl-disable-tcp-nodelay no
slave-priority 100
requirepass wangjun1234
lazyfree-lazy-eviction no
lazyfree-lazy-expire no
lazyfree-lazy-server-del no
slave-lazy-flush no
appendonly no
appendfilename "appendonly.aof"
appendfsync everysec
no-appendfsync-on-rewrite no
auto-aof-rewrite-percentage 100
auto-aof-rewrite-min-size 64mb
aof-load-truncated yes
aof-use-rdb-preamble no
lua-time-limit 5000
slowlog-log-slower-than 10000
slowlog-max-len 128
latency-monitor-threshold 0
notify-keyspace-events ""
hash-max-ziplist-entries 512
hash-max-ziplist-value 64
list-max-ziplist-size -2
list-compress-depth 0
set-max-intset-entries 512
zset-max-ziplist-entries 128
zset-max-ziplist-value 64
hll-sparse-max-bytes 3000
activerehashing yes
client-output-buffer-limit normal 0 0 0
client-output-buffer-limit slave 256mb 64mb 60
client-output-buffer-limit pubsub 32mb 8mb 60
hz 10
aof-rewrite-incremental-fsync yes
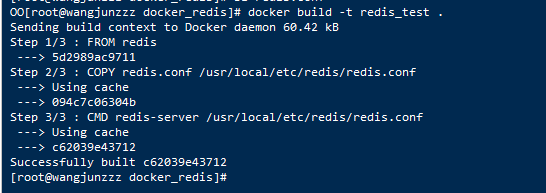
2.1、构建docker镜像(docker build -t redis_test .)
2.1、运行容器(docker run -d --restart=always -p 6379:6379 --name redis_container redis_test)

三、开始建立Core Demo
3.1、新建2个MVC项目
dotnet new mvc --name Session-demo-1
dotnet new mvc --name Session-demo-2

3.2、2个项目都添加(Microsoft.AspNetCore.DataProtection.Redis和Microsoft.Extensions.Caching.Redis)nuget包
dotnet add package Microsoft.Extensions.Caching.Redis
dotnet add package Microsoft.AspNetCore.DataProtection.Redis
3.3、修改Startup.cs
在ConfigureServices中添加:
        public void ConfigureServices(IServiceCollection services)
        {
            //分布式session
            var redis = ConnectionMultiplexer.Connect("47.107.30.29:6379,password=f***,defaultdatabase=7");
            services.AddDataProtection()
            .SetApplicationName("Test")
            .PersistKeysToRedis(redis, "Test-Keys");
            services.AddDistributedRedisCache(options => {
                options.Configuration = "47.107.30.29:6379,password=***,defaultdatabase=7";
                options.InstanceName = "session";
            });
            services.AddMvc().SetCompatibilityVersion(CompatibilityVersion.Version_2_1);

          services.AddSession(options =>
            {
                options.IdleTimeout = TimeSpan.FromHours(2);
            });
        }
在Configure中添加
app.UseSession();
只配置Session-demo-1,同时启动2个项目

配置Session-demo-2(startup.cs的配置一摸一样),同时启动项目


 浙公网安备 33010602011771号