基于街景全景照片数据计算SVF(天空开阔度)
1.MXnet深度学习环境及GluonCV深度学习包的安装2.Python遍历文件夹中的文件并根据文件类型将文件分类储存3.对ERA5数据进行区域提取及时间处理
4.基于街景全景照片数据计算SVF(天空开阔度)
5.基于transbigdata包获取交通线路和站点的邻接表及shp文件6.gephi导入networkx:使用经纬度绘图并根据情景计算节点指标与网络整体指标(关联gephi导入networkx一文)7.备忘:爬取poi代码8.基于Python+MXnet预训练模型的街景图像语义分割代码9.基于Python Sklearn的机器学习代码(备忘)10.基于OpenAI API接口向GPT4v上传图像进行图像分析11.保持校园网自动登录的代码备忘: 基于webdriver和chrome12.Python Selenium+cookie+XPATH爬取数据13.Python web自动化爬虫-selenium/处理验证码/Xpath14.0803/代码本文参照了冯叶涵等发表的《基于百度街景的SVF计算及其在城市热岛研究中的应用》一文,以及https://blog.csdn.net/Mikumiku339/article/details/112995609一文
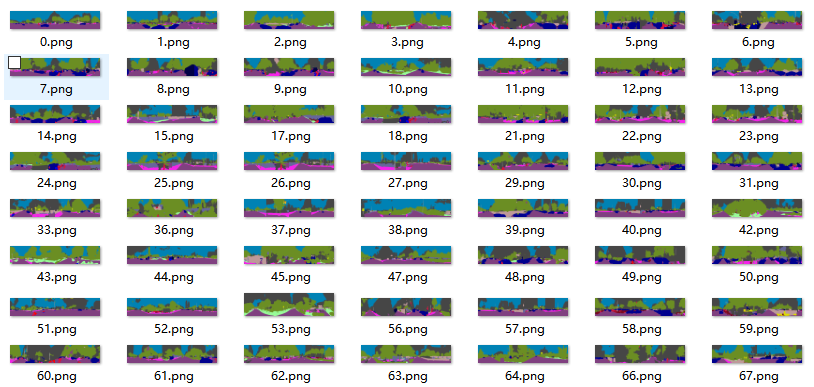
操作的数据是经过pspnet网络分类的街景图像(每个坐标点4张)
操作步骤是将4张街景图像拼接后转为鱼眼照片,之后计算天空RGB在整个图像中的像素占比
原始数据:

1.将图像进行拼接

import os
import numpy as np
from PIL import Image


for n in range(1,12854):#由于我的数据是以数字命名文件夹的,因此只需要遍历数字即可
    print('The No.{} coordinate is handling'.format(n))
    general_path='G:/points/SVF/SVFstep2/{}'.format(n)#替换为自己的路径
    general_file=os.walk(general_path)
    img_names=[]#文件名的储存列表
    img_path_list=[]#文件路径的储存列表
    for root, dirs, files in general_file:
        img_names[:] = [f for f in files if f.endswith(".png")]#筛选出其中的图片文件
        for img_path_ in img_names:
            img_path='G:/points/SVF/SVFstep2/{}/{}'.format(n,img_path_)#根据图片名构建图片文件路径
            img_path_list.append(img_path)
    print(img_path_list)
    if len(img_path_list) !=0:#由于我的文件夹部分是空的,因此筛选一下
        img_array = ''
        img = ''
        for i, v in enumerate(img_path_list):
            if i == 0:
                img = Image.open(v)  # 打开图片
                img_array = np.array(img)  # 转化为np array对象
            if i > 0:
                img_array2 = np.array(Image.open(v))
                img_array = np.concatenate((img_array, img_array2), axis=1)  # 横向拼接
                # img_array = np.concatenate((img_array, img_array2), axis=0)  # 纵向拼接
                img = Image.fromarray(img_array)

        # 保存图片
        img.save('G:/points/SVF/SVFstep3/{}.png'.format(n)) #替换为自己的路径保存起来
运行后得到各点的拼接图像
2.鱼眼图像转换(参照了https://blog.csdn.net/Mikumiku339/article/details/112995609)
对上一步骤得到的全景拼接图像转换为鱼眼图像
import cv2
import numpy as np
import math

#定义鱼眼转换函数
def transform(img):
    rows,cols,c = img.shape
    R = np.int(cols/2/math.pi)
    D = R*2
    cx = R
    cy = R
    print(rows,cols,c,R,D,cx,cy)
    new_img = np.zeros((D,D,c),dtype = np.uint8)
    new_img1 = np.zeros((D,D,c),dtype = np.uint8)
    for i in range(D):
        for j in range(D):
            r = math.sqrt((i-cx)**2+(j-cy)**2)
            if r > R:
                continue
            tan_inv = np.arctan((j-cy)/(i-cx+1e-10))
            if(i<cx):
                theta = math.pi/2+tan_inv
            else:
                theta = math.pi*3/2+tan_inv
            xp = np.int(np.floor(theta/2/math.pi*cols))
            yp = np.int(np.floor(r/R*rows)-1)
            new_img[j,i] = img[yp,xp]
    return new_img

#对上一步得到的拼接照片进行遍历,转换为鱼眼照片
for n in range(0,12854):
    print('The No.{} coordinate is handling'.format(n))
    general_path='G:/points/SVF/SVFstep3/{}.png'.format(n)#替换为自己的路径
    try:
        img = cv2.imread(general_path)#读取原始图片
    except FileNotFoundError:
        print("No.{} coordinate is missing".format(n))

    try:
        img = transform(img)#转换原始图片
        cv2.imwrite('G:/points/SVF/SVFstep4/{}.jpg'.format(n),img) #替换为自己的路径
    except AttributeError:
        print("No.{} coordinate is missing".format(n))
        pass
转换后得到各点的鱼眼图像

3.提取天空像素占比(参照了https://www.coder.work/article/2090123)
from PIL import Image
import numpy as np
import cv2
import pandas as pd

#创建储存SVF值的列表
SVF_list=[]
sought = [0,130,180]#此处的0,130,180是天空的RGB,可以自己替换为需要的颜色

#遍历源文件
for n in range(0,12854):
    print('The No.{} coordinate is handling'.format(n))
    general_path='G:/points/SVF/SVFstep4/{}.jpg'.format(n)

    try:
        im=np.array(Image.open(general_path).convert('RGB'))
        color_sky = np.count_nonzero(np.all(im==sought,axis=2))

        #计算SVF并保留3位小数
        SVF=round((color_sky/1251948)*100,3)#此处的1251948是我通过计算去除黑色边框后的像素数量

        #可以通过以下代码计算总像素
        #img_L = np.array(Image.open('test.png').convert("L"))
        #pixel_sum = img_L.shape[0] * img_L.shape[1]计算

        #打印结果
        print("像素个数:{} 占比:{}".format(color_sky,SVF))
        #在储存列表中添加SVF值
        SVF_list.append(SVF)

    #如果有空值则跳过
    except FileNotFoundError:
        print("No.{} coordinate is missing".format(n))
        pass

#查看储存列表
print(SVF_list)

#将列表转为dataframe
data = pd.DataFrame({'SVF':SVF_list})
#从dataframe创建csv并写入
data.to_csv('SVF.csv',index=False,)
合集:
一些代码


【推荐】国内首个AI IDE,深度理解中文开发场景,立即下载体验Trae
【推荐】编程新体验,更懂你的AI,立即体验豆包MarsCode编程助手
【推荐】抖音旗下AI助手豆包,你的智能百科全书,全免费不限次数
【推荐】轻量又高性能的 SSH 工具 IShell:AI 加持,快人一步
· 震惊!C++程序真的从main开始吗?99%的程序员都答错了
· 别再用vector<bool>了!Google高级工程师:这可能是STL最大的设计失误
· 【硬核科普】Trae如何「偷看」你的代码?零基础破解AI编程运行原理
· 单元测试从入门到精通
· 上周热点回顾(3.3-3.9)