Ubuntu 扩展磁盘分区
之前安装 Ubuntu 虚拟机时使用的都是默认配置,虚拟机硬盘分配了 60 GB。后来想要扩容,特此记录一下扩容过程。
在操作前请做好备份
扩展磁盘分区
-
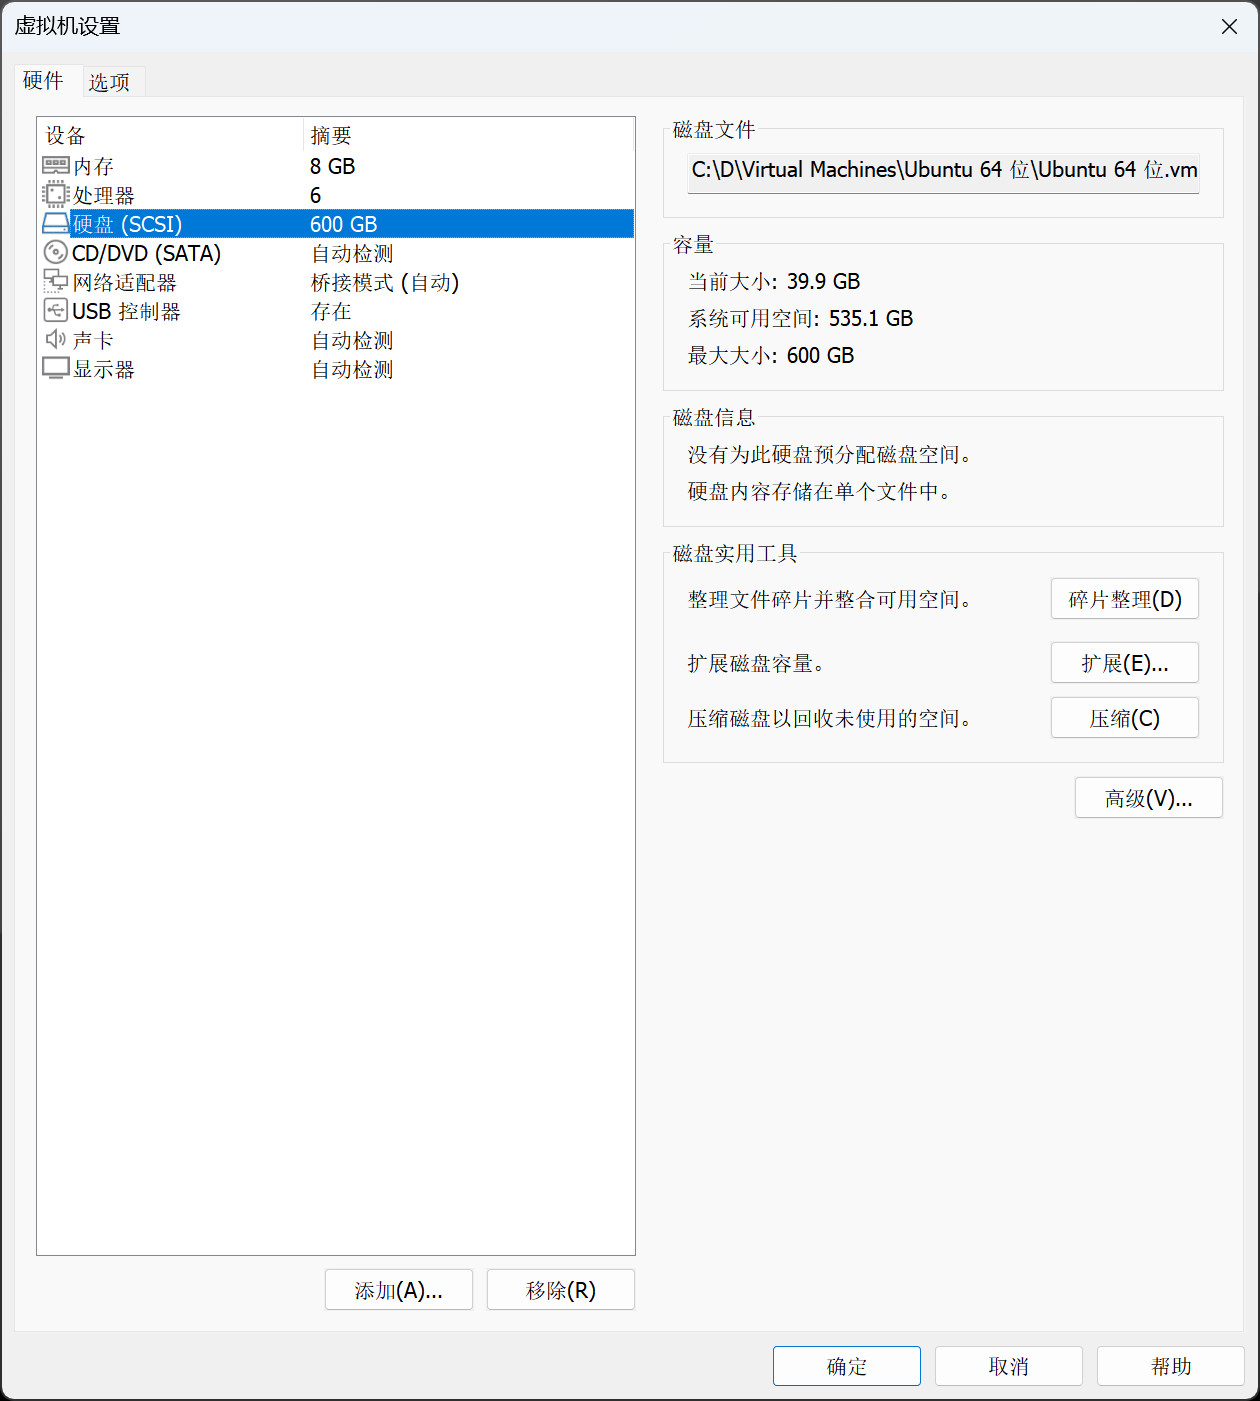
首先在 VMware 中修改虚拟硬盘大小。
-
然后进入虚拟机,使用
lsblk命令查看块设备(硬盘)信息,然后使用命令gdisk -l查看磁盘分区情况:有两种分区表模式,一种是 MBR(Main Boot Record,主引导记录),是一种传统的分区表格式,广泛用于 BIOS 系统。最大只支持管理 2TiB 的硬盘空间。另一种是 GPT(GUID Partition Table,GUID 分区表),是一种更现代的分区表格式,旨在取代 MBR,常用于 UEFI 系统。最大支持管理 9.44ZiB 的硬盘空间。
fdisk命令用于编辑MBR分区表,gdisk命令用于编辑 GPT 分区表。$ sudo gdisk -l /dev/sda GPT fdisk (gdisk) version 1.0.8 Partition table scan: MBR: protective BSD: not present APM: not present GPT: present Found valid GPT with protective MBR; using GPT. Disk /dev/sda: 126149222 sectors, 60.0 GiB Model: VMware Virtual S Sector size (logical/physical): 512/512 bytes Disk identifier (GUID): 69EBCFE5-CC8A-44E8-A97C-D110BE68AC44 Partition table holds up to 128 entries Main partition table begins at sector 2 and ends at sector 33 First usable sector is 34, last usable sector is 126149220 Partitions will be aligned on 2048-sector boundaries Total free space is 2014 sectors (1007.0 KiB) Number Start (sector) End (sector) Size Code Name 1 2048 4095 1024.0 KiB EF02 2 4096 1054719 513.0 MiB EF00 EFI System Partition 3 1054720 126147208 59.5 GiB 8300 Linux filesystem我们需要扩容的是容量最大的那个分区,也就是 3 号分区。
-
重新分区:
$ sudo gdisk /dev/sda GPT fdisk (gdisk) version 1.0.8 Partition table scan: MBR: protective BSD: not present APM: not present GPT: present Found valid GPT with protective MBR; using GPT. Command (? for help):-
首先使用
d选项删除旧分区。这里我们要删除3号分区,因此接下来的分区号填3。Command (? for help): d Partition number (1-3): 3 -
删除分区后,使用
n选项新建分区。接下来要填写分区号,我们再次填写3以重建一个3号分区。之后会让你填写分区起始扇区号,默认就是 2 号分区后面的第一个扇区号,我们直接回车使用默认值。接下来要求填写结束扇区号,默认就是最后一个可用扇区号,我们也回车使用默认值。接下来要求填写文件系统类型,依然回车使用默认值。Command (? for help): n Partition number (3-128, default 3): 3 First sector (34-1258291166, default = 1054720) or {+-}size{KMGTP}: Last sector (1054720-1258291166, default = 1258291166) or {+-}size{KMGTP}: Current type is 8300 (Linux filesystem) Hex code or GUID (L to show codes, Enter = 8300): Changed type of partition to 'Linux filesystem' Command (? for help): -
此时我们的新分区就建立好了。接下来使用
w选项保存并应用更改。Command (? for help): w Final checks complete. About to write GPT data. THIS WILL OVERWRITE EXISTING PARTITIONS!! Do you want to proceed? (Y/N): Y OK; writing new GUID partition table (GPT) to /dev/sda. Warning: The kernel is still using the old partition table. The new table will be used at the next reboot or after you run partprobe(8) or kpartx(8) The operation has completed successfully.
-
-
接下来重启以使用新的分区表。
sudo systemctl reboot
扩展文件系统
分区扩展后。我们还需要将其上的文件系统扩展到分区的大小。
如果你的文件系统是 ext4(常见),使用 resize2fs 命令。如果你的文件系统是 xfs,使用 xfs_growfs 命令。可以通过 df -T 命令查看文件系统的类型。
-
扩展文件系统
$ sudo resize2fs /dev/sda3 resize2fs 1.46.5 (30-Dec-2021) Filesystem at /dev/sda3 is mounted on /; on-line resizing required old_desc_blocks = 7, new_desc_blocks = 75 The filesystem on /dev/sda3 is now 157154555 (4k) blocks long. -
查看文件系统的磁盘空间使用情况以验证扩容是否成功:
$ df -hT
Filesystem     Type   Size  Used Avail Use% Mounted on
tmpfs          tmpfs  790M  2.1M  788M   1% /run
/dev/sda3      ext4   590G   19G  548G   4% /
tmpfs          tmpfs  3.9G     0  3.9G   0% /dev/shm
tmpfs          tmpfs  5.0M  4.0K  5.0M   1% /run/lock
/dev/sda2      vfat   512M  6.1M  506M   2% /boot/efi
tmpfs          tmpfs  790M  2.4M  788M   1% /run/user/1000
可以看到
/dev/sda3的磁盘空间总容量是 590G,说明扩容成功了。

 浙公网安备 33010602011771号