maix2 dock设置静态ip(v831)
前言
V831内置了udhcpc获取动态ip,在使用ssh及其他服务时ip变动会很麻烦,遂打算使用静态ip。
开始
- 备份文件
cd /etc/init.d
cp rc.final rc.final.back
chmod -x rc.final.back
- 添加静态ip
echo -e ifconfig wlan0 192.168.137.123 netmask 255.255.255.0\\nroute add default gw 192.168.137.1 >>/etc/init.d/rc.final
193.168.137.123为打算使用的静态ip,
255.255.255.0为掩码,
192.168.137.1为网关,具体以实际为准。
3. 测试
reboot
ifconfig
ping www.baidu.com
输出如下:
root@sipeed:/# ifconfig
lo Link encap:Local Loopback
inet addr:127.0.0.1 Mask:255.0.0.0
inet6 addr: ::1/128 Scope:Host
UP LOOPBACK RUNNING MTU:65536 Metric:1
RX packets:4 errors:0 dropped:0 overruns:0 frame:0
TX packets:4 errors:0 dropped:0 overruns:0 carrier:0
collisions:0 txqueuelen:1
RX bytes:356 (356.0 B) TX bytes:356 (356.0 B)
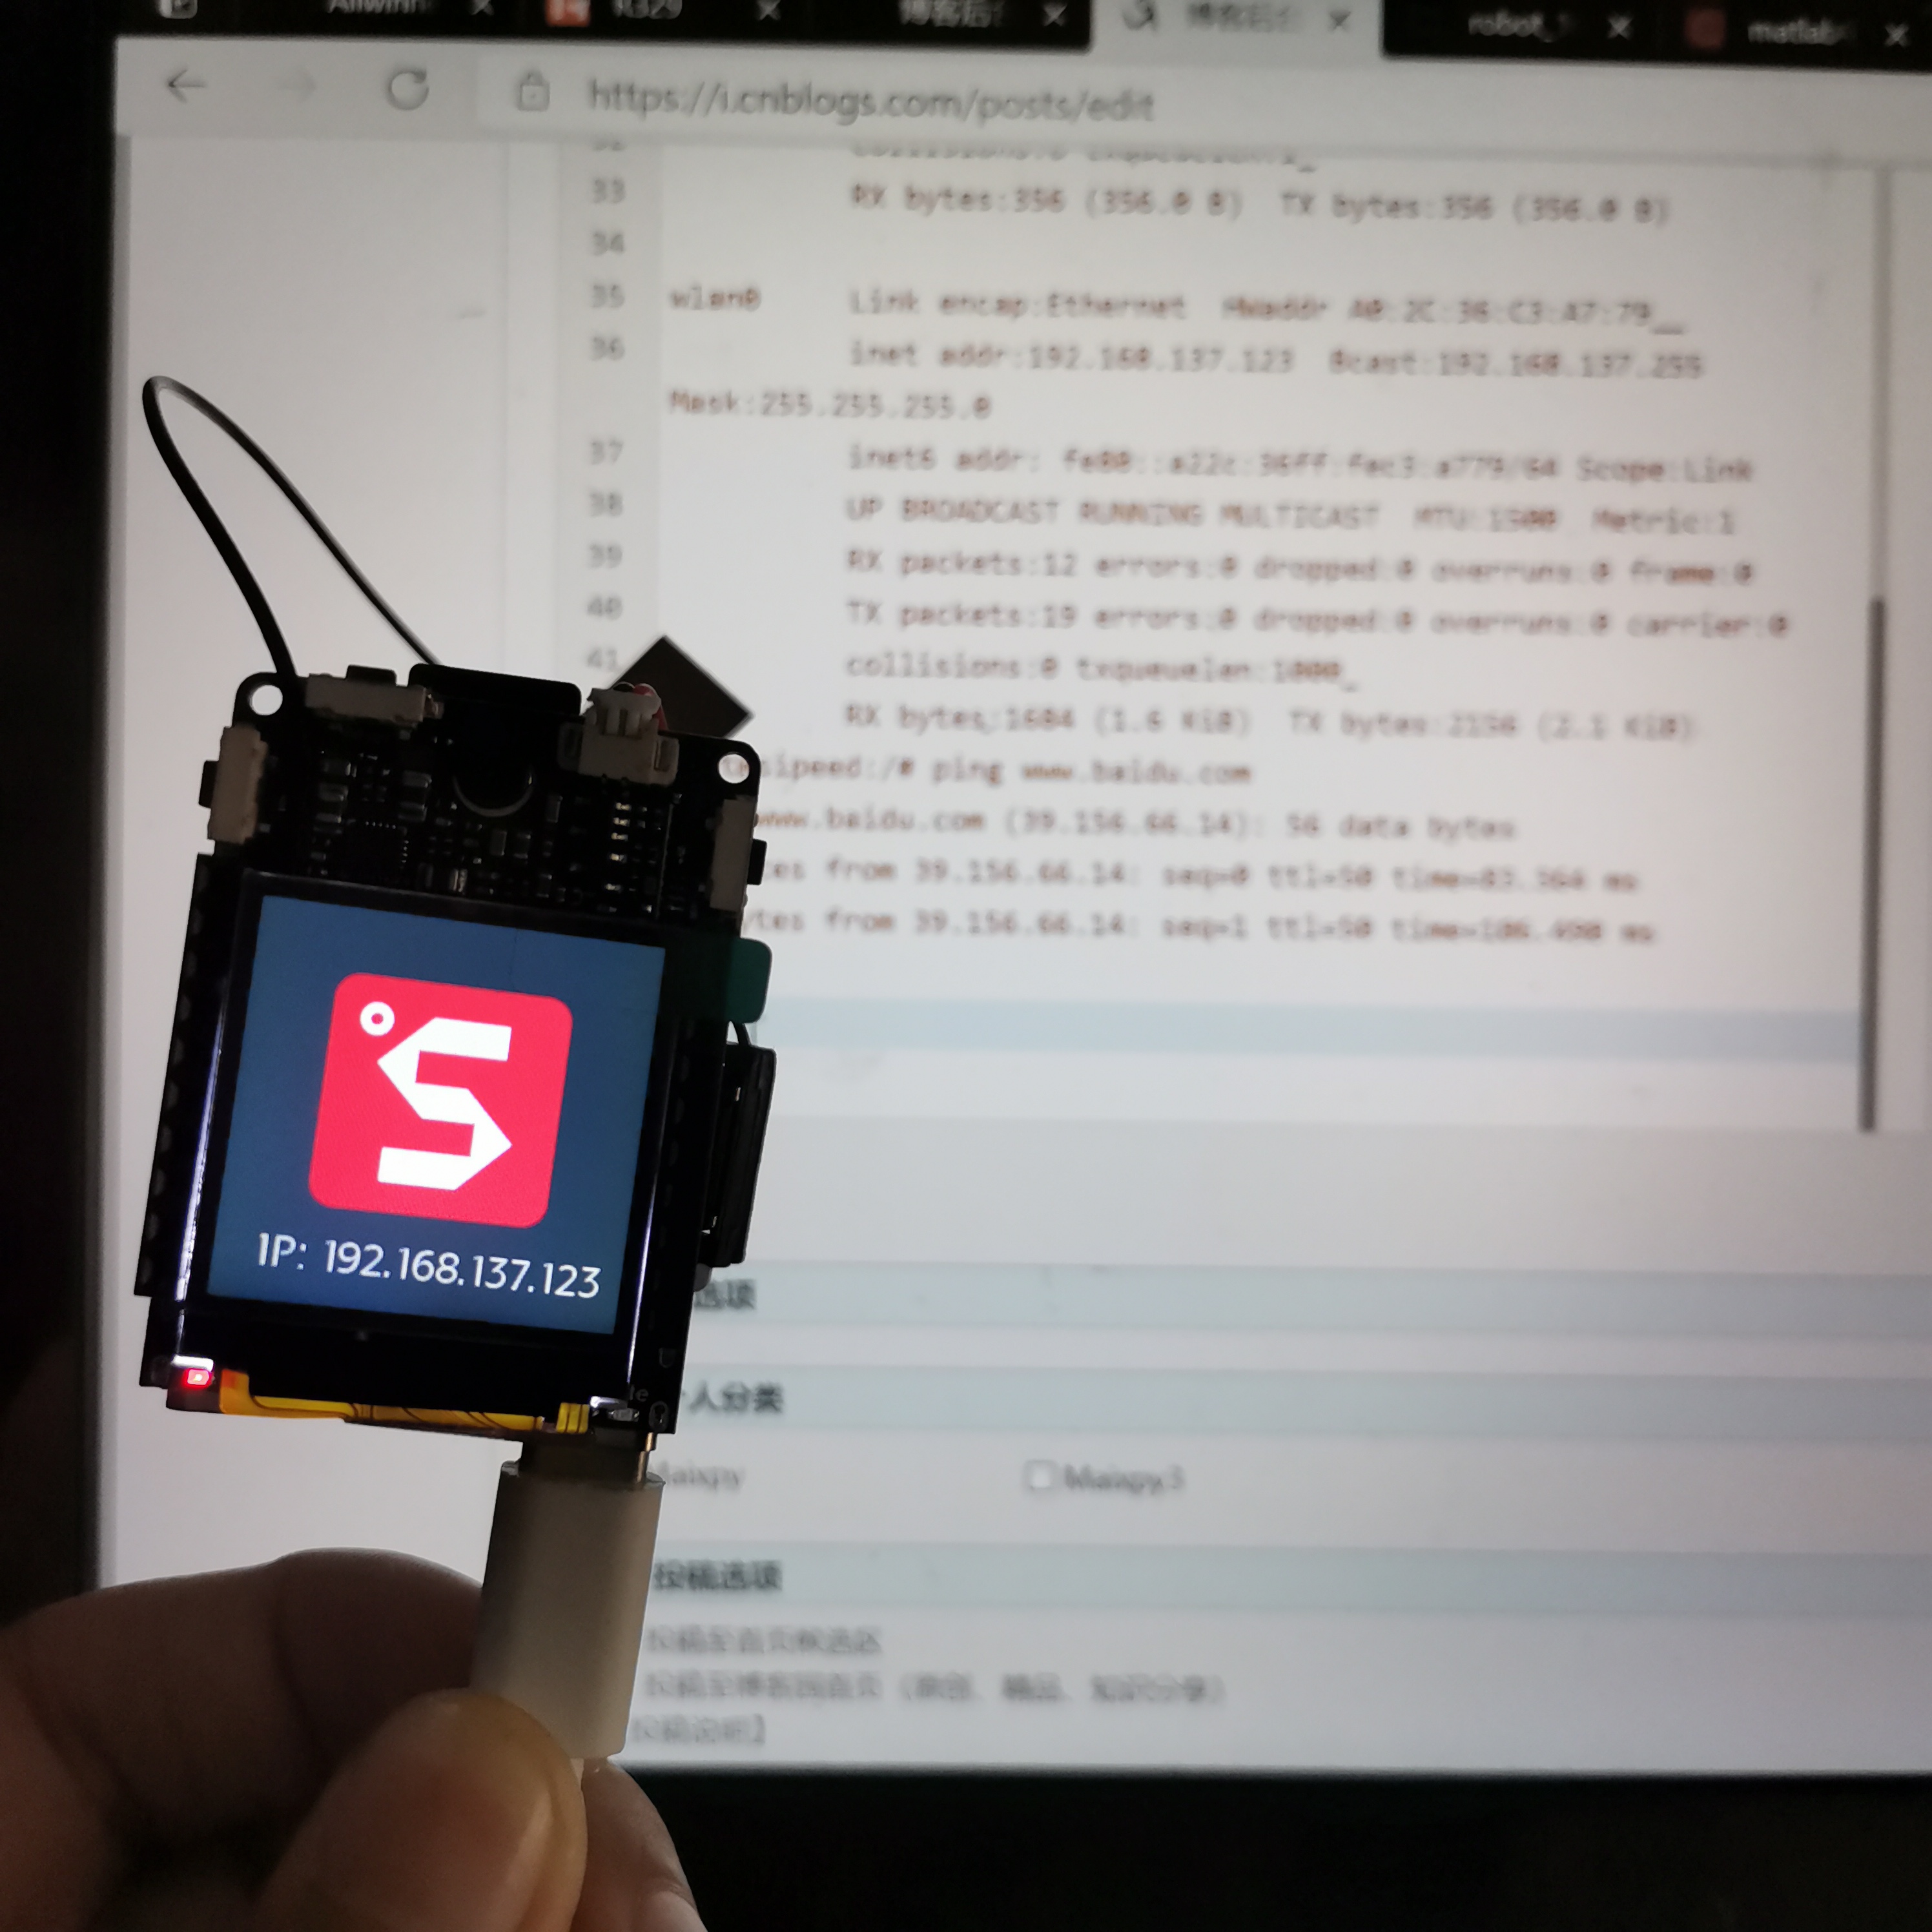
wlan0 Link encap:Ethernet HWaddr A0:2C:36:C3:A7:79
inet addr:192.168.137.123 Bcast:192.168.137.255 Mask:255.255.255.0
inet6 addr: fe80::a22c:36ff:fec3:a779/64 Scope:Link
UP BROADCAST RUNNING MULTICAST MTU:1500 Metric:1
RX packets:12 errors:0 dropped:0 overruns:0 frame:0
TX packets:19 errors:0 dropped:0 overruns:0 carrier:0
collisions:0 txqueuelen:1000
RX bytes:1684 (1.6 KiB) TX bytes:2156 (2.1 KiB)
root@sipeed:/# ping www.baidu.com
PING www.baidu.com (39.156.66.14): 56 data bytes
64 bytes from 39.156.66.14: seq=0 ttl=50 time=83.364 ms
64 bytes from 39.156.66.14: seq=1 ttl=50 time=106.490 ms
测试ssh连接
Connecting to 192.168.137.123:22...
Connection established.
To escape to local shell, press 'Ctrl+Alt+]'.

sh: /usr/bin/xauth: not found


BusyBox v1.27.2 () built-in shell (ash)

------run profile file-----
   __  ___     _        __   _
  /  |/  /__ _(_)_ __  / /  (_)__  __ ____ __
 / /|_/ / _ `/ /\ \ / / /__/ / _ \/ // /\ \ /
/_/  /_/\_,_/_//_\_\ /____/_/_//_/\_,_//_\_\
 ----------------------------------------------
root@sipeed:~#
结尾
以上方法并没有关闭udhcpc程序,开机还会自行获取ip,如果需要关闭,
vim /etc/init.d/S40network,注释掉udhcpc -iwlan0 -b, 如下:
  start)
        echo "Starting network..."
        do_insmod
        sleep 1
        /sbin/ifconfig wlan0 up
        sleep 1
        wpa_supplicant -c /etc/wpa_supplicant.conf -iwlan0 -B
        #udhcpc -iwlan0 -b
实际上,在这里添加ifconfig命令应该也执行的,但是实际测试时会提示
route: SIOCADDRT: Network unreachable,还未找到原因。
另外,编辑/etc/profile文件也可以,但是会导致每次ssh都执行一遍,因此不建议用。

 浙公网安备 33010602011771号