
验证码图片
pillow模块
验证码图片需要随机生成一张图片,而pillow模块就是用来生成图片的,它可在上面生成背景图片,然后在背景图片上写字、画线条、画点、画圆圈等。利用此模块可随机生成一个带有5个字符串,有一些干扰点线的图片作为验证;还需要一个BytesIO模块,类似于文件句柄,只不过这是内存级别,用完即删除安装
pip install pillow
例子
在Django视图函数中生成验证码,并且把且图片返回给客户端
视图函数
def get_valid_img(request):
    height = 30
    width = 120
    # 图片大小
    from PIL import Image, ImageDraw, ImageFont  # 导入图像、画笔、字体模块
    from io import BytesIO  # 导入模块,相对于句柄,但它保存在内存中
    f = BytesIO()
    import random

    def rnd_color():
        return random.randint(0, 255), random.randint(0, 255), random.randint(0, 255)

    img = Image.new(mode='RGB', size=(120, 30), color=rnd_color())
    # 生成一张背景图片
    draw = ImageDraw.Draw(img, mode='RGB')
    # 定义了画在img上的画笔
    font = ImageFont.truetype('blog/static/dist/fonts/kumo.ttf', 28)
    # 定义了一个28号的kumo字体
    # 随机生成验证码
    for i in range(5):
        code = random.choice([str(random.randint(0, 9)), chr(random.randint(65, 90)),
                              chr(random.randint(97, 122))])
        # 注意random.choice传入的是一个列表
        draw.text([i * 24, 0], code, rnd_color(), font=font)
    # 在图片上写字
    # 画干扰线
    for i in range(5):
        x1 = random.randint(0, width)
        y1 = random.randint(0, height)
        x2 = random.randint(0, width)
        y2 = random.randint(0, height)
        draw.line(xy=(x1, y1, x2, y2), fill=rnd_color())
    # 画干扰圆圈
    for i in range(20):
        x = random.randint(0, width)
        y = random.randint(0, height)
        draw.arc((x, y, x + 4, y + 4), 0, 90, fill=rnd_color())
    # 画干扰点
    for i in range(20):
        x = random.randint(0, width)
        y = random.randint(0, height)
        draw.point((x, y), rnd_color())
    img.save(f, 'png')
    # 保存图片
    data = f.getvalue()
    # 读取数据
    return HttpResponse(data)
    # 返回数据
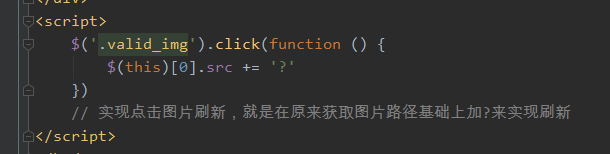
实现点击图片自动刷新验证码的功能

 浙公网安备 33010602011771号