
VSCode 配置 C++
每次换台电脑写c++,就要找配置,很是繁琐。这次自己写篇博客,记录下相关配置过程。
安装编译器
打开下面的网站 http://www.msys2.org ,下载 64 位的 MSYS2,按照主页上的步骤安装软件。完装完成后,输入命令:
cd /etc/pacman.d
进入 /etc/pacman.d 目录后,分别修改下面 3 个文件。
-
mirrorlist.mingw32 文件内容为:
Server = http://mirrors.ustc.edu.cn/msys2/mingw/i686/ -
mirrorlist.mingw64 文件内容为:
Server = http://mirrors.ustc.edu.cn/msys2/mingw/x86_64/ -
mirrorlist.msys 文件内容为:
Server = http://mirrors.ustc.edu.cn/msys2/msys/$arch/
然后输入下面命令,更新系统。
cd ~
pacman -Syu
再次输入命令,安装 c++ 工具。
pacman -S mingw-w64-x86_64-toolchain
出现以下提示,分别选择 3,9,13。文件有点大,耐心等待下载。
或安装clang,此步骤配置较麻烦,慎用。
pacman -S mingw-w64-x86_64-clang
pacman -S mingw-w64-x86_64-lldb
pacman -S mingw-w64-x86_64-make

完成后,把 e:\Softwares\msys64\mingw64\bin\加入到系统环境中。注意:e:\Softwares目录根据实际情况调正。
安装VSCode
这次工具我们选择 VsCode,方便实用,虽然c++的插件弱了点,但是微软开发的,不会差到哪里去。安装完成后选择 c/c++ 插件。见下图。

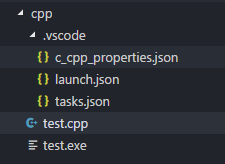
打开软件,然后在File菜单中,点击Add Folder to Workspace..., 选择一个目录作为以后写c++代码的文件夹,这里我们假设选择的文件夹为 cpp。在 cpp 下新建目录 .vscode, 然后在 .vscode 目录下分别新建 task.json,c_cpp_properties.json, launch.json 3 个文件。见下图。
tasks.cpp 的内容如下:
{
    "version": "2.0.0",
    "tasks": [
        {
            "label": "Compile",
            "command": "g++",
            "args": [
                "-g",
                "${file}", //指定编译源代码文件
                "-o",
                "${fileDirname}/${fileBasenameNoExtension}.exe", // 指定输出文件名,不加该参数则默认输出a.exe
                "-ggdb3", // 生成和调试有关的信息
                "-Wall", // 开启额外警告
                "-static-libgcc", // 静态链接
                "-std=c++17", // 使用最新的c++17标准
                "-Wno-format",
                "-fexec-charset=GBK", //Console窗体输出字符编码 保证能正常显示中文
                "-finput-charset=UTF-8" //输入编译器文本编码 默认为UTF-8
            ],
            "type": "shell",
            "group": {
                "kind": "build",
                "isDefault": true
            },
            "problemMatcher":"$gcc",
        }
    ]
}
c_cpp_properties.json 的内容:
{
    "configurations": [
        {
            "name": "Win32",
            "intelliSenseMode": "clang-x64",
            "compilerPath": "e:/Softwares/msys64/mingw64/bin/g++.exe",
            "includePath": [
                "${workspaceFolder}"
            ],
            "defines": [
                "_DEBUG",
                "UNICODE",
                "__GNUC__=7",
                "__cdecl=__attribute__((__cdecl__))"
            ],
            "browse": {
                "path": [
                    "${workspaceFolder}"
                ]
            },
            "limitSymbolsToIncludedHeaders": true,
            "databaseFilename": "",
            "cStandard": "c11",
            "cppStandard": "c++17"
        }
    ],
    "version": 3
}
launch.json 的内容:
{
    "version": "0.2.0",
    "configurations": [
        {
            "name": "C++ Launch (GDB)", // 配置名称,将会在启动配置的下拉菜单中显示
            "type": "cppdbg", // 配置类型,这里只能为cppdbg
            "request": "launch", // 请求配置类型,可以为launch(启动)或attach(附加)
            "targetArchitecture": "x64", // 生成目标架构,一般为x86或x64
            "program": "${fileDirname}/${fileBasenameNoExtension}.exe", // 将要进行调试的程序的路径
            "args": [], // 程序调试时传递给程序的命令行参数,一般设为空即可
            "stopAtEntry": false, // 设为true时程序将暂停在程序入口处,一般设置为false
            "cwd": "${workspaceRoot}", // 调试程序时的工作目录,一般为${workspaceRoot}
            "externalConsole": true, // 调试时是否显示控制台窗口,一般设置为true显示控制台
            "internalConsoleOptions": "neverOpen", // 如果不设为neverOpen,调试时会跳到“调试控制台”选项卡",
            "MIMode": "gdb", // 指定连接的调试器
            "miDebuggerPath": "gdb.exe", // 调试器路径
            "setupCommands": [
                {
                    "description": "Enable pretty-printing for GDB",
                    "text": "-enable-pretty-printing",
                    "ignoreFailures": false
                }
            ],
            "preLaunchTask": "Compile"
        }
    ]
}
运行代码
完成上面的工作后,在 cpp 目录下,写个 test.cpp 文件,然后按 Ctrl+Shift+B,就会生成 test.exe 文件了。然后在终端执行 test.exe。

 浙公网安备 33010602011771号