【Python AsciiArt】利用命令行打印出字符图案
利用字符串生成工具可以方便的打印出自己想要字符图案,以及如何将图片转换为ASCII ART输出。
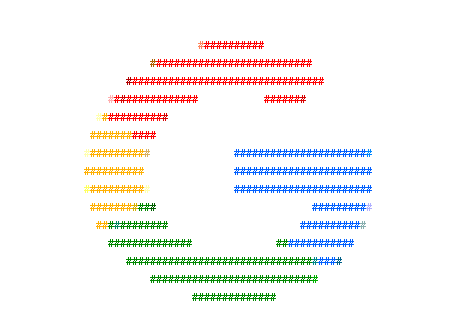
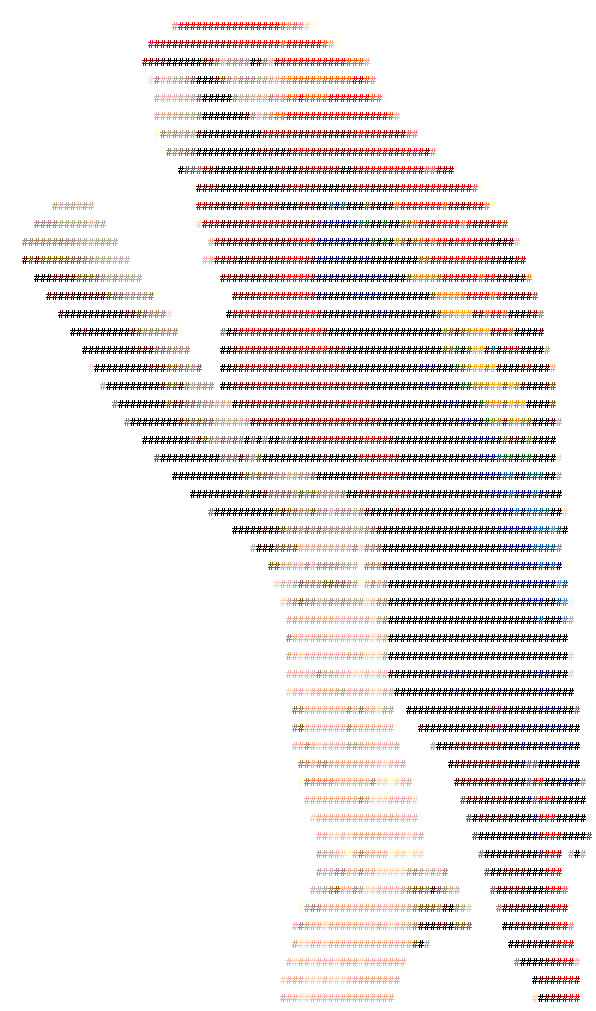
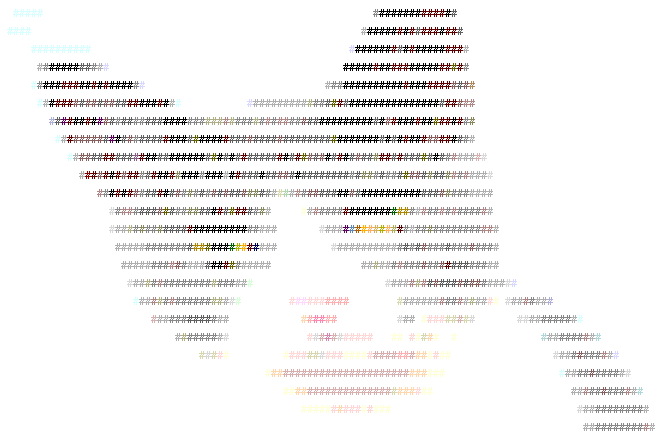
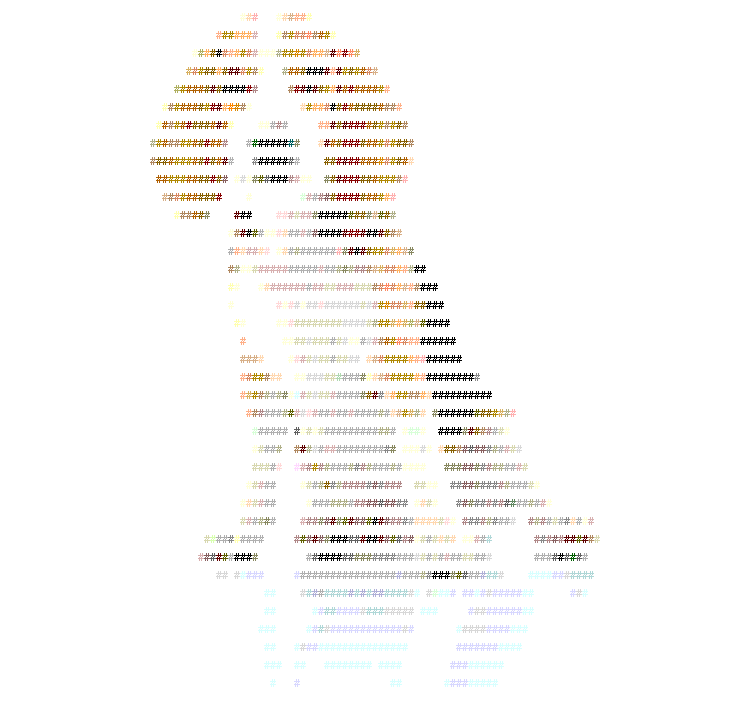
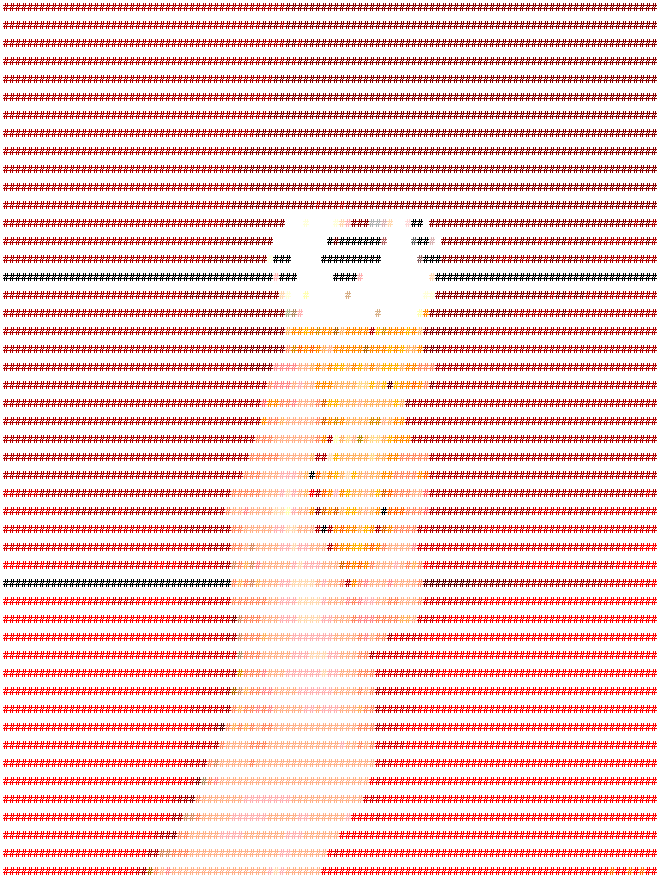
最终可以用命令行输出各种彩色图像---->>
一般字符图案
我们在使用一些开源软件的时候,启动打开的字符图形很好看。于是搜索到了一些工具来实现:
"""
 _              _   _
| |            | | ( )
| |       ___  | |_|/   ___    __ _    ___
| |      / _ \ | __|   / __|  / _` |  / _ \
| |____ |  __/ | |_    \__ \ | (_| | | (_) |
\_____/  \___|  \__|   |___/  \__, |  \___/
                               __/ |
                              |___/
"""
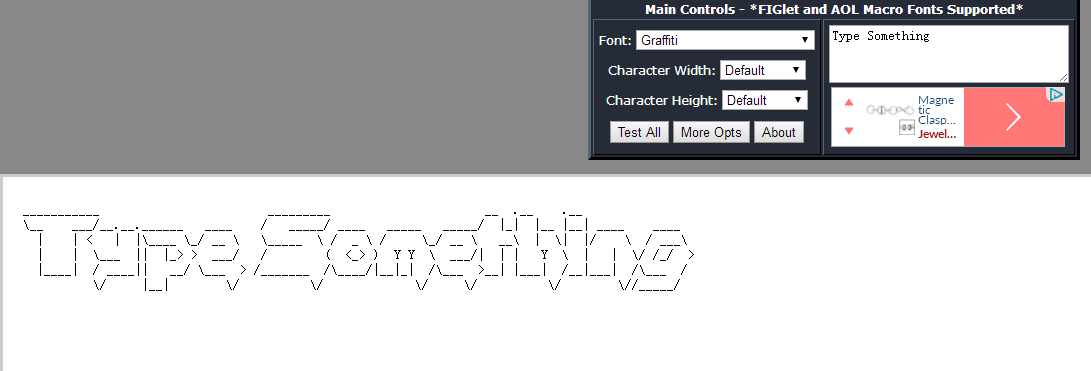
1.网站taag
可以随意输入内容,调节字体、宽、高。
同时作者还有另外一个ascii图形生成器:http://patorjk.com/arial-ascii-art
#一条小鳄鱼
#                    __  __
#       _ _        /_@)_@) \          /^^\ /^\ /^^\_
#    _/oo \____/~''. . .  '~\       /'\''  ~ ''~~' -'\_
#   / '.'. ~.~.~.       .'    ~ |     /'\~~..''''.'' ''  ~\_
#  ('_'_'_'_'_'_'_'_  ' :   '     \_/' '.''  . '.   .''  '.  ~\_
#  ~V~V~V~V  \   ~\  '' '~  '   '' ~   `   ~  ''   ~\_
#    /\~/\~/\~/\~/|/  '   ''  _   ' ~ ''  '    ~  '' __  '  ..  \_
# <-- --- ---.---.--/'   ''   /'  '\_ '' ': ~ ;;''    ' /''; \ ;'''''' '' ~\ _
#    \~ '. . : .:: ~. :.  /_'''_'' \_' :'''_ : _ ''/''_' '_ \:_ '''' #''..\/\/\/~/\~ ''~~~~~O
# ~~ \-~ `---~~~---- \(_)(_)(_)/ ~ ~~' ~\(_)(_)(_)\_~_~_~_~_~/˜¤¹
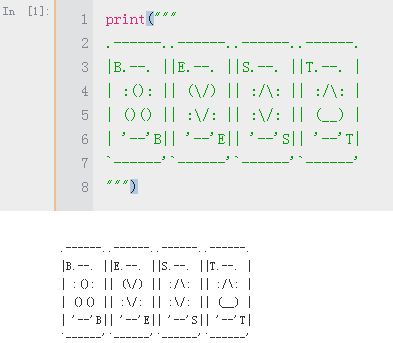
如果想要在python中输出,只需要把上面的字符串赋值然后使用print函数打印即可,需要用多行注释来包含这些字符:
2.命令行工具figlet
figlet [ -cklnoprstvxDELNRSWX ] [ -d fontdirectory ]
      [ -f fontfile ] [ -m layoutmode ]
      [ -w outputwidth ] [ -C controlfile ]
      [ -I infocode ] [ message ]
安转后直接在命令行中使用即可。更多高级用法参考doc
图片字符串图案
3.在python中显示字符串图片
这种方法的主要原理是利用一组视觉密度不同的字符,按照灰度去替换每一个像素:
- 可以将图像的灰度定义为不同的级别来显示:
gscale1 = "$@B%8&WM#*oahkbdpqwmZO0QLCJUYXzcvunxrjft/\|()1{}[]?-_+~i!lI;:,\"^.
gscale2 = "@%#*+=-:. "这种灰度级别少一些 - 然后读入图像,将图像映射为长宽等比的矩阵;
- 然后将颜色灰度值映射到定义的灰度级别上来。
import sys
import cv2

grays = "@%#*+=-:. "   #由于控制台是白色背景,所以先密后疏/黑色背景要转置一下
gs = 10                #10级灰度
#grays2 = "$@B%8&WM#*oahkbdpqwmZO0QLCJUYXzcvunxrjft/\|()1{}[]?-_+~i!lI;:,\"^.` "
#gs2 = 67

img = cv2.imread('where/your/img.jpg',0)  #读入灰度图

#宽(列)和高(行数)
w = img.shape[1]
h = img.shape[0]
ratio = float(w)/h  #调整长宽比 (**注:此比例为win cmd,ratio需要根据不同终端的字符长宽调整)

scale = w // 50    #缩放尺度,向下取整,每50个像素取一个 值越小图越小(scale 越大)

for y in range(0, h, int(scale*ratio)):  #根据缩放长度 遍历高度 y对于h,x对应w
    for x in range(0, w, scale):  #根据缩放长度 遍历宽度
        idx=img[y][x] * gs // 255  #获取每个点的灰度  根据不同的灰度填写相应的 替换字符
        if idx==gs:
            idx=gs-1
        sys.stdout.write(grays[idx])  #写入控制台
    sys.stdout.write('\n')
    sys.stdout.flush()

4.输出彩色图像
首先我们将上面的灰度图转字符的代码封装成一个函数img_ascii:
def img_ascii(img,r=3):
    #img: input img
    #r:  raito params #由于不同控制台的字符长宽比不同,所以比例需要适当调整。
    #window cmd:r=3/linux console r=

    grays = "@%#*+=-:. "   #由于控制台是白色背景,所以先密后疏/黑色背景要转置一下
    gs = 10                #10级灰度
    #grays2 = "$@B%8&WM#*oahkbdpqwmZO0QLCJUYXzcvunxrjft/\|()1{}[]?-_+~i!lI;:,\"^.` "
    #gs2 = 67              #67级灰度

    #宽(列)和高(行数)
    w = img.shape[1]
    h = img.shape[0]
    ratio = r*float(w)/h  #调整长宽比-根据终端改变r

    scale = w // 100    #缩放尺度/取值步长,向下取整,每100/50个像素取一个 值越小图越小(scale 越大)

    for y in range(0, h, int(scale*ratio)):  #根据缩放长度 遍历高度 y对于h,x对应w
        strline=''
        for x in range(0, w, scale):  #根据缩放长度 遍历宽度
            idx=img[y][x] * gs // 255  #获取每个点的灰度  根据不同的灰度填写相应的 替换字符
            if idx==gs:
                idx=gs-1
            strline+=grays[idx]  #写入控制台
        print(strline)
        #sys.stdout.flush()
然后利用控制台输出彩色的功能
#控制带自带的256色输出功能,demo如下
#from:#https://askubuntu.com/questions/821157/print-a-256-color-test-pattern-in-the-terminal

print("Color indexes should be drawn in bold text of the same color.")

colored = [0] + [0x5f + 40 * n for n in range(0, 5)]    #array combined [0, 95, 135, 175, 215, 255]
colored_palette = [
    "%02x/%02x/%02x" % (r, g, b)    #转为16进制
    for r in colored
    for g in colored
    for b in colored
]

grayscale = [0x08 + 10 * n for n in range(0, 24)]
grayscale_palette = [
    "%02x/%02x/%02x" % (a, a, a)
    for a in grayscale
]

normal = "\033[38;5;%sm"
bold = "\033[1;38;5;%sm"
reset = "\033[0m"

for (i, color) in enumerate(colored_palette + grayscale_palette, 16):
    index = (bold + "%4s" + reset) % (i, str(i) + ':')
    hex   = (normal + "%s" + reset) % (i, color)
    newline = '\n' if i % 6 == 3 else ''
    print(index, hex, newline,)
##ref
#https://en.wikipedia.org/wiki/ANSI_escape_code
#https://github.com/grawity/code/blob/master/term/xterm-color-chooser
#https://unix.stackexchange.com/questions/404414/print-true-color-24-bit-test-pattern/404415#404415
可见核心是利用格式化输出ASCII转义码(ANSI escape code)来实现的:
print("\033[38;5;%sm #\n"%'1') #其中%s对应的就是256位颜色的一种
我们需要根据rgb值和对应的颜色构建查表或转换函数来将图形中的颜色(r,g,b)转为n[0,255]:
based = range(0,16)
based_palette = [
    "%02x" %l    #转为16进制
    for l in based
]

colored = [0] + [0x5f + 40 * n for n in range(0, 5)]    #array combined [0, 95, 135, 175, 215, 255]
colored_palette = [
    "%02x/%02x/%02x" % (r, g, b)    #转为16进制
    for r in colored
    for g in colored
    for b in colored
]

grayscale = [0x08 + 10 * n for n in range(0, 24)]
grayscale_palette = [
    "%02x/%02x/%02x" % (a, a, a)
    for a in grayscale
]

color_256 = based_palette + colored_palette + grayscale_palette
#生成一个字典
color_dict={color:i for (i,color) in enumerate(color_256)}
#通过rgb值近似到00/5f/87/af/d7/ff来得到彩色值

#输出显示各种颜色
index =''
for (i,color) in enumerate(color_256):
    index +=  "\033[38;5;%sm#"%i   #其中#为各个颜色的输出显示
print(index)
或者可以选择公式来直接转换216种彩色:
16-231: 6 × 6 × 6 cube (216 colors): 16 + 36 × r + 6 × g + b (0 ≤ r, g, b ≤ 5)(待验证)
A.首先我们需要定义一本RGB**到真彩的颜色字典,利用前面生成的color_256来定义:
#先定义颜色和对应的16进制值
based = range(0,16)
based_palette = [
    "%02x" %l    #转为16进制
    for l in based
]

colored = [0] + [0x5f + 40 * n for n in range(0, 5)]    #array combined [0, 95, 135, 175, 215, 255]
colored_palette = [
    "%02x%02x%02x" % (r, g, b)    #转为16进制
    for r in colored
    for g in colored
    for b in colored
]

grayscale = [0x08 + 10 * n for n in range(0, 24)]
grayscale_palette = [
    "%02x%02x%02x" % (a, a, a)
    for a in grayscale
]

color_256 = based_palette + colored_palette + grayscale_palette
#生成一个字典
color_dict={color:i for (i,color) in enumerate(color_256)}
#color_dict={}
#for index,name in enumerate(color_256):
#    color_dict[name]=index
B.随后我们需要定义函数将图像的RGB转换为对应的真彩像素:
#首先定义函数,利用颜色字典将RGB颜色转换为真彩对应数值
def cvtrgb(rgb,color_dict):
    xx=''
    #根据上面生成的颜色字典来,对于不同取值区间赋予不同的值
    for i in range(3):
        if rgb[i]<95:
            xx+= '00'
        elif rgb[i]<135:
            xx+= '5f'
        elif rgb[i]<175:
            xx+= '87'
        elif rgb[i]<215:
            xx+= 'af'
        elif rgb[i]<225:
            xx+= 'd7'
        else:
            xx+= 'ff'
        name =  ''.join(xx)

    value = color_dict[name]
    return value

#随后对输入图进行遍历,将所有的RGB值转换为相应的真彩值
def cvtimg(img,color_dict):
    ascii_img = np.array(img[:,:,0],dtype=np.string_)
    for h in range(img.shape[0]):
        for w in range(img.shape[1]):
            ascii_img[h,w] = cvtrgb(img[h,w,:],color_dict)   #调用换色函数
    return ascii_img  #返回值中每一个像素已经是真彩值
C.最后重新定义一个真彩ASCII彩色绘图函数来绘制,将原来的绘图函数略微修改即可:
def img_color_ascii(img,r=3):
    #img: input img
    #r:  raito params #由于不同控制台的字符长宽比不同,所以比例需要适当调整。
    #window cmd:r=3/linux console r=

    grays = "@%#*+=-:. "   #由于控制台是白色背景,所以先密后疏/黑色背景要转置一下
    gs = 10                #10级灰度
    #grays2 = "$@B%8&WM#*oahkbdpqwmZO0QLCJUYXzcvunxrjft/\|()1{}[]?-_+~i!lI;:,\"^.` "
    #gs2 = 67              #67级灰度

    #宽(列)和高(行数)
    w = img.shape[1]
    h = img.shape[0]
    ratio = r*float(w)/h  #调整长宽比-根据终端改变r

    scale = w // 100    #缩放尺度/取值步长,向下取整,每100/50个像素取一个 值越小图越小(scale 越大)

    for y in range(0, h, int(scale*ratio)):  #根据缩放长度 遍历高度 y对于h,x对应w
        strline=''
        for x in range(0, w, scale):  #根据缩放长度 遍历宽度
            idx=img[y][x] * gs // 255  #获取每个点的灰度  根据不同的灰度填写相应的 替换字符
            if idx==gs:
                idx=gs-1  #防止溢出
			######改变这里,将真彩值利用命令行格式化输出赋予
            color_id = "\033[38;5;%sm%s"%(img[y][x],grays[2])      #输出!
            strline+= color_id #按行写入控制台
        print(strline)
D.下面就可以使用了:
#导入图片
import cv2
import matplotlib.pyplot as plt
import numpy as np
img0 = cv2.imread('img2.png')
img =cv2.cvtColor(img0,cv2.COLOR_BGR2RGB)
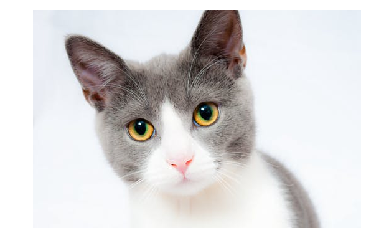
plt.imshow(img)
plt.axis('off')
plt.show()
随后利用前面定义的颜色转换函数得到ascii编码的颜色值:
#使用前面定义的颜色字典,颜色转换函数cvtrgb和图像映射哈数cvtimg
ass = cvtimg(img,color_dict)
ass = np.array(ass,dtype=np.int)  #将array转化为int类型
img_color_ascii(ass,2.5)          #彩色绘图函数,r=2.5调整比例,由于命令行行距存在需要微调r因子
下面就是一些转换的图像,一起来感受一下自己的ASCII ART。(由于截图,尺度可能有些许扭曲)
5. 彩蛋
在做完了上面所有的代码之后,发现了控制台的输出还可以直接使用RGB来表示:
"\033[38;2;r;g;bm "
所以无需进行颜色空间转换,直接利用RGB即可!
将上面的绘图函数稍加改变:
def img_RGBcolor_ascii(img,r=3):
    #img: input img img here is 3channel!
    #r:  raito params #由于不同控制台的字符长宽比不同,所以比例需要适当调整。
    #window cmd:r=3/linux console r=

    grays = "@%#*+=-:. "   #由于控制台是白色背景,所以先密后疏/黑色背景要转置一下
    gs = 10                #10级灰度
    #grays2 = "$@B%8&WM#*oahkbdpqwmZO0QLCJUYXzcvunxrjft/\|()1{}[]?-_+~i!lI;:,\"^.` "
    #gs2 = 67              #67级灰度

    #宽(列)和高(行数)
    w = img.shape[1]
    h = img.shape[0]
    ratio = r*float(w)/h  #调整长宽比-根据终端改变r

    scale = w // 100    #缩放尺度/取值步长,向下取整,每100/50个像素取一个 值越小图越小(scale 越大)

    for y in range(0, h, int(scale*ratio)):  #根据缩放长度 遍历高度 y对于h,x对应w
        strline=''
        for x in range(0, w, scale):  #根据缩放长度 遍历宽度
            idx=int(img[100][100].mean()) * gs // 255  #获取每个点的灰度  根据不同的灰度填写相应的 替换字符
            if idx==gs:
                idx=gs-1  #防止溢出
			######改变这里,将RGB值,利用2控制参数直接输入
            color_id = "\033[38;2;%d;%d;%dm%s"%(img[y][x][0],img[y][x][1],img[y][x][2],grays[2])      #输出!
            #38为前景  ->> 48为背景 ,使用grays[-1/-2]输出
            strline+= color_id #按行写入控制台
        print(strline)
img_RGBcolor_ascii(img)
就可以愉快绘图了!
TODO
#https://en.wikipedia.org/wiki/ANSI_escape_code
#opencv:https://docs.opencv.org/3.1.0/de/d25/imgproc_color_conversions.html
def cvtRGB2ITU([r,g,b]):
    [r,g,b] = [r,g,b]/255*5
    color_v = 16 + 36 × r + 6 × g + b
    return color_v
def cvtRGB2ITU(color):
    #array combined [0, 95, 135, 175, 215, 255]  find the region
    color = np.array(color)/40
    color_v = color
    return color_v
ref:
https://en.wikipedia.org/wiki/ASCII_art
https://blog.csdn.net/qq_19655383/article/details/70176349
https://blog.csdn.net/su_bao/article/details/80355001
color:
https://www.text-image.com/index.html
https://www.maketecheasier.com/convert-pictures-ascii-art/
https://fossbytes.com/linux-distribution-logo-ascii-art-terminal/
https://gallery.technet.microsoft.com/scriptcenter/bc15444a-9490-4115-aa40-76d898041724
https://stackoverflow.com/questions/40754673/python-fails-to-output-ansi-color-codes-for-the-terminal
https://en.wikipedia.org/wiki/8-bit_color
changechar:https://www.geeksforgeeks.org/converting-image-ascii-image-python/
++||| https://stackoverflow.com/questions/287871/print-in-terminal-with-colors
modules:
https://pypi.org/project/colorama/
https://pypi.org/project/termcolor/
ternima:
https://unix.stackexchange.com/questions/404414/print-true-color-24-bit-test-pattern/404415#404415
++YY$$ python:https://askubuntu.com/questions/821157/print-a-256-color-test-pattern-in-the-terminal
https://segmentfault.com/q/1010000016688755


![利用背景显示,参数48,占位符grays[-2]](https://img-blog.csdnimg.cn/20181201131433451.)
