2、SpringBoot+Mybatis整合------一对一
开发工具:STS
代码下载链接:https://github.com/theIndoorTrain/SpringBoot_Mybatis01/tree/93398da60c647573645917b27bd549da2f9f0f15
前言:
上一篇blog里面介绍了整合springboot和mybatis的项目的建立,以及单表的简单的增删改查。这里是上一篇blog的地址:https://www.cnblogs.com/TimerHotel/p/springboot_matatis_01.html。今天我们来介绍一对一的关系该怎么处理。
一、建立数据库:
每个学生对应一张身份证,每张身份证上有身份证号cardId、开始日期、结束日期。并且建立与student表的外键关系

二、代码实现
1.添加身份证实体:

 1 package com.xm.pojo;
 2
 3 import java.util.Date;
 4 /**
 5  * 身份证实体
 6  * @author xm
 7  *
 8  */
 9 public class IDCard {
10
11     private int sid;
12     private long cardId;
13     private Date beginTime;
14     private Date endTime;
15     private Student student;
16
17
18     public Student getStudent() {
19         return student;
20     }
21     public void setStudent(Student student) {
22         this.student = student;
23     }
24     public int getSid() {
25         return sid;
26     }
27     public void setSid(int sid) {
28         this.sid = sid;
29     }
30     public long getCardId() {
31         return cardId;
32     }
33     public void setCardId(long cardId) {
34         this.cardId = cardId;
35     }
36     public Date getBeginTime() {
37         return beginTime;
38     }
39     public void setBeginTime(Date beginTime) {
40         this.beginTime = beginTime;
41     }
42     public Date getEndTime() {
43         return endTime;
44     }
45     public void setEndTime(Date endTime) {
46         this.endTime = endTime;
47     }
48
49
50
51 }
2.添加数据操作接口mapper:

 1 package com.xm.mapper;
 2
 3 import java.util.List;
 4
 5 import com.xm.pojo.IDCard;
 6
 7 /**
 8  * Idcard的数据操作层接口类
 9  * @author xm
10  *
11  */
12 public interface IDCardMapper {
13
14     /**
15      * 获取包括学生信息的身份证列表
16      * @return
17      */
18     public List<IDCard>  getListIdOfStudent();
19
20 }
3.添加mapper映射:

 1 <?xml version="1.0" encoding="UTF-8" ?>
 2 <!DOCTYPE mapper PUBLIC "-//mybatis.org//DTD Mapper 3.0//EN" "http://mybatis.org/dtd/mybatis-3-mapper.dtd" >
 3 <mapper namespace="com.xm.mapper.IDCardMapper">
 4
 5 <!--  学生表与身份证表的一对一映射-->
 6 <resultMap type="iDCard" id="IDCardOfStudentMap">
 7 <id property="cardId" column="cardId"/>
 8 <result property="beginTime" column="begin_time"/>
 9 <result property="endTime" column="end_time"/>
10 <association property="student" javaType="student">
11 <id property="id" column="id"/>
12 <result property="name" column="name"/>
13 </association>
14 </resultMap>
15
16 <!-- 查出带有学生信息的身份证列表 -->
17 <select id="getListIdOfStudent" resultMap="IDCardOfStudentMap">
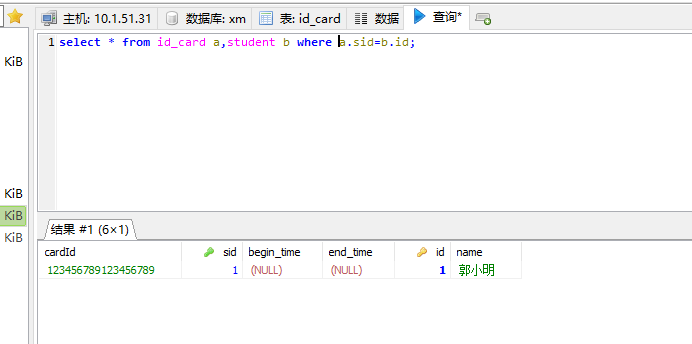
18 select * from id_card a,student b where a.sid=b.id;
19 </select>
20
21 </mapper>
4.添加controller

 1 package com.xm.controller;
 2
 3 import java.util.List;
 4
 5 import org.springframework.beans.factory.annotation.Autowired;
 6 import org.springframework.web.bind.annotation.GetMapping;
 7 import org.springframework.web.bind.annotation.RestController;
 8
 9 import com.xm.mapper.IDCardMapper;
10 import com.xm.pojo.IDCard;
11
12 /**
13  * 身份证信息的控制类
14  * @author xm
15  *
16  */
17 @RestController
18 public class IDCardController {
19     @Autowired
20     private IDCardMapper iDCardMapper;
21     /**
22      * 查出带有学生信息的身份证列表
23      * @return
24      */
25     @GetMapping("/IDCardsOfStudent")
26     public List<IDCard> listOfStudent(){
27         List<IDCard>  iDCards=  iDCardMapper.getListIdOfStudent();
28         return iDCards;
29     }
30
31 }
三、测试:
1.数据表信息:

2.运行结果:

2018-06-19


 浙公网安备 33010602011771号