docker部署nginx+宿主机部署keepalive实现高可用(离线方式安装)
docker部署nginx+宿主机部署keepalive实现高可用(离线方式安装)
一、准备两台虚拟机,离线安装docker
1.下载docker的安装包
我这里是19.03.9版本
链接:https://pan.baidu.com/s/12iYjgO0IoYcEmDkvhNS4pA?pwd=nxrb
提取码:nxrb
2.下载完后上传到虚拟机并且解压
tar -zxvf docker-19.03.9.tgz
3.复制解压后docker文件夹里的文件到/usr/bin下
cp docker/* /usr/bin
4.在/etc/systemd/system下创建以下三个文件
创建docker.scoke
touch docker.socke
内容为:
点击查看代码
[Unit]
Description=Docker Socket for the API
PartOf=docker.service

[Socket]
ListenStream=/var/run/docker.sock
SocketMode=0660
SocketUser=root
SocketGroup=docker

[Install]
WantedBy=sockets.target
创建docker.service
touch docker.service
内容为:
点击查看代码
[Unit]
Description=Docker Application Container Engine
Documentation=https://docs.docker.com
After=network.target

[Service]
Type=notify
# the default is not to use systemd for cgroups because the delegate issues still
# exists and systemd currently does not support the cgroup feature set required
# for containers run by docker
#ExecStart=/usr/bin/dockerd
#ExecStart=/usr/bin/docker daemon --tlsverify --tlscacert=/root/openssl/ca.pem --tlscert=/root/openssl/server-cert.pem --tlskey=/root/openssl/server-key.pem --registry-mirror=http://3cda3ca9.m.daocloud.io -H tcp://0.0.0.0:2376

#ExecStart=/usr/bin/docker daemon --registry-mirror=http://3cda3ca9.m.daocloud.io -H fd:// -H tcp://0.0.0.0:2375
#ExecStart=/usr/bin/dockerd --registry-mirror=http://3cda3ca9.m.daocloud.io
ExecStart=/usr/bin/dockerd --registry-mirror=http://3cda3ca9.m.daocloud.io -H unix:///var/run/docker.sock -H tcp://0.0.0.0:2375

ExecReload=/bin/kill -s HUP $MAINPID
# Having non-zero Limit*s causes performance problems due to accounting overhead
# in the kernel. We recommend using cgroups to do container-local accounting.
LimitNOFILE=infinity
LimitNPROC=infinity
LimitCORE=infinity
# Uncomment TasksMax if your systemd version supports it.
# Only systemd 226 and above support this version.
#TasksMax=infinity
TimeoutStartSec=0
# set delegate yes so that systemd does not reset the cgroups of docker containers
Delegate=yes
# kill only the docker process, not all processes in the cgroup
KillMode=process

[Install]
WantedBy=multi-user.target
创建containerd.service
touch containerd.service
内容为:
点击查看代码
# Copyright The containerd Authors.
#
# Licensed under the Apache License, Version 2.0 (the "License");
# you may not use this file except in compliance with the License.
# You may obtain a copy of the License at
#
#     http://www.apache.org/licenses/LICENSE-2.0
#
# Unless required by applicable law or agreed to in writing, software
# distributed under the License is distributed on an "AS IS" BASIS,
# WITHOUT WARRANTIES OR CONDITIONS OF ANY KIND, either express or implied.
# See the License for the specific language governing permissions and
# limitations under the License.

[Unit]
Description=containerd container runtime
Documentation=https://containerd.io
After=network.target local-fs.target

[Service]
ExecStartPre=-/sbin/modprobe overlay
ExecStart=/usr/local/bin/containerd

Type=notify
Delegate=yes
KillMode=process
Restart=always
RestartSec=5
# Having non-zero Limit*s causes performance problems due to accounting overhead
# in the kernel. We recommend using cgroups to do container-local accounting.
LimitNPROC=infinity
LimitCORE=infinity
LimitNOFILE=infinity
# Comment TasksMax if your systemd version does not supports it.
# Only systemd 226 and above support this version.
TasksMax=infinity
OOMScoreAdjust=-999

[Install]
WantedBy=multi-user.target
5.重新加载配置文件
systemctl daemon-reload
6.创建docker用户组
groupadd docker
7.尝试启动docker
systemctl start docker
8.查看启动情况
systemctl status docker
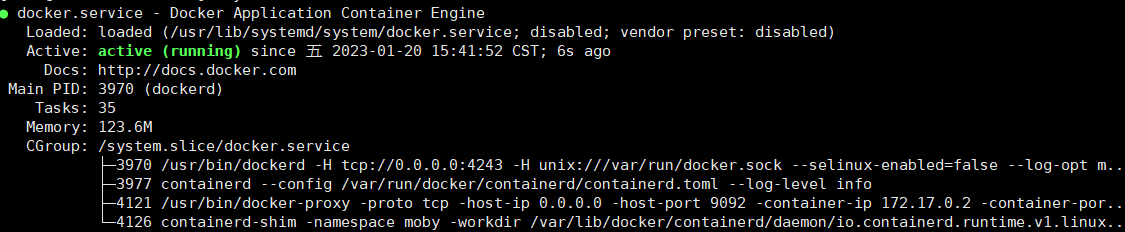
显示active(running)就说明运行成功
9.设置开机自动启动docker
systemctl enable docker
10.对另一台机器也执行以上操作安装docker
二、导入nginx镜像
1.可以在有网络的机器上先下好nginx镜像
docker pull nginx
2.保存
docker save -o docker_nginx.tar nginx:latest
3.将tar包上传至服务器并且导入到docker
docker load -i docker_nginx.tar
4.查看镜像
docker iamges

导入成功
三、运行并且配置挂载目录
1.在宿主机/root/nginx目录下存放nginx配置文件用于挂载
mkdir /root/nginx
mkdir -p /root/nginx/conf.d /root/nginx/html /root/nginx/logs
2.可以先启动镜像把配置文件复制出来
从镜像启动容器
docker run -d docker_nginx:dng_V1.0
查看容器id
docker ps -a
复制文件
docker cp [容器id]:/etc/nginx/nginx.conf /root/nginx
docker cp [容器id]:/etc/nginx/conf.d /root/nginx
docker cp [容器id]:/usr/share/nginx/html /root/nginx
3.停止并且删除已启动的容器
停止容器
docker stop [容器id]
删除容器
docker rm [容器id]
4.重新启动并且配置挂载目录
点击查看代码
docker run --name=nginx_docker --privileged=true --restart=always -p 8000:80 -v /root/nginx/nginx.conf:/etc/nginx/nginx.conf -v /root/nginx/conf.d:/etc/nginx/conf.d -v /root/nginx/html:/usr/share/nginx/html -v /root/nginx/logs:/var/log/nginx -d docker_nginx:dng_V1.0
如果出现以下报错
docker: Error response from daemon: OCI runtime create failed: container_linux.go:449;container init caused "write /proc/self/attr/keycreate: permission denied"": unknown.
可以执行
setenforce 0
如果要永久解决,编辑/etc/selinux/config文件
vim /etc/selinux/config
将SELINUX=enforcing改为SELINUX=disabled
之后重启机器
reboot
5.在另一台机器上重复上述操作
四、安装keepalive
所需安装包可以从下面这个链接下载:
链接:https://pan.baidu.com/s/1LnKIkV1eZPpg-z-XVEx5sQ?pwd=nsnn
提取码:nsnn
安装的版本是keepalived-2.2.7
1.安装keepalived
解压
tar -zxvf keepalived-2.2.7.tar.gz
进入目录
cd keepalived-2.2.7/
安装
prefix后面是安装的路径
./configure --prefix=/usr/local/keepalived make && make install
如果报错
no acceptable C compiler found in $PATH
说明没安装gcc环境,用gcc离线包安装
rpm -Uvh *.rpm --nodeps –-force
如果报错
OpenSSL is not properly installed on your system. !!!
说明缺少OpenSSL,安装openssl
解压openssl-1.1.1q.tar.gz
tar -zxvf openssl-1.1.1q.tar.gz
进入解压后的目录
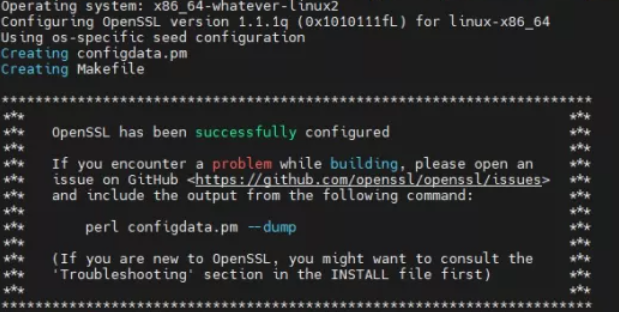
输入 ./config shared zlib --prefix=/usr/local/openssl
加载依赖
make depend
安装openssl
make && make install
如果报错
zlib.h: No such file or directory # include <zlib.h>
原因是没有安装zlib-devel
使用下载好的zlib-devel包安装
rpm -Uvh zlib-devel-1.2.7-20.el7_9.x86_64.rpm
如果出现:
警告:zlib-devel-1.2.7-20.el7_9.x86_64.rpm: 头V3 RSA/SHA256 Signature, 密钥 ID f4a80eb5: NOKEY
错误:依赖检测失败:
zlib = 1.2.7-20.el7_9 被 zlib-devel-1.2.7-20.el7_9.x86_64 需要
说明需要zlib = 1.2.7-20.el7_9依赖,可以去这个网站搜索或下载
http://rpmfind.net/linux/rpm2html/search.php?query=zlib
需要的安装包在前面下载的链接里也有
安装zlib1.2.7-20.el7_9
rpm -Uvh zlib1.2.7-20.el7_9.x86_64
安装完成zlib-devel再重新安装openssl
openssl安装完成需要验证一下版本
openssl version
显示的如果不是安装的1.1.1版本需要进行配置
执行以下命令
点击查看代码
echo "/usr/local/lib64/" >> /etc/ld.so.conf
ldconfig
mv /usr/bin/openssl /usr/bin/openssl.old
ln -s /usr/local/openssl/bin/openssl /usr/bin/openssl
ln -s /usr/local/openssl/include/openssl /usr/include/openssl
echo "/usr/local/openssl/lib" >> /etc/ld.so.conf
ldconfig -v
重新查看版本
openssl version

重新执行keepalived的编译安装
如果出现
OpenSSL EVP libraries are required
则在安装命令前加上LDFLAGS="$LDFAGS -L /usr/local/openssl/lib"
完整命令如下
LDFLAGS="$LDFAGS -L /usr/local/openssl/lib" ./configure --prefix=/usr/local/keepalived make && make install
2.配置keepalived
创建目录
mkdir /etc/keepalived
进入/etc/keepalived目录,创建配置文件
touch keepalived.conf
配置文件参考
点击查看代码
global_defs {
    #每个keepalived取个不同名称
    router_id 56
}
vrrp_script chk_nginx {
	script "/usr/local/src/nginx_check.sh"
	interval 2
	weight 2
}
vrrp_instance VI_1 {
    # MASTER为主实例,BACKUP 为从实例
    state BACKUP
    # 网卡名称
    interface ens160
    # 主备这里要配置为同样的
    virtual_router_id 68
    # 优先级,主要高于备. 一般主配置为100  备配置为80
    priority 100
    advert_int 1
    # 主动抢占,主备都开启的话,服务器抢占过去后,要等这个服务器keepalived停掉才会漂移到另一台
    nopreempt
    authentication {
        # 主备必须配置成同样的
        auth_type PASS
         # 主备必须配置成同样的
        auth_pass 1111
    }
    virtual_ipaddress {
      # vip,主备必须配置一样
      15.48.25.68
    }
	track_script{
	#要执行的检测脚本,需要给权限
	  chk_nginx
	}
}
3.创建nginx的检测脚本
touch /usr/local/src/nginx_check.sh
脚本内容如下:
点击查看代码
#!/bin/bash
#version 0.0.1
#
A=`ps -C nginx --no-header |wc -l`
if [ $A -eq 0 ];then
     systemctl restart docker
      sleep 3
            if [ `ps -C nginx --no-header |wc -l` -eq 0 ];then
                  systemctl stop keepalived
fi
fi
脚本说明:当nginx进程不存在时,会自动重启docker服务,docker服务启动时会自动启动nginx容器;再次检查nginx进程,如果不存在,就停止keepalived服务,然后NGINX_BACKUP主机会自动接替NGINX_MASTER的工作。
给予脚本执行权限
chmod +x /usr/local/src/nginx_check.sh
4.启动keepalived
启动
systemctl start keepalived
查看状态
systemctl status keepalived

启动成功,查看主机的ip
ip a
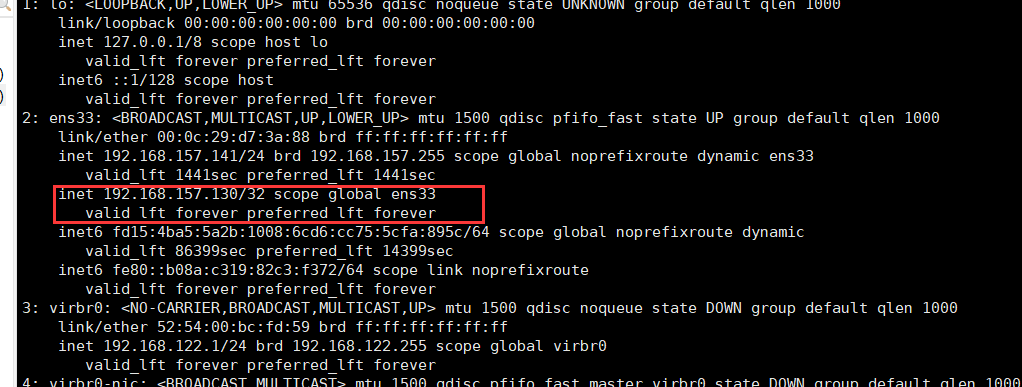
成功绑定虚拟ip
启动备机keepalived,查看备机ip
ip a

没有出现虚拟ip
如果出现主备都抢用了虚拟ip的情况,那很可能是firewall的原因
需对防火墙进行设置
防火墙开启vrrp
keepalived 是基于vrrp做到虚拟ip漂移的,这里不开启的话,主备均会认为对方挂掉了,会造成主备都能获取到虚拟ip(vip)
firewall-cmd --add-rich-rule='rule protocol value="vrrp" accept' --permanent
重新载入配置
firewall-cmd –reload
这时候,重启主机和备机的keepalived,就不会出现抢占vip的情况了
5.测试
现在我们通过vip去访问nginx的页面
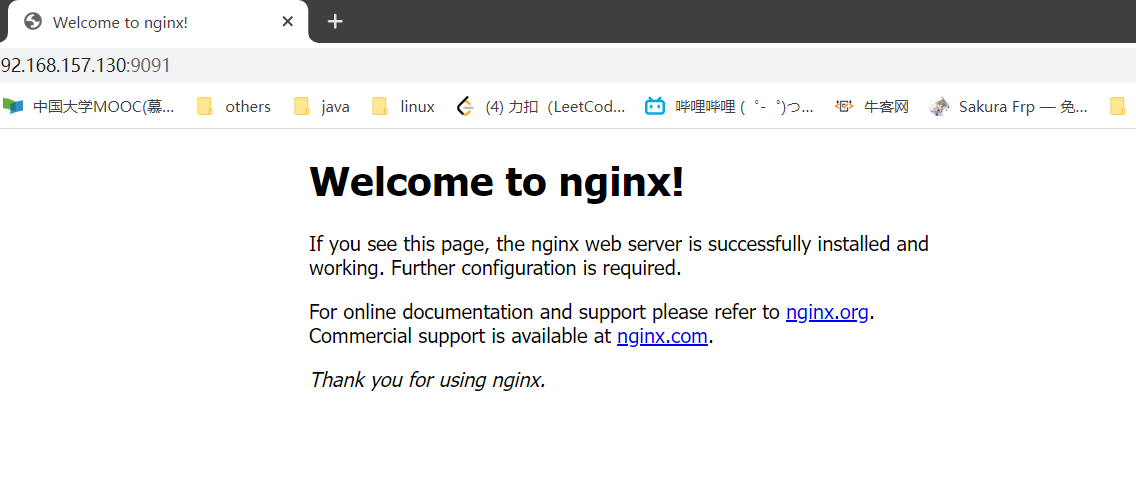
可以访问
这个时候我们停止主机上的keepalived或者直接关闭主机
查看备机上的ip
ip a

可以看到vip成功漂移
访问nginx页面
也可以成功访问
注:这里我备机nginx的映射端口写成了9092和主机不一样
参考博客:https://zhuanlan.zhihu.com/p/578139761 感谢大佬的博客!解决了我很多问题
参考博客:https://www.bbsmax.com/A/lk5avlYod1/

