OpenCV中的凸包和凸缺陷
一、概念
1.1 什么叫凸包
凸包是指如果在集合A内连接任意两个点的直线段都在A的内部,则称集合A是凸形的,简单点理解,就是一个多边型,没有凹的地方,其常应用在物体识别、手势识别及边界检测等领域。
1.2 什么叫凸缺陷
凸缺陷是指一组点在其凸包(Convex Hull)和形状之间的偏差部分,下图中黑色双箭头部分所指就是红色线绘制的凸包的缺陷,结合图形来看,凸包缺陷在运算上就像是凸包减去轮廓的图形。

二、代码及结果展示
2.1 凸包函数接口
void convexHull(InputArray points,
				OutputArray hull,
				bool clockwise = false,
				bool returnPoints = true );
/*
*points:输入二维点集(一般为轮廓点集),这些点集被存储在容器vector或Mat中
*hull:凸包点集输出。它的数据类型要么为整型向量,要么为点集向量。如果是整型向量,那么存储的只是索引,索引的对象是你输入的二维点集,之所以可以这样做,是因为函数检测到的凸包是输入点集的子集。如果是点集向量,那么这些点集就是凸包本身的点。
*clockwise:凸包方向的标志位。如果是true,那么是基于顺时针方向,如果是false,那么是基于逆时针方向
*returnPoints:函数输出类型,如果OutputArray是一个矩阵变量(MAT),那么returnPoints==true时,输出点坐标,否则,输出坐标索引,索引的对象是输入的二维点集,但如果OutputArray本来就是一个向量了,那这个参数的值会被无视掉,因为向量在初始化的时候是需要规定好类型的,要么为int型,要么为point型。
*/
2.2 凸缺陷函数接口
void convexityDefects(InputArray contour,
InputArray convexhull,
OutputArray convexityDefects);
/*
*contour:生成凸包的轮廓点集,一般就是轮廓检测函数findContours()的输出
*convexhull:convexHull()的输出,里面存储的是凸包信息,在这里只能是int类型(即vector<vector<int>>类型),而不能是vector<vector<Point>>类型。
*convexityDefects:为vector<vector<Vec4i>>类型,这四个整型数据的名称分别为:start_index, end_index, farthest_pt_index, fixpt_depth,以`1.2`节图中的⑥为例:
*1)start_index:凸包缺陷的起点,上图⑥中的A或B就代表起点,A或B都位于轮廓上。
*2)end_index:凸包缺陷的终点,上图⑥中的A或B就代表终点,A或B都位于轮廓上。
*3)farthest_pt_index:凸包缺陷中轮廓与凸包相距的最远点,上图⑥中的C点就是凸包缺陷中轮廓与凸包相距的最远点,C点也位于轮廓上。
*4)fixpt_depth:上图中C点距离凸包的距离。它以`8位定点小数`来近似表示,所以如果要换成浮点数,应该除以256,即the floating-point value=fixpt_depth/256.0。
*/
2.3 使用实例
#include <opencv2/opencv.hpp>

using namespace std;
using namespace cv;

int main()
{

    Mat srcGary = imread("P0044-hand-02.jpg", 0);

    imshow("srcGary", srcGary);

    // 阈值化操作
    Mat threMat;
    int thresh = 128;
    threshold(srcGary, threMat, thresh, 255, THRESH_BINARY);

    // 轮廓检测
    vector<vector<Point> > contours;
    vector<Vec4i> hierarchy;
    findContours(threMat, contours, hierarchy, RETR_TREE, CHAIN_APPROX_SIMPLE, Point(0, 0)); //注意:在3.X版本中,标志为:CV_RETR_TREE, CV_CHAIN_APPROX_SIMPLE

    // 绘制轮廓
    Mat contours_img(srcGary.size(), CV_8U, Scalar(0));
    drawContours(contours_img, contours, -1, Scalar(255), 1);
    imshow("contours_img", contours_img);

    //凸包检测和凸包缺陷检测
    vector<vector<Point> > pointHull(contours.size());
    vector<vector<int> >   intHull(contours.size());
    vector<vector<Vec4i> > hullDefect(contours.size());

    for (size_t i = 0; i < contours.size(); i++)
    {
        // 输出结果为Point类型的凸包检测
        convexHull(Mat(contours[i]), pointHull[i], false);
        // 输出结果为int类型的凸包检测
        convexHull(Mat(contours[i]), intHull[i], false);

        //凸包缺陷检测
        convexityDefects(Mat(contours[i]), intHull[i], hullDefect[i]);
    }

    //绘制凸包及凸包缺陷
    Mat convex_hull_img = contours_img.clone();
    cvtColor(convex_hull_img, convex_hull_img, COLOR_GRAY2BGR);


    for (size_t i = 0; i < contours.size(); i++)
    {
        Scalar color = Scalar(0, 0, 255);
        drawContours(convex_hull_img, pointHull, i, color, 1, 8, vector<Vec4i>(), 0, Point());

        // 绘制缺陷
        size_t count = contours[i].size();
        if (count < 300) //小于300个点的轮廓略去
            continue;

        // 凸包缺陷迭代器设置
        vector<Vec4i>::iterator iterDefects = hullDefect[i].begin();
        // 遍历得到凸包缺陷的4个特征量并进行绘制
        while (iterDefects != hullDefect[i].end())
        {
            Vec4i& v = (*iterDefects);
            // 起始位置
            int startidx = v[0];
            Point ptStart(contours[i][startidx]);
            // 终止位置
            int endidx = v[1];
            Point ptEnd(contours[i][endidx]);
            // 内凸壳的最远的点缺陷
            int faridx = v[2];
            Point ptFar(contours[i][faridx]);
            // 凸包之间的最远点
            int depth = v[3] / 256;
            if (depth > 10 && depth < 100)
            {
                line(convex_hull_img, ptStart, ptFar, CV_RGB(0, 255, 0), 2);
                line(convex_hull_img, ptEnd, ptFar, CV_RGB(0, 255, 0), 2);
                circle(convex_hull_img, ptStart, 4, Scalar(255, 0, 0), 2);//ptStart用蓝色
                circle(convex_hull_img, ptEnd, 4, Scalar(255, 0, 128), 2);//ptEnd用紫色
                circle(convex_hull_img, ptFar, 4, Scalar(128, 0, 255), 2);//ptFar用粉红色
            }
            iterDefects++;
        }


    }
    imshow("convex_hull_img", convex_hull_img);

    cv::waitKey();
    return 0;
}
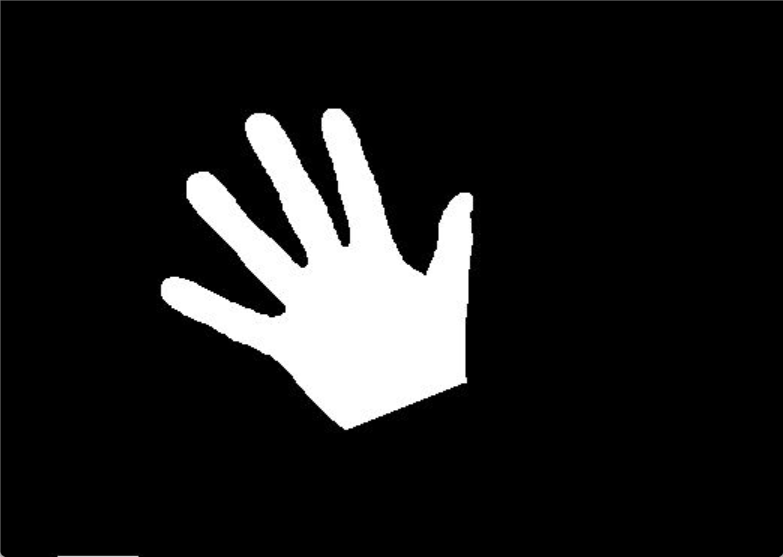
1、原图

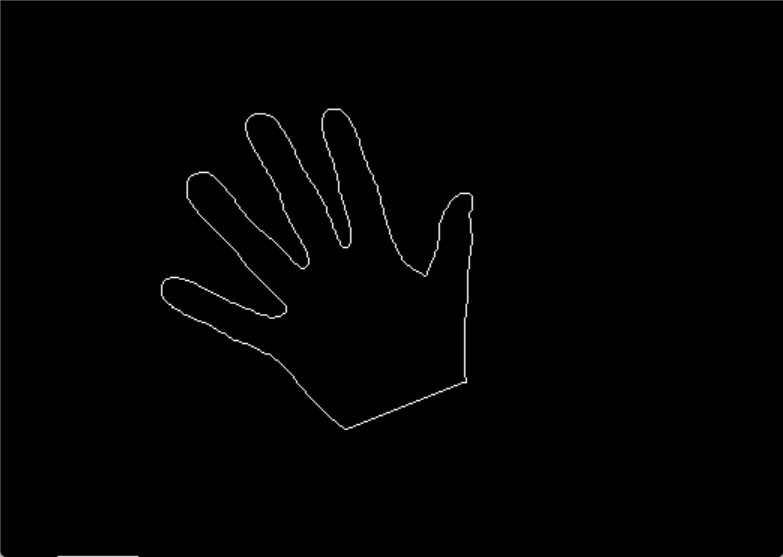
2、轮廓图

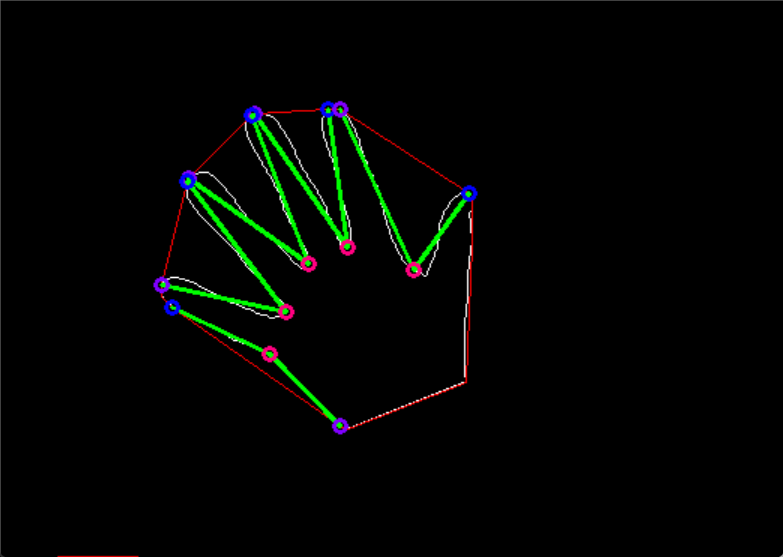
3、结果图


 浙公网安备 33010602011771号