
虚拟机CentOS6.5 安装mysql简易版
CentOS6.5 安装mysql简易版
#### 注意:本文档仅就Linux课程中安装mysql举例 ####
#### 注意:不保证可以满足mysql课程教学中的需要 ####
前提:保证这台CentOS6.5的虚拟机可以连通网络
[root@localhost ~]# ping -c 4 www.baidu.com
PING www.a.shifen.com (220.181.111.188) 56(84) bytes of data.
64 bytes from 220.181.111.188: icmp_seq=1 ttl=55 time=23.2 ms
64 bytes from 220.181.111.188: icmp_seq=2 ttl=55 time=23.3 ms
64 bytes from 220.181.111.188: icmp_seq=3 ttl=55 time=24.5 ms
64 bytes from 220.181.111.188: icmp_seq=4 ttl=55 time=23.3 ms
--- www.a.shifen.com ping statistics ---
4 packets transmitted, 4 received, 0% packet loss, time 3036ms
rtt min/avg/max/mdev = 23.279/23.621/24.519/0.552 ms
第一步:通过yum安装mysql
[root@localhost ~]# yum -y install mysql*
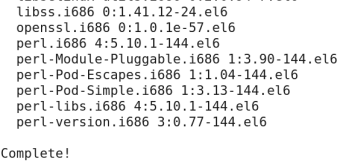
第二步:查看是否安装成功
[root@localhost ~]# yum list installed | grep mysql

第三步:启动mysql服务
[root@localhost ~]# service mysqld start
Initializing MySQL database: Installing MySQL system tables...
OK
Filling help tables...
OK
To start mysqld at boot time you have to copy
support-files/mysql.server to the right place for your system
PLEASE REMEMBER TO SET A PASSWORD FOR THE MySQL root USER !
To do so, start the server, then issue the following commands:
/usr/bin/mysqladmin -u root password 'new-password'
/usr/bin/mysqladmin -u root -h localhost.localdomain password 'new-password'
Alternatively you can run:
/usr/bin/mysql_secure_installation
which will also give you the option of removing the test
databases and anonymous user created by default. This is
strongly recommended for production servers.
See the manual for more instructions.
You can start the MySQL daemon with:
cd /usr ; /usr/bin/mysqld_safe &
You can test the MySQL daemon with mysql-test-run.pl
cd /usr/mysql-test ; perl mysql-test-run.pl
Please report any problems with the /usr/bin/mysqlbug script!
[ OK ]
Starting mysqld: [ OK ]
[root@localhost ~]#
注意:如果是第一次启动mysql服务,mysql服务器先会进行初始化的配置,会提示非常多的信息,目的就是对mysql数据库进行初始化操作,当再次重新启动mysql服务时,就不会提示这么多信息了.
第四步:开机启动mysql服务(根据实际要求配置,可不配置,建议配置)
chkconfig --list | grep mysqld查看mysql是否配置开机启动,如果全是off的结果,则说明并未配置开机启动。
chkconfig mysqld on 配置开机启动
chkconfig mysqld off 取消开机启动
[root@localhost ~]# chkconfig --list | grep mysqld
mysqld 0:off 1:off 2:off 3:off 4:off 5:off 6:off
[root@localhost ~]# chkconfig mysqld on
[root@localhost ~]# chkconfig --list | grep mysqld
mysqld 0:off 1:off 2:on 3:on 4:on 5:on 6:off
第五步:配置mysql的root用户的密码(不是Linux系统的root用户)
[root@localhost ~]# mysqladmin -u root password ‘123456’
本例的mysql的root用户密码被设置为123456,可根据实际情况自行设置。
验证:执行 mysql -u root -p123456 命令来登录mysql数据库了
[root@localhost ~]# mysql -u root -p
Enter password: (此处输入配置的密码,本例为123456)
Welcome to the MySQL monitor. Commands end with ; or \g.
Your MySQL connection id is 2
Server version: 5.1.73 Source distribution
Copyright (c) 2000, 2013, Oracle and/or its affiliates. All rights reserved.
Oracle is a registered trademark of Oracle Corporation and/or its
affiliates. Other names may be trademarks of their respective
owners.
Type 'help;' or '\h' for help. Type '\c' to clear the current input statement.
mysql> show databases;
+--------------------+
| Database |
+--------------------+
| information_schema |
| mysql |
| test |
+--------------------+
3 rows in set (0.07 sec)
mysql>quit
第六步:可通过lsof或者netstat命令验证mysql占用3306端口

