基于IDEA maven工程配置TestNG及使用
2020-10-29 20:09 Tanwheey 阅读(3098) 评论(0) 收藏 举报TestNG是Java中的一个测试框架,类似JUnit 和NUnit, 功能都差不多,只是功能更加强大,使用也更方便。
详细使用说明请参考官方链接:https://testng.org/doc/index.html
IDEA自带了Junit 和testng 测试框架。但默认并不包含在你的项目或者模块中。
一、所需环境
1、JDK
2、Maven
3、intellij idea
二、创建工程
三、导入相关依赖包和插件
1)IDEA安装TestNG
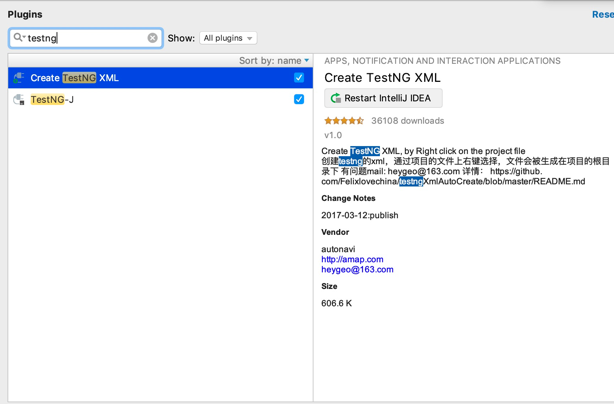
进入设置->Browse Repositories->搜索“testng”进行下载,下载完成后重启IDEA。
若IDEA已经安装TestNG的插件,显示如下:
TestNG-J:idea 自己做的插件, 默认存在
2)导入testNG依赖包
在pom.xml中添加:
<dependency>
<groupId>org.testng</groupId>
<artifactId>testng</artifactId>
<version>7.3.0</version>
<scope>test</scope>
</dependency>
3)添加编译插件和执行测试插件:
在pom.xml中添加:
<build>
<plugins>
<plugin>
<groupId>org.apache.maven.plugins</groupId>
<artifactId>maven-compiler-plugin</artifactId>
<version>3.8.0</version>
<configuration>
//<source>${jdk.target.version}</source>
//<target>${jdk.target.version}</target>
<source>1.8</source>
<target>1.8</target>
<encoding>UTF-8</encoding>
</configuration>
</plugin>
<plugin>
<groupId>org.apache.maven.plugins</groupId>
<artifactId>maven-surefire-plugin</artifactId>
<version>2.15</version>
<configuration>
<!--<testFailureIgnore>true</testFailureIgnore>-->
<forkMode>never</forkMode>
<argLine>-Dfile.encoding=UTF-8</argLine>
<suiteXmlFiles>
<suiteXmlFile>xml/testNG.xml</suiteXmlFile>
</suiteXmlFiles>
</configuration>
</plugin>
</plugins>
</build>
四、创建测试类
1)在Java文件夹下创建
打开需要进行单元测试的方法,选择类名,点击Alt+Enter键(windows)/Option+Enter键(mac),选择Create Test,右键菜单->go to->test(alt+command+t)

第一次创建单元测试方法,可能会提示“TestNG library not found In the module”,是因为没有在pom.xml文件中,写入TestNG插件的依赖,点击下图的“Fix”按钮,即可自动添加:
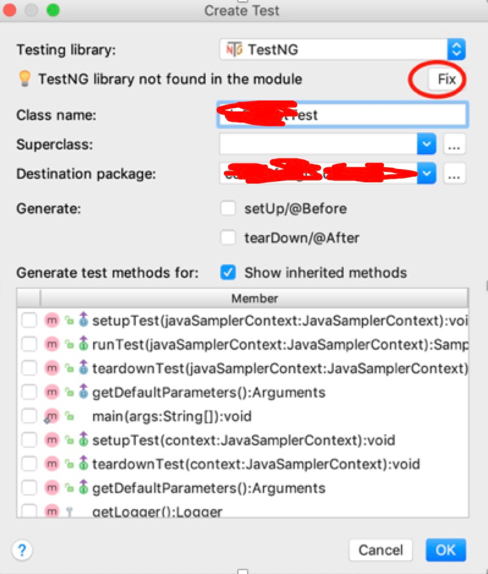
setUp/@Before:创建@Before方法
tearDown/@After:创建@After方法
Show inherited methods:为父类的方法创建单元测试
2)规范单元测试的存放路径:
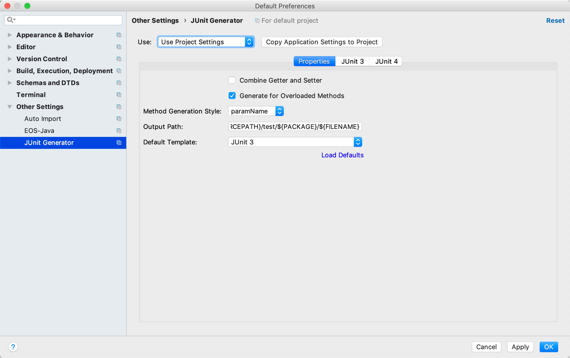
Preferences --> Plugins 安装Junit Generator V2.0
设置Junit的Output Path目录为${SOURCEPATH}/../test/${PACKAGE}/${FILENAME},否则默认为${SOURCEPATH}/test/${PACKAGE}/${FILENAME},此目标和Maven设置test目录不一致。
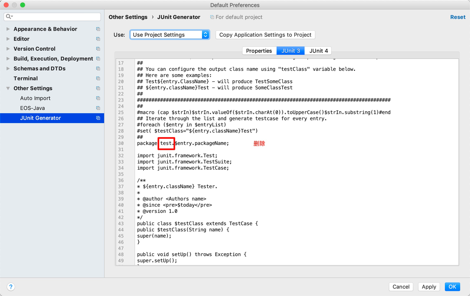
File->other settings-> default settings->junit generator:
去掉JUnit3和JUnit4Tab中生成Package中前面的test目录
Junit自动生成测试类:
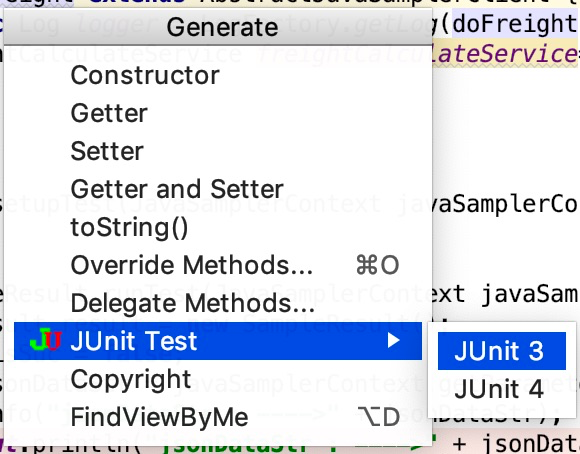
右键类->generate->
找到需要test的类,使用command+N快捷键,选中 Junit test 即会自动生成Test代码
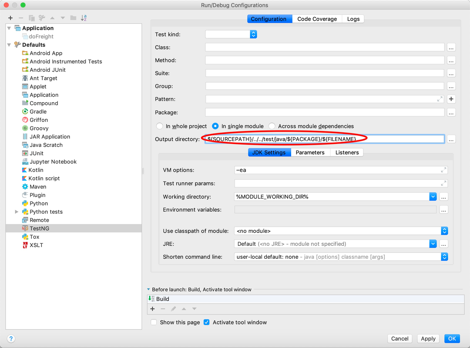
Run->Edit Configurations->Defaults->TestNG:
output directory:${SOURCEPATH}/../../test/java/${PACKAGE}/${FILENAME}
3)编写testNG.xml
<?xml version="1.0" encoding="utf-8" ?>
<suite name="testproj" parallel="false">
<test name="testDemo1">
<classes>
<class name="TestDemo"></class>
</classes>
</test>
</suite>
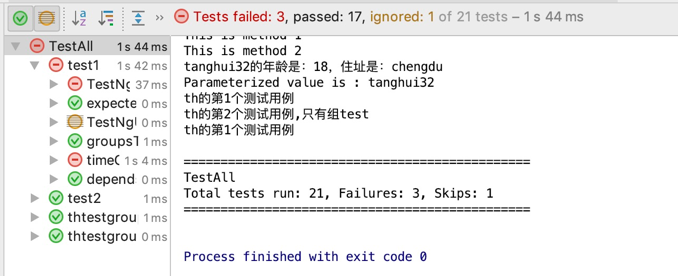
五、运行testNG.xml
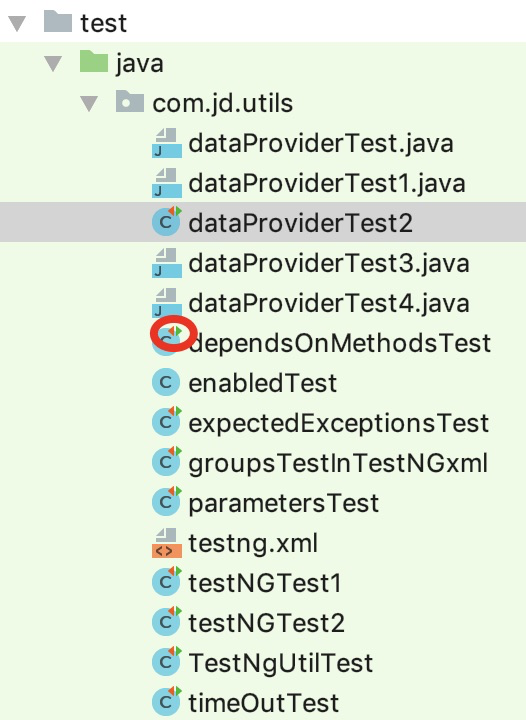
ps:类的图标上有红色箭头表示已经是测试类了,把测试相关的东西删了就可以用shift+ctrl+t创建测试类了,比如是否继承了TestCase

 浙公网安备 33010602011771号