Selenium 打包为.exe执行
前言:不依赖环境执行,拓展UI自动化使用的场景
一、项目结构介绍
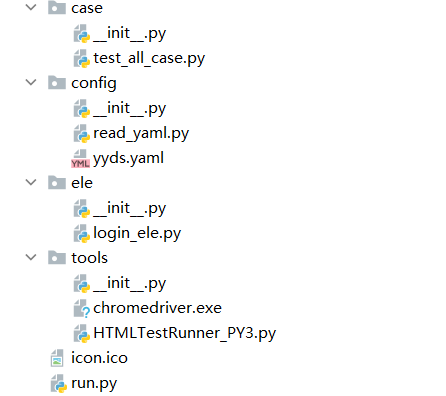
- case:测试用例次存放目录
- config:主要存放yaml文件配置
- ele:元素的定位以及执行动作
- tools:HTMLTestRunner以及webdriver
- ico:生成exe是的图标
- run:主执行程序
二、代码演示
1.创建 yyds.yaml 以及 read_yaml,py
- yyds.yaml
# yyds.yaml

- user_name: bky
- pass_word: test666
- base_url: https://account.cnblogs.com/
- read_yaml.py
# coding:utf-8
import yaml
import os, sys

# 获取当前脚本所在文件夹路径
curPath = os.path.dirname(os.path.realpath(__file__))

# 获取yaml文件路径
# yamlPath = os.path.join(curPath, "yyds.yaml")
yamlPath = os.path.join(os.path.dirname(os.path.realpath(sys.executable)), './config/yyds.yaml')

# open方法打开直接读出来
f = open(yamlPath, 'r', encoding='utf-8')
cfg = f.read()
# print(type(cfg))  # 读出来是字符串
# print(cfg)

# d = yaml.load(cfg)  # 用load方法转字典
d = yaml.load(cfg, Loader=yaml.FullLoader)
username = d[0]["user_name"]
password = d[1]["pass_word"]
baseurl = d[2]["base_url"]
print("\nUI自动化")
print("\n温馨提示:执行失败请检查Google浏览器版本,当前driver版本104.0.xxx.xxx,如不匹配请自行下载")
print("下载地址:http://chromedriver.storage.googleapis.com/index.html\n")

print("登录账号:%s\n登录密码:%s\n访问地址:%s" %(username, password, baseurl))

#print(type(d))
2.创建 login.ele.py 以及 test_all_case.py
- login.ele.py
# -*- coding:UTF-8 -*-
from selenium.webdriver.common.by import By
from time import sleep

class Login():

    user_loc = (By.ID, "mat-input-0")
    pass_loc = (By.ID, "mat-input-1")
    login_loc = (By.XPATH, "//span[contains(.,'登录')]")

    def user_name(self, driver, name):
        sleep(1.5)
        try:
            driver.find_element(*self.user_loc).send_keys(name)
            print("\n输入 【%s】 账号成功" %name)
        except:
            print("\n输入账号失败")

    def pass_word(self, driver, word):
        sleep(1.5)
        try:
            driver.find_element(*self.pass_loc).send_keys(word)
            print("输入 【%s】 密码成功" %word)
        except:
            print("输入密码失败")

    def login_button(self, driver):
        try:
           # el_standard = driver.find_element(*self.login_loc)
           # ActionChains(driver).move_to_element(el_standard).perform()
           sleep(0.5)
           driver.find_element(*self.login_loc).click()
           # el_standard.click()
           print("登录成功")
        except:
           print("登录失败")
- test_all_case.py
# -*- coding:UTF-8 -*-
from selenium import webdriver
import config.read_yaml
from ele.login_ele import Login
import unittest
from time import sleep
from selenium.webdriver.chrome.options import Options

'''

㎡

'''

class Test_all(unittest.TestCase):
    """BKY FRMO ㎡"""
    @classmethod
    def setUpClass(self):
        global driver
        option = Options()
        option.add_experimental_option('useAutomationExtension', False)
        option.add_experimental_option("excludeSwitches", ['enable-automation'])
        option.add_argument("disable-blink-features=AutomationControlled")
        driver = webdriver.Chrome('tools\chromedriver.exe',options=option)
        print('加载驱动完成 √')
        driver.maximize_window()  # 浏览器全屏显示
        driver.get(config.read_yaml.baseurl)
        print('加载页面完成 √\n')

        print('正在执行中,请耐心等待...')
        print('注:测试报告详见此目录下的report.html\n')
        sleep(10)

    def test_a_login(self):
        """【登录】"""
        Login().user_name(driver, name=config.read_yaml.username)
        Login().pass_word(driver, word=config.read_yaml.password)
        Login().login_button(driver)
3.创建 run.py
- run.py
# -*- coding:UTF-8 -*-

from tools.HTMLTestRunner_PY3 import HTMLTestRunner
import unittest
from case.test_all_case import Test_all

suit = unittest.TestSuite()
suit.addTest(unittest.makeSuite(Test_all))
with open("report.html", 'wb') as f:  # 改为with open 格式
        HTMLTestRunner(stream=f, title="UI自动化-测试报告", description="演示Demo").run(suit)
4.执行打包命令
- pyinstaller -i lcon.ico -F -c run.py
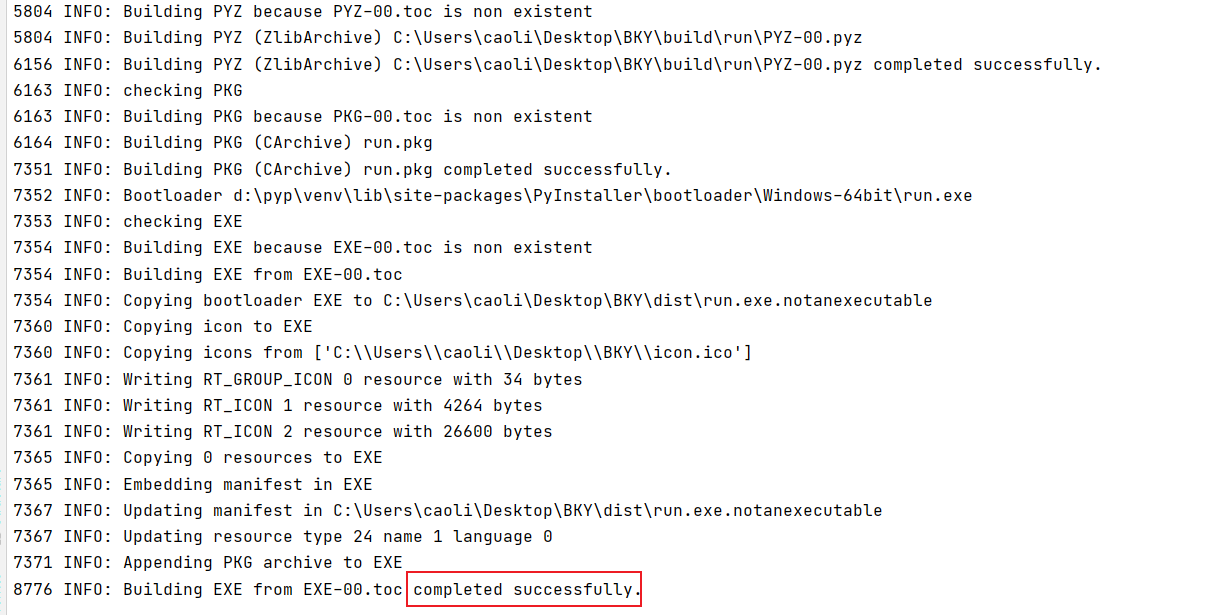
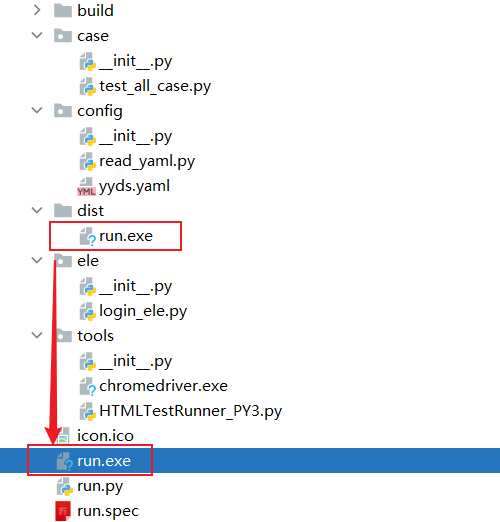
5.打包成功后出现dist文件夹,将 run.exe 移到与 run.py 同级即可
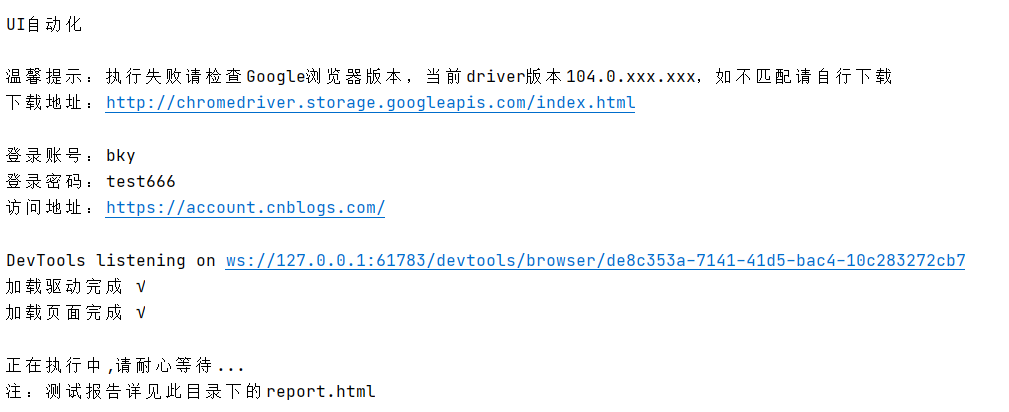
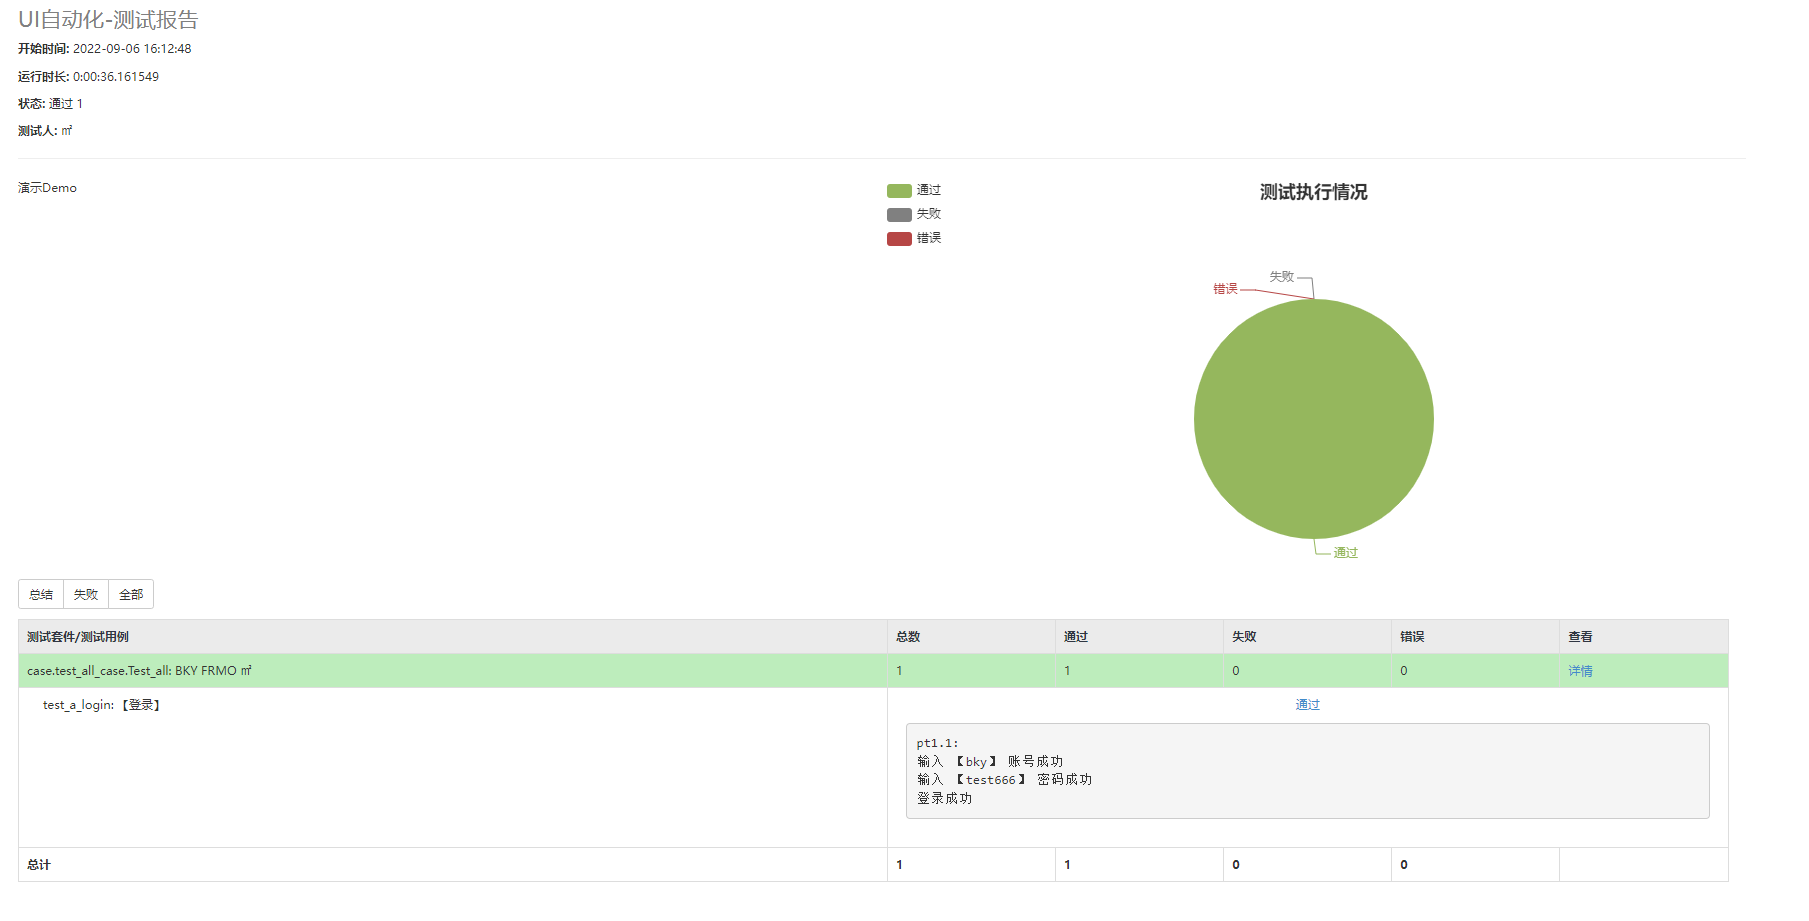
6.执行测试生成报告
- run.exe

三、扩展
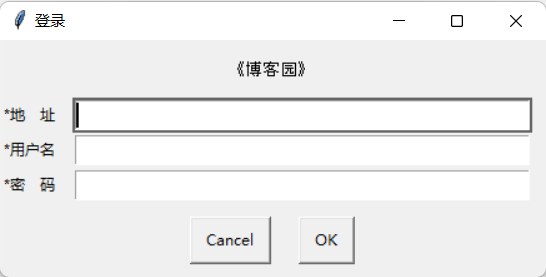
通过输入配置环境
to be continued...


 浙公网安备 33010602011771号