Jenkins-Email Extension Plugin邮件配置
前言:此文为 Jenkins 2.346 版本
一、配置准备
1.安装 Email Extension Plugin 插件
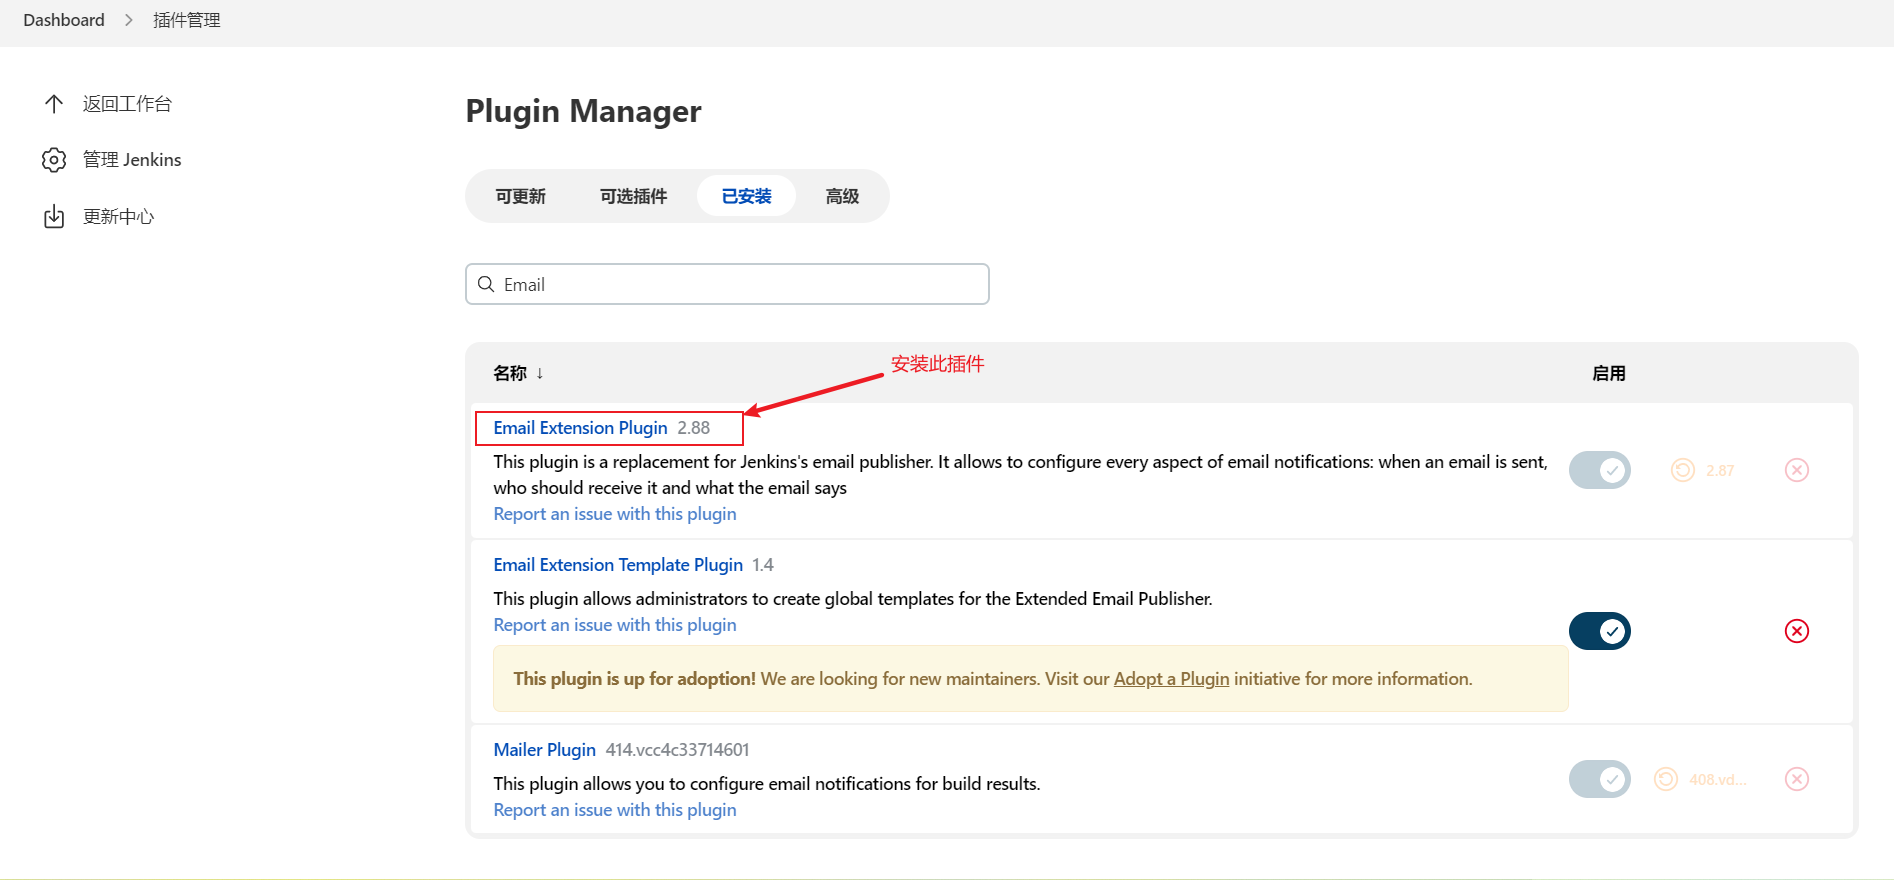
二、配置邮件 Email Extension Plugin 部分
1.进入系统管理
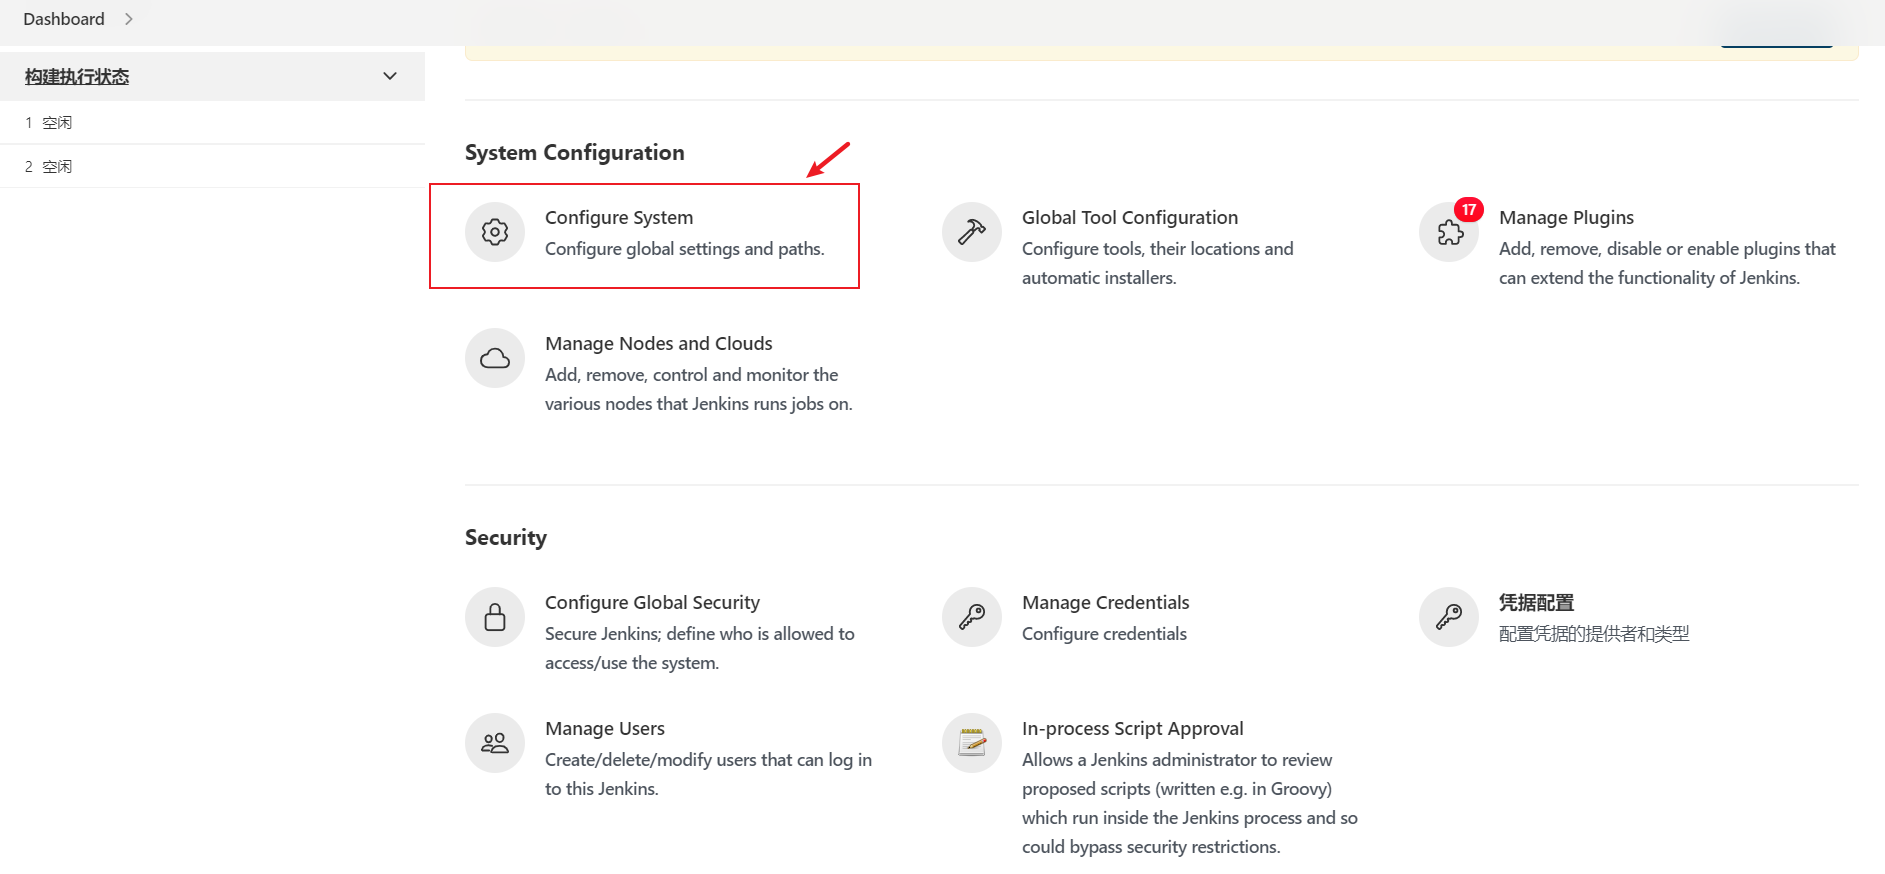
2.找到 Email Extension Plugin
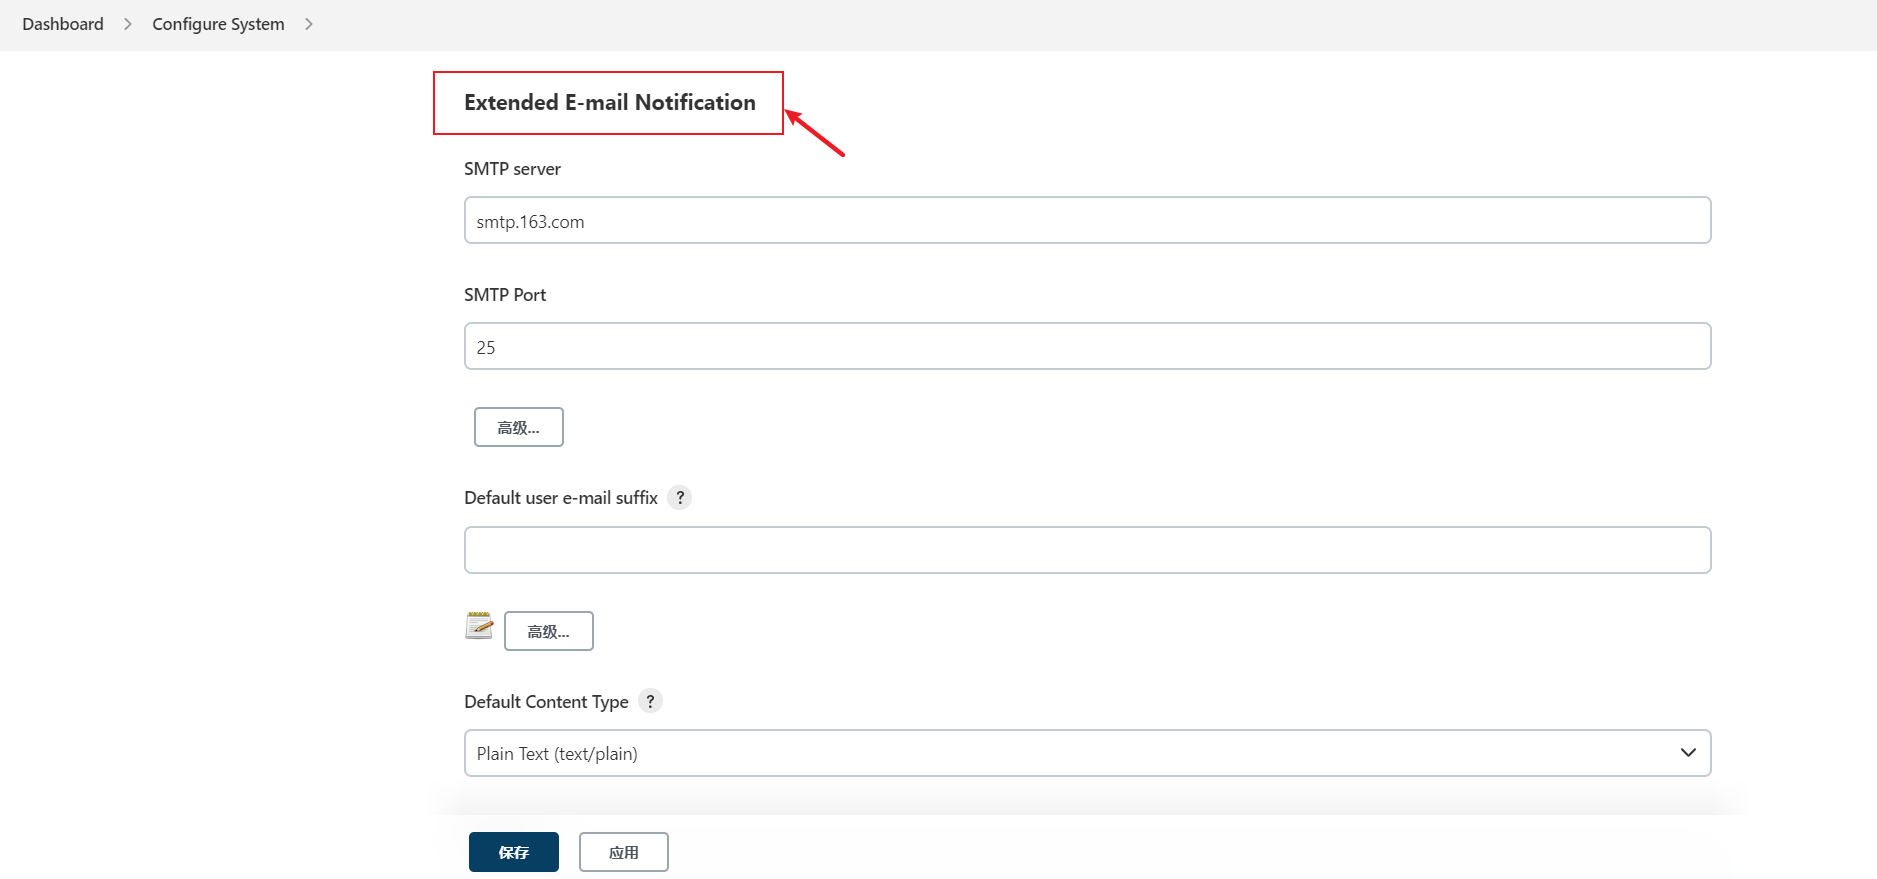
3.输入 SMTP server(本文以163邮箱为例)

4.输入 SMTP Port

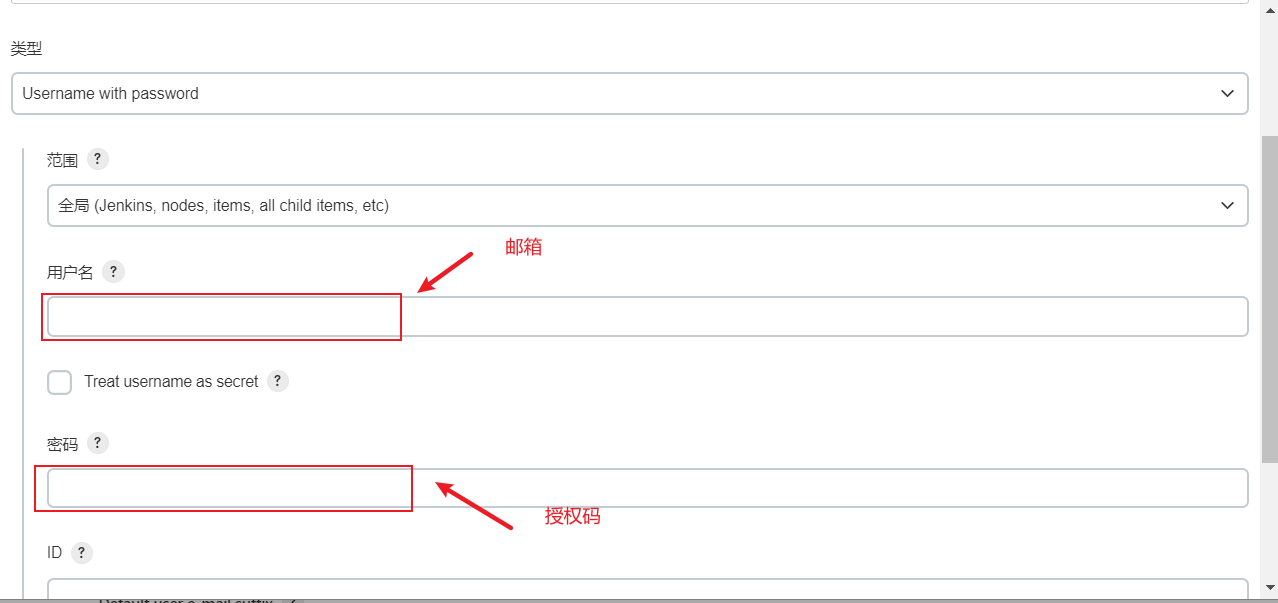
5.添加邮箱


6.输入 Default Recipients(收件人)

7.配置 Default Triggers

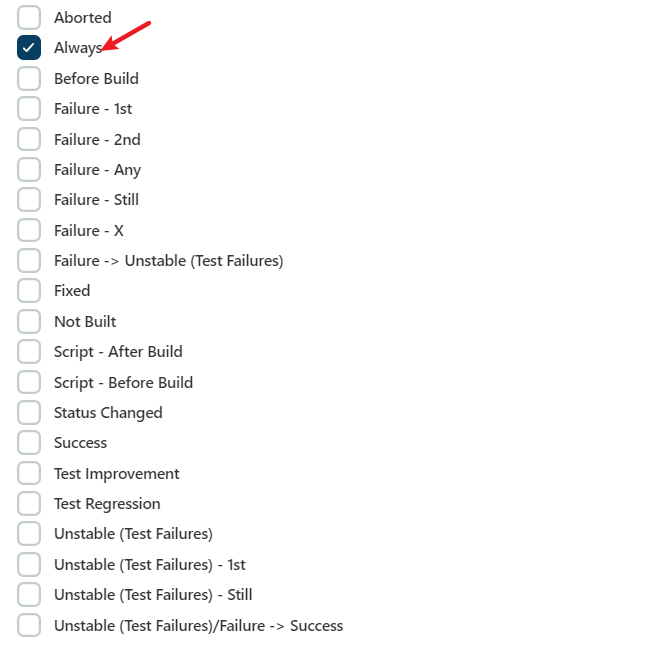
至此 Email Extension Plugin部分配置完成
三、邮件通知部分
1.基础配置
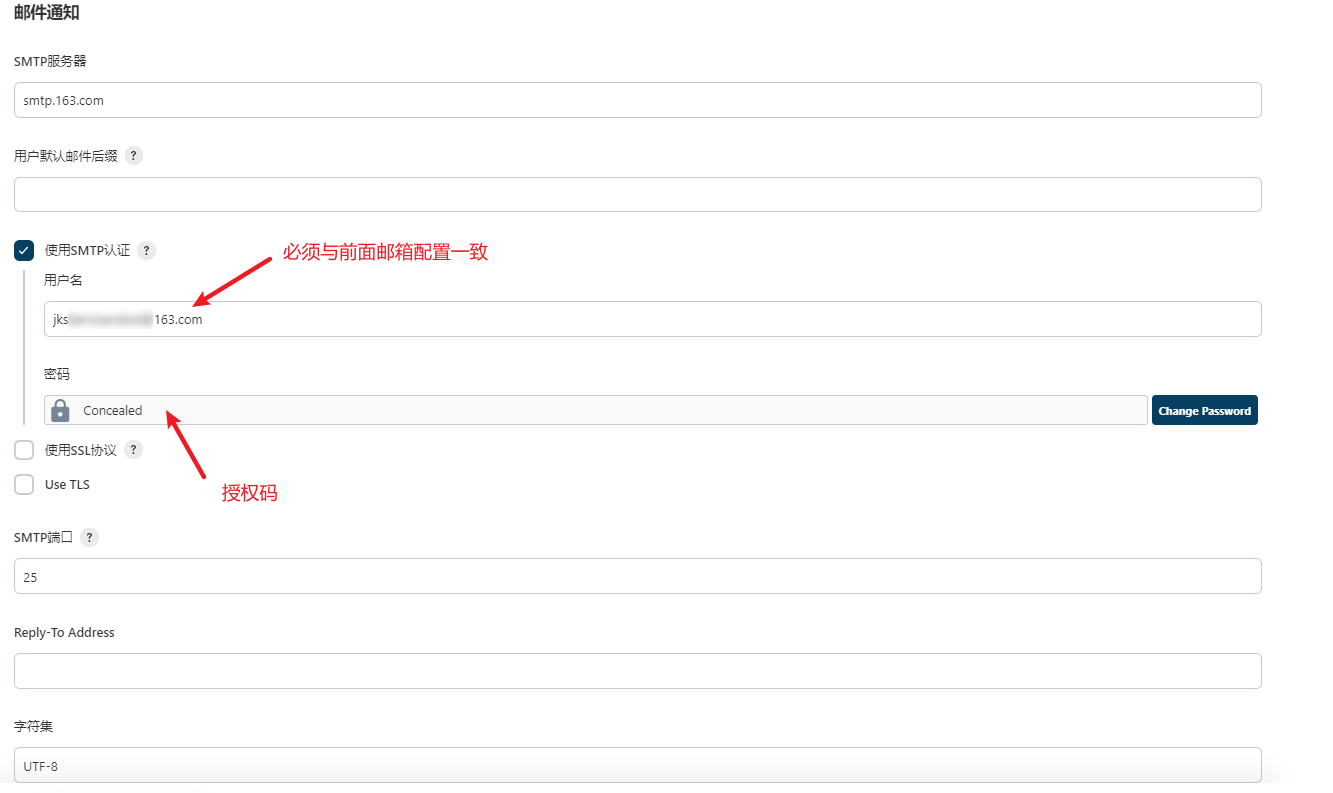
2.测试配置是否成功

注:此处必须配置

四、应用
1.构建后操作,选择 Editable Email Notification
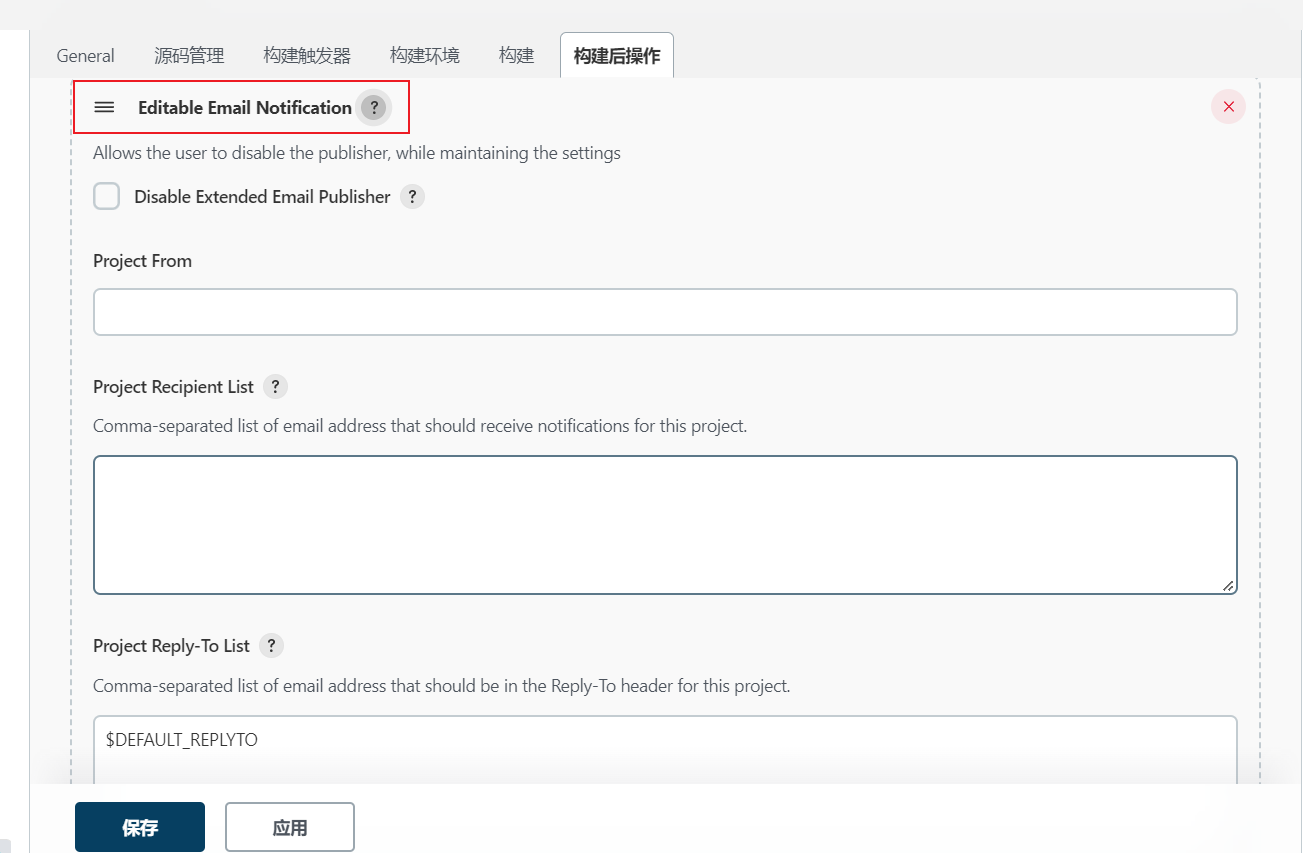
2.配置 Project Recipient List (收件人,多个可使用逗号分隔)

3.配置 Content Type 为 HTML(text/html)

4.配置 Default Subject

5.配置 Default Content (邮件模板)

<!-- #######  YAY, I AM THE SOURCE EDITOR! #########-->

<body>

    <head>
        <STYLE TYPE="text/css">
            BODY {
                background-image: URL(https://gimg2.baidu.com/image_search/src=http%3A%2F%2Fb-ssl.duitang.com%2Fuploads%2Fitem%2F201808%2F19%2F20180819133522_prilf.jpg&refer=http%3A%2F%2Fb-ssl.duitang.com&app=2002&size=f9999,10000&q=a80&n=0&g=0n&fmt=auto?sec=1655527793&t=a795bc6b8174c01e3e3393d451395ec8);
                background-position: center;
                background-repeat: no-repeat;
                background-attachment: fixed;
                background-size:100% 100%;
            }
        </STYLE>
    </head>
    <h1 style="color: #FF0000; text-align: center;">注:此邮件无需回复!</h1>
    <table class="editorDemoTable" style="height: 273px;" width="430">
        <thead>
            <tr>
                <td nowrap="nowrap" style="background-color: #FFFFFF; text-align: center;" colspan="2">
                    <h2><span style="color: #000000;">XXX项目_API自动化测试</span></h2>
                </td>
            </tr>
        </thead>
        <tbody>
            <tr>
                <td nowrap="nowrap" style="border-color: gray;"><span style="color: #272727;">项目名称:</span></td>
                <td nowrap="nowrap" style="border-color: gray;"><span style="color: #272727;">$PROJECT_NAME</span></td>
            </tr>
            <tr>
                <td nowrap="nowrap" style="border-color: gray;"><span style="color: #272727;">构建编号:</span></td>
                <td nowrap="nowrap" style="border-color: gray;"><span style="color: #272727;">$BUILD_NUMBER</span></td>
            </tr>
            <tr>
                <td nowrap="nowrap" style="border-color: gray;"><span style="color: #272727;">构建状态:</span></td>
                <td nowrap="nowrap" style="border-color: gray;"><span style="color: #272727;">$BUILD_STATUS</span></td>
            </tr>
            <tr>
                <td nowrap="nowrap" style="border-color: gray;"><span style="color: #272727;">触发原因:</span></td>
                <td nowrap="nowrap" style="border-color: gray;"><span style="color: #272727;">${CAUSE}</span></td>
            </tr>
            <tr>
                <td nowrap="nowrap" style="border-color: gray;"><span style="color: #272727;">报告地址:</span></td>
                <td nowrap="nowrap" style="border-color: gray;"><span style="color: #272727;">详见附件 TestReportxxx.html</span></td>
            </tr>
        </tbody>
    </table>
</body>
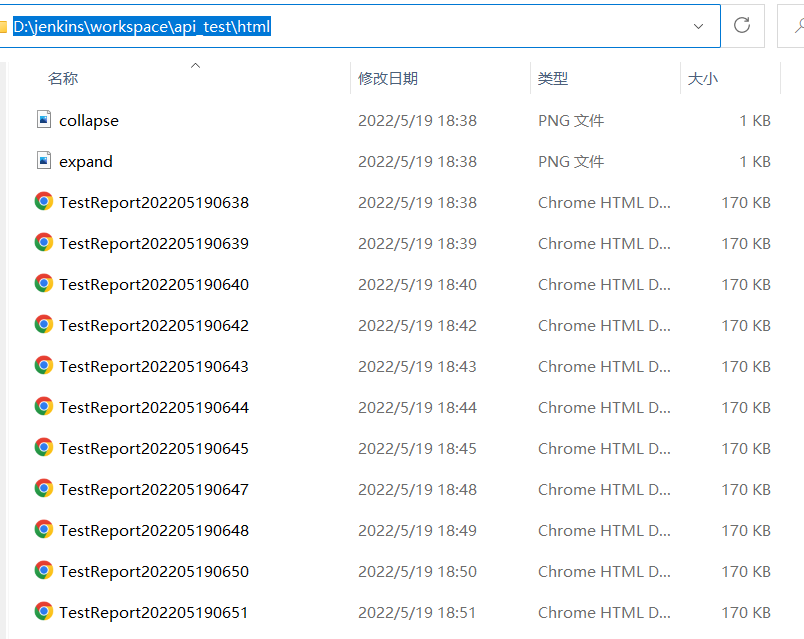
6.配置 Attachments (邮件附件)

注:必须为Jenkins workspace 项目下的文件
7.我的路径举栗
api_test:项目名称
html:测试报告位置
《 v2.346版本-Jenkins》
to be continued...


 浙公网安备 33010602011771号