nginx平滑升级与location实战
nginx平滑升级具体流程
获取老版本的编译信息,从网上获取所需要的安装包或者功能包,配置新版本或功能时加上老版本编译信息和新版本的功能 --add-module=/usr/src/echo-nginx-module ,重新进行编译注意不要进行安装,将老版本的程序文件复制,停掉老版本的进程,将新版本的程序复制到老版本的所在位置,启动新版本
当前版本没有添加echo模块功能所以使用不能echo
[root@nginx nginx-1.20.2]# vim /usr/local/nginx/conf/nginx.conf
location / {
            echo "liuyang";
            root   html;
            index  index.html index.htm;
        }
[root@nginx sbin]# nginx-bak -t
nginx: [emerg] unknown directive "echo" in /usr/local/nginx/conf/nginx.conf:44
nginx: configuration file /usr/local/nginx/conf/nginx.conf test failed
//我现在的最新版本是1.22.0
[root@nginx src]# wget https://nginx.org/download/nginx-1.22.0.tar.gz
解压安装包			//最新版本与老版本的包要在同级目录下
[root@nginx src]# tar xf nginx-1.22.0.tar.gz
[root@nginx src]# ls
debug    nginx-1.20.2         nginx-1.22.0
kernels  nginx-1.20.2.tar.gz  nginx-1.22.0.tar.gz
安装git命令,用来下载github仓库的包
[root@nginx src]# dnf -y install git
使用git clone将所需要添加的功能包下载下来,也需要在之前的同级目录中
[root@nginx src]# git clone https://github.com/openresty/echo-nginx-module.git
[root@nginx src]# ls
debug              kernels       nginx-1.20.2.tar.gz  nginx-1.22.0.tar.gz
echo-nginx-module  nginx-1.20.2  nginx-1.22.0
//查看之前的编译参数有哪些,然后将自己所需要添加的功能进行编译
[root@nginx src]# nginx -V
nginx version: nginx/1.20.2
built by gcc 8.5.0 20210514 (Red Hat 8.5.0-4) (GCC)
built with OpenSSL 1.1.1k  FIPS 25 Mar 2021
TLS SNI support enabled
configure arguments: --prefix=/usr/local/nginx --user=nginx --group=nginx --with-debug --with-http_ssl_module --with-http_realip_module --with-http_image_filter_module --with-http_gunzip_module --with-http_gzip_static_module --with-http_stub_status_module --http-log-path=/var/log/nginx/access.log --error-log-path=/var/log/nginx/error.log
然后重新编译
[root@nginx nginx-1.22.0]# ./configure --prefix=/usr/local/nginx --user=nginx --group=nginx --with-debug --with-http_ssl_module --with-http_realip_module --with-http_image_filter_module --with-http_gunzip_module --with-http_gzip_static_module --with-http_stub_status_module --http-log-path=/var/log/nginx/access.log --error-log-path=/var/log/nginx/error.log
--add-module=/usr/src/echo-nginx-module   (添加的功能模块)
//注意make后不要进行安装
[root@nginx nginx-1.22.0]# make
编译完成后新版本已经完成了在 objs/nginx
[root@nginx nginx-1.22.0]# objs/nginx -v
nginx version: nginx/1.22.0
将老版本的nginx程序文件进行备份防止新版本出现问题无法恢复,将老版本的nginx杀掉
[root@nginx nginx-1.22.0]# mv /usr/local/nginx/sbin/nginx{,-bak}
[root@nginx nginx-1.22.0]# cp objs/nginx /usr/local/nginx/sbin/
[root@nginx nginx-1.22.0]# pkill nginx
此时启动已经是新版本了
[root@nginx nginx-1.22.0]# systemctl  start nginx
[root@nginx nginx-1.22.0]# nginx -v
nginx version: nginx/1.22.0
没添加echo功能之前是不能使用的
[root@nginx sbin]# nginx-bak -t
nginx: [emerg] unknown directive "echo" in /usr/local/nginx/conf/nginx.conf:44
nginx: configuration file /usr/local/nginx/conf/nginx.conf test failed
此时echo的功能就可以使用了
[root@nginx sbin]# nginx -t
nginx: the configuration file /usr/local/nginx/conf/nginx.conf syntax is ok
nginx: configuration file /usr/local/nginx/conf/nginx.conf test is successful

以上步骤时分解步骤,在生成环境中nginx服务不能停掉,我们使用一条命令进行替换版本
[root@nginx nginx-1.22.0]# \cp /usr/local/nginx/sbin/nginx{,-bak};pkill nginx;\cp objs/nginx /usr/local/nginx/sbin/nginx;systemctl start nginx
location实战
( location = 路径 ) --> ( location ^~ 路径 ) --> ( location ~ 正则 ) --> ( location ~* 正则 ) --> ( location 路径 )
常用修饰符说明:
| 修饰符 | 功能 |
|---|---|
| = | 精确匹配 |
| ~ | 正则表达式模式匹配,区分大小写 |
| ~* | 正则表达式模式匹配,不区分大小写 |
| ^~ | 前缀匹配,类似于无修饰符的行为,也是以指定模块开始,不同的是,如果模式匹配,那么就停止搜索其他模式了,不支持正则表达式 |
| @ | 定义命名location区段,这些区段客户端不能访问, |
测试
        location = /liu {				//精准匹配,只匹配根后面一样的
           echo "[ configuration A ]";
        }
        location / {					//其他都没匹配到时就匹配
           echo "[ configuration B ]";
        }
        location /liu/ {				//以liu开头的但是优先级没有 = 高
           echo "[ configuration C ]";
        }
        location ^~ /yang/ {			// 以yang开头的比没有正则表达式优先级高
           echo "[ configuration D ]";
        }
        location ~* \.(gif|jpg|jpeg)$ {	//以括号中的内容结尾的
           echo "[ configuration E ]";
        }
// =的优先级最高所以匹配到了A

// 当其他匹配项都匹配不到时会匹配到此项

//因为=后面的东西必须是一模一样的,所以他会匹配到c

//以yang开头的就会匹配到此项

以括号中的内容结尾的则匹配到此项

nginx访问控制
用于location段
allow:设定允许哪台或哪些主机访问
deny:设定禁止哪台或哪些主机访问
示例:
		location / {
            root   html;
            index   index.html index.htm ;
            deny   192.168.34.130;
用真实机可以访问到
被限制的虚拟机不能访问
[root@nginx ~]# curl http://192.168.34.130
<html>
<head><title>403 Forbidden</title></head>
<body>0
<center><h1>403 Forbidden</h1></center>
<hr><center>nginx/1.20.2</center>
</body>
</html>
开启status界面
        location /status {
            stub_status on;
        }
状态页面信息详解:
| 状态码 | 表示的意义 |
|---|---|
| Active connections 2 | 当前所有处于打开状态的连接数 |
| accepts | 总共处理了多少个连接 |
| handled | 成功创建多少握手 |
| requests | 总共处理了多少个请求 |
| Reading | nginx读取到客户端的Header信息数,表示正处于接收请求状态的连接数 |
| Writing | nginx返回给客户端的Header信息数,表示请求已经接收完成, 且正处于处理请求或发送响应的过程中的连接数 |
| Waiting | 开启keep-alive的情况下,这个值等于active - (reading + writing), 意思就是Nginx已处理完正在等候下一次请求指令的驻留连接 |

[root@nginx conf]# yum -y install httpd-tools
   location / {
        root   html;
        index   index.html index.htm ;
        auth_basic "hello";
        auth_basic_user_file "htpasswd";
    }
[root@nginx conf]# htpasswd -c -m /usr/local/nginx/conf/htpasswd ly
New password:
Re-type new password:
Adding password for user ly


https配置
生成自签证书
[root@nginx ~]# mkdir /usr/local/nginx/conf/ssl
[root@nginx ~]# cd /usr/local/nginx/conf/ssl
[root@nginx ssl]# openssl genrsa -out nginx.key 2048
Generating RSA private key, 2048 bit long modulus (2 primes)
.........+++++
..............+++++
e is 65537 (0x010001)
[root@nginx ssl]# openssl req -new -key nginx.key -out nginx.csr
You are about to be asked to enter information that will be incorporated
into your certificate request.
What you are about to enter is what is called a Distinguished Name or a DN.
There are quite a few fields but you can leave some blank
For some fields there will be a default value,
If you enter '.', the field will be left blank.
-----
Country Name (2 letter code) [XX]:CN
State or Province Name (full name) []:HB
Locality Name (eg, city) [Default City]:WUHAN
Organization Name (eg, company) [Default Company Ltd]:runtime
Organizational Unit Name (eg, section) []:jy
Common Name (eg, your name or your server's hostname) []:www.jiran.love
Email Address []:1@2.com

Please enter the following 'extra' attributes
to be sent with your certificate request
A challenge password []:
An optional company name []:
[root@nginx ssl]# openssl x509 -req -days 365 -in nginx.csr -signkey nginx.key -out nginx.crt
Signature ok
subject=C = CN, ST = HB, L = WUHAN, O = runtime, OU = jy, CN = www.jiran.love, emailAddress = 1@2.com
Getting Private key
[root@nginx ssl]# ls
nginx.crt  nginx.csr  nginx.key
修改nginx配置文件
[root@nginx ssl]# vim /usr/local/nginx/conf/nginx.conf
    server {
        listen       443 ssl;
        server_name  www.jiran.love;

        ssl_certificate      ssl/nginx.crt;
        ssl_certificate_key  ssl/nginx.key;

        ssl_session_cache    shared:SSL:1m;
        ssl_session_timeout  5m;

        ssl_ciphers  HIGH:!aNULL:!MD5;
        ssl_prefer_server_ciphers  on;

        location / {
            root   html;
            index  index.html index.htm;
        }
    }
测试结果

zabbix监控Nginx状态
环境说明
| 主机名 | ip | 服务 | 系统 |
|---|---|---|---|
| zabbix | 192.168.34.130 | zabbix | centos8 |
| nginx | 192.168.34.139 | nginx zabbix_agentd | centos8 |
[root@nginx ~]# dnf -y install make gcc gcc-c++ pcre-devel openssl openssl-devel wget
[root@nginx ~]# wget https://cdn.zabbix.com/zabbix/sources/stable/6.2/zabbix-6.2.2.tar.gz
[root@nginx ~]# tar xf zabbix-6.2.2.tar.gz
[root@nginx zabbix-6.2.2]# ./configure --enable-agent
[root@nginx zabbix-6.2.2]# make install
将以下三条配置文件修改
[root@nginx zabbix-6.2.2]# vim /usr/local/etc/zabbix_agentd.conf
Server=192.168.34.139			//服务端的ip
ServerActive=192.168.34.139		//服务端的ip
Hostname=nginx					//主机名
启动服务端口为10050
[root@nginx zabbix-6.2.2]# zabbix_agentd
[root@nginx zabbix-6.2.2]# ss -antl
State   Recv-Q  Send-Q   Local Address:Port      Peer Address:Port  Process
LISTEN  0       128            0.0.0.0:80             0.0.0.0:*
LISTEN  0       128            0.0.0.0:22             0.0.0.0:*
LISTEN  0       128            0.0.0.0:10050          0.0.0.0:*
LISTEN  0       128               [::]:22                [::]:*
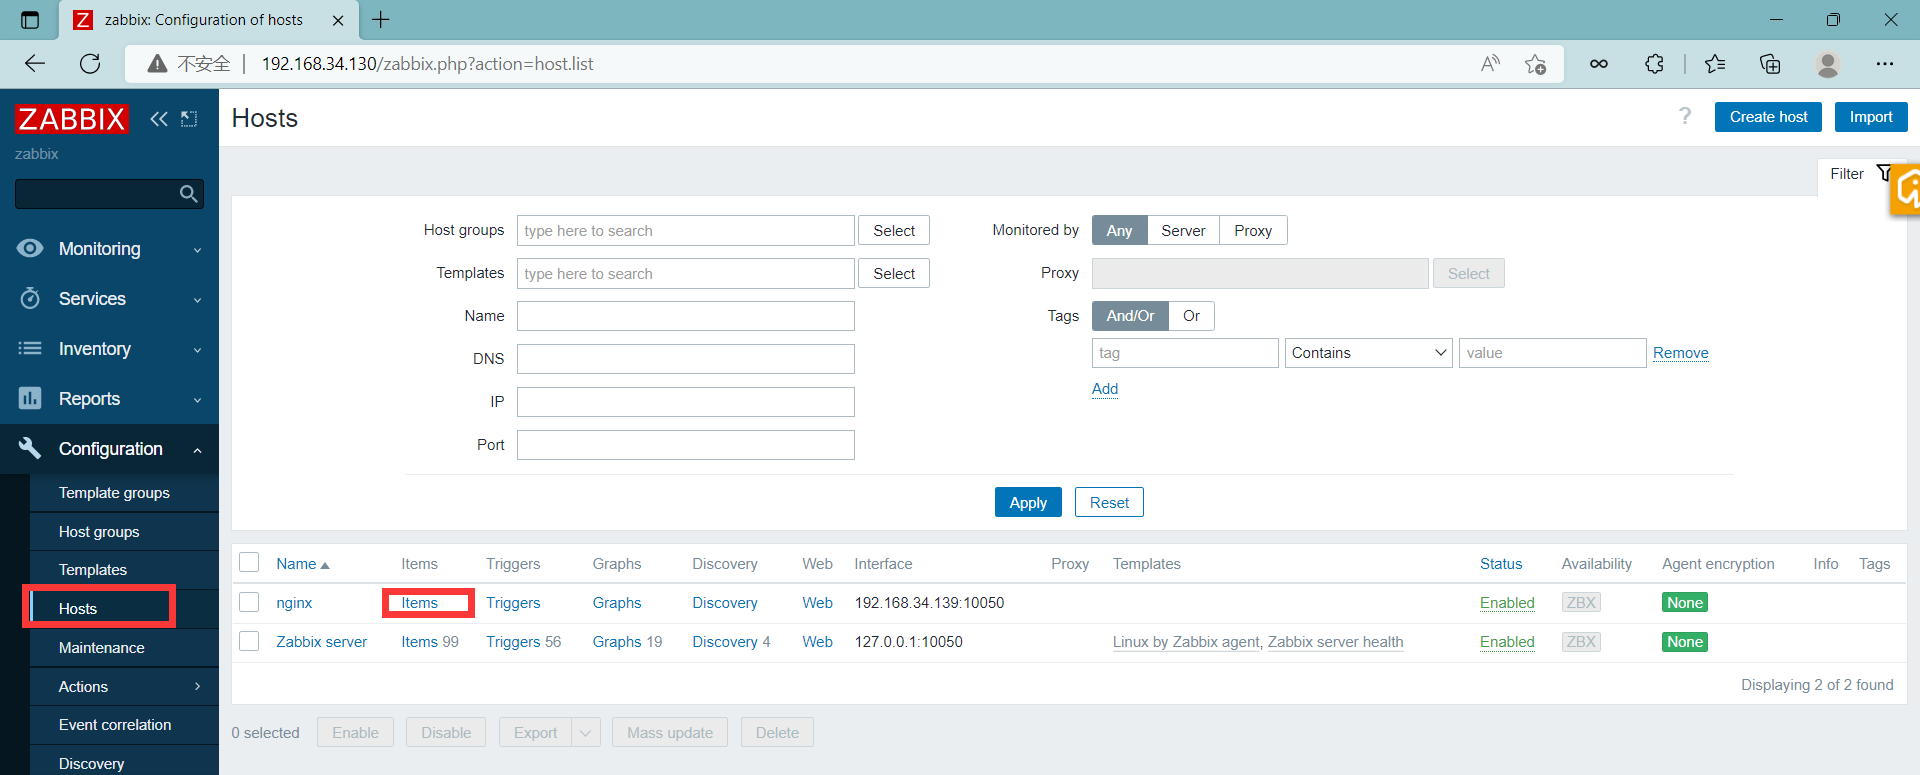
创建主机


开启状态页面,在nginx端编写监控状态的脚本
[root@nginx ~]# vim /usr/local/nginx/conf/nginx.conf
		location = /status {
            stub_status;
            allow 127.0.0.1;		//只允许本地访问
            deny all;
        }
[root@nginx ~]# mkdir /scripts
[root@nginx ~]# cd /scripts/
[root@nginx scripts]# cat n_status.sh
#!/bin/bash
case $1 in
    Reading)
        curl -s 127.0.0.1/status |awk "NR==4{print\$2}"
        ;;
    Writing)
        curl -s 127.0.0.1/status |awk "NR==4{print\$4}"
        ;;
    Waiting)
        curl -s 127.0.0.1/status |awk "NR==4{print\$6}"
    ;;
    *)
        exit
        ;;
esac
[root@nginx scripts]# chmod +x n_status.sh
//修改zabbi的配置文件
[root@nginx scripts]# vim /usr/local/etc/zabbix_agentd.conf
UnsafeUserParameters=1
UserParameter=n_status[*],/bin/bash /scripts/n_status.sh $1
//在zabbix服务端检查key是否可用
[root@localhost local]# zabbix_get -s 192.168.34.139 -k n_status[Writing]
1
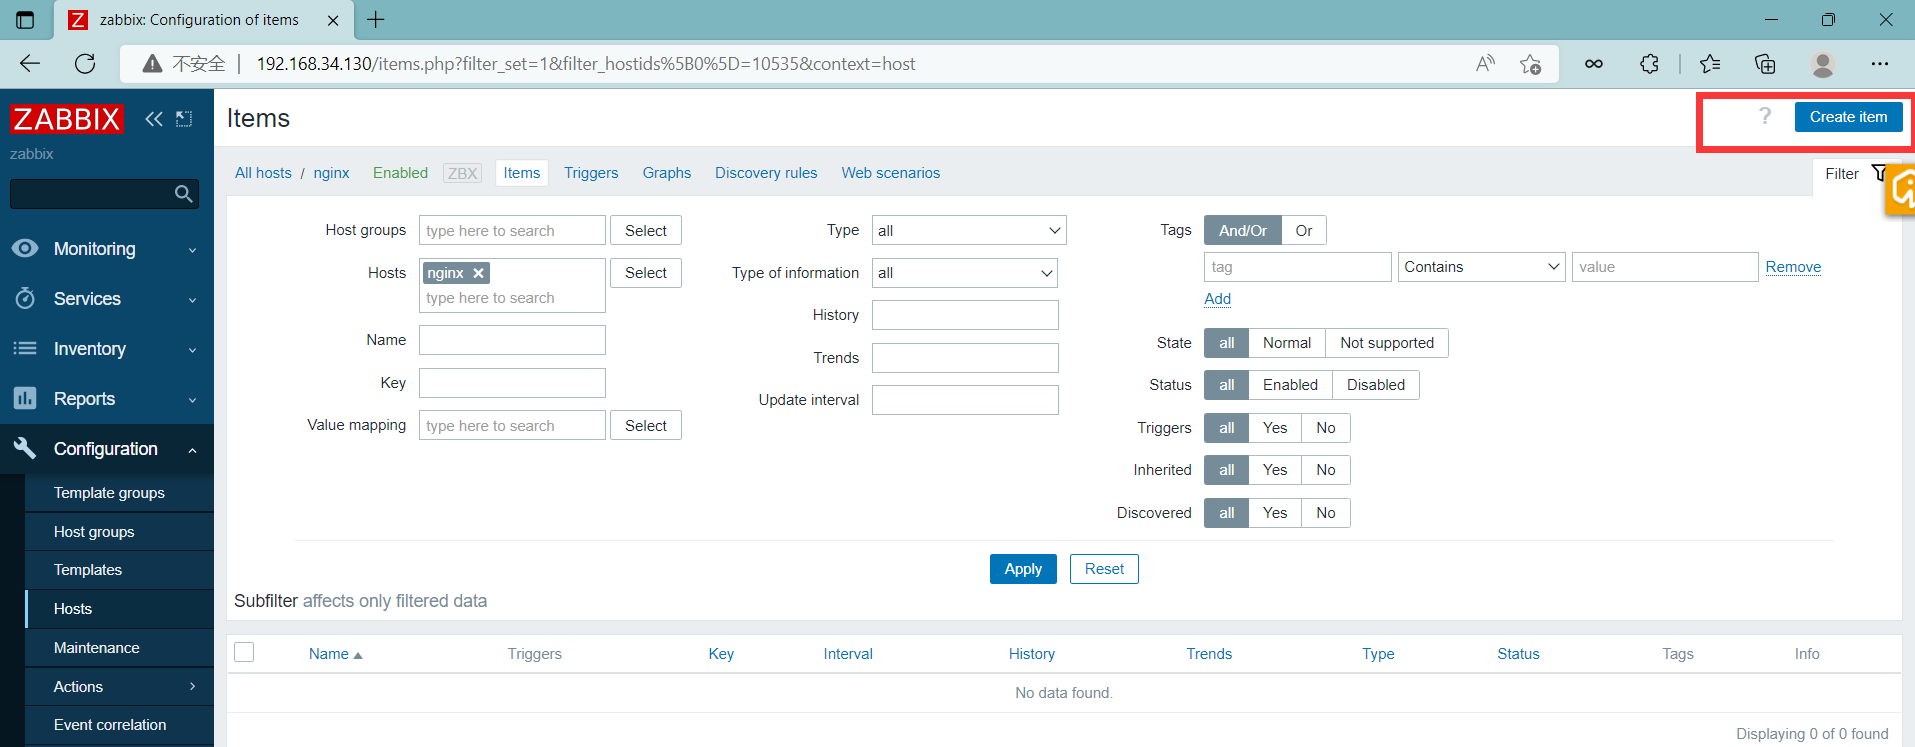
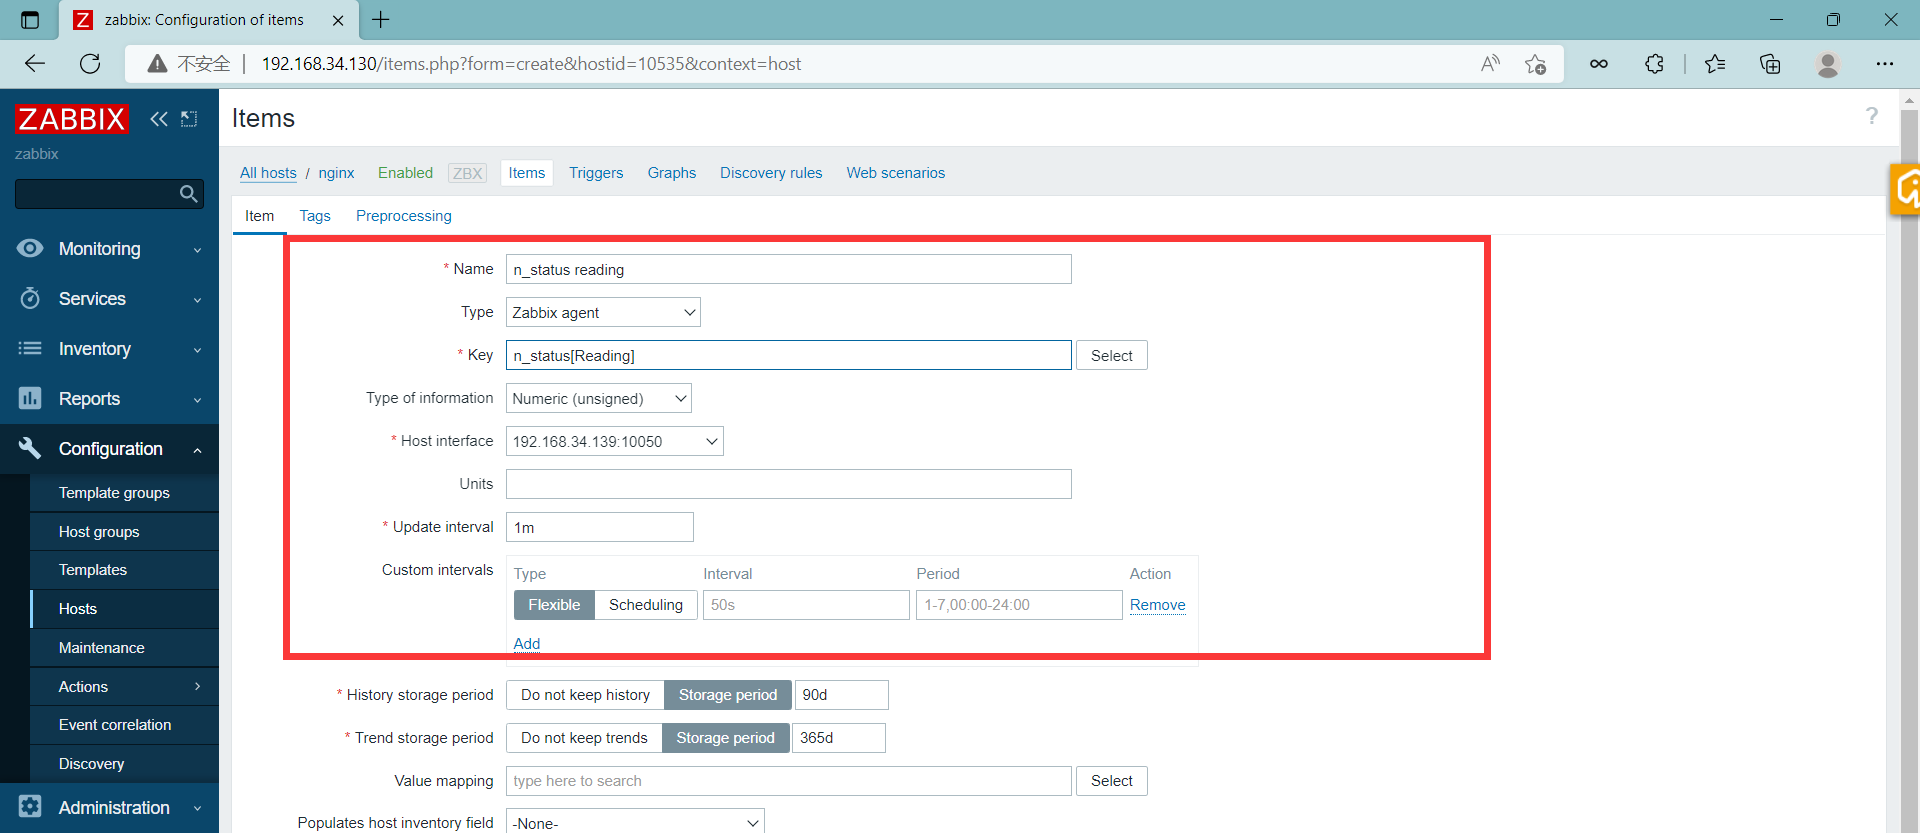
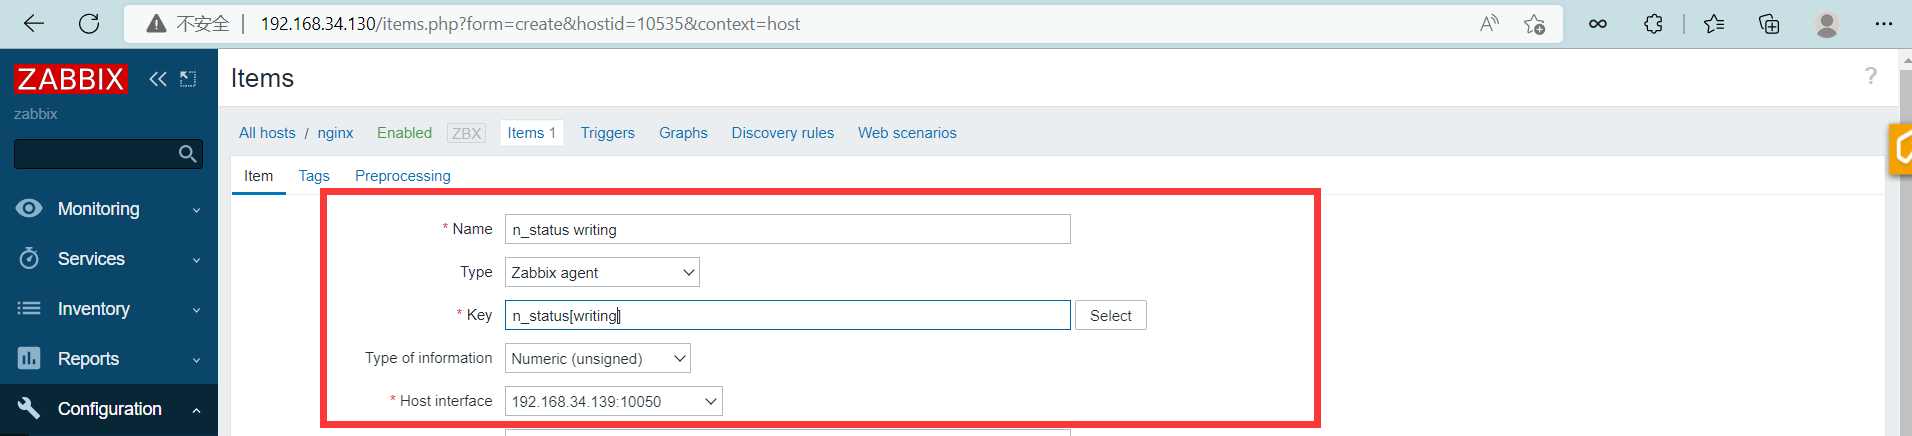
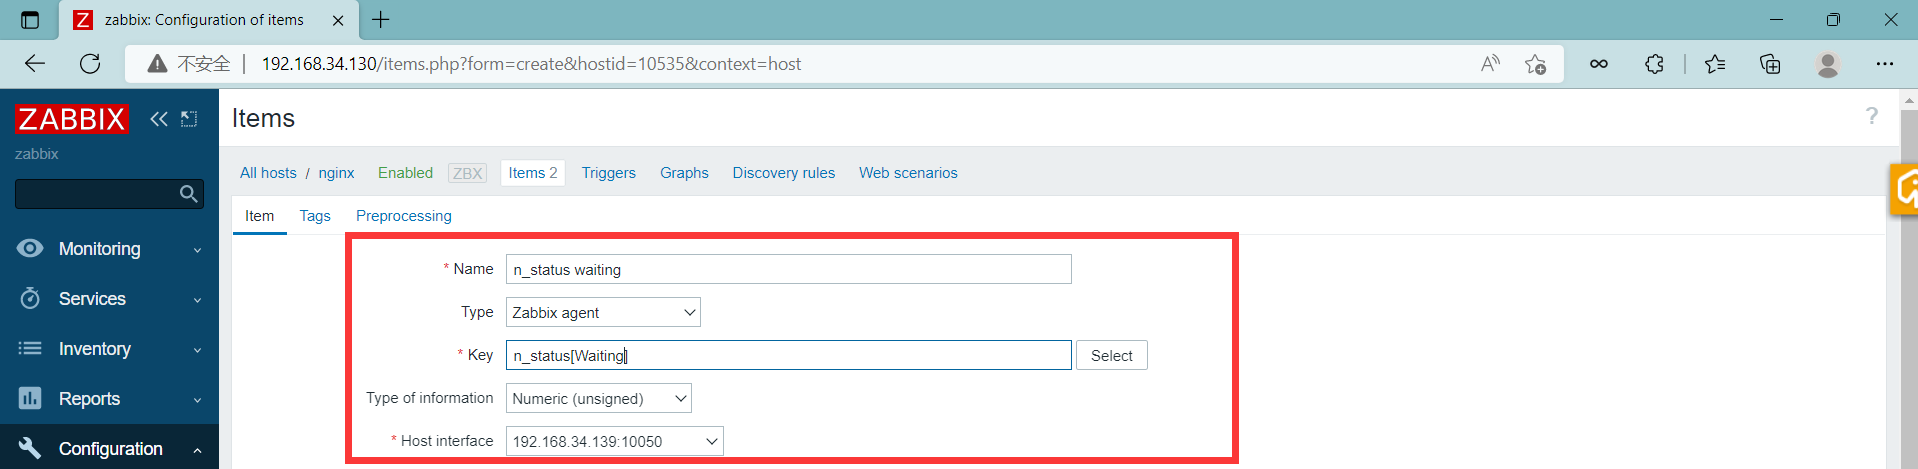
添加监控项

nginx重写
语法:rewrite regex replacement flag;,如:
rewrite ^/images/(.*\.jpg)$ /imgs/$1 break;
此处的$1用于引用(.*.jpg)匹配到的内容,又如:
rewrite ^/bbs/(.*)$ http://www.idfsoft.com/index.html redirect;
如上例所示,replacement可以是某个路径,也可以是某个URL
常见的flag
| flag | 作用 |
|---|---|
| last | 基本上都用这个flag,表示当前的匹配结束,继续下一个匹配,最多匹配10个到20个 一旦此rewrite规则重写完成后,就不再被后面其它的rewrite规则进行处理 而是由UserAgent重新对重写后的URL再一次发起请求,并从头开始执行类似的过程 |
| break | 中止Rewrite,不再继续匹配 一旦此rewrite规则重写完成后,由UserAgent对新的URL重新发起请求, 且不再会被当前location内的任何rewrite规则所检查 |
| redirect | 以临时重定向的HTTP状态302返回新的URL |
| permanent | 以永久重定向的HTTP状态301返回新的URL |
rewrite模块的作用是用来执行URL重定向。这个机制有利于去掉恶意访问的url,也有利于搜索引擎优化(SEO)
默认的访问路径
[root@nginx ~]#vim usr/local/nginx/conf/nginx.conf
       location / {
            root html;
            index  index.html index.htm;
        }
[root@nginx ~]# cd /usr/local/nginx/html/
将照片放入html/photo目录下进行访问
[root@nginx html]# mkdir photo
[root@nginx html]# cd photo
/拖入一张照片到photo目录
[root@nginx photo]# ls
shanzhi.png
[root@nginx photo]# cat shanzhi.png
如果放进去了还访问不到就在虚拟机直接用cat命令访问他

将上面的访问目录进行重写,把photo目录的改名然后浏览器还是用photo访问
[root@nginx ~]# mv photo/ ly
[root@nginx ~]# vim /usr/local/nginx/conf/nginx.conf
    location / {
            root html;
            index  index.html;
            rewrite ^/photo(.*)$          /ly/$1 break;
        }
用photo访问还是可以访问到

将访问目录重写到另外一个网站
[root@nginx ~]#vim usr/local/nginx/conf/nginx.conf
      location / {
            root html;
            index  index.html;
            rewrite ^/photo(.*)$   https://www.cnblogs.com/TQingS/     break;
        }
转到重写的网站后域名会自动变化所以只能显示访问到的结果
用户访问路径不变


if
语法:if (condition) {...}
应用场景:
- server段
- location段
常见的condition
- 变量名(变量值为空串,或者以“0”开始,则为false,其它的均为true)
- 以变量为操作数构成的比较表达式(可使用=,!=类似的比较操作符进行测试)
- 正则表达式的模式匹配操作
- ~:区分大小写的模式匹配检查
- ~*:不区分大小写的模式匹配检查
- !和!*:对上面两种测试取反
- 测试指定路径为文件的可能性(-f,!-f)
- 测试指定路径为目录的可能性(-d,!-d)
- 测试文件的存在性(-e,!-e)
- 检查文件是否有执行权限(-x,!-x)
基于浏览器实现分离案例
if ($http_user_agent ~ Firefox) {
  rewrite ^(.*)$ /firefox/$1 break;
}

if ($http_user_agent ~ MSIE) {
  rewrite ^(.*)$ /msie/$1 break;
}

if ($http_user_agent ~ Chrome) {
  rewrite ^(.*)$ /chrome/$1 break;
}
防盗链案例
location ~* \.(jpg|gif|jpeg|png)$ {
  valid_referers none blocked www.idfsoft.com;
  if ($invalid_referer) {
    rewrite ^/ http://www.idfsoft.com/403.html;
  }
}

 浙公网安备 33010602011771号