kubesphere -- 中间件部署
中间件部署
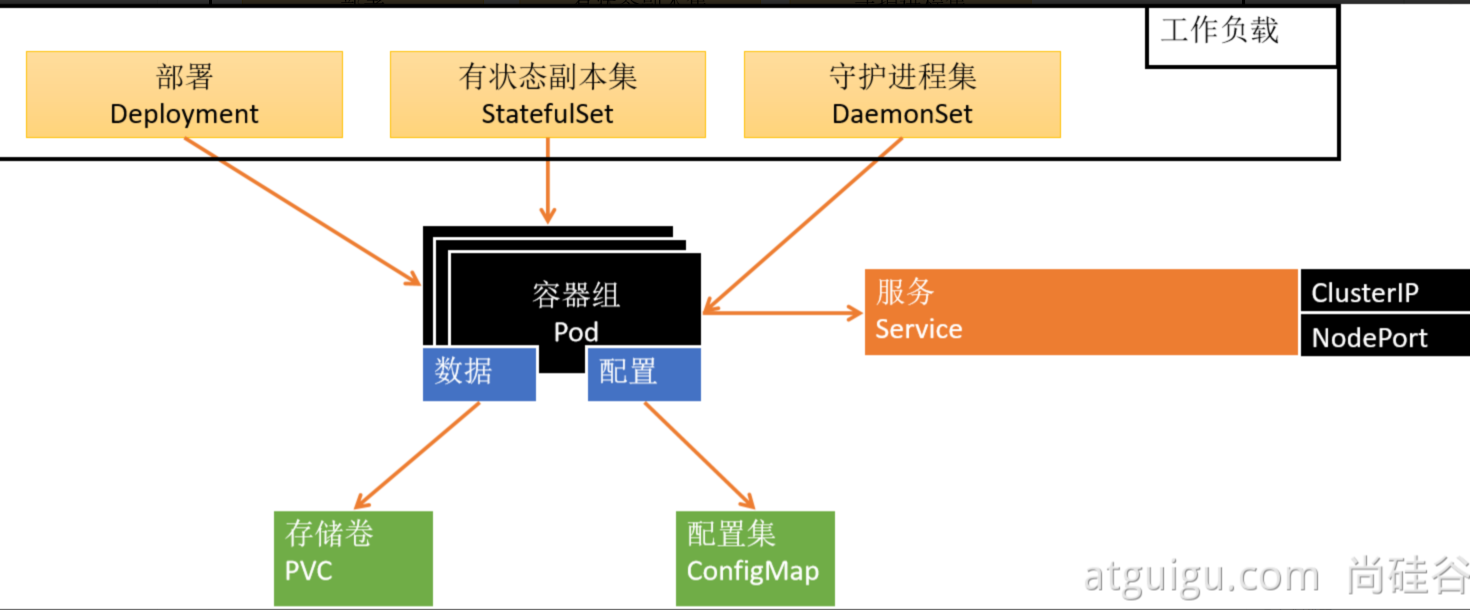
应用部署需要关注的信息【应用部署三要素】
1、应用的部署方式
2、应用的数据挂载(数据,配置文件)
3、应用的可访问性
部署Mysql
docker run -p 3306:3306 --name mysql-01 \
-v /mydata/mysql/log:/var/log/mysql \
-v /mydata/mysql/data:/var/lib/mysql \
-v /mydata/mysql/conf:/etc/mysql/conf.d \
-e MYSQL_ROOT_PASSWORD=root \
--restart=always \
-d mysql:5.7
三个 -v:
- 挂载日志
- 挂载数据存储路径
- 挂载配置
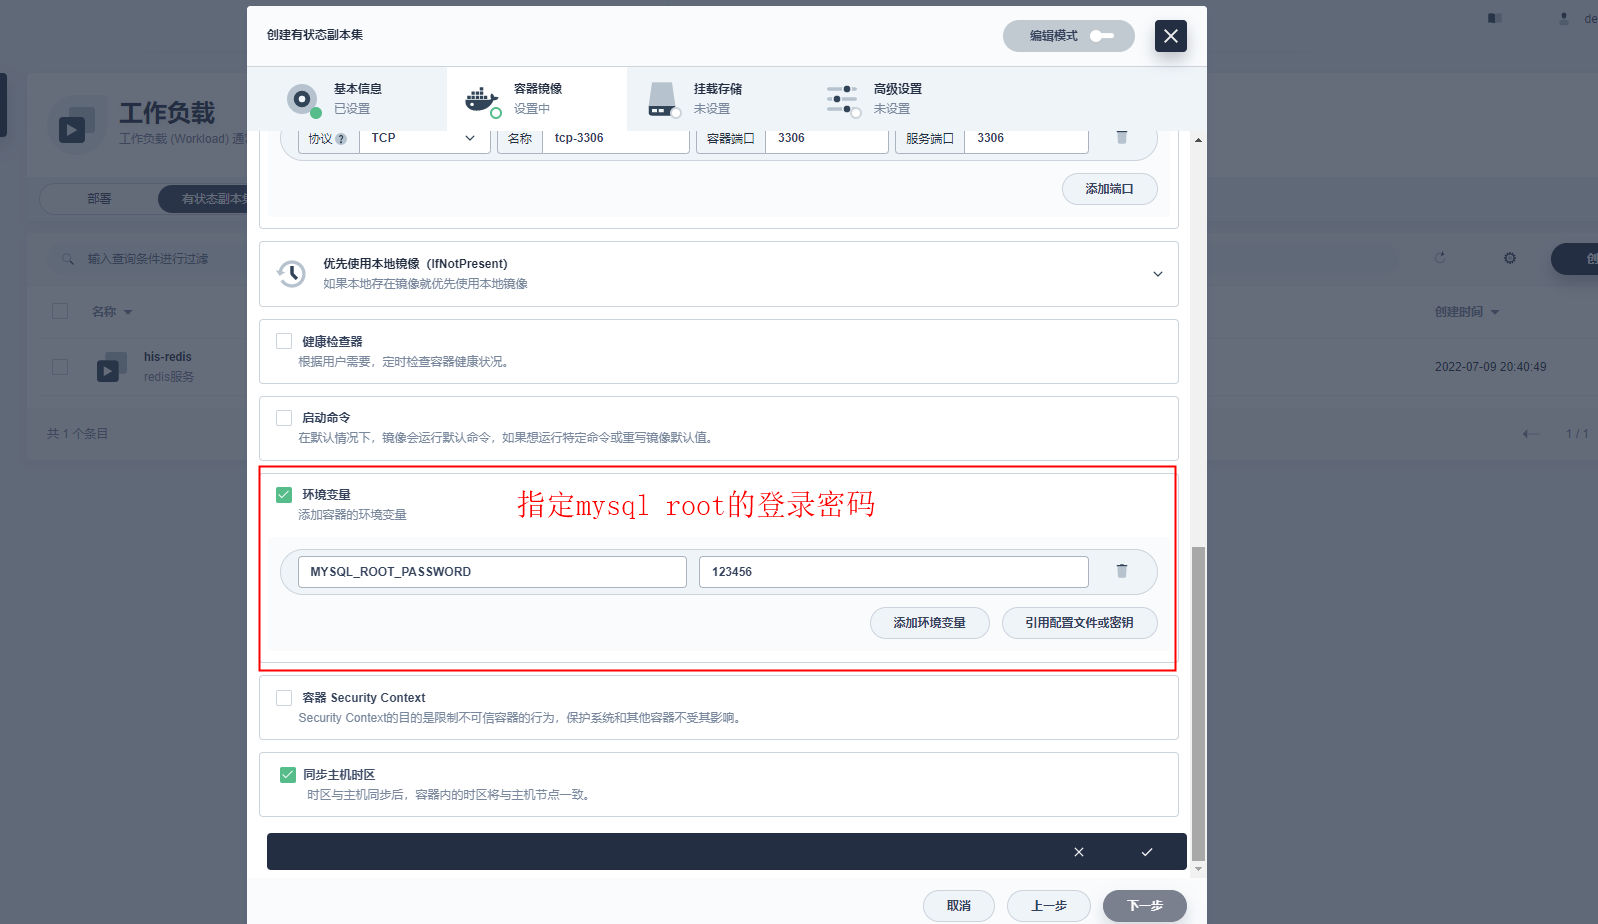
-e: 指定root用户的登录密码
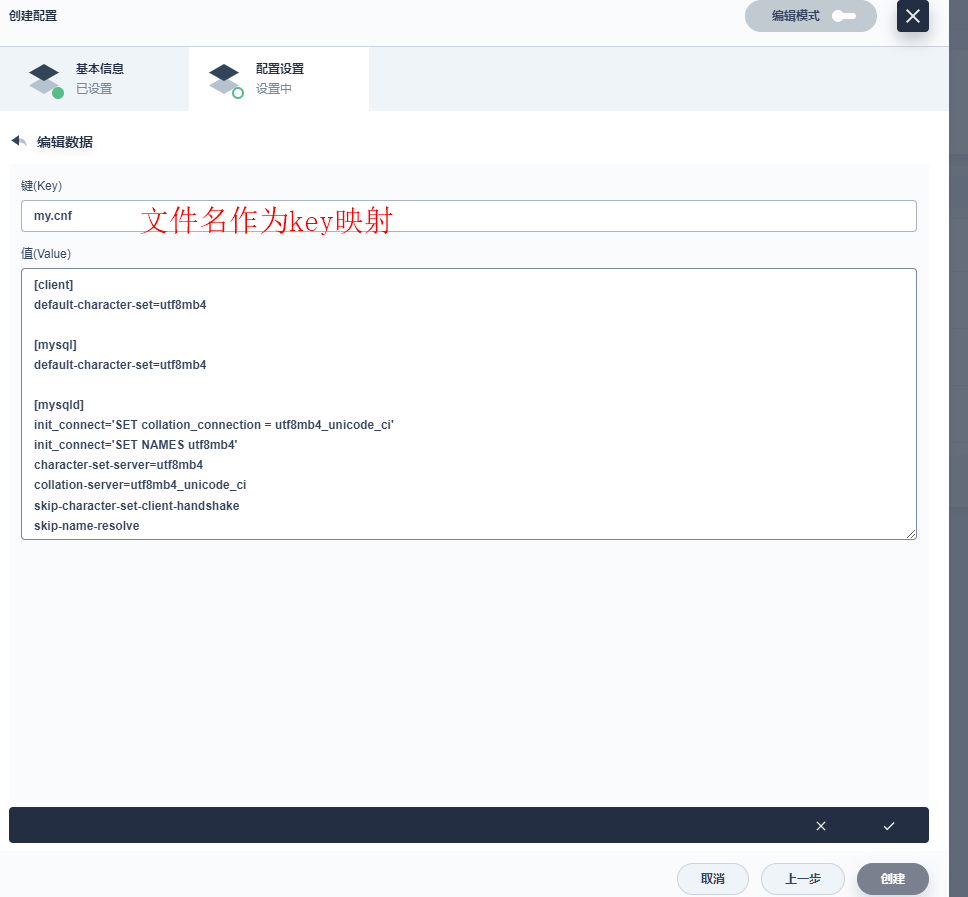
[client]
default-character-set=utf8mb4

[mysql]
default-character-set=utf8mb4

[mysqld]
init_connect='SET collation_connection = utf8mb4_unicode_ci'
init_connect='SET NAMES utf8mb4'
character-set-server=utf8mb4
collation-server=utf8mb4_unicode_ci
skip-character-set-client-handshake
skip-name-resolve

1、集群内部,直接通过应用的 【服务名.项目名】 直接访问
mysql -uroot -hhis-mysql-glgf.his -p
2、集群外部,

部署流程:
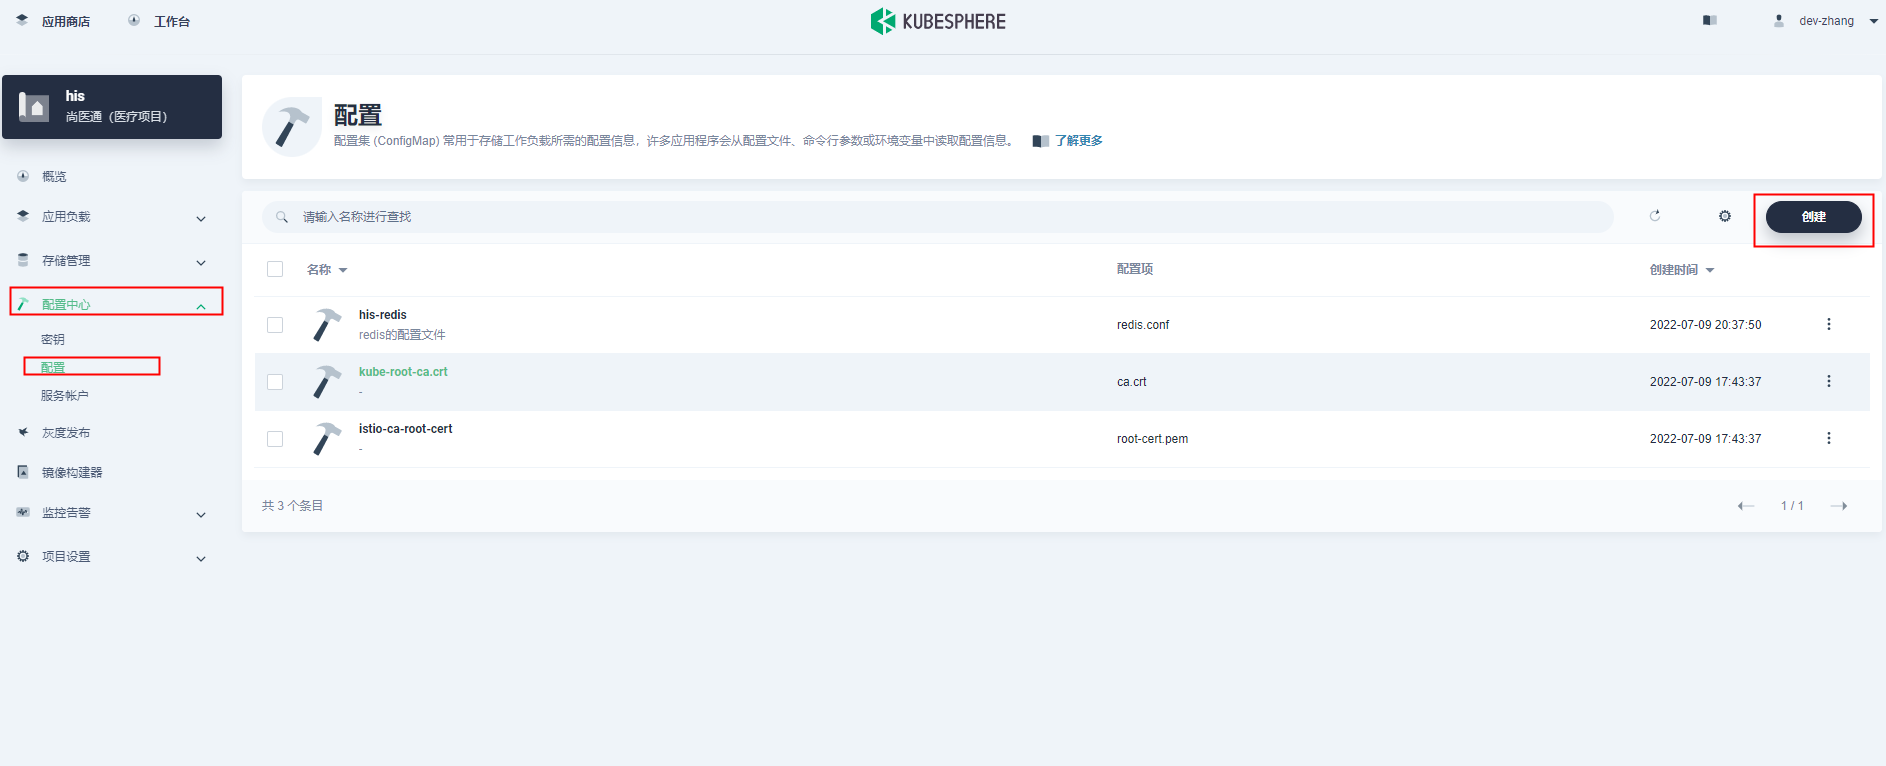
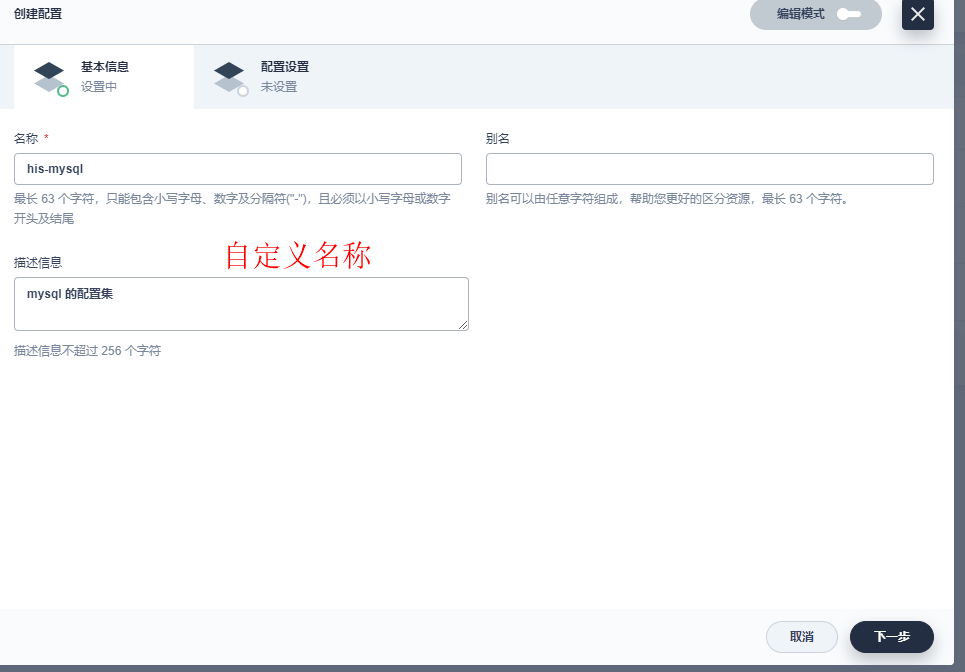
第一步:创建配置集
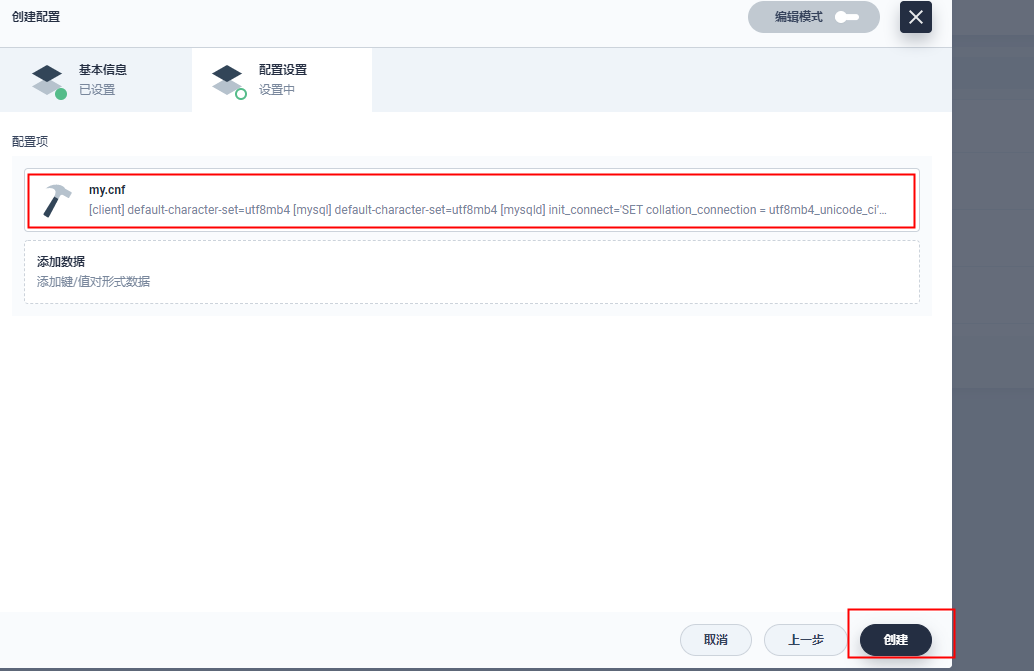
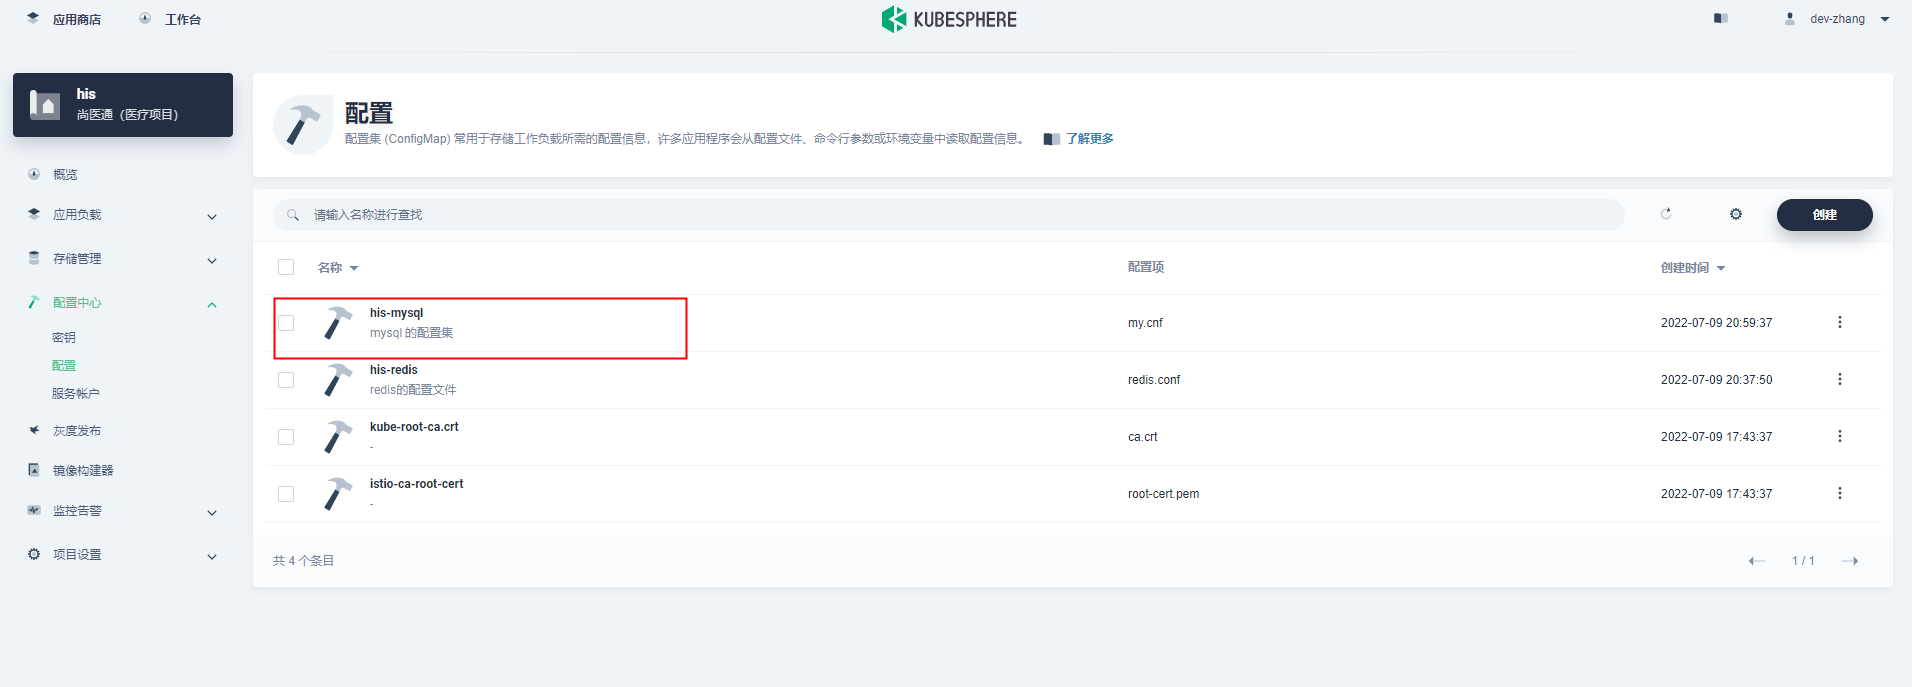
创建配置集成功:
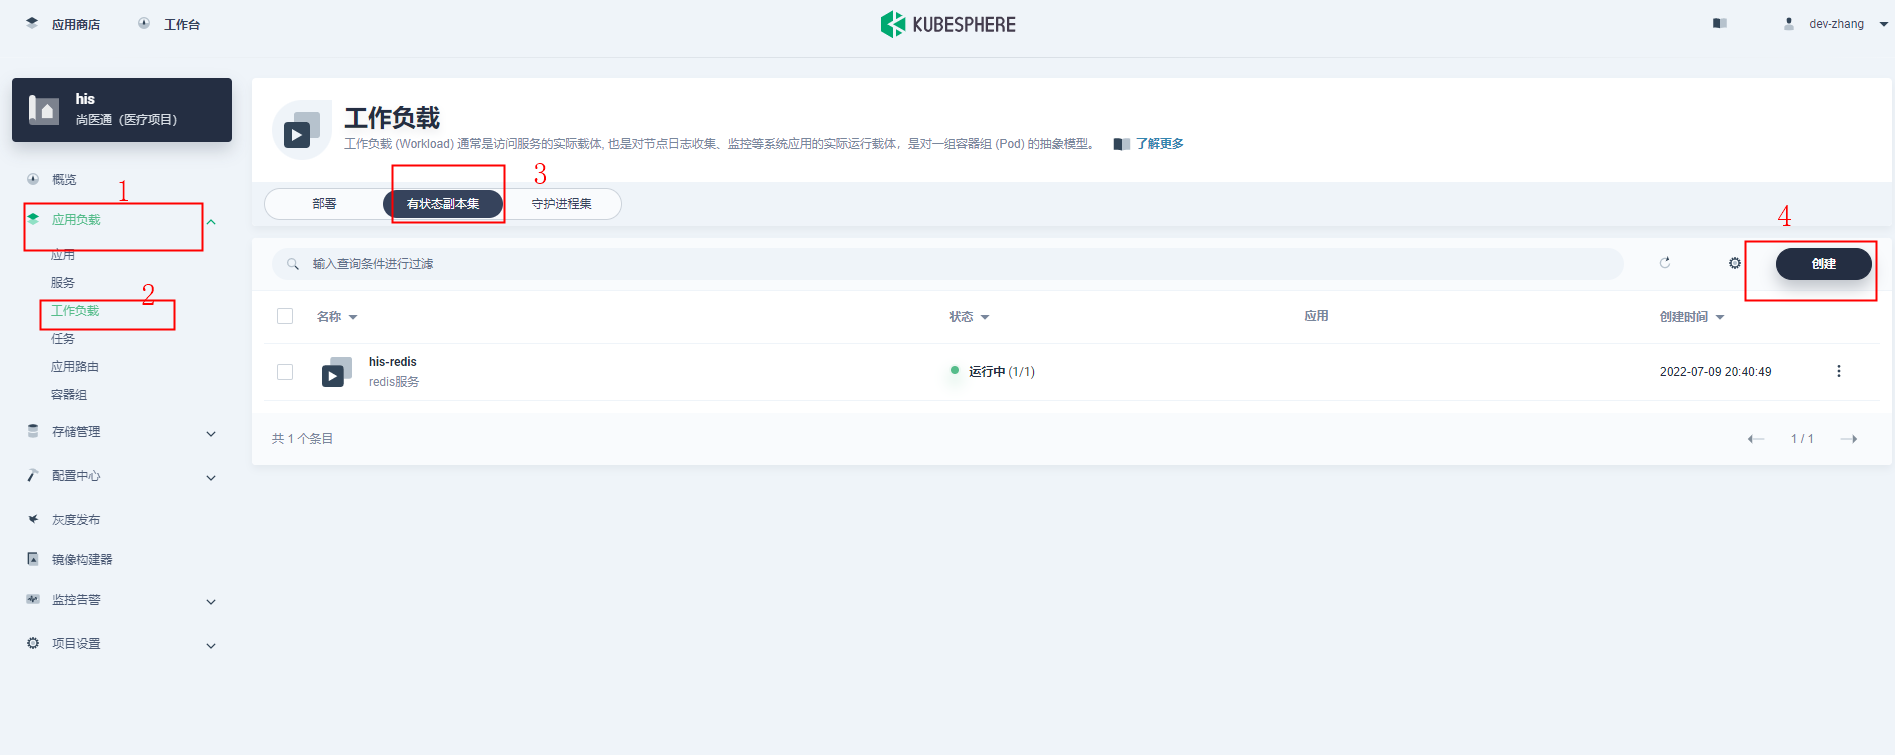
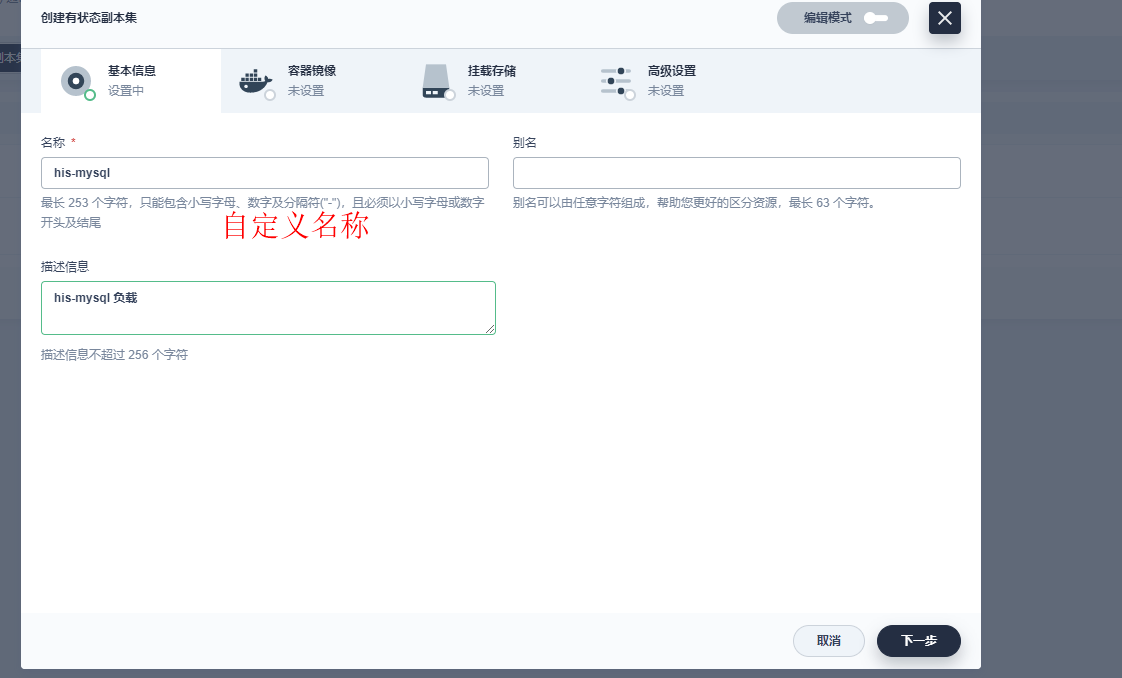
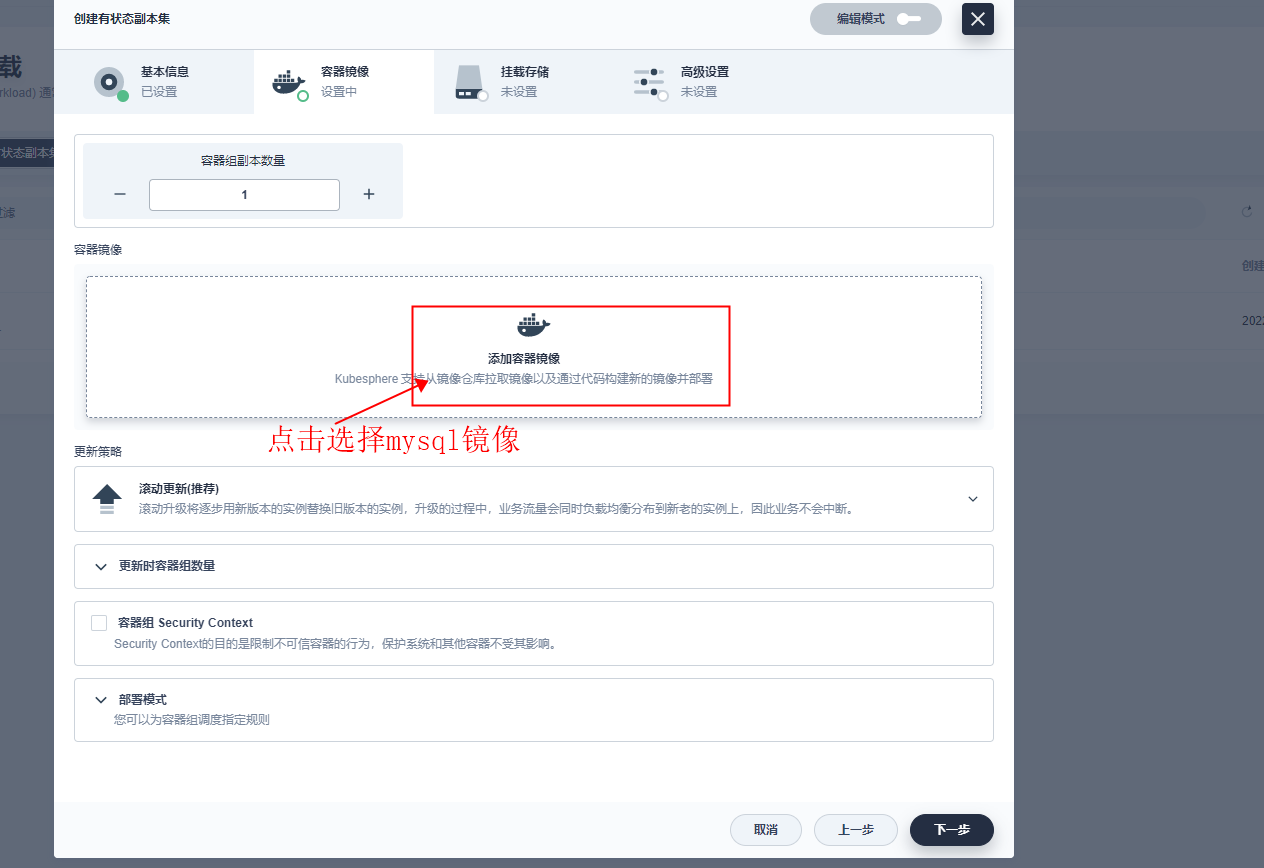
第二步:创建工作负载
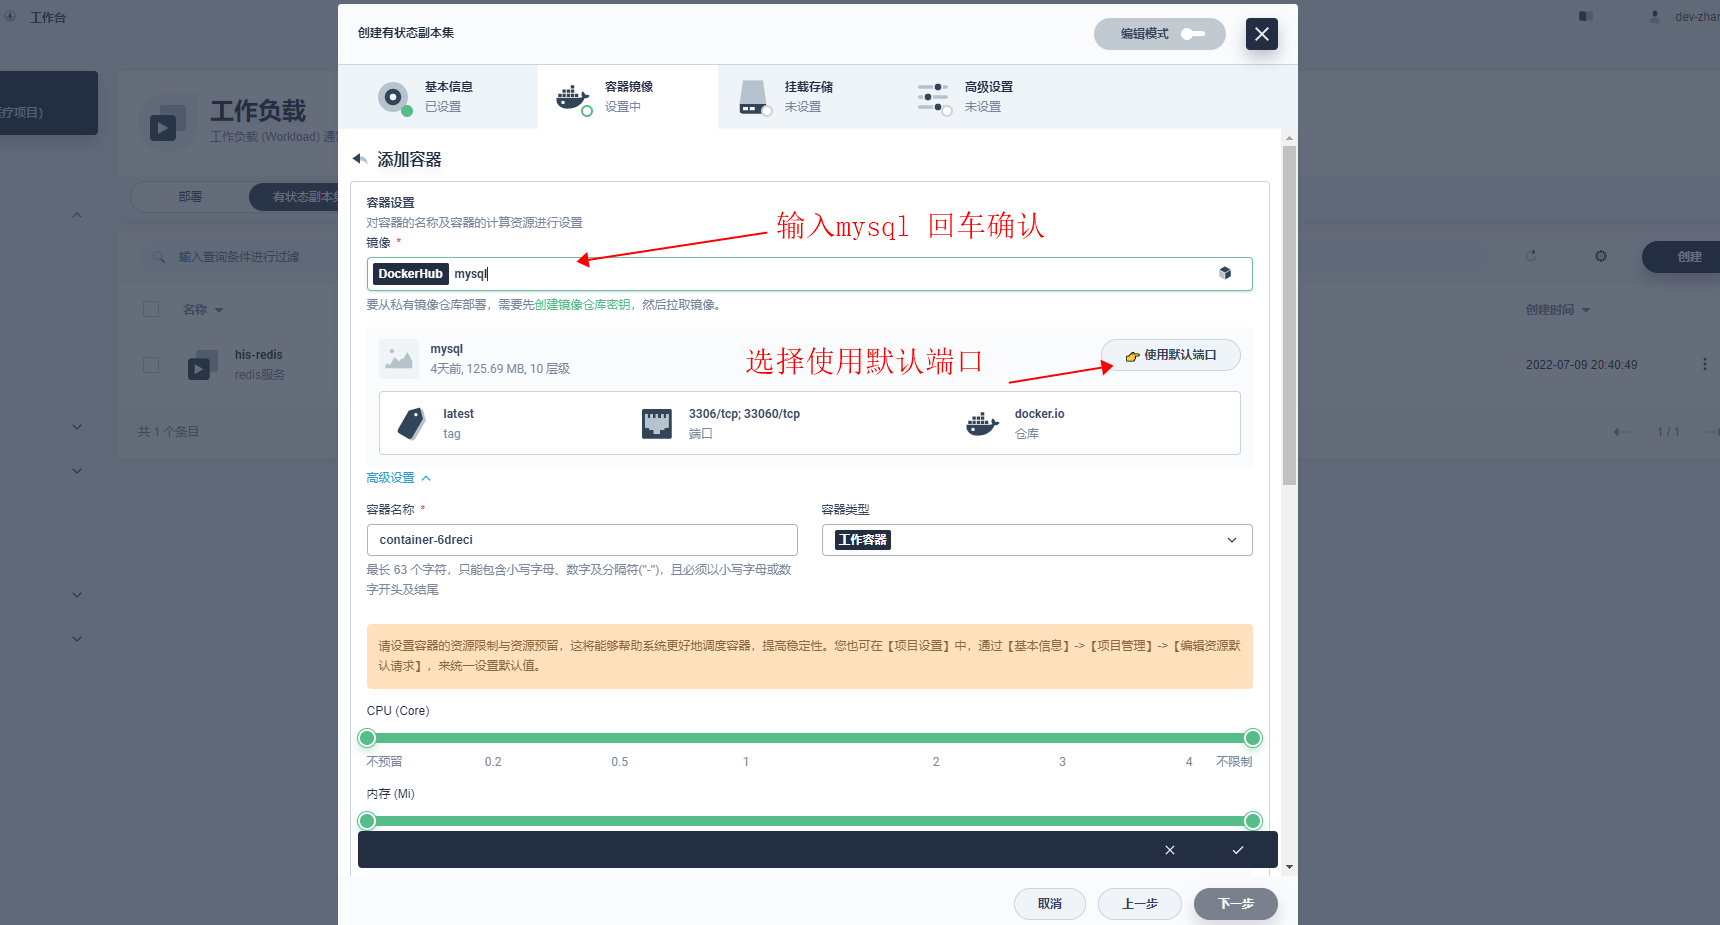
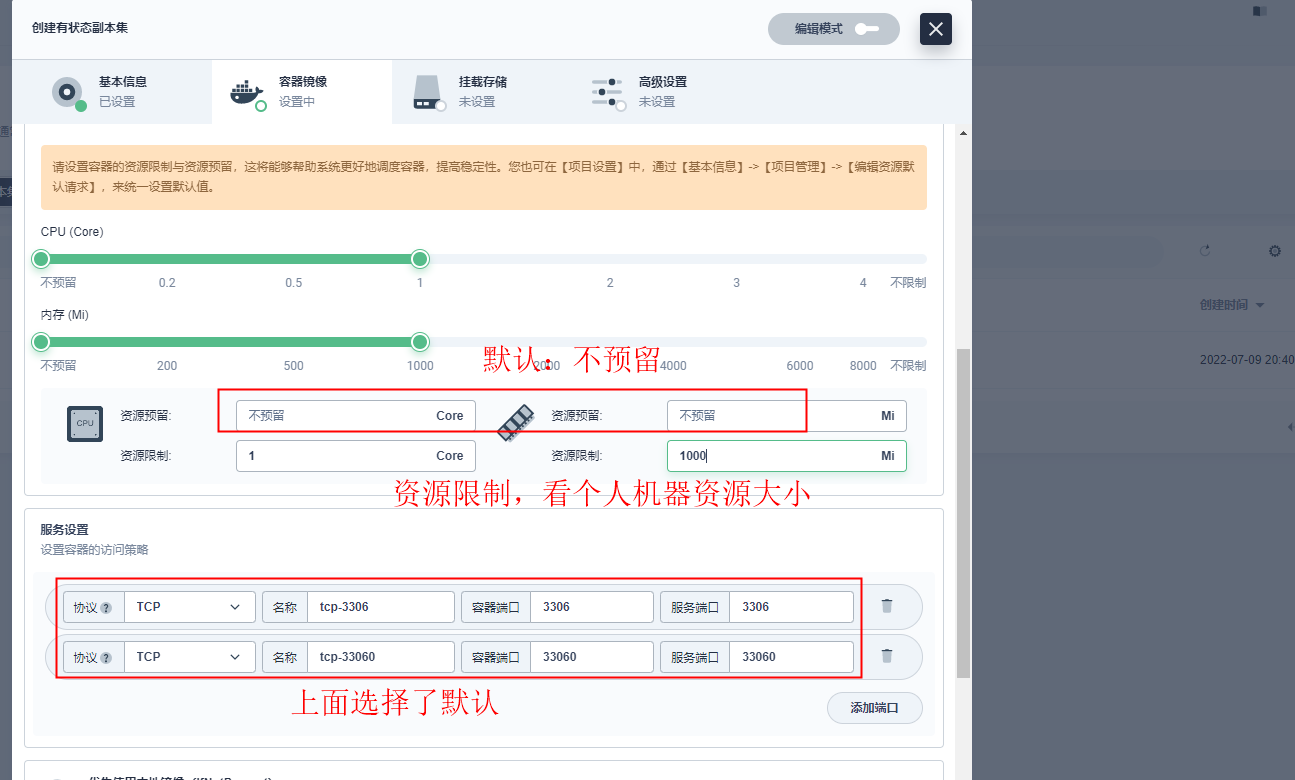
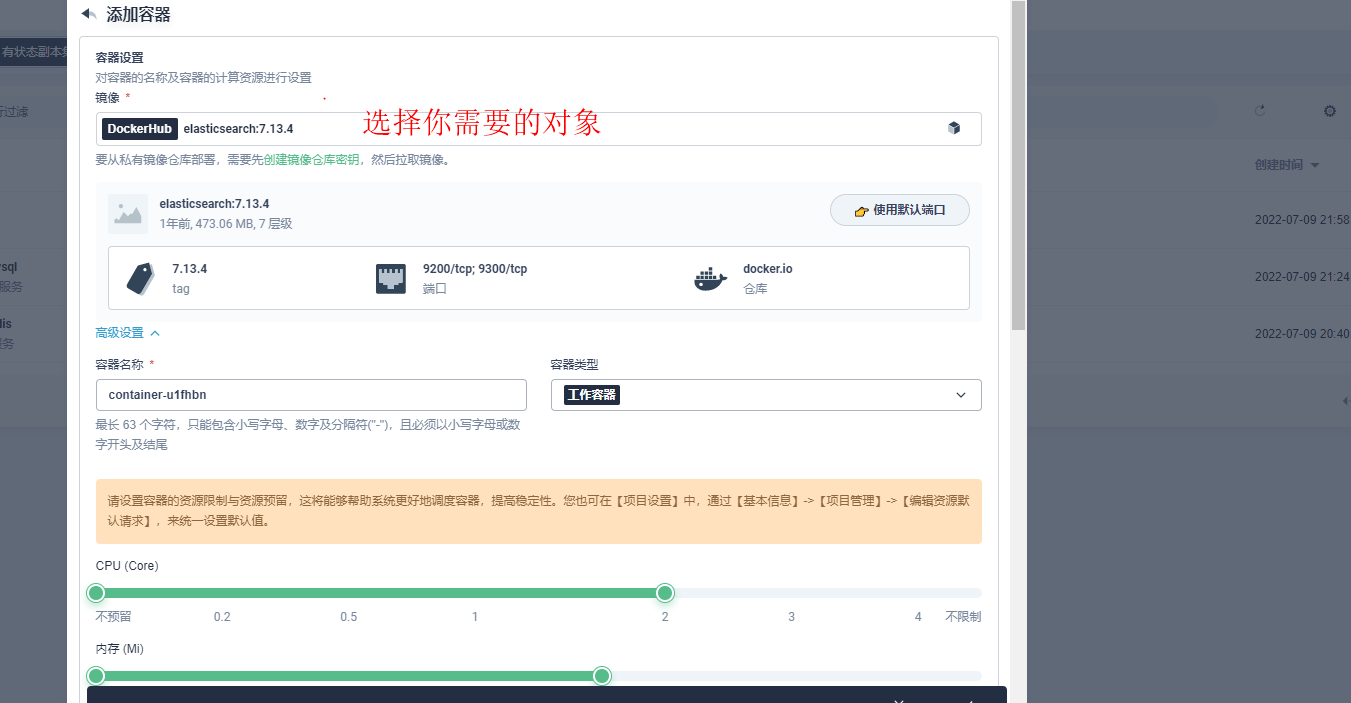
选择镜像
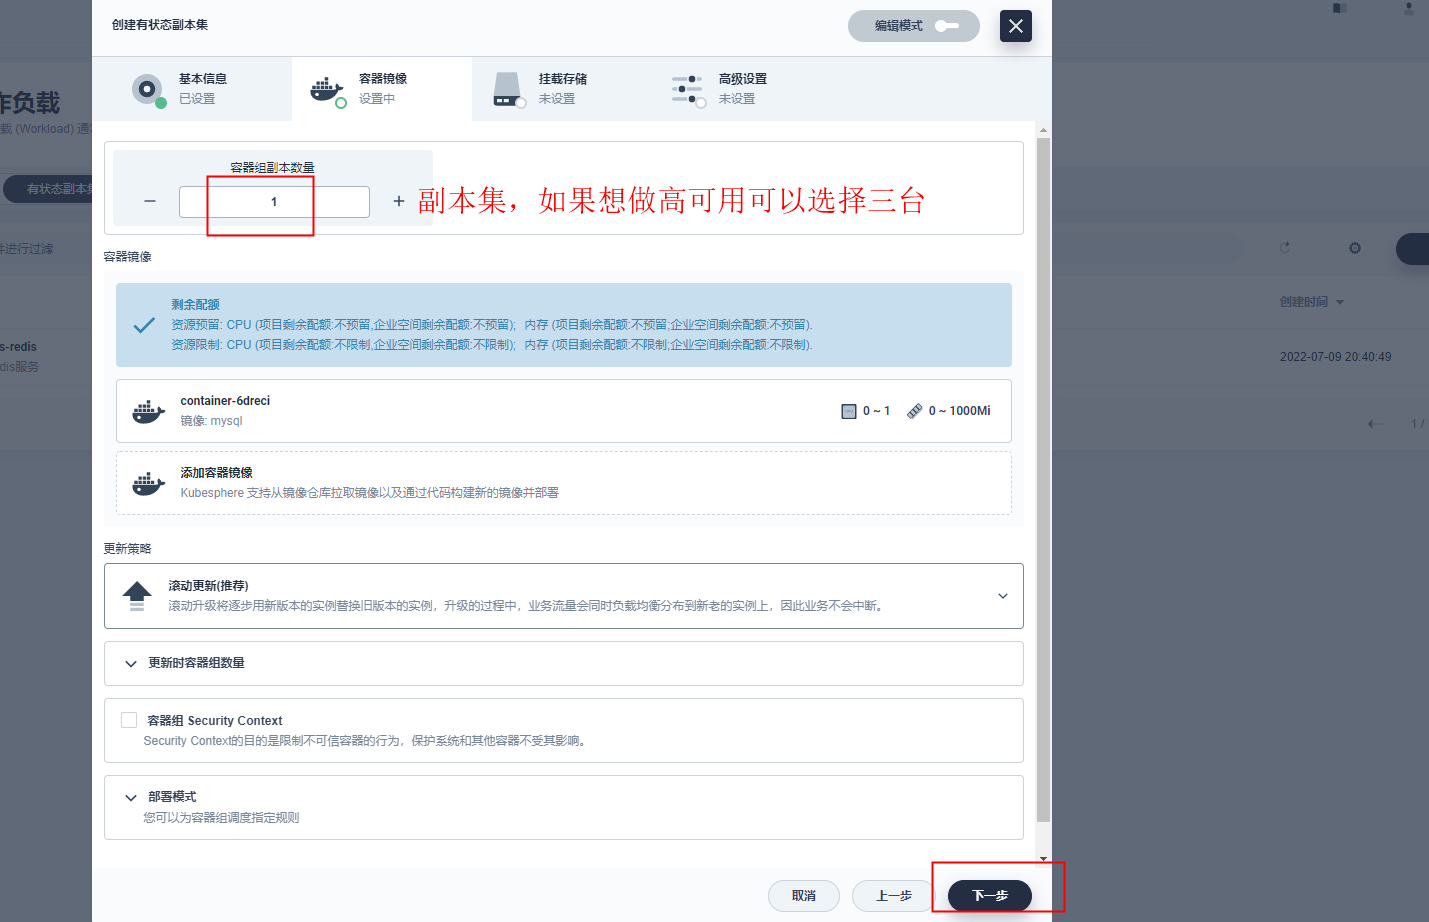
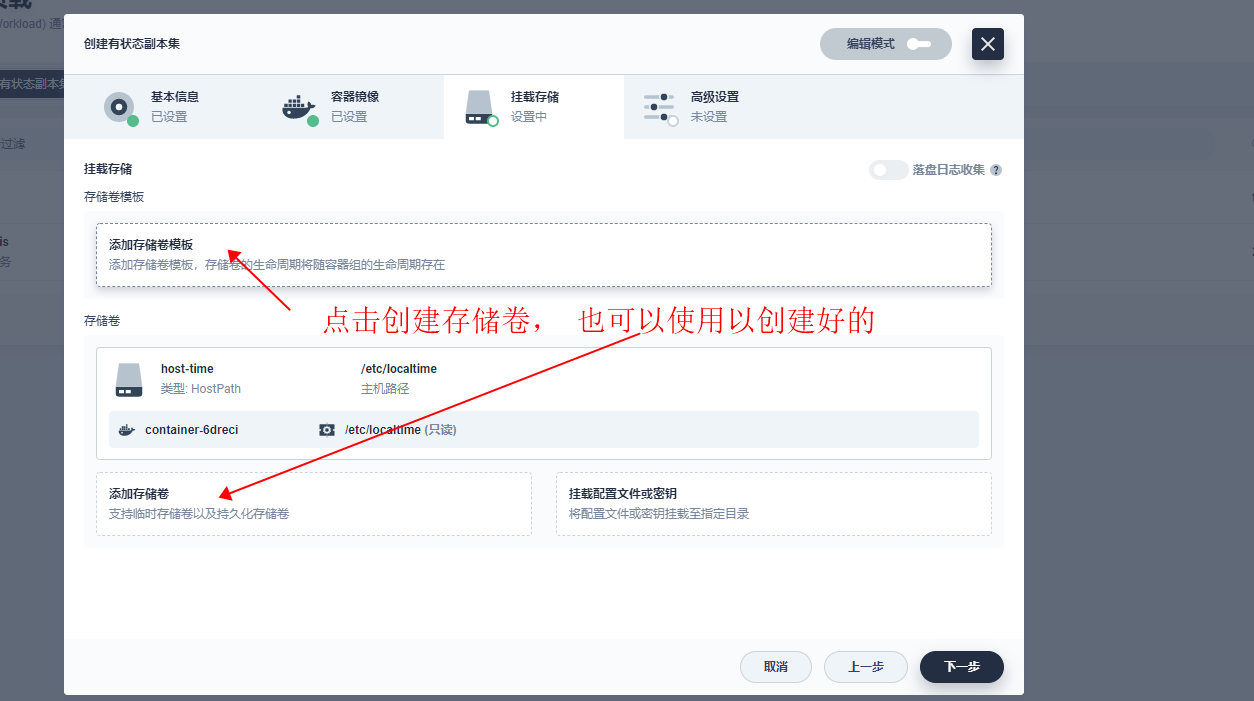
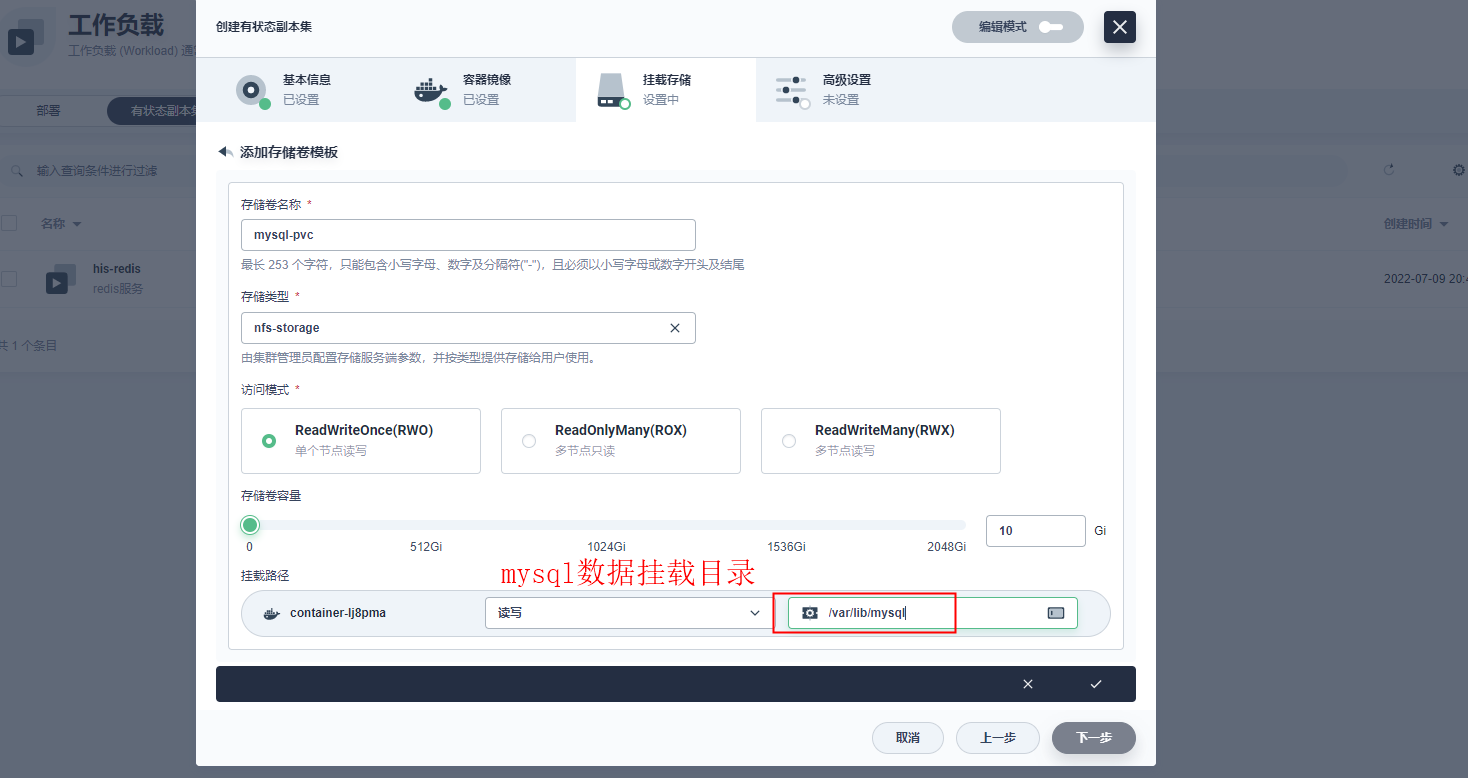
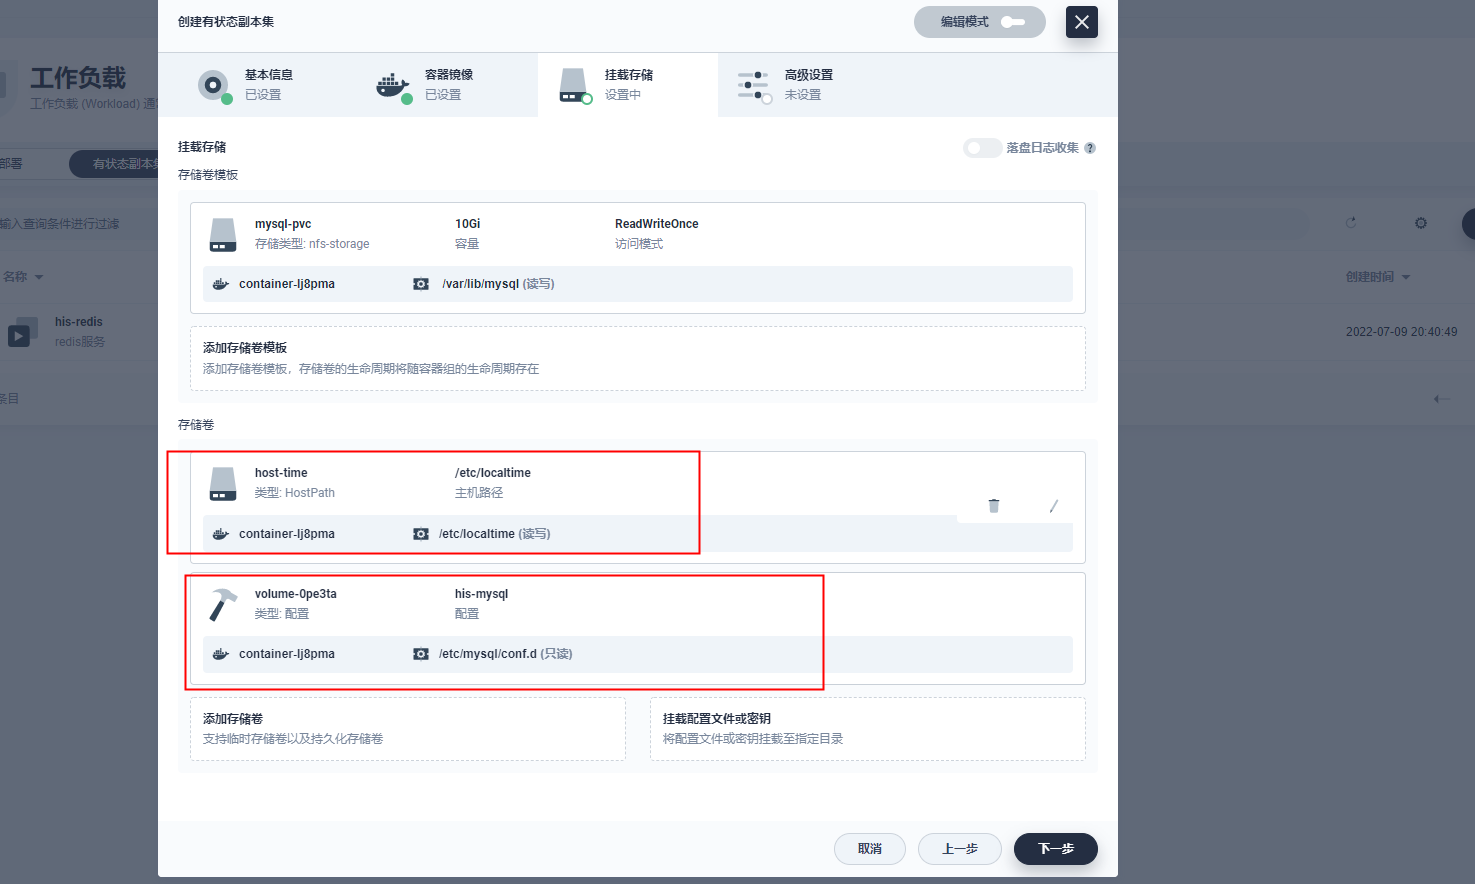
创建存储卷,一般推荐默认创建为好
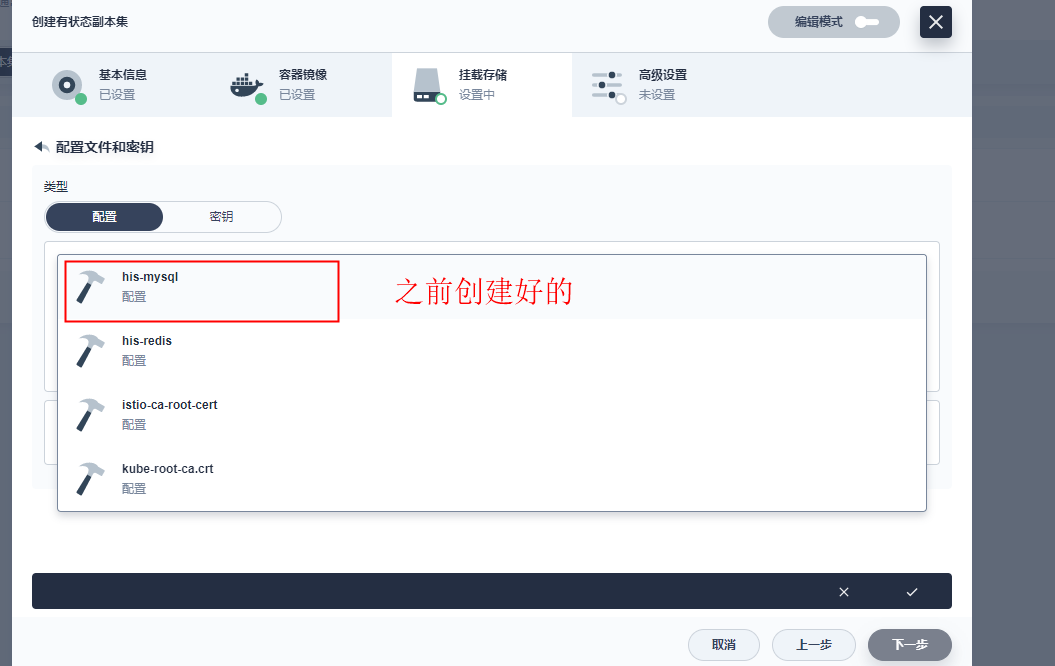
选择配置集

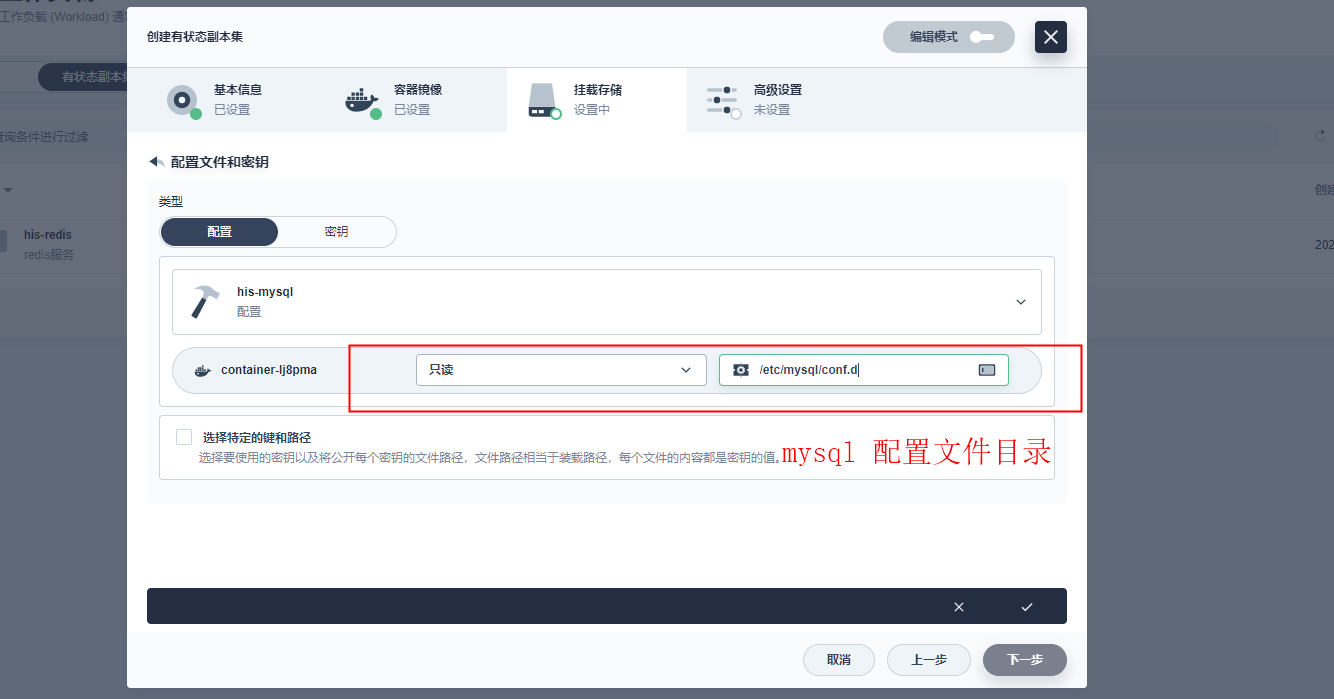
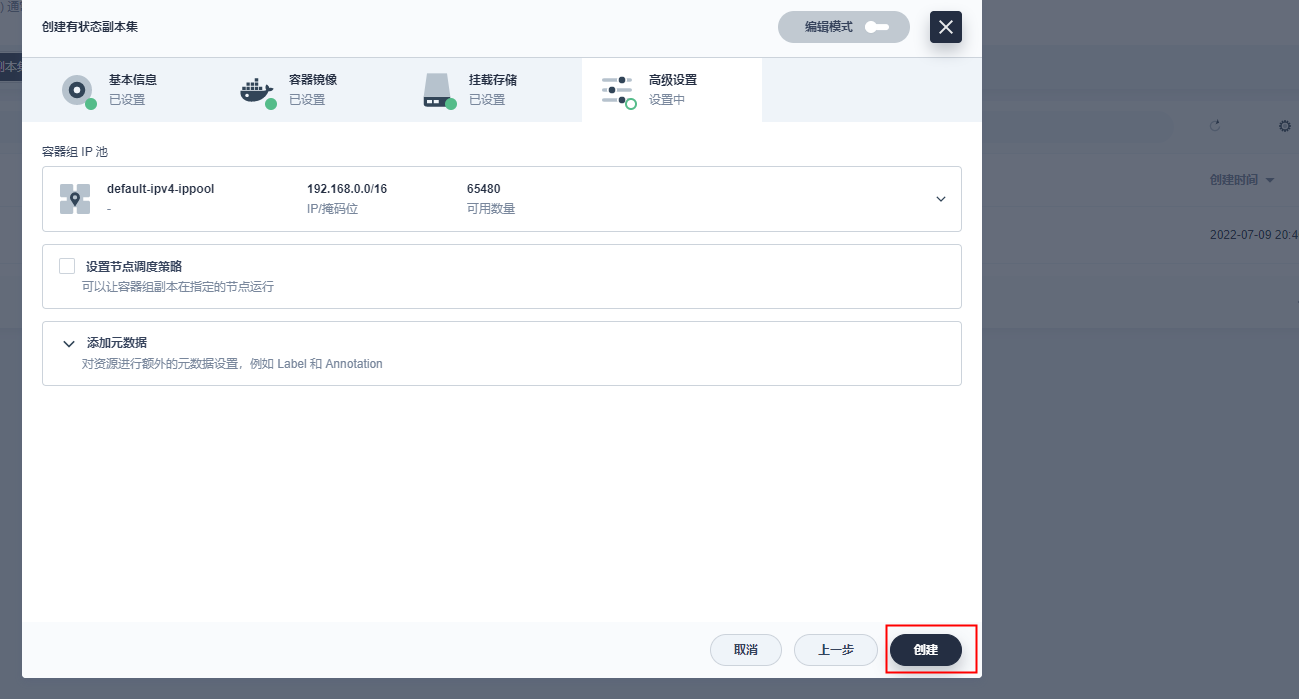
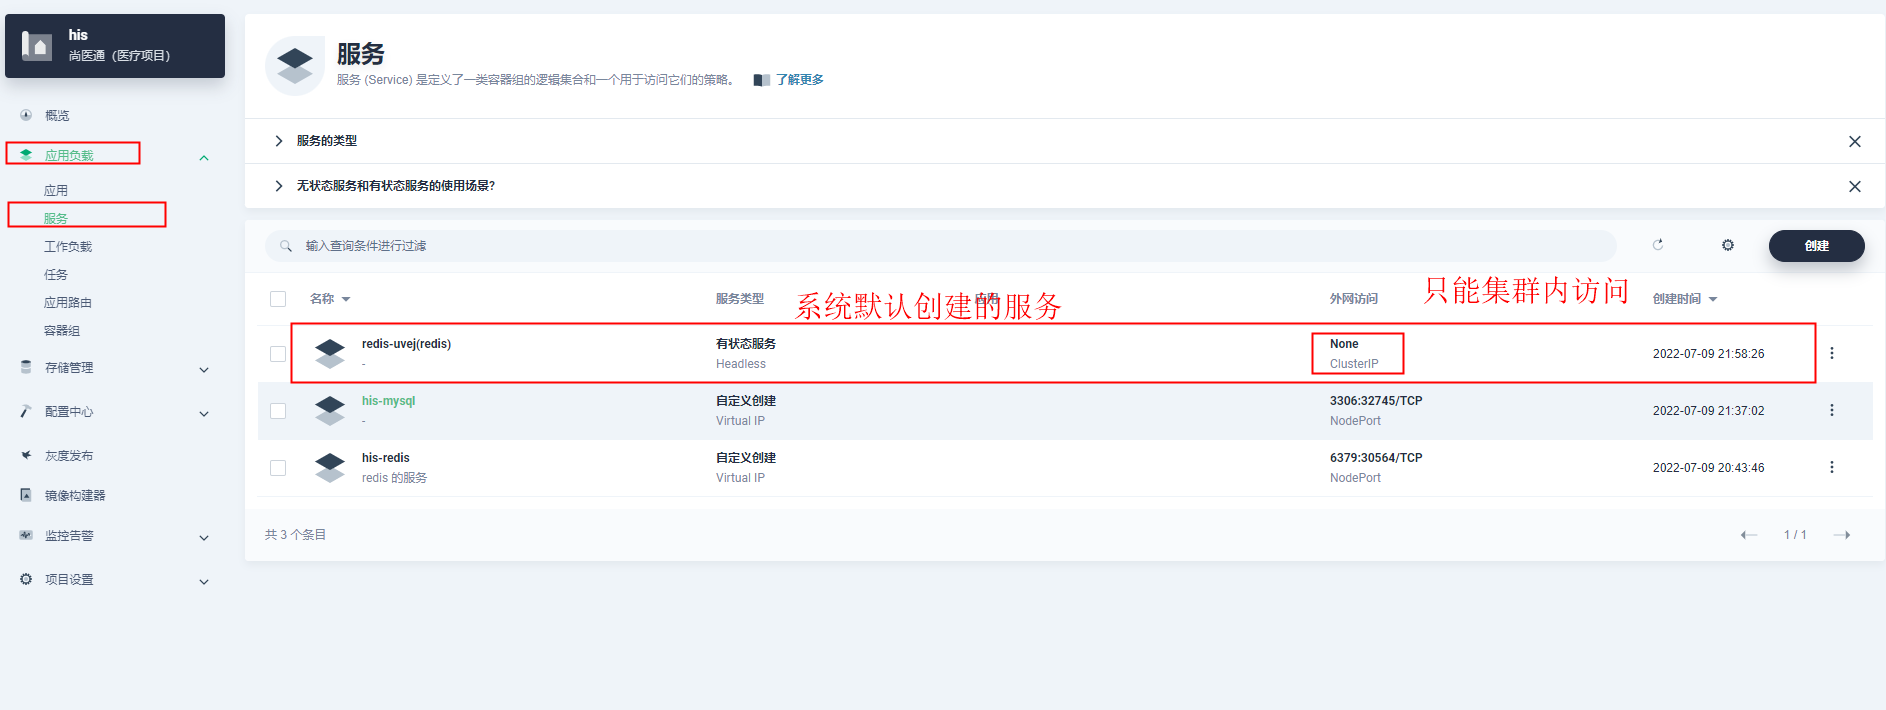
点创建:(这个mysql只能集群内部访问)
测试连接
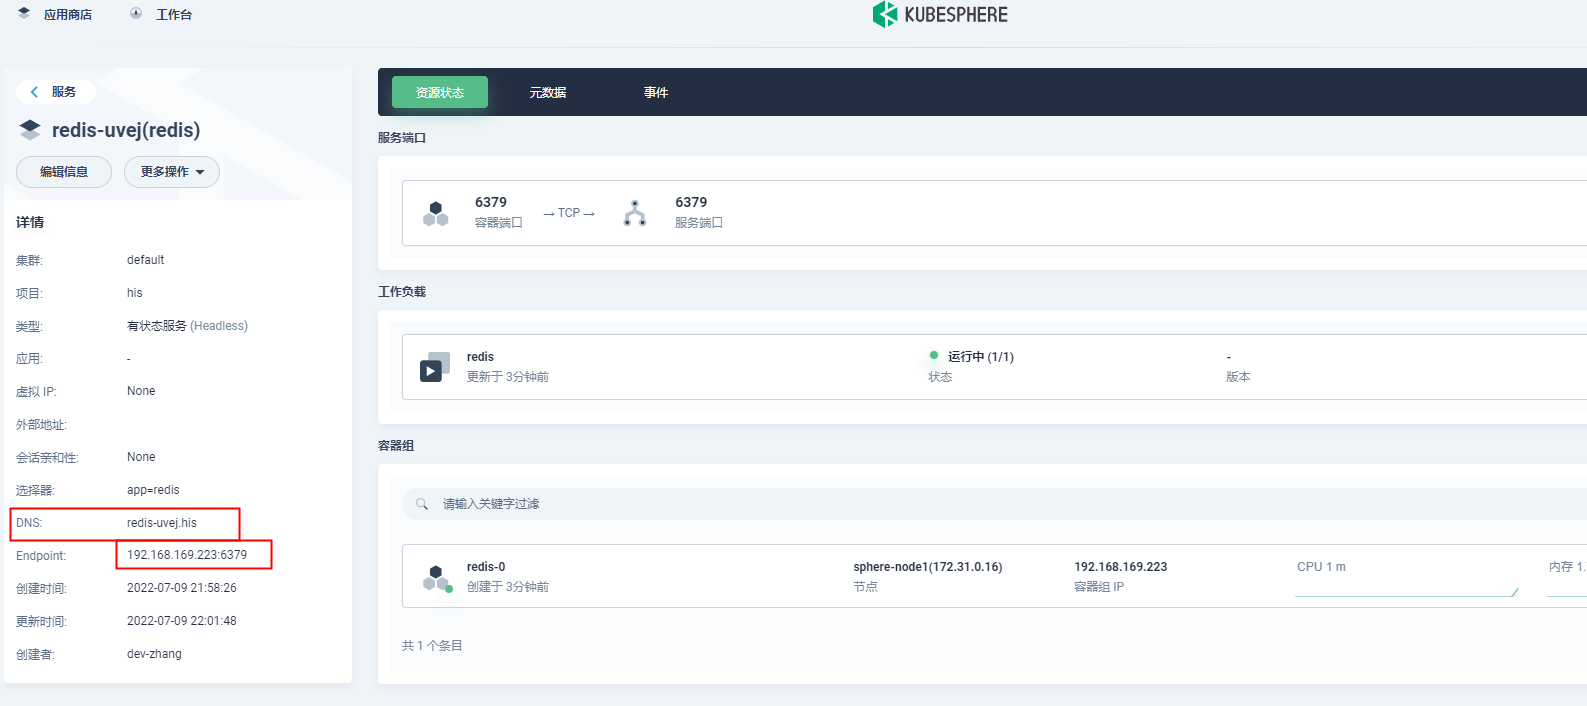
获取mysql域名
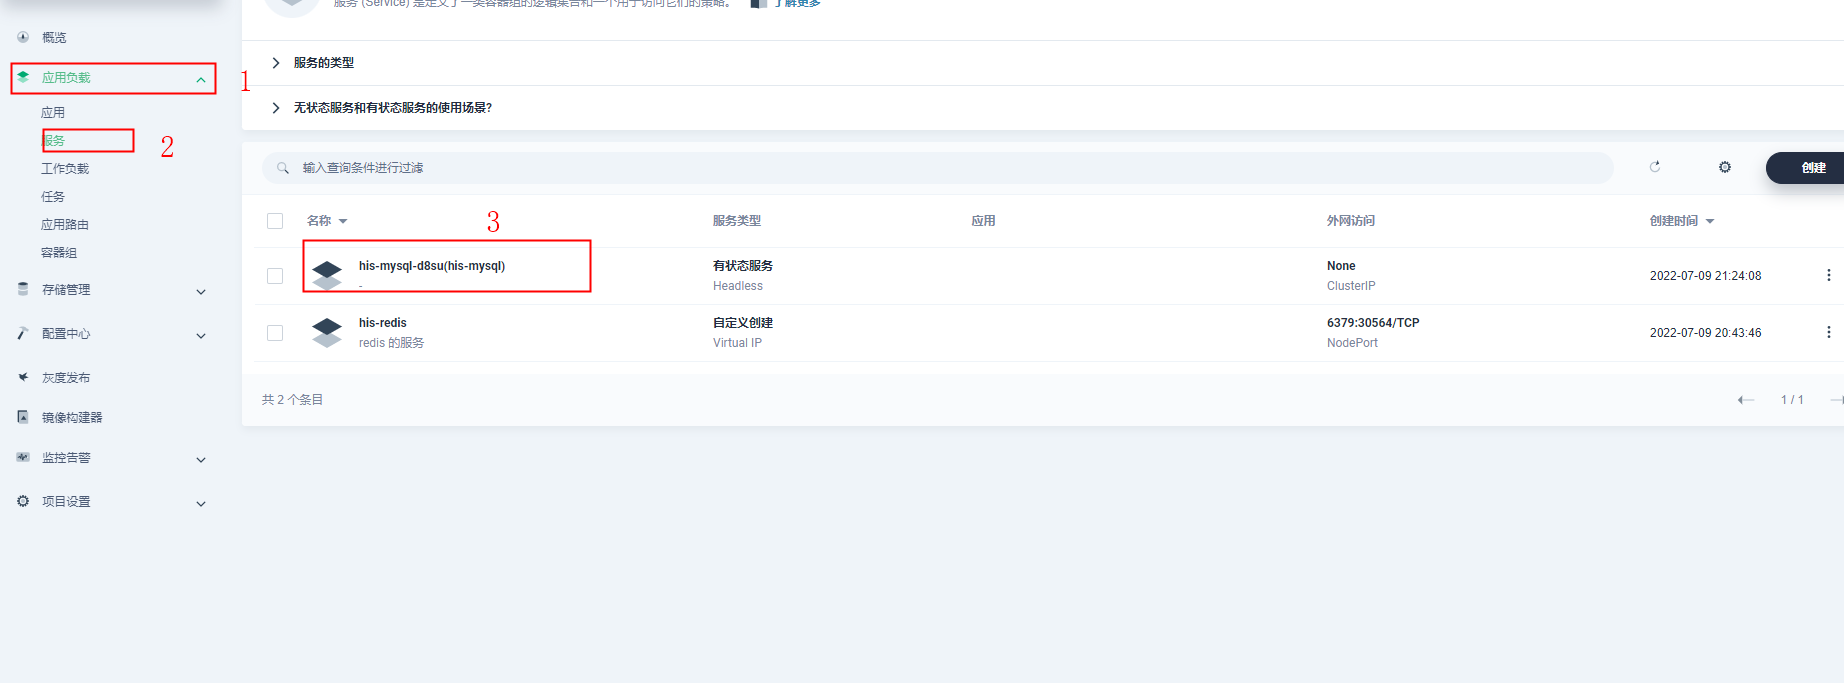
这个域名是kubephere随机创建的

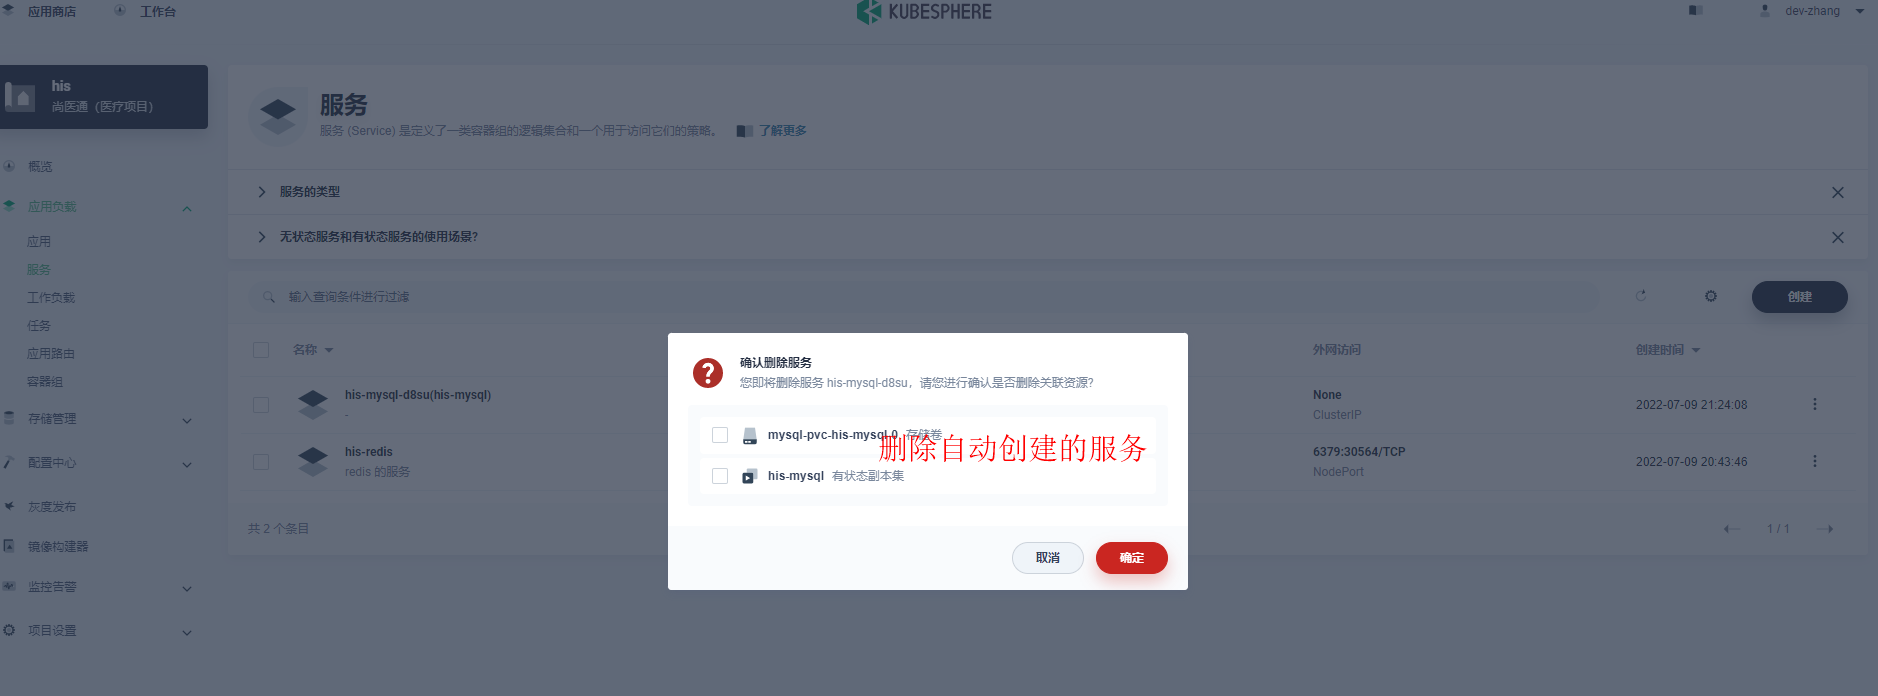
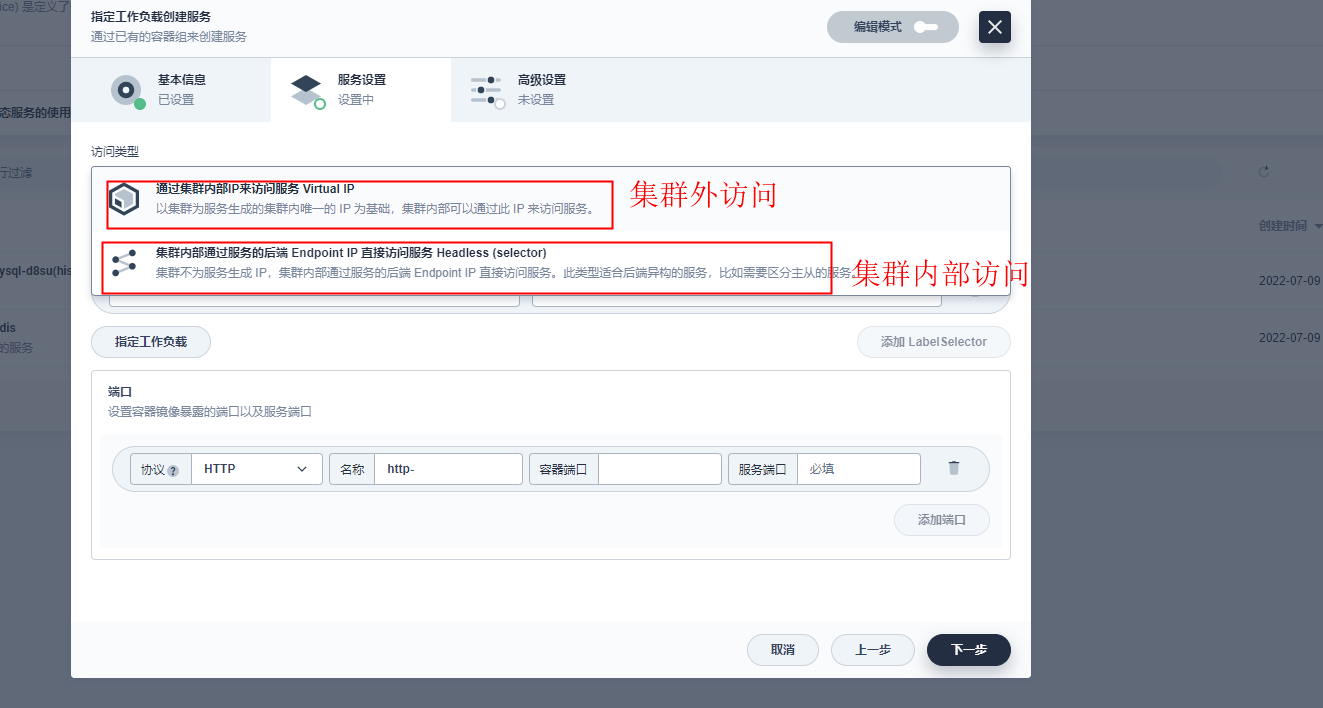
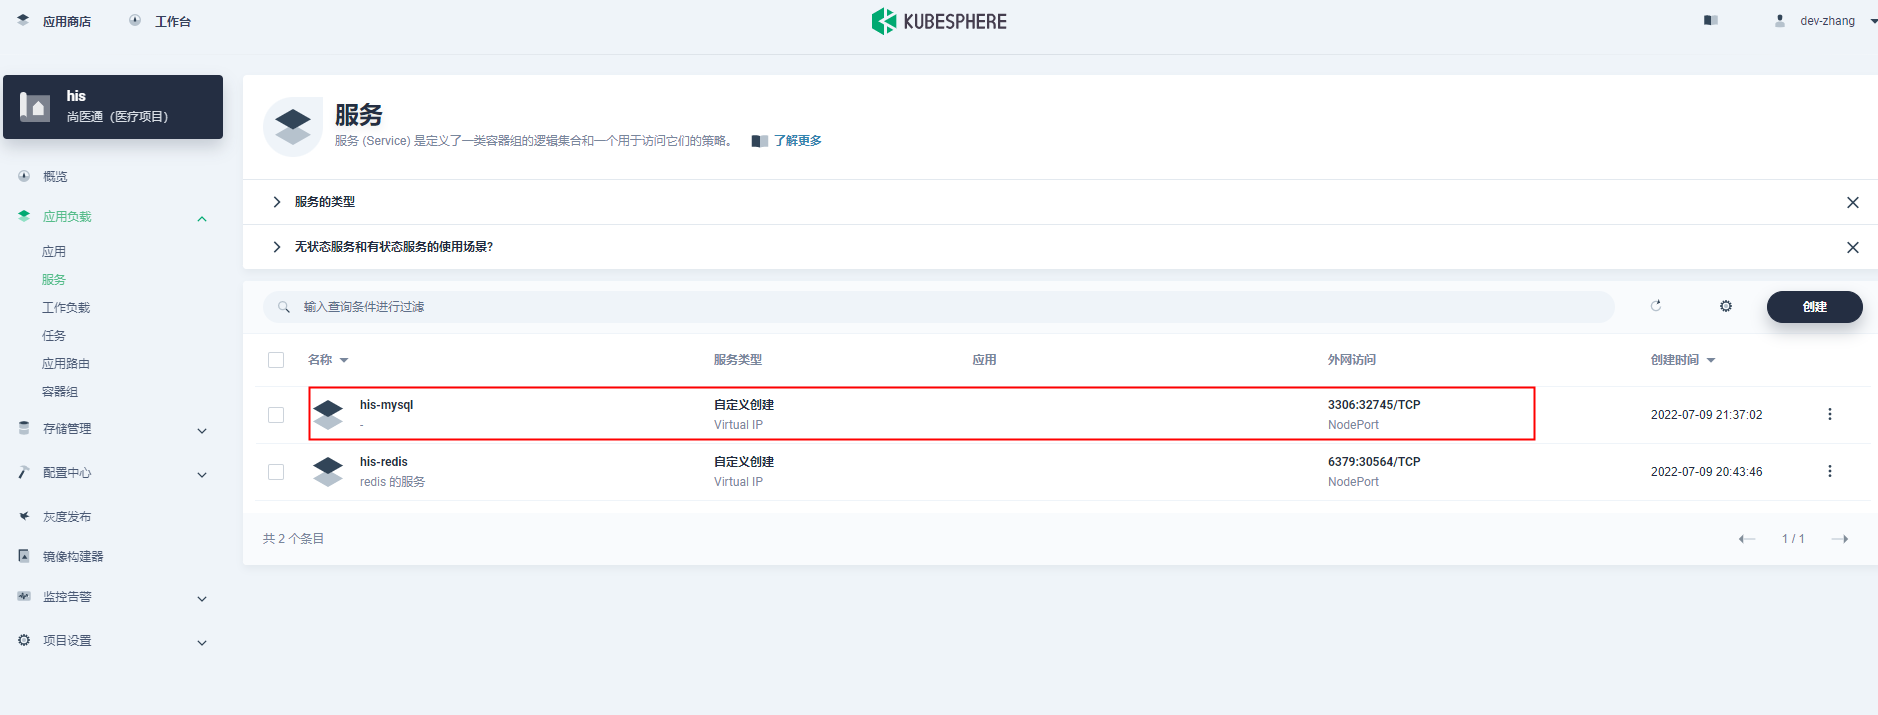
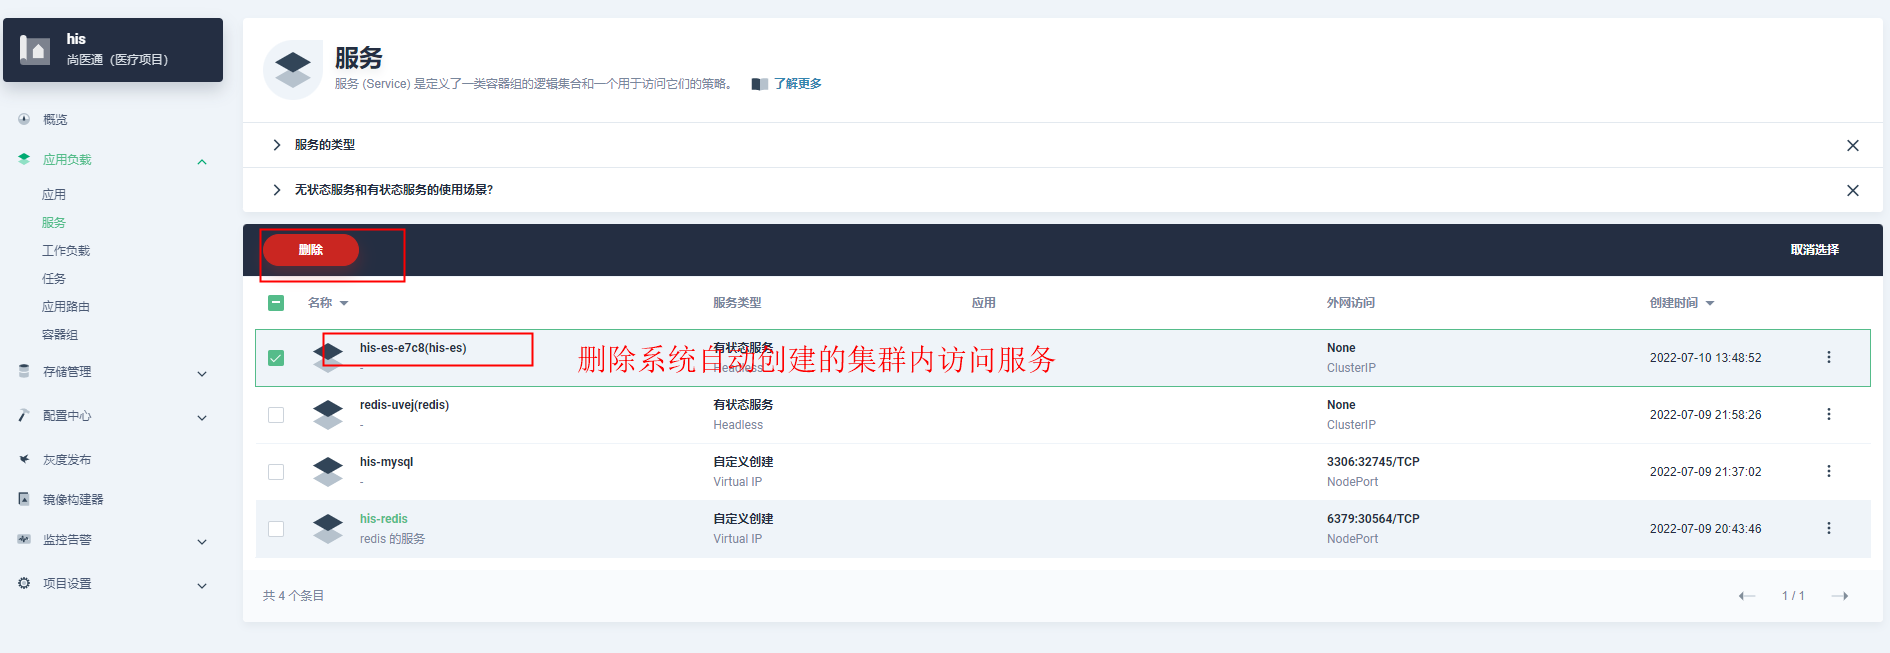
集群外部访问
首先:删除自动创建的服务
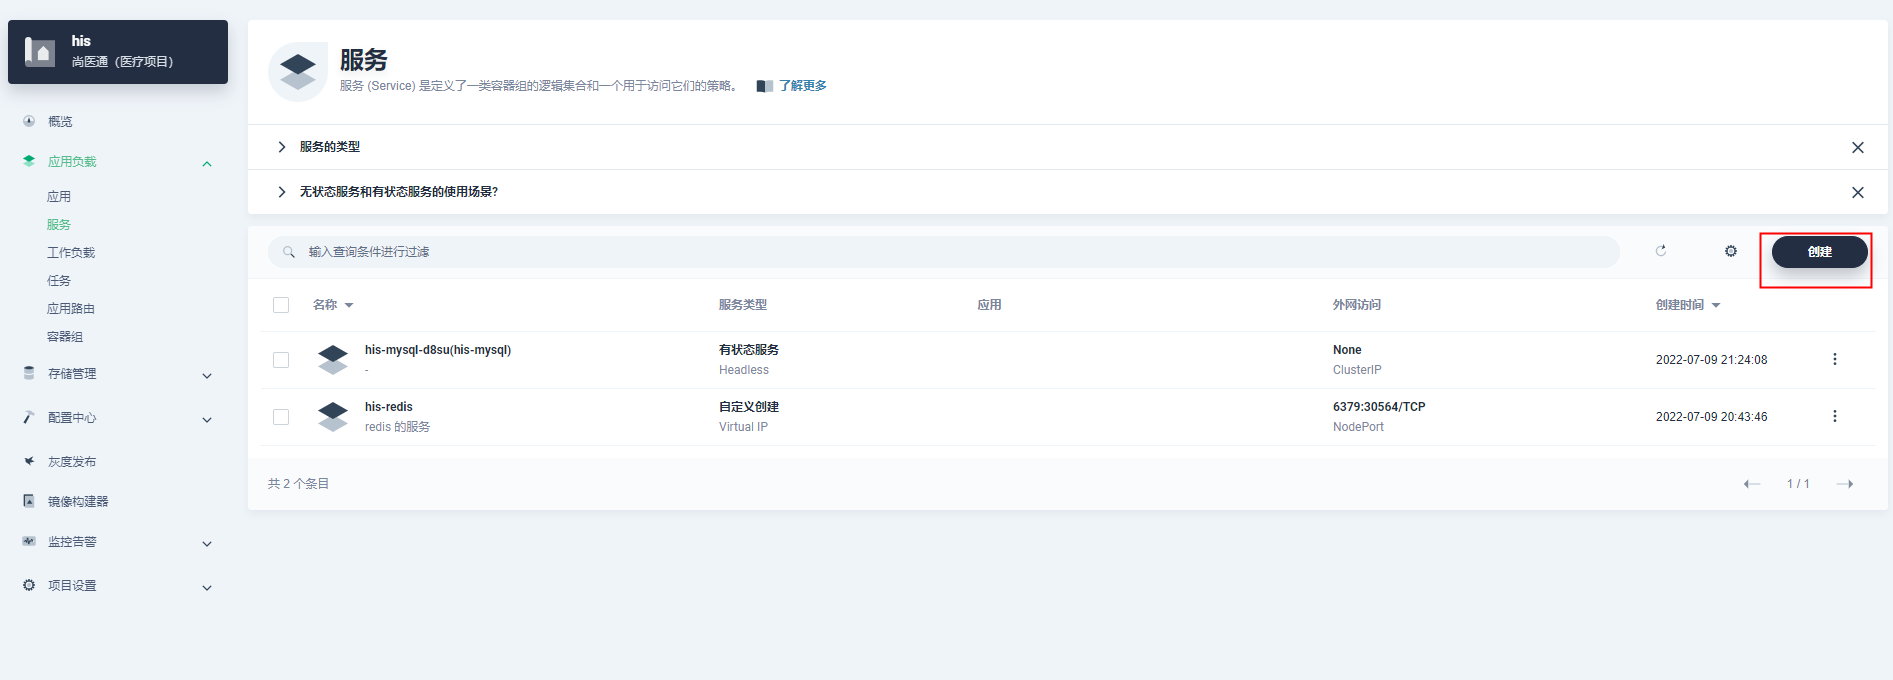
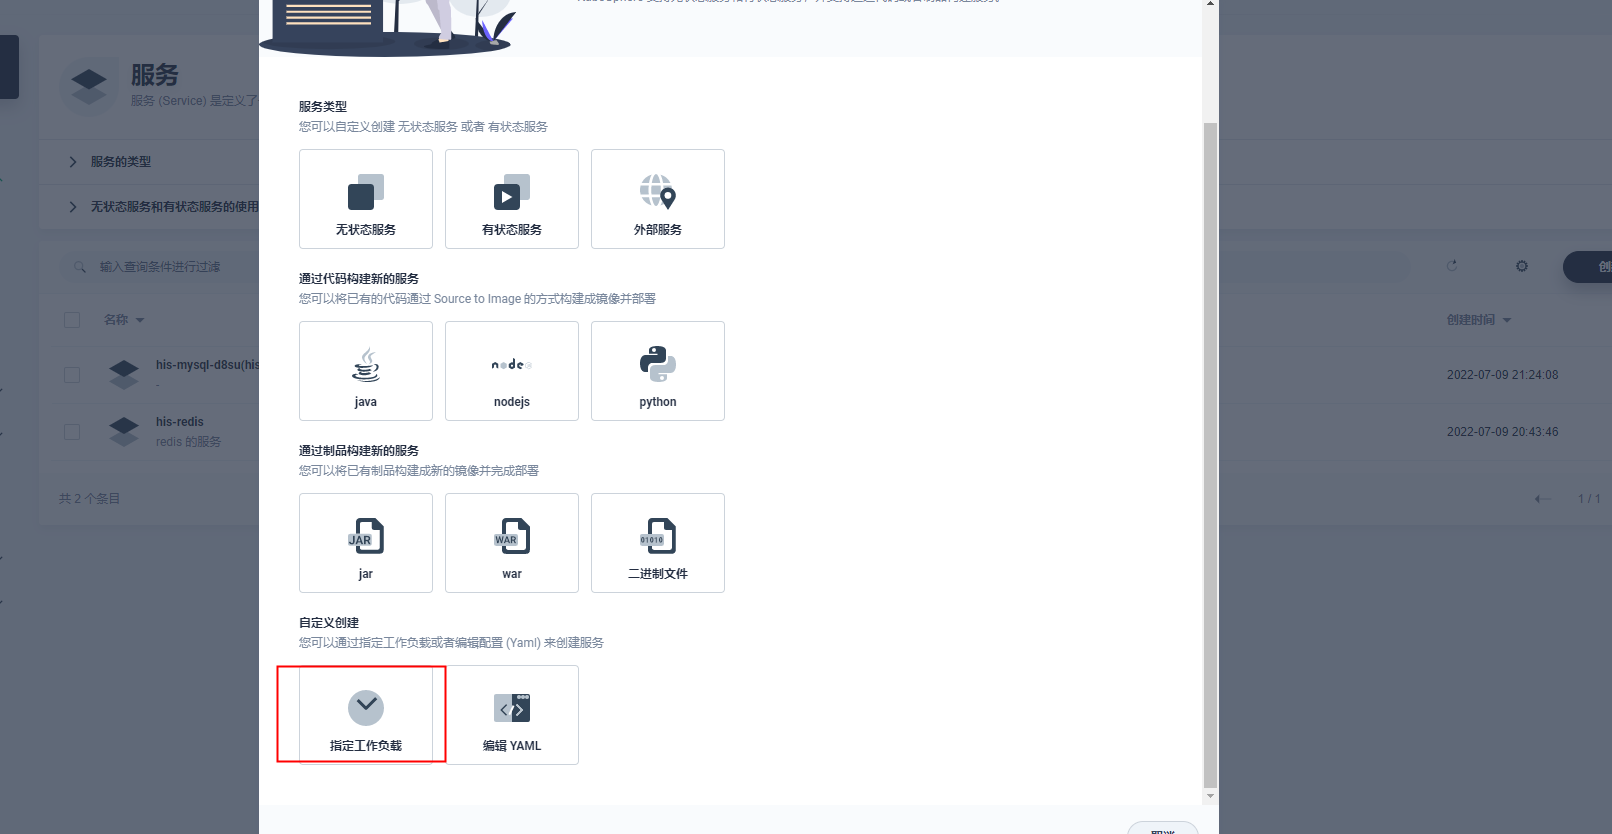
第一创建服务:
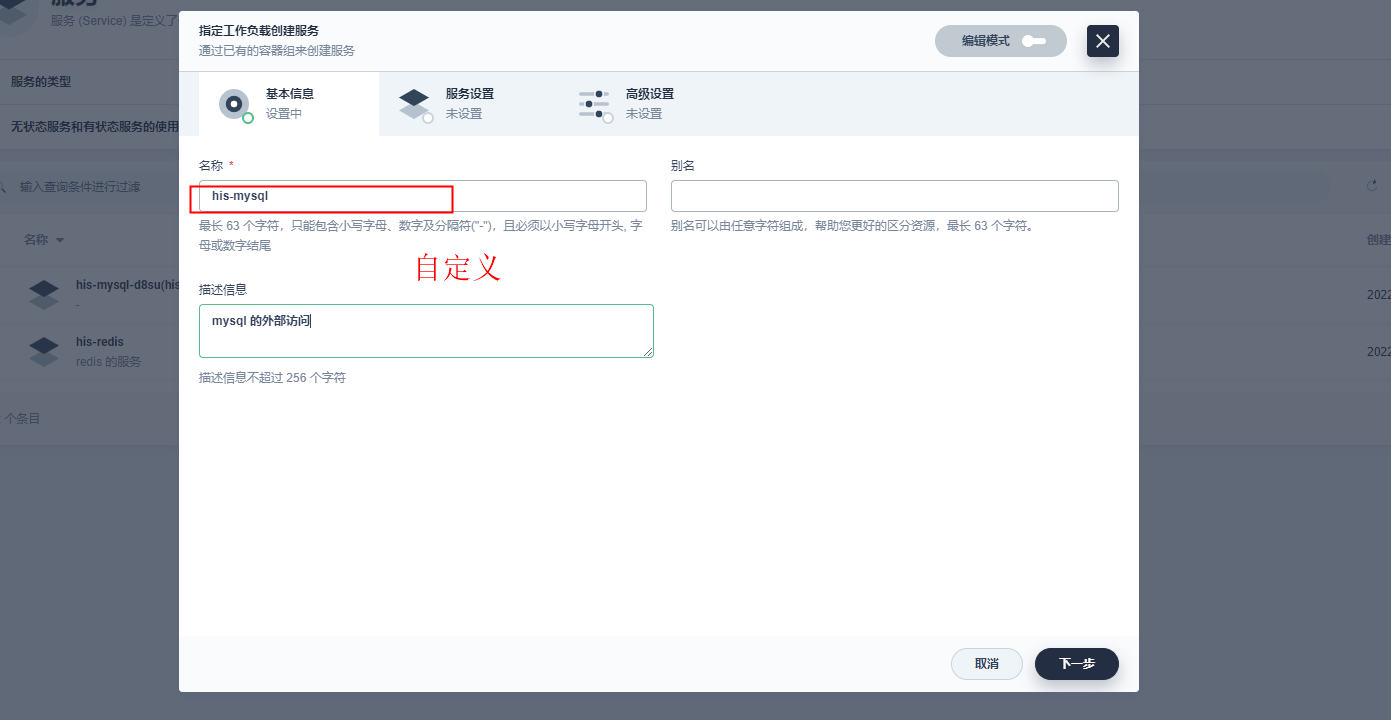
第二:
第三:
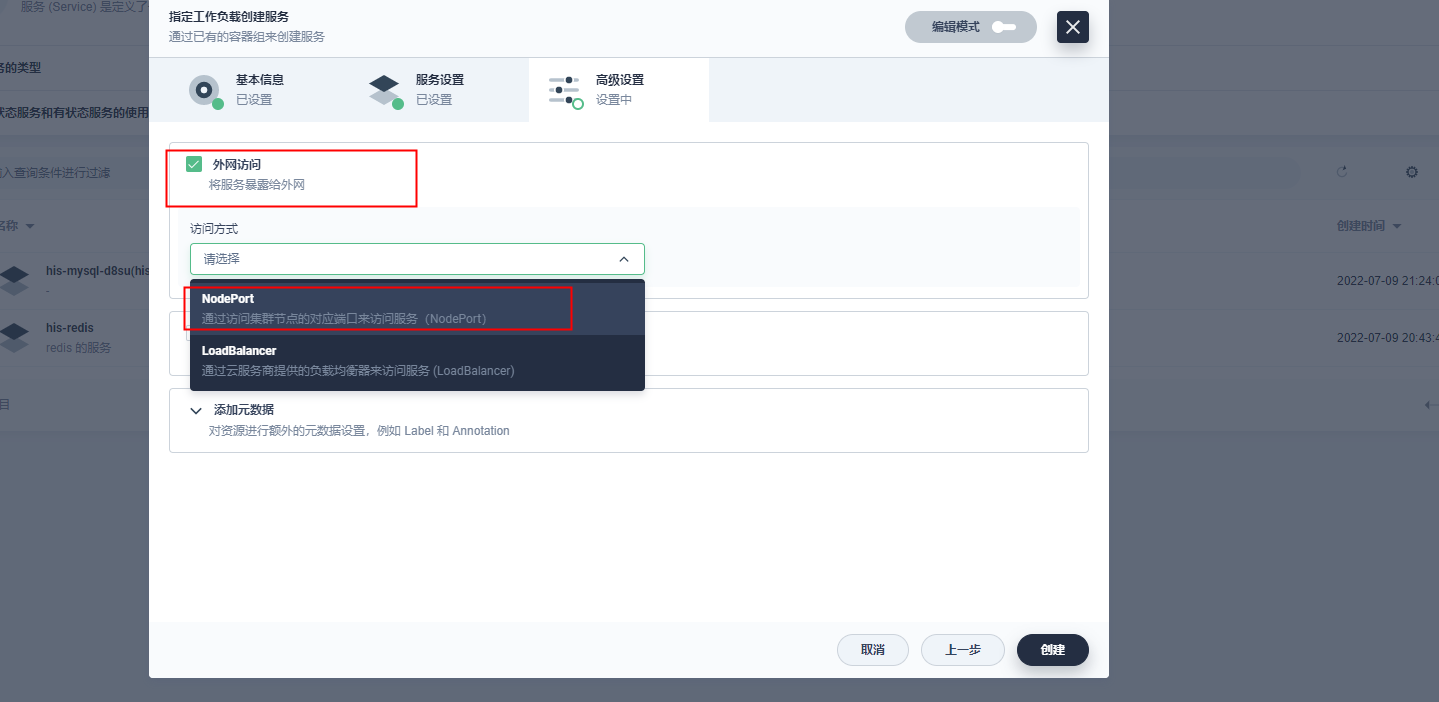
第四:(选择外网访问)
第五:(选择副本集)
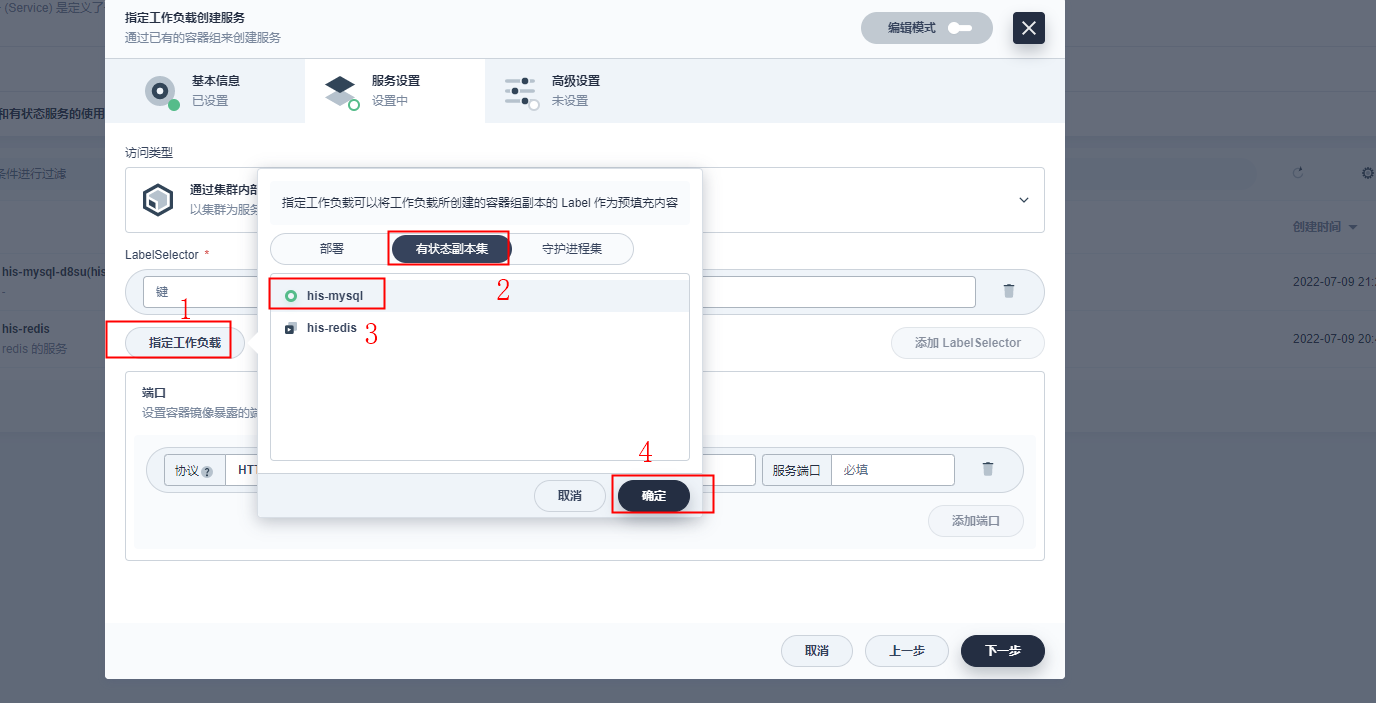
第六:
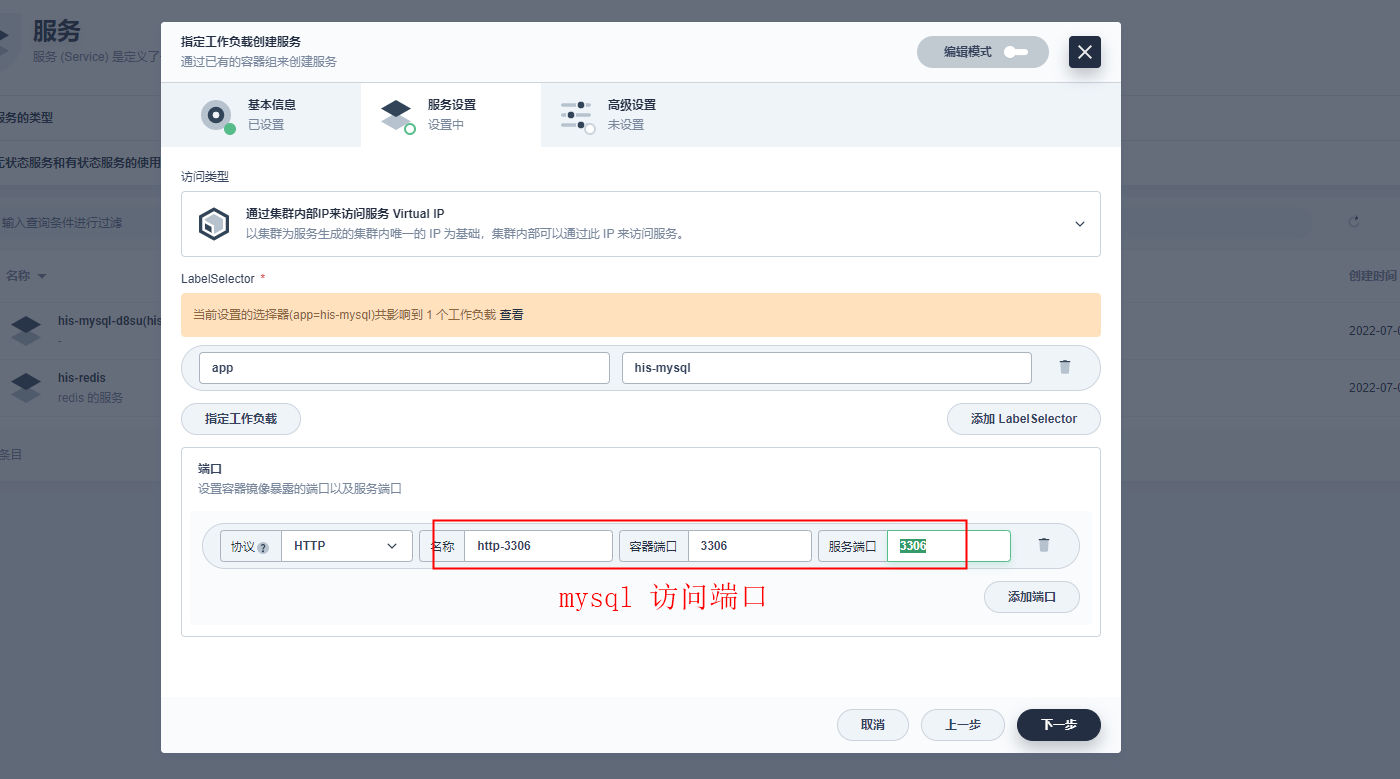
第七:
创建完成:
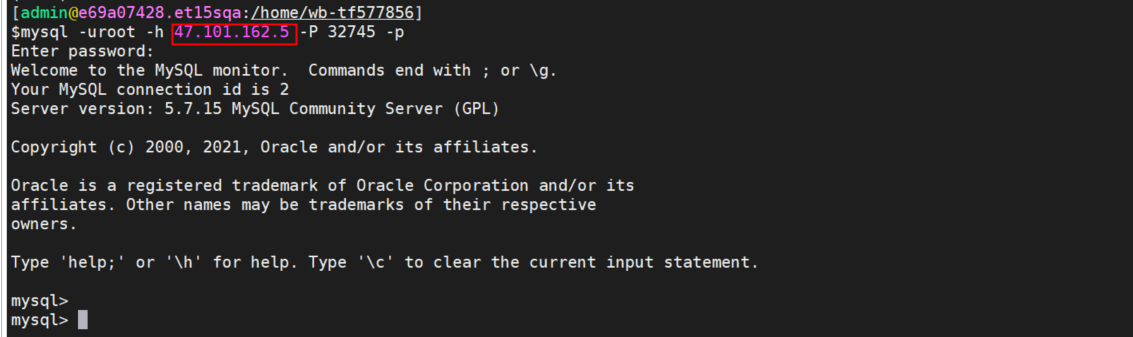
连接测试:
集群内可以用域名:

集群外使用公网IP:
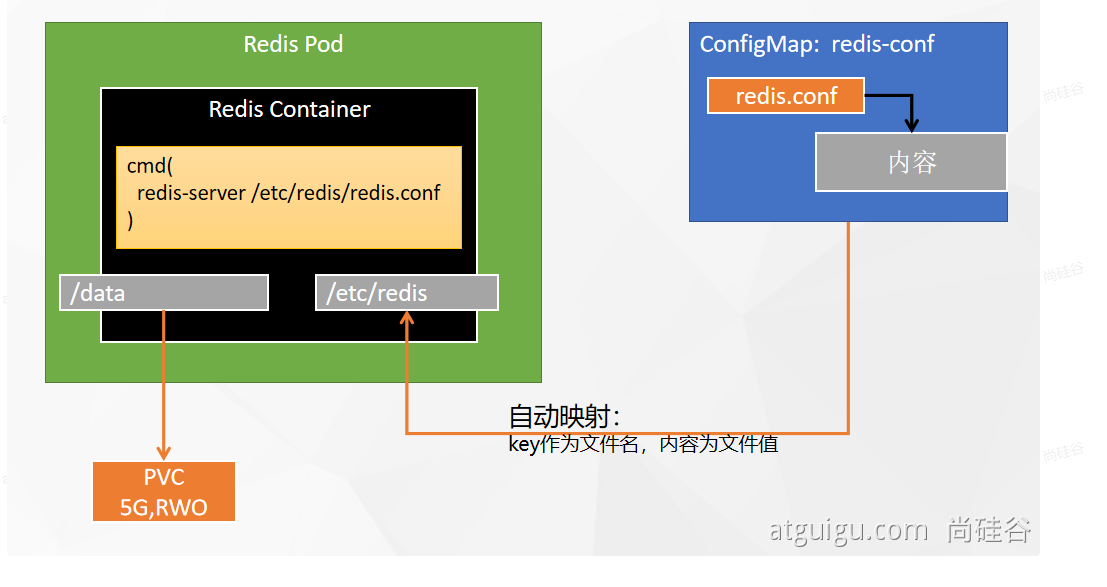
Redis部署
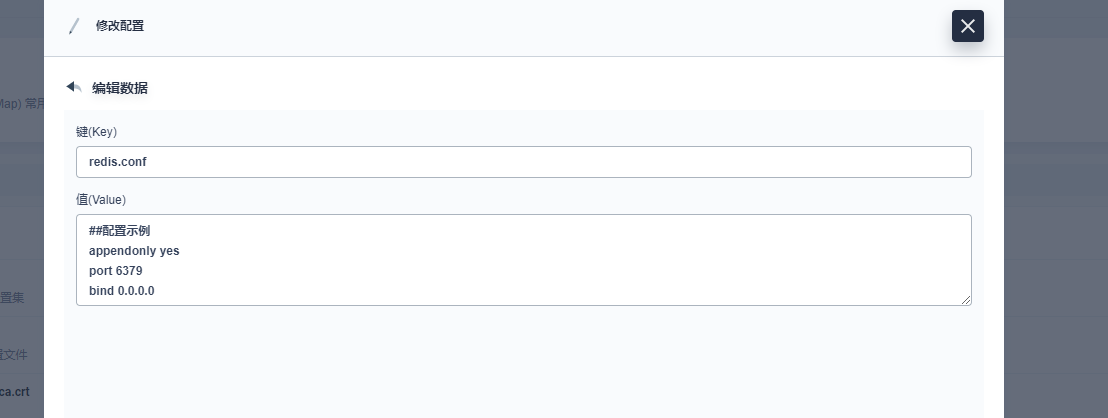
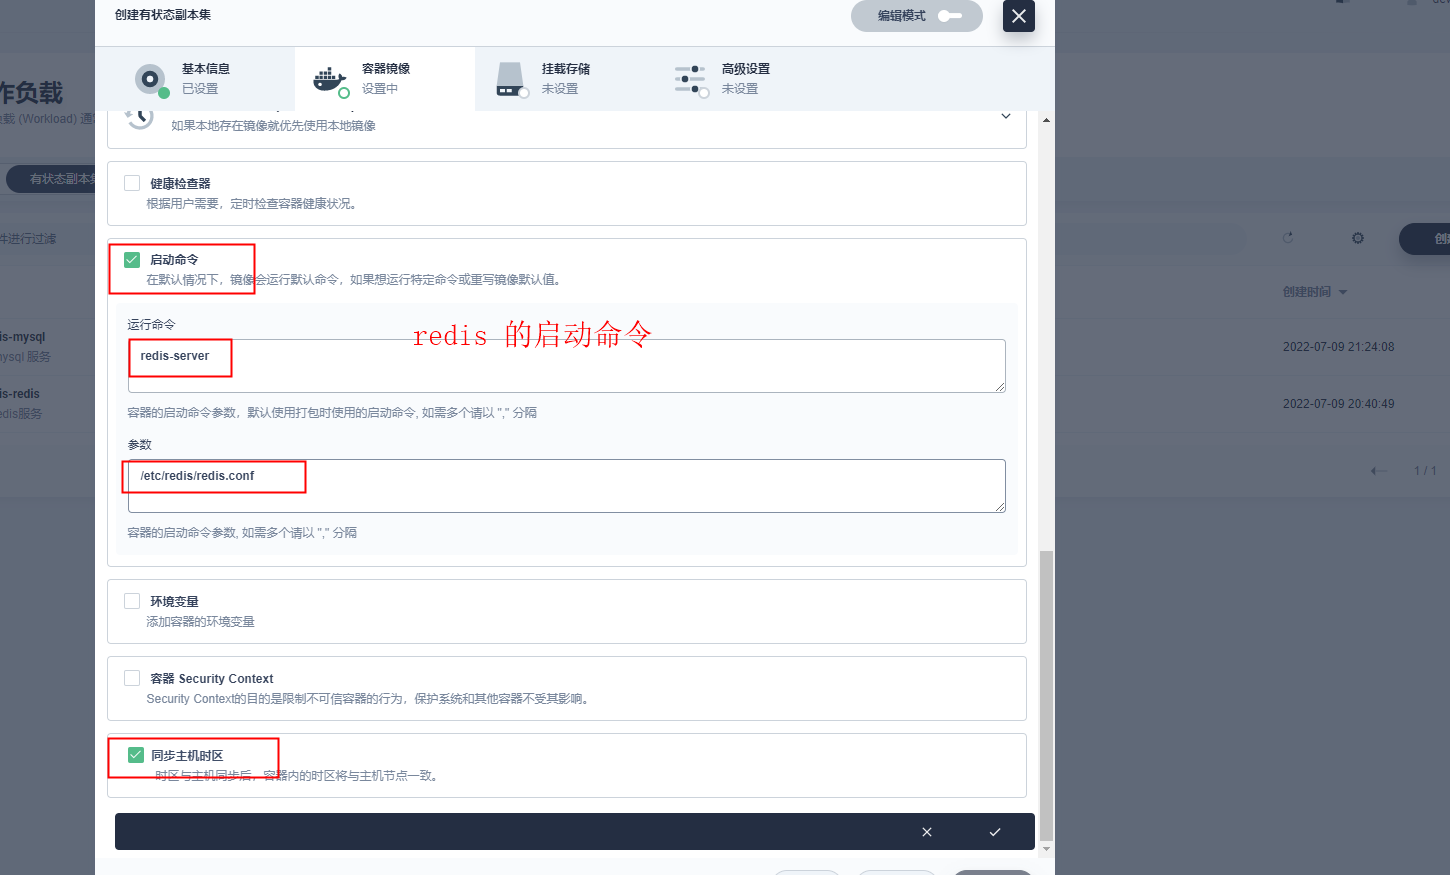
#创建配置文件
## 1、准备redis配置文件内容
mkdir -p /mydata/redis/conf && vim /mydata/redis/conf/redis.conf


##配置示例
appendonly yes
port 6379
bind 0.0.0.0


#docker启动redis
docker run -d -p 6379:6379 --restart=always \
-v /mydata/redis/conf/redis.conf:/etc/redis/redis.conf \
-v  /mydata/redis-01/data:/data \
 --name redis-01 redis:6.2.5 \
 redis-server /etc/redis/redis.conf
和上面差不多的操作不一一记录了,
第一:设置配置集
第二:创建工作负载

第三:创建挂载卷
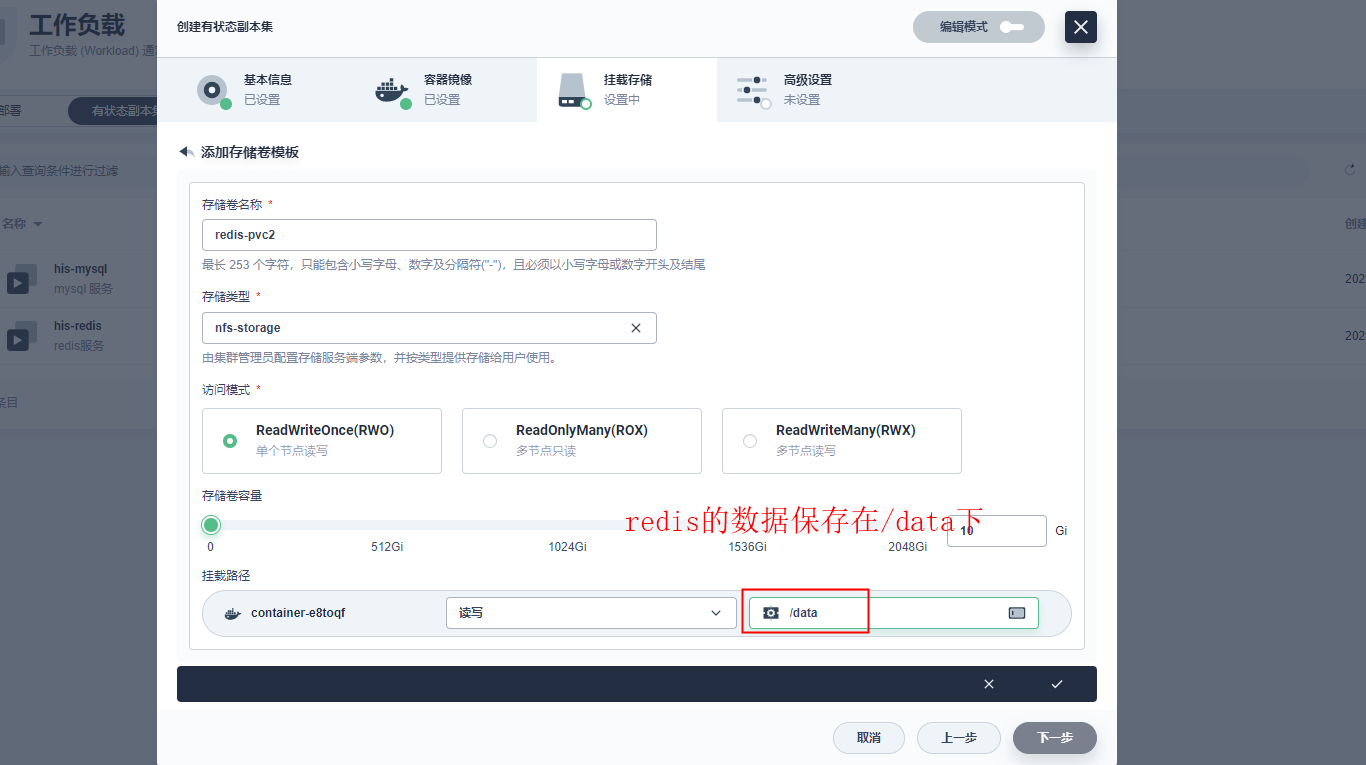

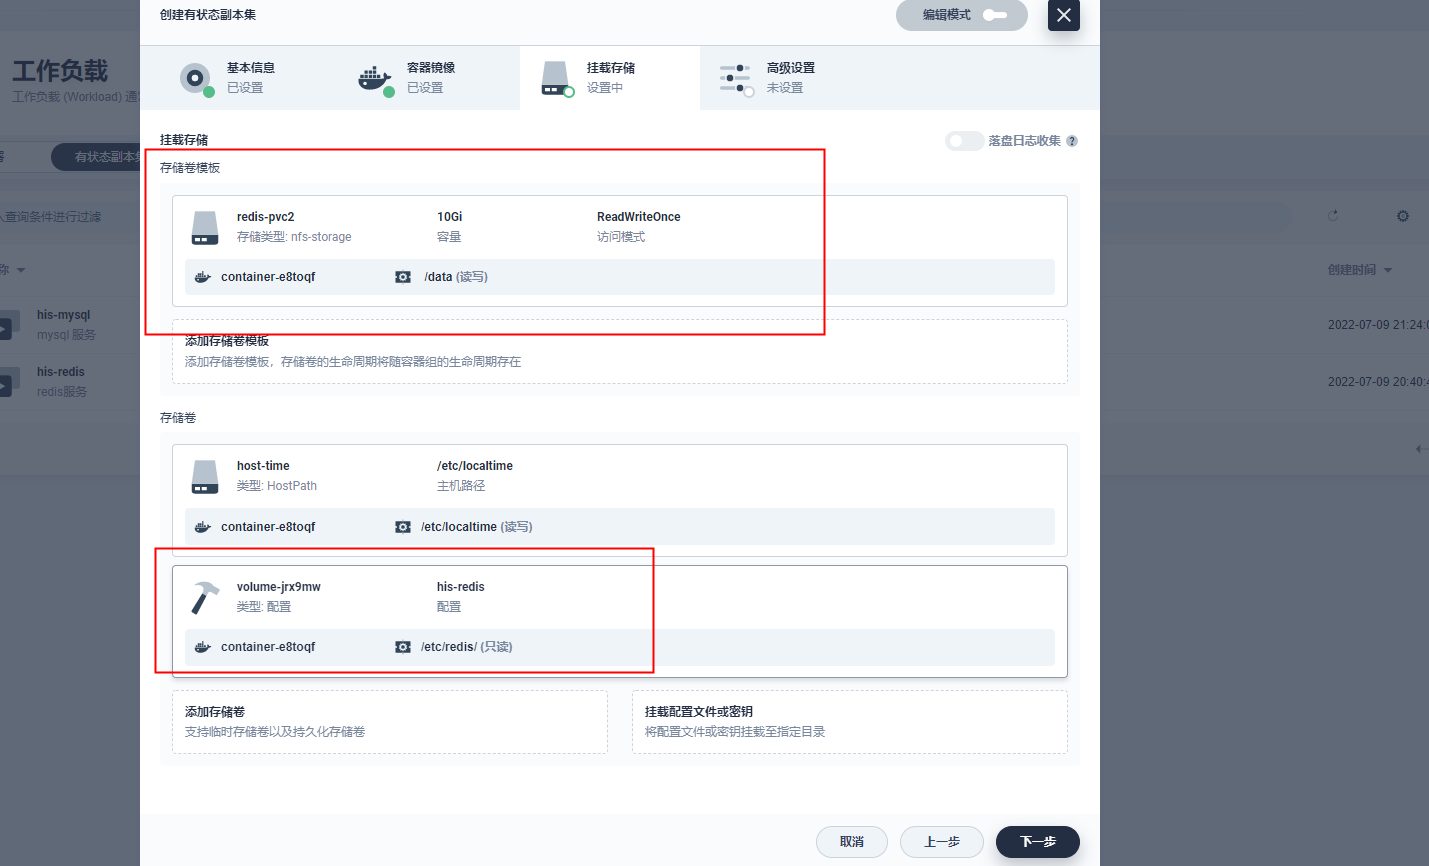
一路向下, 点击创建:
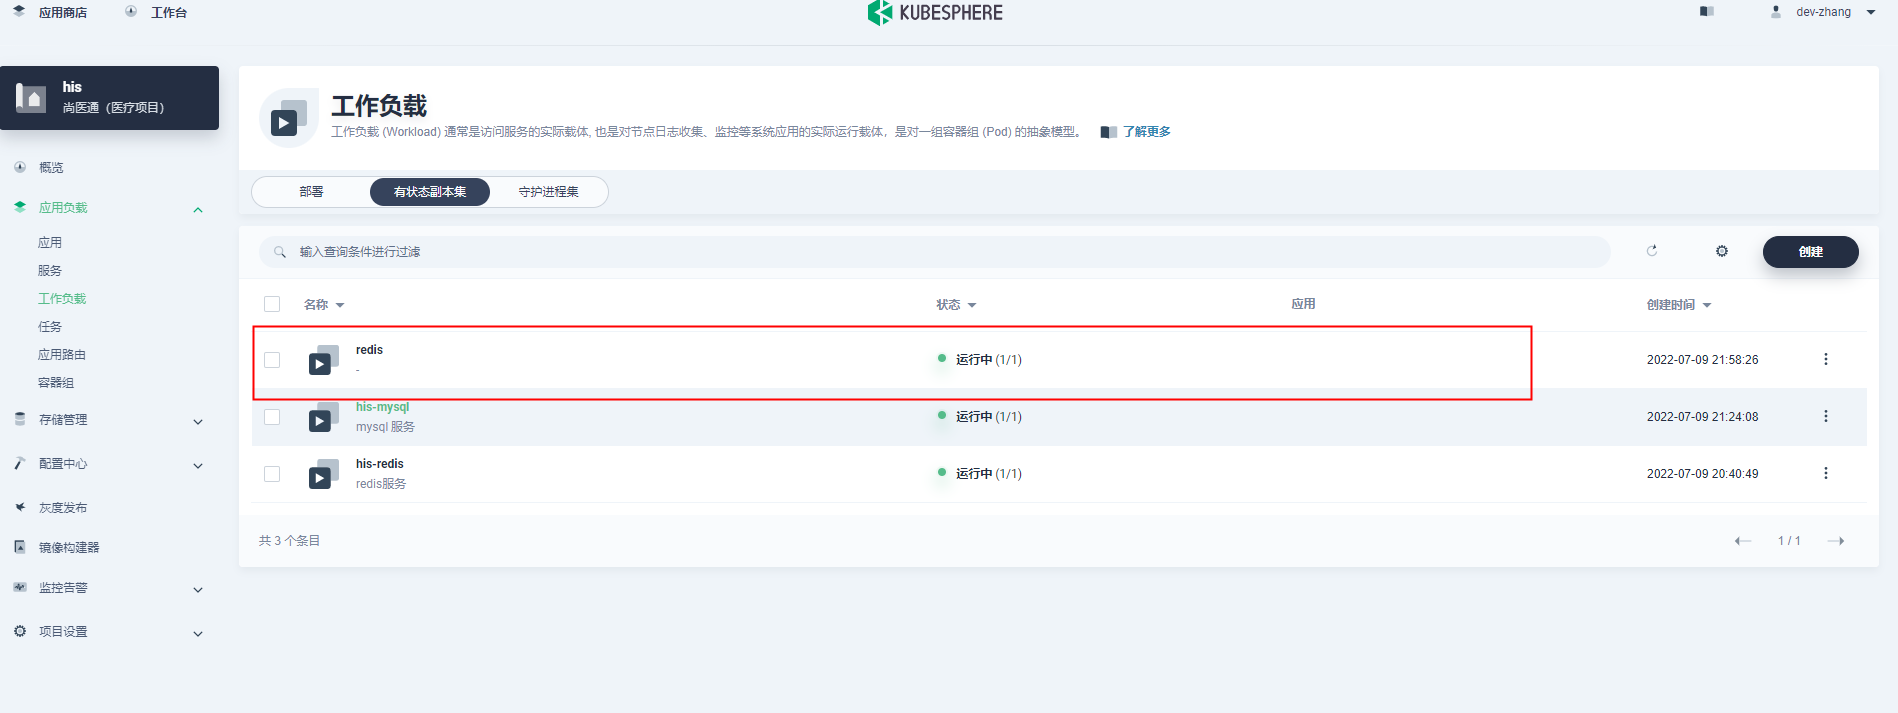
创建成功!!!
测试连接:
第一:获取IP
关于外网访问, 可以往上查看mysql 外网访问
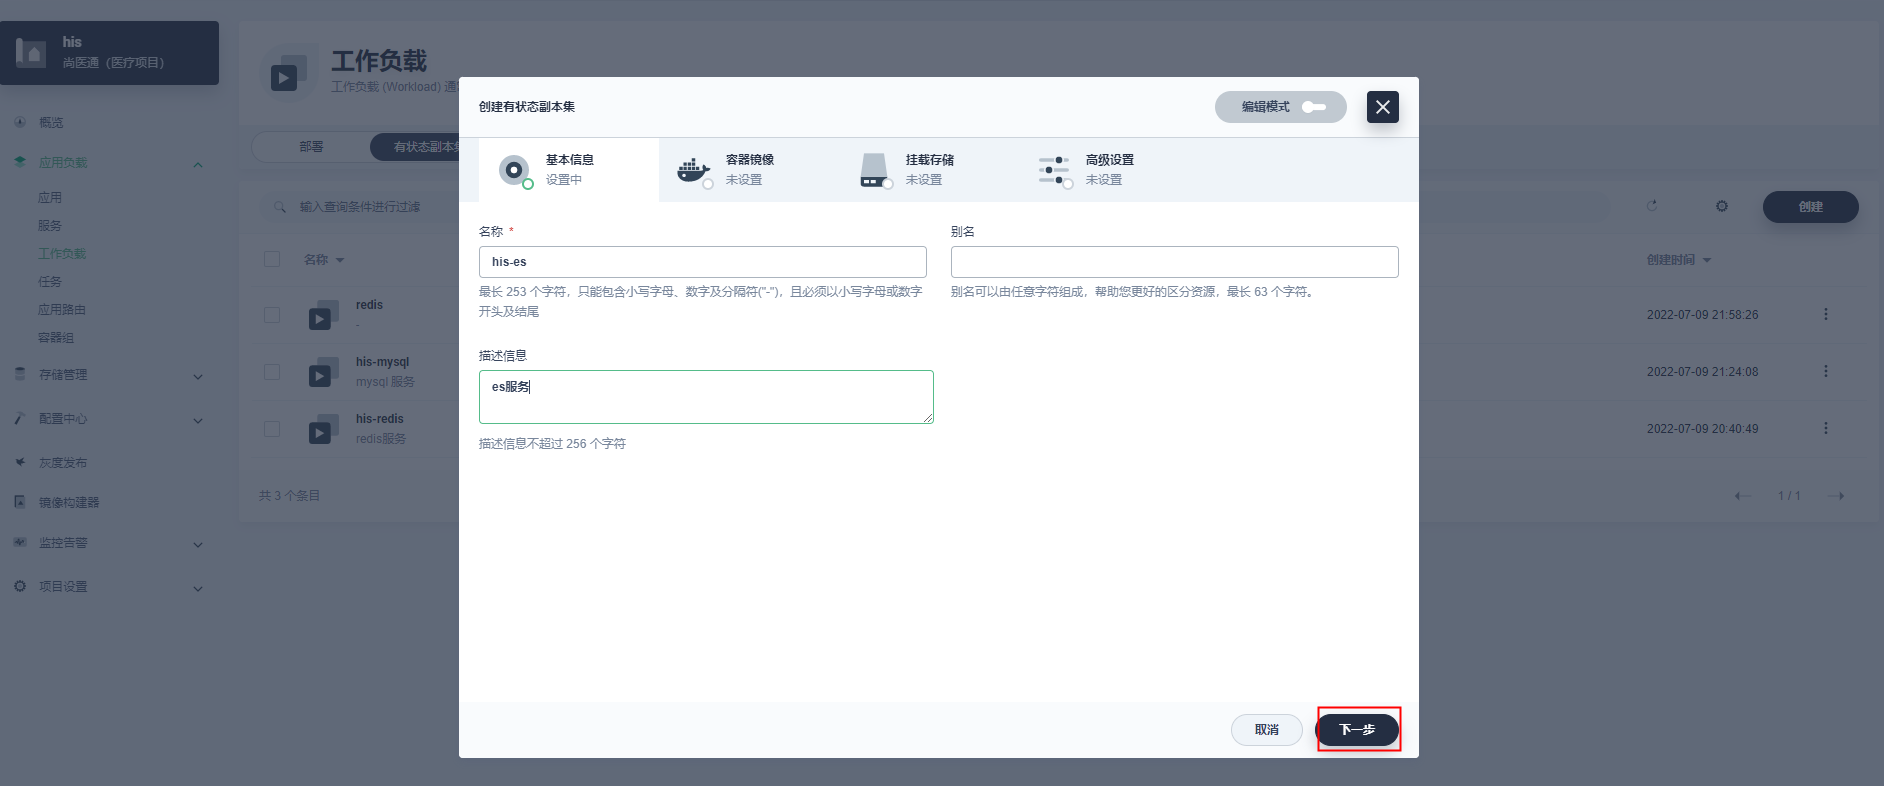
ElasticSearch(ES)部署
# 创建数据目录
mkdir -p /mydata/es-01 && chmod 777 -R /mydata
# 下载镜像
docker pull elasticsearch:7.13.4
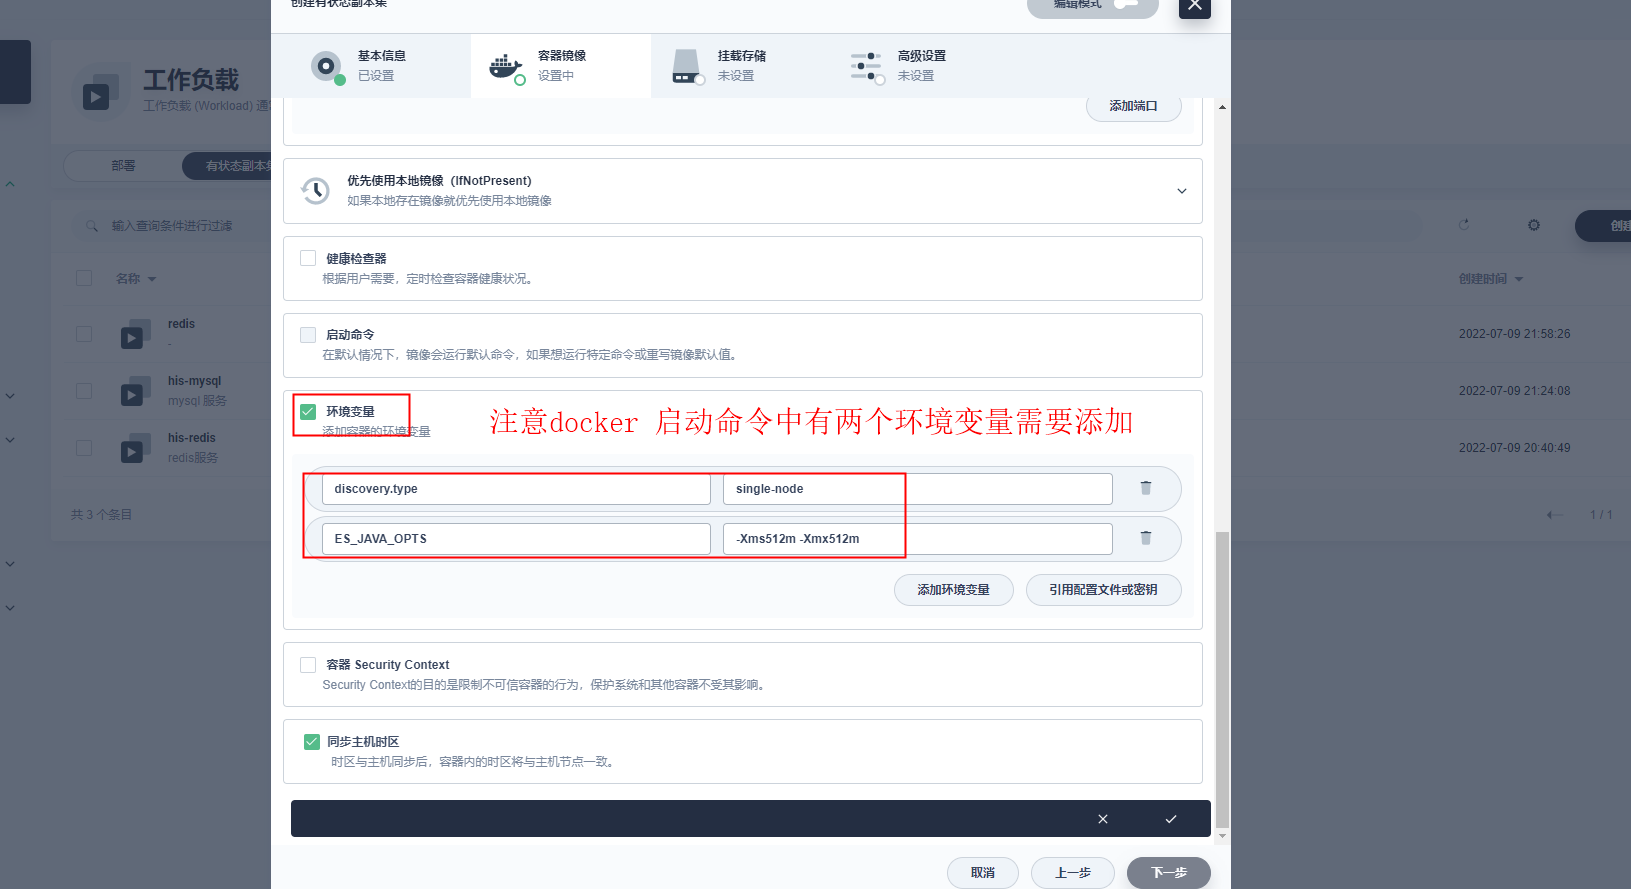
# 容器启动 docker run --restart=always -d -p 9200:9200 -p 9300:9300 \ -e "discovery.type=single-node" \ -e ES_JAVA_OPTS="-Xms512m -Xmx512m" \ -v es-config:/usr/share/elasticsearch/config \ -v /mydata/es-01/data:/usr/share/elasticsearch/data \ --name es-01 \ elasticsearch:7.13.4
详解:
- -e 单节点类型
- -e 环境变量
- -v 挂载配置, es-config 如果没有内容就会复制一份 /usr/share/elasticsearch/config 中的内容进去,而不是直接覆盖; 如果有内容,
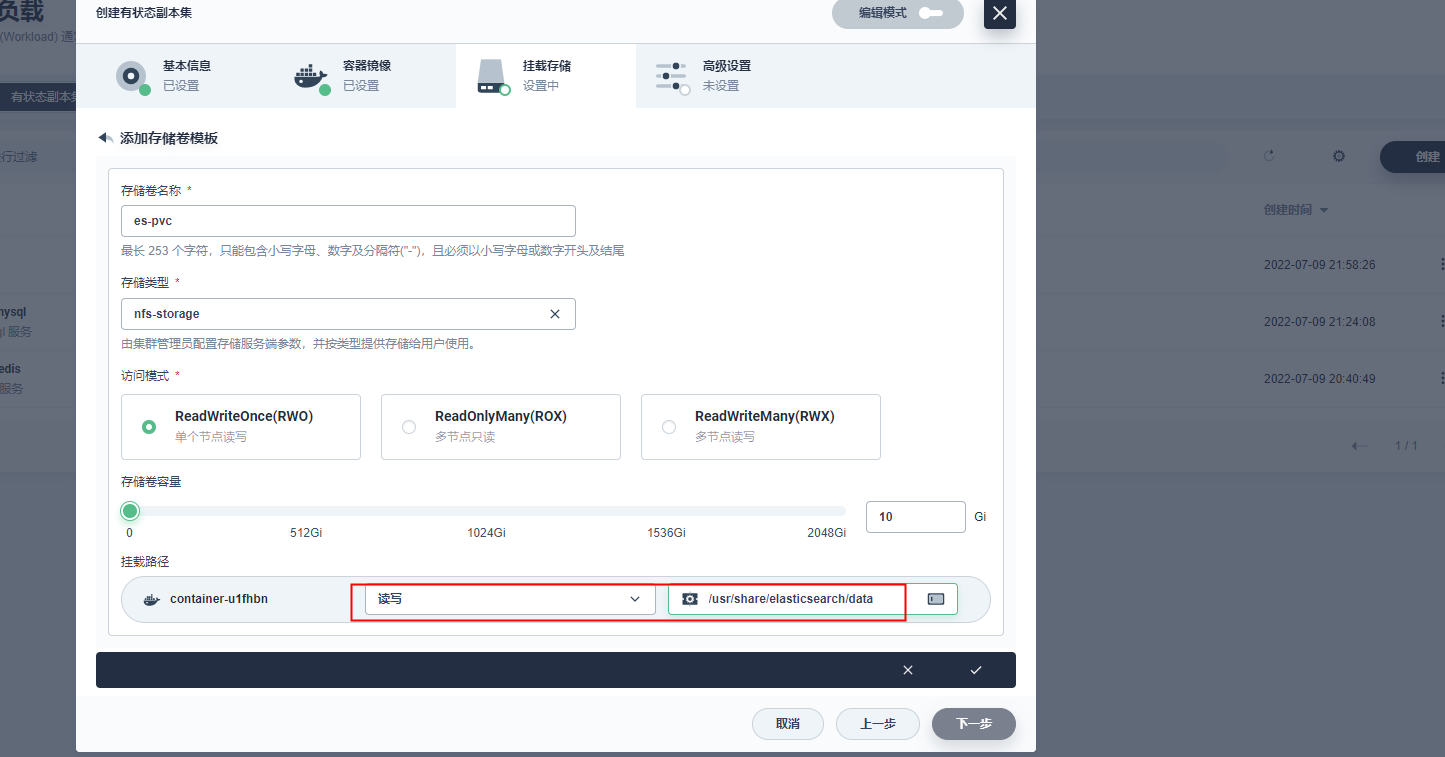
- -v 挂载数据保存目录
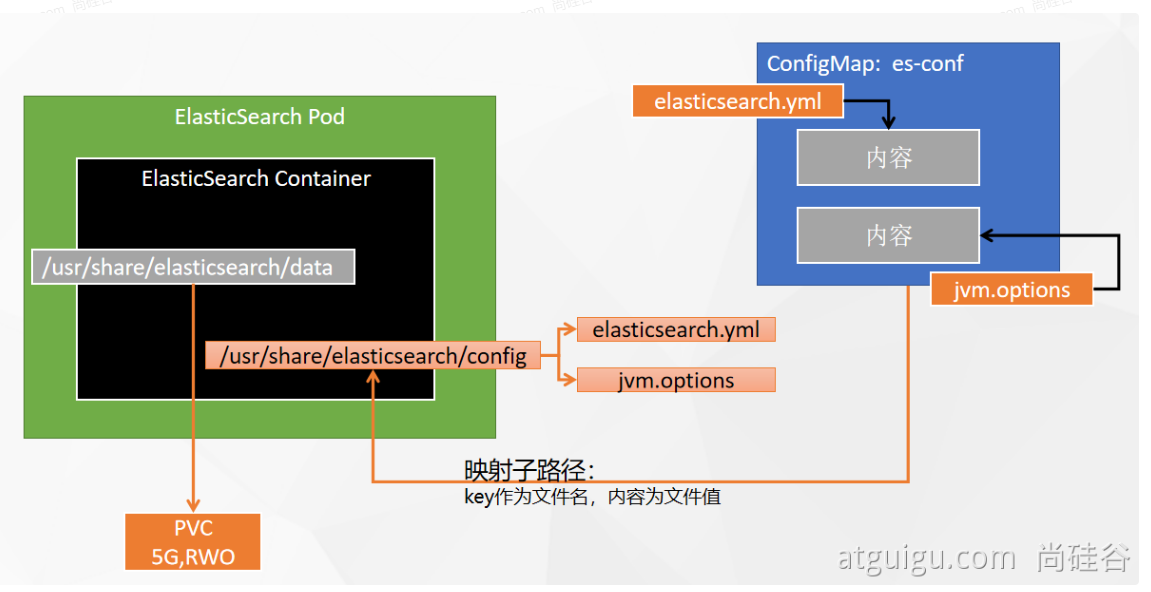
注意: 子路径挂载,配置修改后,k8s不会对其Pod内的相关配置文件进行热更新,需要自己重启Pod
第一:
进入容器获取 elasticsearch.yml 与 jvm.options
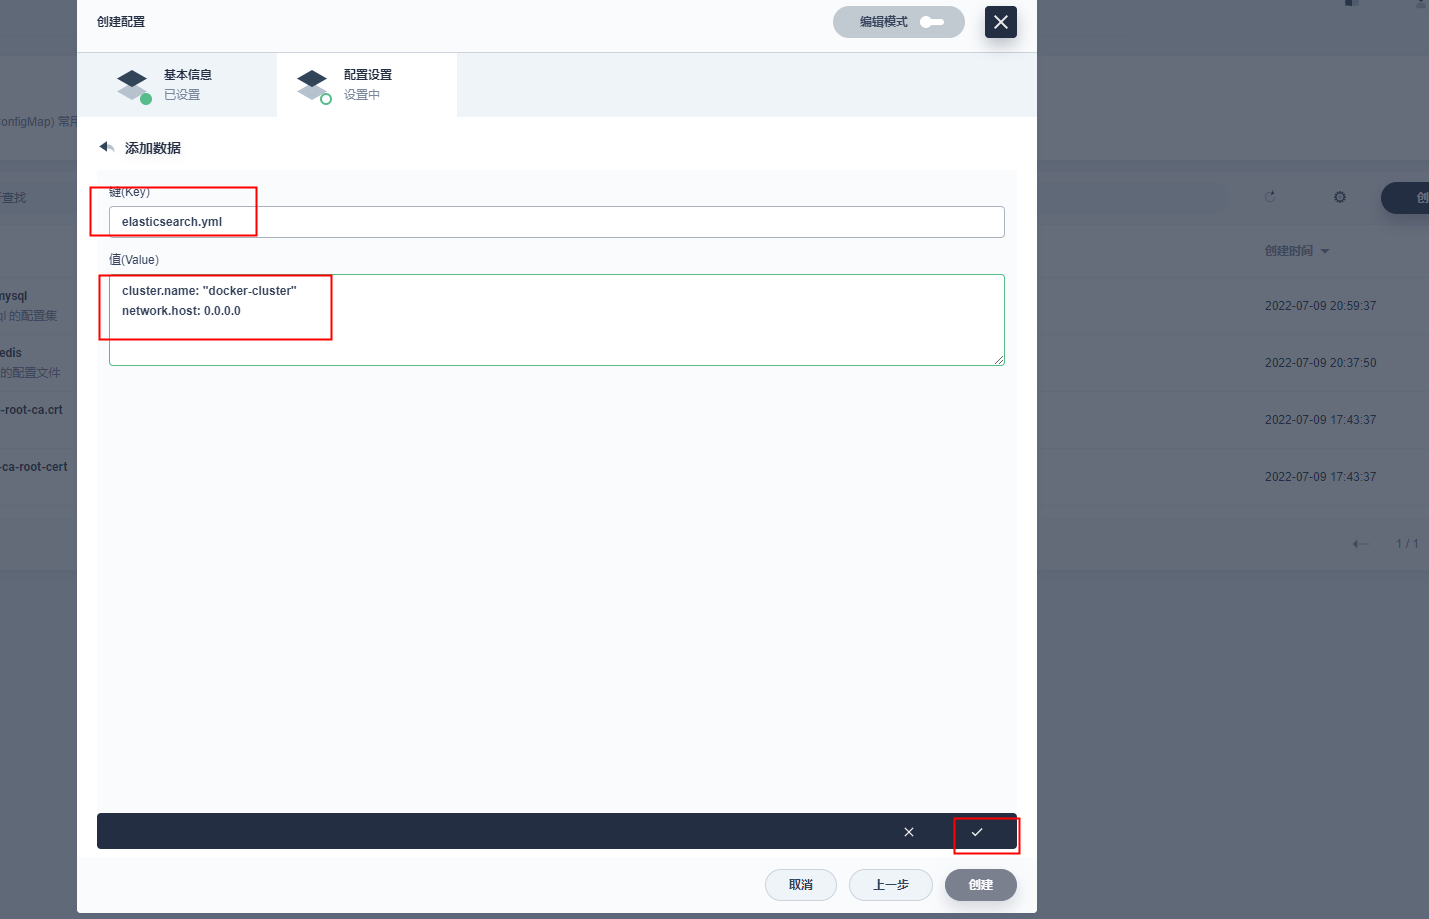
elasticsearch.yml 内容
cluster.name: "docker-cluster"
network.host: 0.0.0.0
jvm.options内容


################################################################
##
## JVM configuration
##
################################################################
##
## WARNING: DO NOT EDIT THIS FILE. If you want to override the
## JVM options in this file, or set any additional options, you
## should create one or more files in the jvm.options.d
## directory containing your adjustments.
##
## See https://www.elastic.co/guide/en/elasticsearch/reference/current/jvm-options.html
## for more information.
##
################################################################


################################################################
## IMPORTANT: JVM heap size
################################################################
##
## The heap size is automatically configured by Elasticsearch
## based on the available memory in your system and the roles
## each node is configured to fulfill. If specifying heap is
## required, it should be done through a file in jvm.options.d,
## and the min and max should be set to the same value. For
## example, to set the heap to 4 GB, create a new file in the
## jvm.options.d directory containing these lines:
##
## -Xms4g
## -Xmx4g
##
## See https://www.elastic.co/guide/en/elasticsearch/reference/current/heap-size.html
## for more information
##
################################################################


################################################################
## Expert settings
################################################################
##
## All settings below here are considered expert settings. Do
## not adjust them unless you understand what you are doing. Do
## not edit them in this file; instead, create a new file in the
## jvm.options.d directory containing your adjustments.
##
################################################################

## GC configuration
8-13:-XX:+UseConcMarkSweepGC
8-13:-XX:CMSInitiatingOccupancyFraction=75
8-13:-XX:+UseCMSInitiatingOccupancyOnly

## G1GC Configuration
# NOTE: G1 GC is only supported on JDK version 10 or later
# to use G1GC, uncomment the next two lines and update the version on the
# following three lines to your version of the JDK
# 10-13:-XX:-UseConcMarkSweepGC
# 10-13:-XX:-UseCMSInitiatingOccupancyOnly
14-:-XX:+UseG1GC

## JVM temporary directory
-Djava.io.tmpdir=${ES_TMPDIR}

## heap dumps

# generate a heap dump when an allocation from the Java heap fails; heap dumps
# are created in the working directory of the JVM unless an alternative path is
# specified
-XX:+HeapDumpOnOutOfMemoryError

# specify an alternative path for heap dumps; ensure the directory exists and
# has sufficient space
-XX:HeapDumpPath=data

# specify an alternative path for JVM fatal error logs
-XX:ErrorFile=logs/hs_err_pid%p.log

## JDK 8 GC logging
8:-XX:+PrintGCDetails
8:-XX:+PrintGCDateStamps
8:-XX:+PrintTenuringDistribution
8:-XX:+PrintGCApplicationStoppedTime
8:-Xloggc:logs/gc.log
8:-XX:+UseGCLogFileRotation
8:-XX:NumberOfGCLogFiles=32
8:-XX:GCLogFileSize=64m

# JDK 9+ GC logging
9-:-Xlog:gc*,gc+age=trace,safepoint:file=logs/gc.log:utctime,pid,tags:filecount=32,filesize=64m
第二:创建配置集

第一个 elasticsearch.yml
第二个 jvm.options

创建,完成
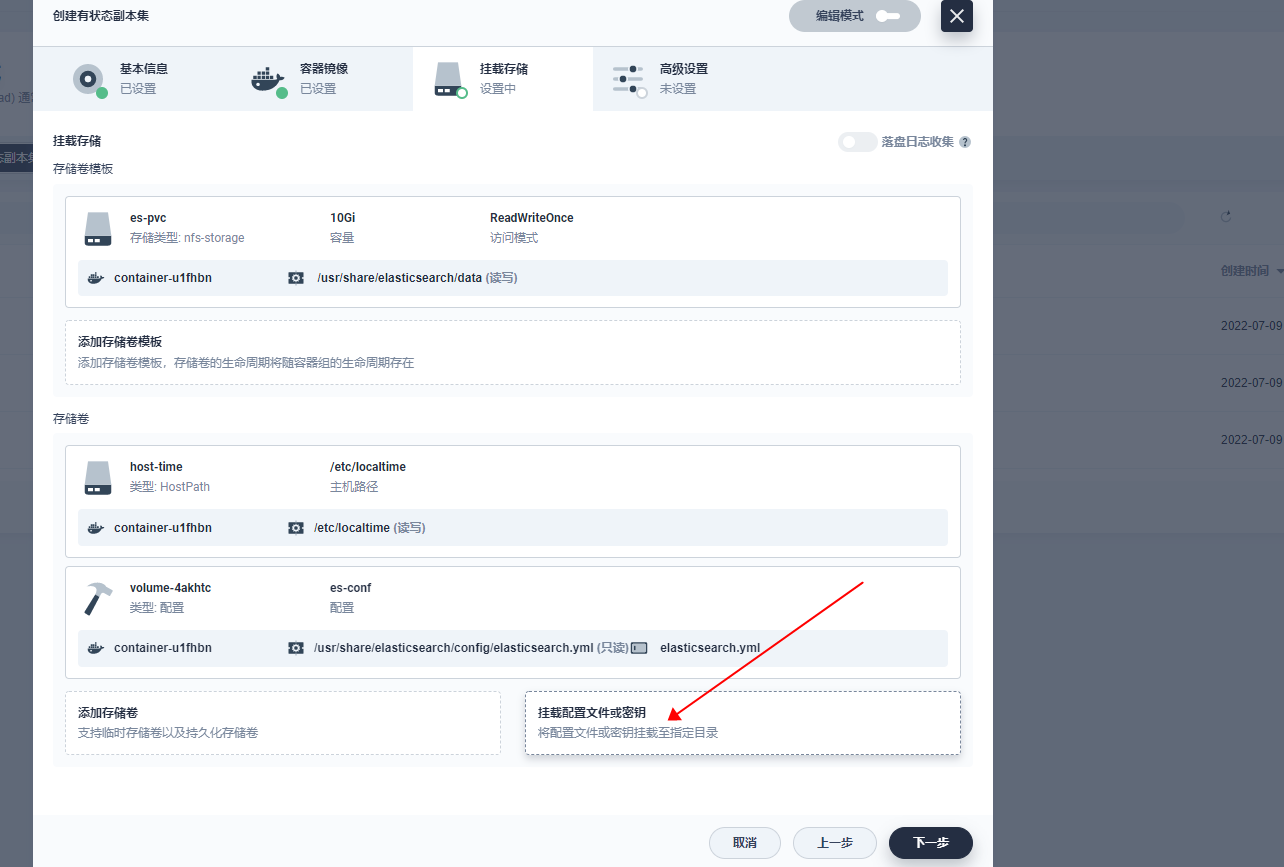
第三:(创建工作负载)
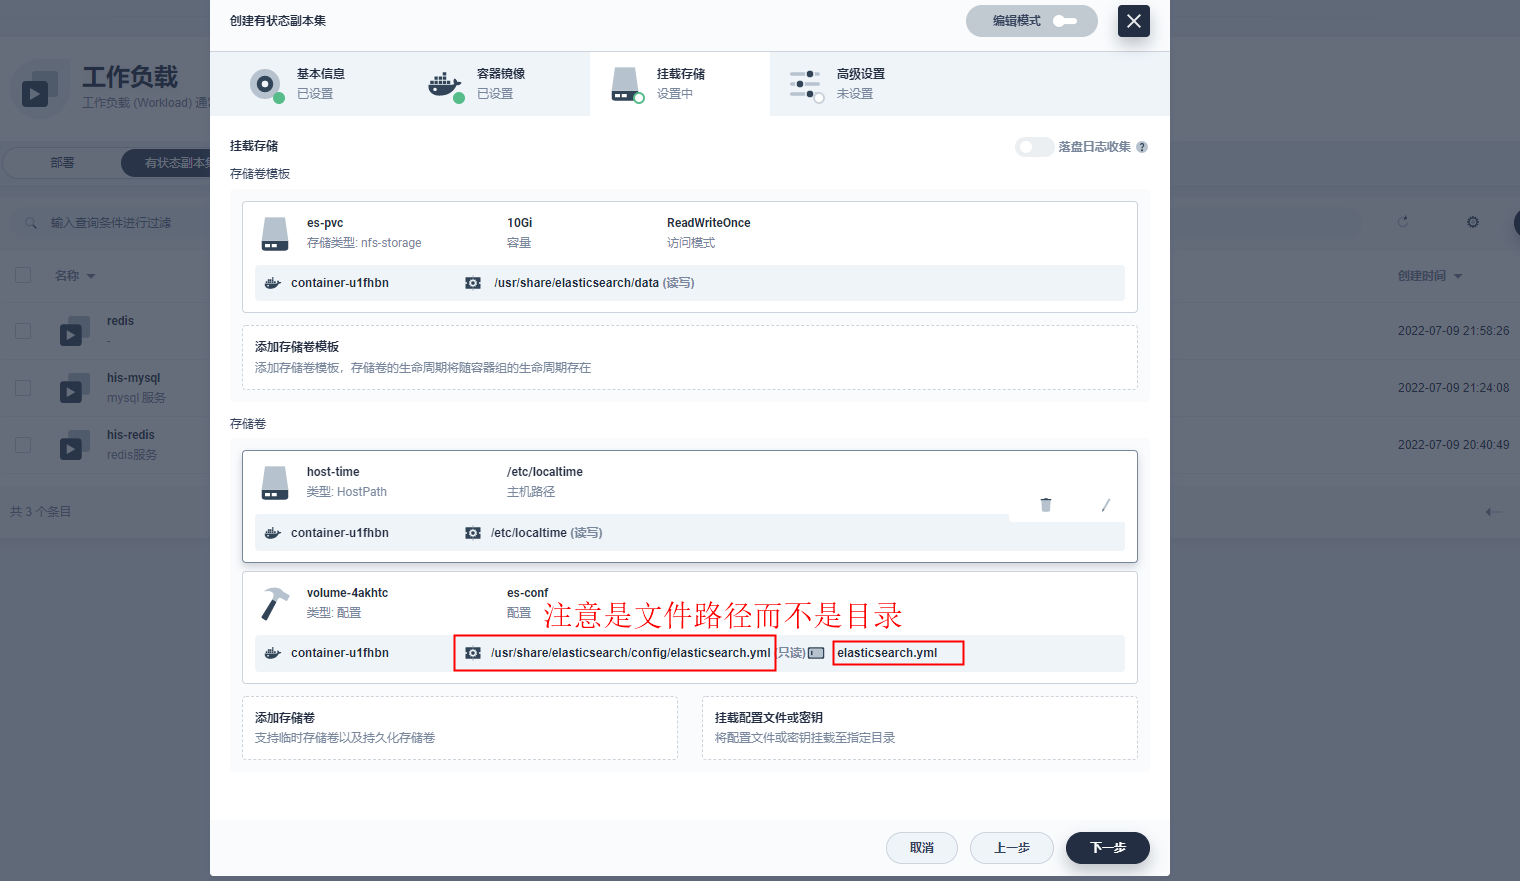
创建存储卷:
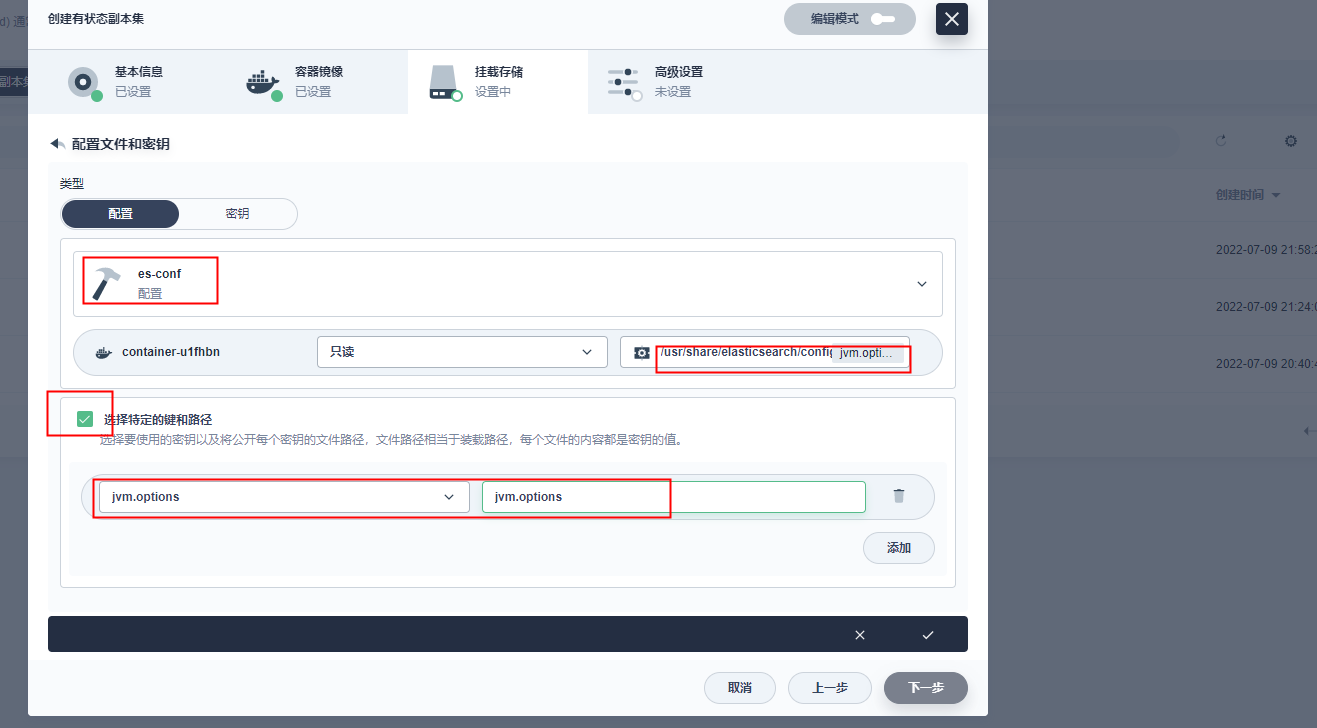
特别注意挂载配置集
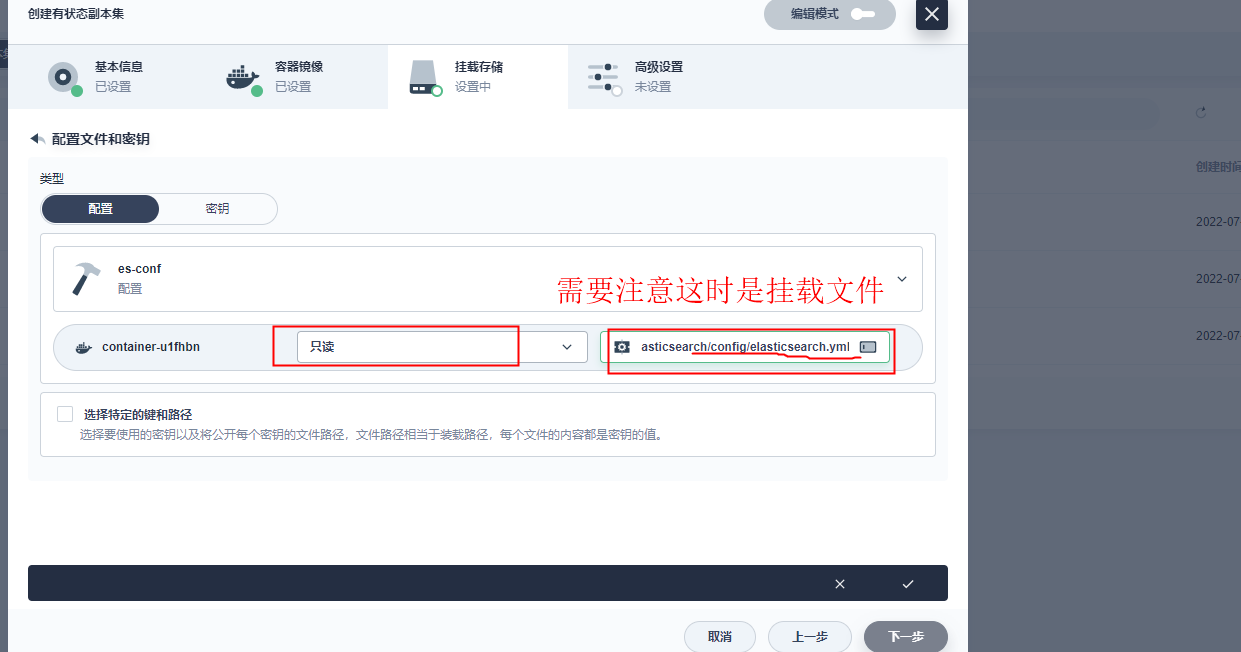
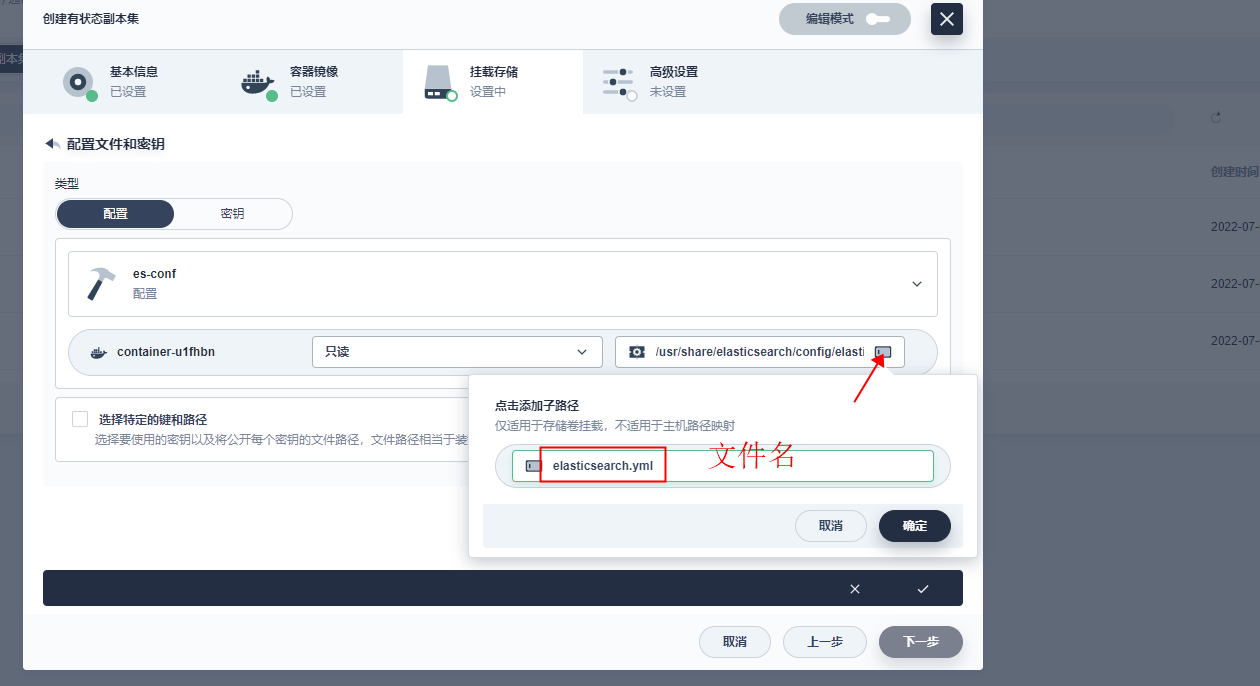
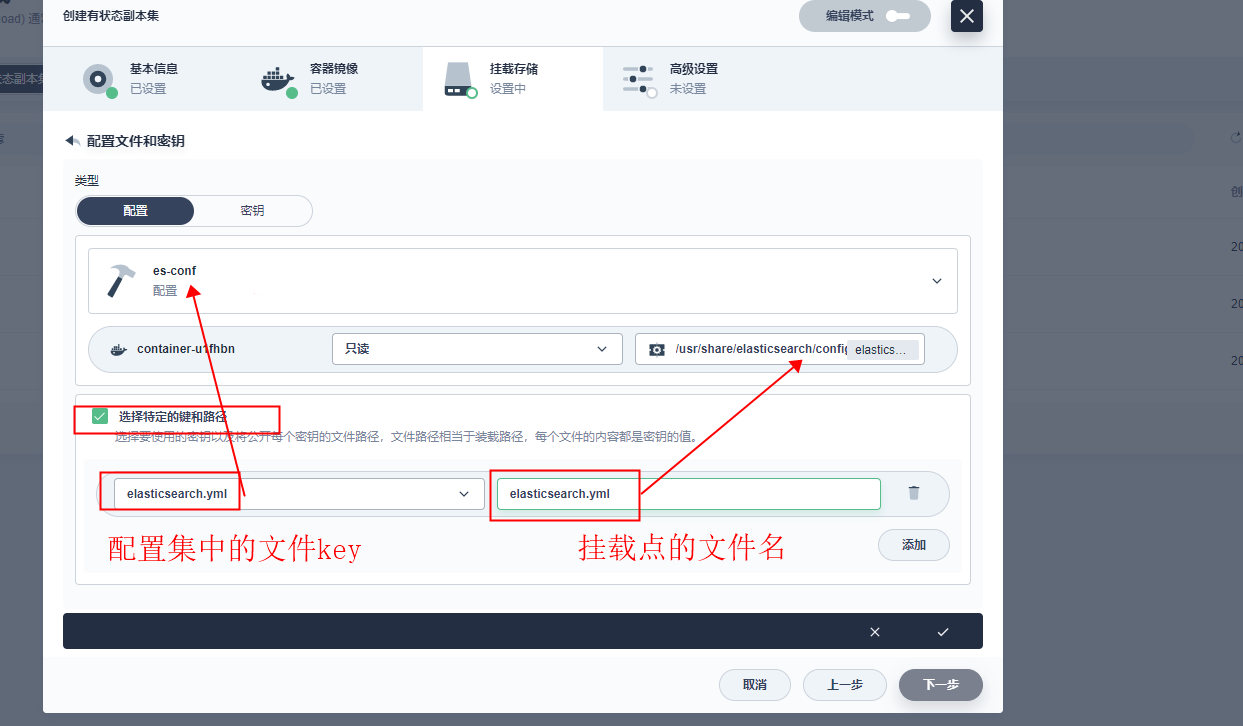
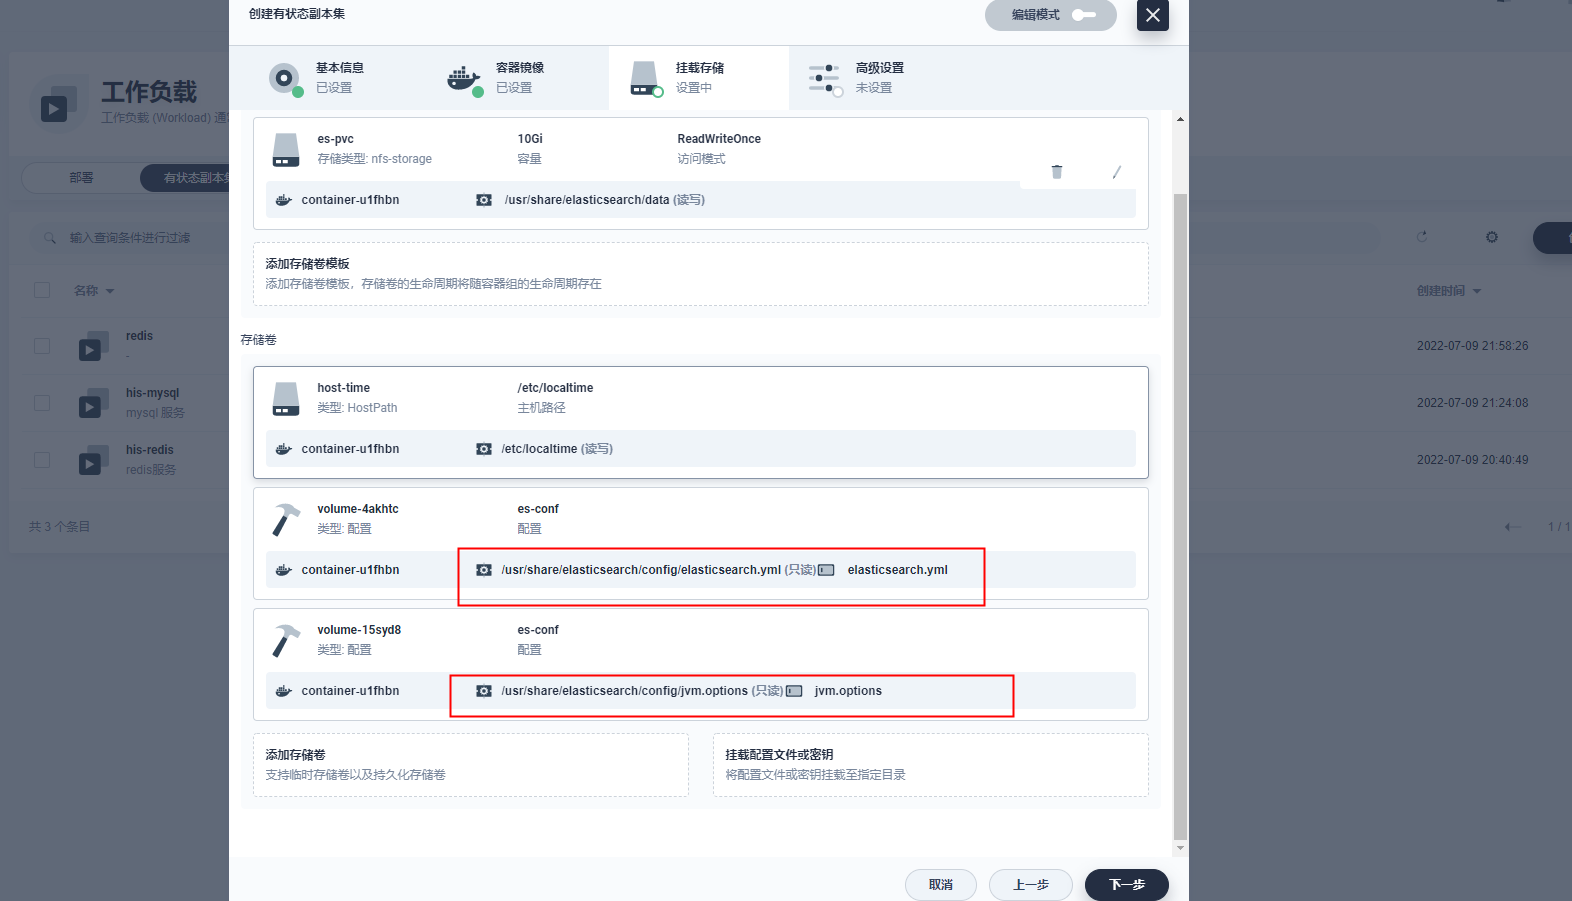
查看是否正确配置:
第二个配置文件同理:
配置完成:
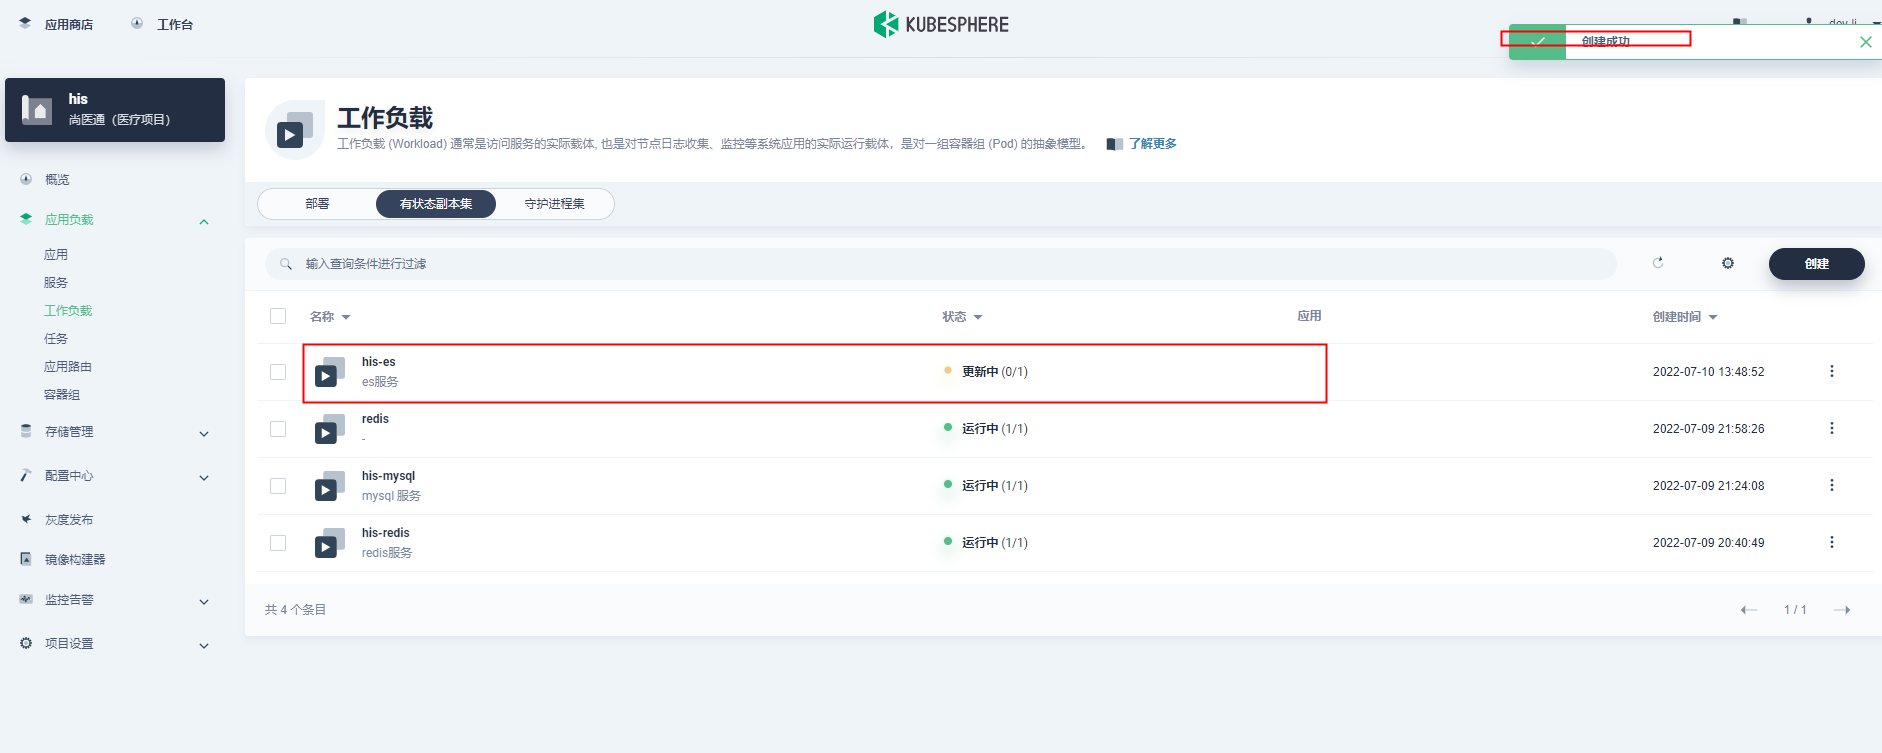
创建完成:
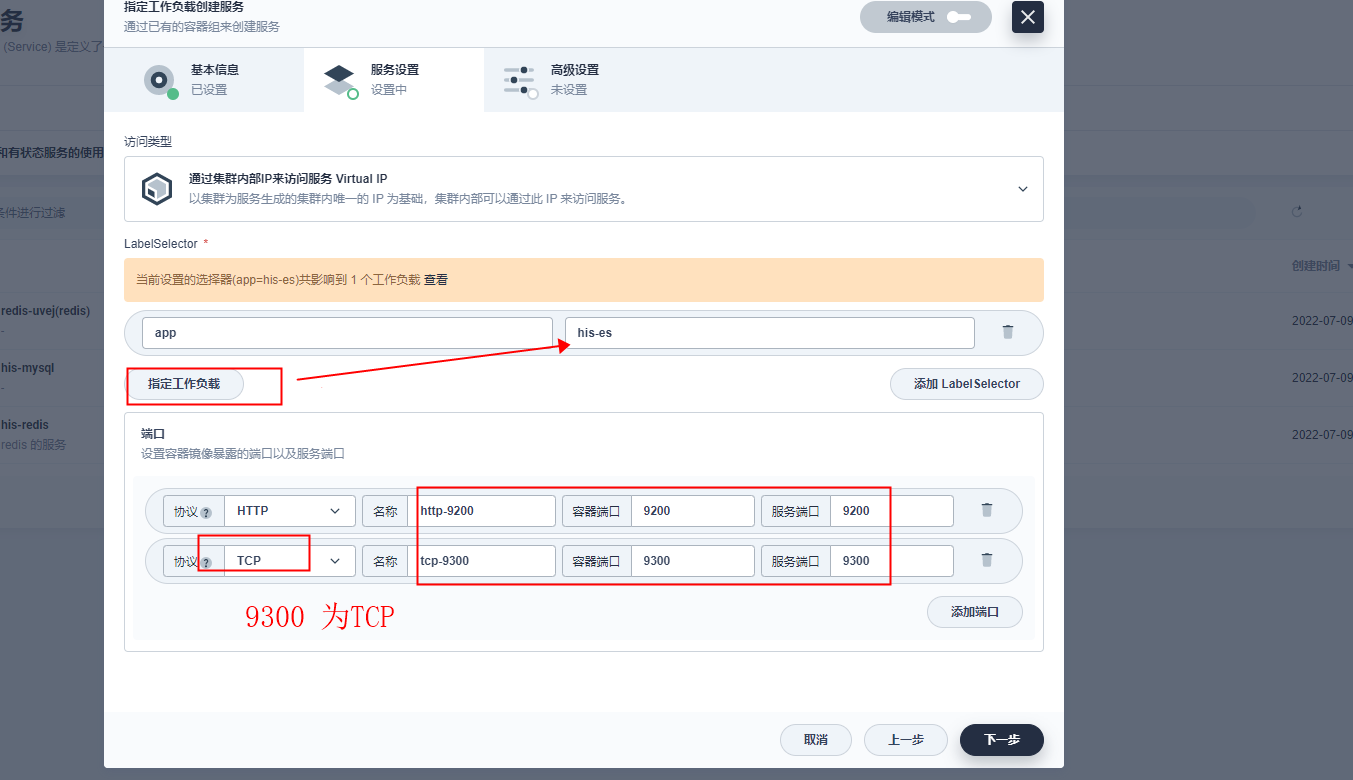
配置公网访问:
注意保留 存储卷 和 副本集


创建完成:
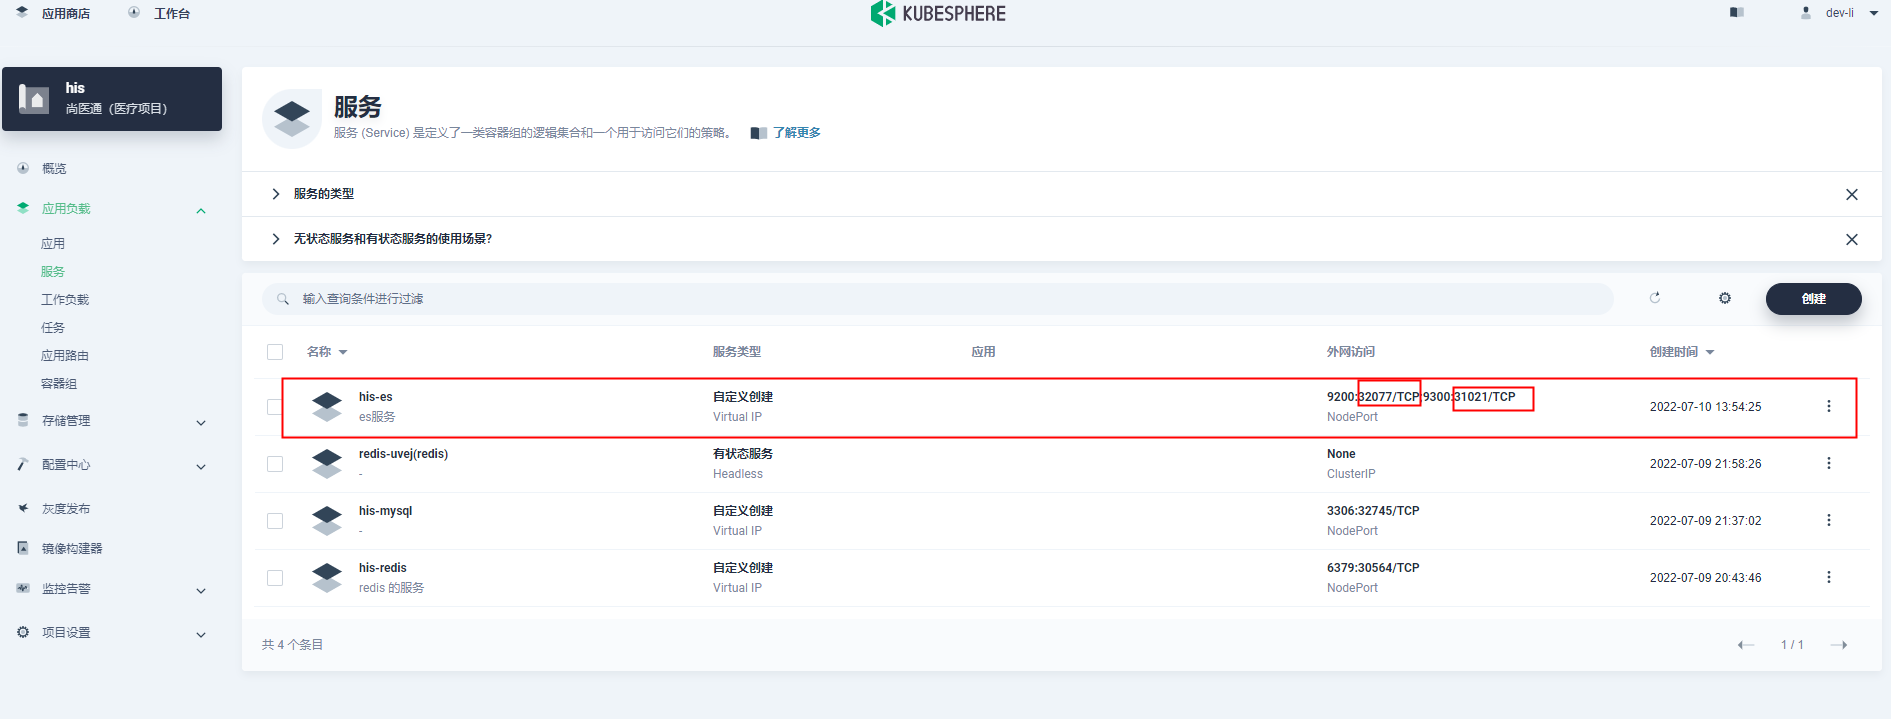
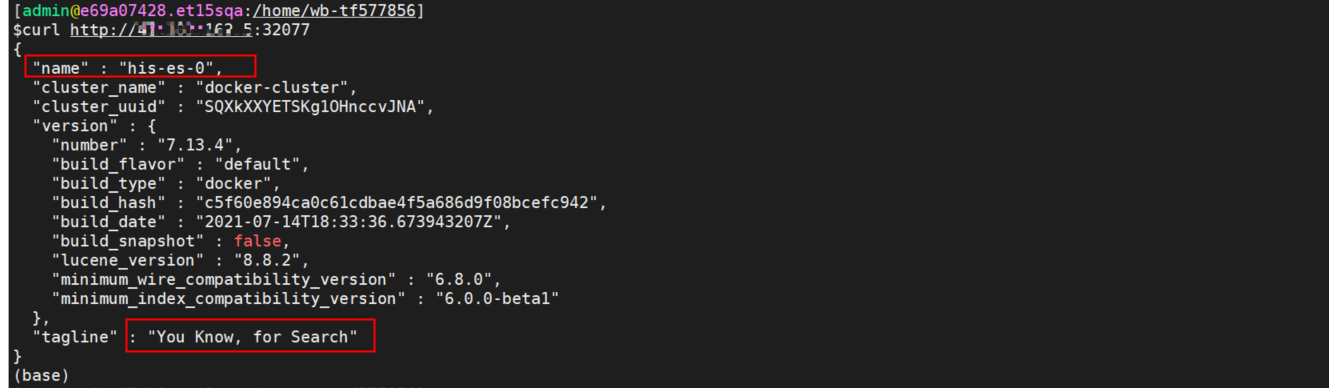
验证:(使用公网IP)
补充:
9300端口: ES节点之间通讯使用
9200端口: ES节点 和 外部 通讯使用

 浙公网安备 33010602011771号