
一、前言
本文jpg解压的关键性代码来自于一篇博客:https://blog.csdn.net/u012372584/article/details/50618739
如果想读懂jpg解压缩的代码,建议去看这篇博客,本文主要是在这篇博客的基础上进行修改,使用framebuffer显示jpg图片。
二、代码
  1 /**
  2  * filename: jpg.c
  3  * author: Suzkfly
  4  * date: 2021-07-28
  5  * platform: S3C6410或Ubuntu
  6  * 注意事项:
  7  *      1、需要在当前目录下准备两张jpg图片,分别命名为apple.jpg和orange.jpg。
  8  *      2、编译时需要加 -ljpeg 参数
  9  */
 10 #include <stdlib.h>
 11 #include <stdio.h>
 12 #include <jpeglib.h>
 13 #include <sys/types.h>
 14 #include <sys/stat.h>
 15 #include <fcntl.h>
 16 #include <linux/fb.h>
 17 #include <sys/mman.h>
 18 #include <time.h>
 19 #include <string.h>
 20 #include <errno.h>
 21 #include <sys/ioctl.h>
 22
 23 /**< \brief 根据实际情况修改,此处为unsigned short是565的屏,根据程序打印出的
 24     bits_per_pixel的值可以判断出输出格式是565还是888 */
 25 //typedef unsigned int color_t;
 26 typedef unsigned short color_t;
 27 /**< \brief 定义每个像素点对应的位数,如果是565的屏则为16,如果是888的屏则为32 */
 28 //#define BITS_PER_PIXEL    32
 29 #define BITS_PER_PIXEL    16
 30
 31
 32 static struct fb_var_screeninfo __g_vinfo;
 33 static color_t *__gp_frame = NULL;
 34
 35 /* framebuffer初始化 */
 36 int framebuffer_init (void)
 37 {
 38     int fd = 0;
 39
 40     fd = open("/dev/fb0", O_RDWR);
 41     if (fd == -1) {
 42         perror("fail to open /dev/fb0\n");
 43         return -1;
 44     }
 45
 46     ioctl(fd, FBIOGET_VSCREENINFO, &__g_vinfo);                   /* 获取显示信息 */
 47     printf("bits_per_pixel = %d\n", __g_vinfo.bits_per_pixel);    /* 一个像素点对应的位数,如果值为16则为565格式输出,如果值为32则为888格式输出 */
 48     printf("xres_virtual = %d\n", __g_vinfo.xres_virtual);        /* 虚拟x轴像素点数 */
 49     printf("yres_virtual = %d\n", __g_vinfo.yres_virtual);        /* 虚拟y轴像素点数 */
 50     printf("xres = %d\n", __g_vinfo.xres);                        /* x轴像素点数 */
 51     printf("yres = %d\n", __g_vinfo.yres);                        /* y轴像素点数 */
 52
 53     __gp_frame = mmap(NULL,                              /* 映射区的开始地址,为NULL表示由系统决定映射区的起始地址 */
 54                       __g_vinfo.xres_virtual * __g_vinfo.yres_virtual * __g_vinfo.bits_per_pixel / 8,    /* 映射区大小 */
 55                       PROT_WRITE | PROT_READ,            /* 内存保护标志(可读可写) */
 56                       MAP_SHARED,                        /* 映射对象类型(与其他进程共享) */
 57                       fd,                                /* 有效的文件描述符 */
 58                       0);                                /* 被映射内容的偏移量 */
 59     if (__gp_frame == NULL) {
 60         perror("fail to mmap\n");
 61         return -1;
 62     }
 63
 64     return 0;
 65 }
 66
 67 /* 显示JPG图片 */
 68 int show_jpg(unsigned int x, unsigned int y, const char *name)
 69 {
 70     int i;
 71     color_t col;
 72     struct jpeg_decompress_struct cinfo;
 73     struct jpeg_error_mgr jerr;
 74     JSAMPARRAY buffer;
 75     int row_stride;
 76     FILE * infile;
 77     int line;
 78
 79     //绑定标准错误处理结构
 80     cinfo.err = jpeg_std_error(&jerr);
 81
 82     //初始化JPEG对象
 83     jpeg_create_decompress(&cinfo);
 84
 85     //指定图像文件
 86     if ((infile = fopen(name, "rb")) == NULL)
 87     {
 88         perror("fopen fail");
 89         return -1;
 90     }
 91     jpeg_stdio_src(&cinfo, infile);
 92
 93     //读取图像信息
 94     jpeg_read_header(&cinfo, TRUE);
 95     printf("cinfo.image_width = %d\n", cinfo.image_width);
 96     printf("cinfo.image_height = %d\n", cinfo.image_height);
 97     printf("cinfo.jpeg_color_space = %d\n", cinfo.jpeg_color_space);
 98     printf("cinfo.num_components = %d\n", cinfo.num_components);
 99
100
101     //设定解压缩参数,图像的长宽变为原来的 (scale_num/scale_denom),只能缩小不能放大
102     //cinfo.scale_num = 1;
103     //cinfo.scale_denom = 2;
104
105     //开始解压缩图像
106     printf("-------------\n");
107     jpeg_start_decompress(&cinfo);
108     //本程序功能是应用GDI+在客户区绘制图像
109
110     //分配缓冲区空间
111     row_stride = cinfo.output_width * cinfo.output_components;
112     printf("width  = %d\n", cinfo.output_width);
113     printf("height  = %d\n", cinfo.output_height);
114     buffer = (*cinfo.mem->alloc_sarray)((j_common_ptr) &cinfo, JPOOL_IMAGE, row_stride, 1);
115
116     //读取数据
117     while (cinfo.output_scanline < cinfo.output_height)
118     {
119         jpeg_read_scanlines(&cinfo, buffer, 1);  /* 按行读取,一次读1行 */
120         //output_scanline是从1开始,所以需要减1
121         line = cinfo.output_scanline - 1 + y;
122         for(i = 0; i < cinfo.output_width; i++) {
123 #if (BITS_PER_PIXEL == 16)
124             /* 由于jpg图片的颜色深度是24位,适用于888的屏,但如果一定要在565的屏
125                上显示,则取红色的高5位,绿色的高6位和蓝色的高5位,拼成16位的数据
126                进行显示。这样做并不是最好的办法,更好的方法是将需要丢失的部分数
127                据进行进位或舍去。 */
128             char b, g, r;
129             r = (buffer[0][i*3] >> 3);
130             g = ((buffer[0][i*3+1] >> 2));
131             b = (buffer[0][i*3+2] >> 3);
132
133             col = (r << 11) | (g << 5) | b;
134 #elif (BITS_PER_PIXEL == 32)
135             col = (buffer[0][i*3] << 16) | (buffer[0][i*3+1] << 8) | buffer[0][i*3+2];
136 #endif
137             *(__gp_frame + line * __g_vinfo.xres + i + x) = col; //如果在Ubuntu下运行,则应该使用xres_virtual
138         }
139         if (line >= __g_vinfo.yres) { /* 如果行数大于等于y的像素点,说明已经显示到最后一行了 */
140             break;
141         }
142     }
143
144     //结束解压缩操作
145     (void)jpeg_finish_decompress(&cinfo);
146
147     //释放资源
148     jpeg_destroy_decompress(&cinfo);
149     fclose(infile);
150
151     return 0;
152 }
153
154 int main(void)
155 {
156     framebuffer_init();
157     show_jpg(0, 0, "apple.jpg");
158     show_jpg(200, 100, "orange.jpg");
159
160     return 0;
161 }
显示效果:
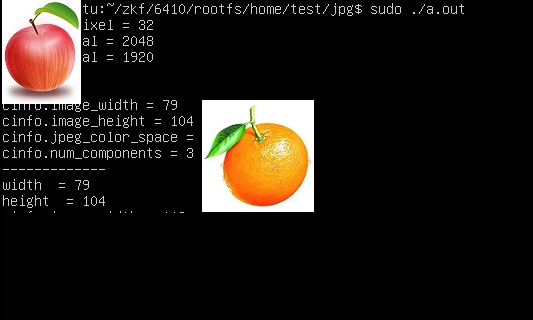
注:苹果和橘子的图片需要自己准备。
三、问题解答
1、编译时报错,如下图:
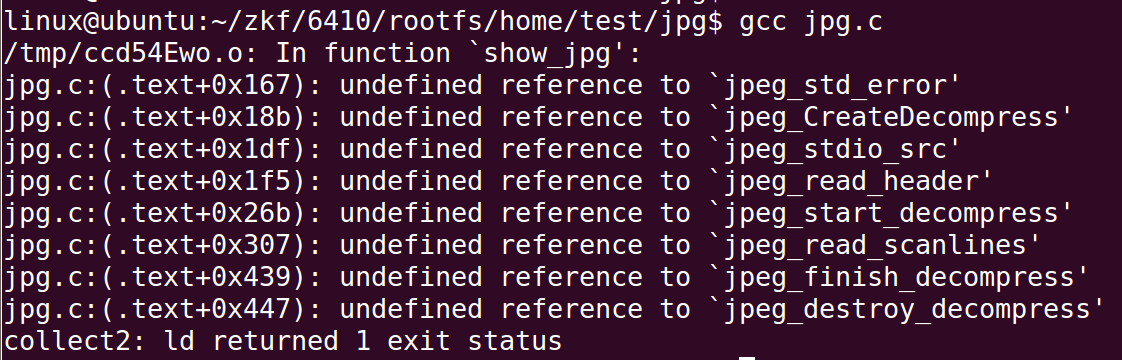
原因是没有加-ljpeg编译,需要使用gcc jpg.c -ljpeg或arm-none-linux-gnueabi-gcc jpg.c -ljpeg编译
2. 在S3C2416平台上运行时报错:
error while loading shared libraries: libjpeg.so.62: cannot open shared object file: No such file or directory
这是因为开发板上缺少libjpeg.so.62这个库,找到这个库,将之复制到开发板上的/lib目录下即可。
可以使用find指令寻找,一般在交叉编译工具目录下会有这个库,如下图:
![]()

 浙公网安备 33010602011771号