SpingMVC:结果跳转方式与数据处理
一:SpingMVC:结果跳转方式
SpringMVC:
通过SpringMVC来实现转发和重定向-无需视图解析器
测试前需要将视图解析器注掉:
<?xml version="1.0" encoding="UTF-8"?>
<beans xmlns="http://www.springframework.org/schema/beans"
xmlns:xsi="http://www.w3.org/2001/XMLSchema-instance"
xmlns:mvc="http://www.springframework.org/schema/mvc"
xmlns:context="http://www.springframework.org/schema/context"
xsi:schemaLocation="http://www.springframework.org/schema/beans
http://www.springframework.org/schema/beans//spring-beans.xsd
http://www.springframework.org/schema/context
http://www.springframework.org/schema/context/spring-context.xsd
http://www.springframework.org/schema/mvc
http://www.springframework.org/schema/mvc/spring-mvc.xsd">
<!--自动扫描包,让指定包下的注解生效,由IOC容器统一管理-->
<context:component-scan base-package="com.kuang.controller"/>
<!--默认的资源过滤:像.css .js .html .mp3 .mp4这样的资源默认让他们不经过视图解析器-->
<!--<mvc:default-servlet-handler/>
<!–
支持mvc注解驱动
在spring中一般采用@RequestMapping注解来完成映射关系
要想使@RequestMapping注解生效
必须要向上下文中注册DefaultAnnotationHandlerMapping和一个AnnotationMethodHandlerAdapter实例
以后直接就使用annotation-driven配置来帮助我们自动完成上述两个实例的注入
–>
<mvc:annotation-driven/>-->
<!--<!–视图解析器–>
<bean class="org.springframework.web.servlet.view.InternalResourceViewResolver" id="internalResourceViewResolver">
<!–前缀–>
<property name="prefix" value="/WEB-INF/jsp/"/>
<!–后缀–>
<property name="suffix" value=".jsp"/>
</bean>-->
<!-- <bean name="/t1" class="com.kuang.controller.ControllerTest"/>-->
</beans>
测试:
@Controller
public class MoodelTest {
    @RequestMapping("/m1/t1")
    public String test1(Model model){
      model.addAttribute("msg","MoldelTest");
      //转发一
      return "/WEB-INF/jsp/hello.jsp";
    }

    @RequestMapping("/m1/t2")
    public String test(Model model){
        model.addAttribute("msg","MoldelTest");
        //转发二
        return "forward:/WEB-INF/jsp/hello.jsp";
    }

    @RequestMapping("/m1/t3")
    public String test1(Model model){
        model.addAttribute("msg","ModelTest");
        //重定向,url地址会发生改变
        return "redirect:/index.jsp";
    }
}
通过SpringMVC来实现转发和重定向-有视图解析器
重定向,不需要视图解析器,本质就是重新请求一个新地方,所以要注意路径问题
@Controller
public class MoodelTest {
    @RequestMapping("/m1/t1")
    public String test1(Model model){
      model.addAttribute("msg","MoldelTest");
      //转发
      return "test";
    }

    @RequestMapping("/m1/t2")
    public String test1(Model model){
        model.addAttribute("msg","ModelTest");
        //重定向,url地址会发生改变
        return "redirect:/index.jsp";
      //return "redirect:hello.do";   //hello.do为另一个请求
    }
}
二:SpringMVC数据处理
处理提交的数据:
1:提交的域名名称和处理方法的参数名一致
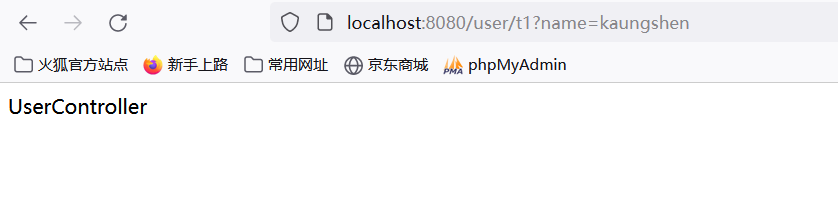
提交数据:http://localhost:8080/hello?name=kuangshen
处理方法
package com.kuang.controller;
import org.springframework.stereotype.Controller;
import org.springframework.ui.Model;
import org.springframework.web.bind.annotation.GetMapping;
import org.springframework.web.bind.annotation.RequestMapping;
@Controller
@RequestMapping("/user")
public class UserController {
//localhost:8080/user/t1 ? name = xxx
@GetMapping("/t1")
public String test(String name, Model model){
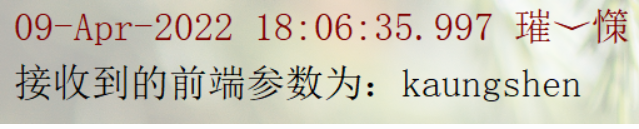
//1:接收前端参数
System.out.println("接收到的前端参数为:"+name);
//2:将返回的结果传递给前段,使用Model
model.addAttribute("msg","UserController");
//3:视图跳转
return "hello";
}
}
后台输出:
2:提交的域名名称和处理方法的参数名不一致:
提交数据:http://localhost:8080/hello?username=kuangshen
处理办法:
@GetMapping("/t1")
    public String test(@RequestParam("username") String name, Model model){
        //1:接收前端参数
        System.out.println("接收到的前端参数为:"+name);
        //2:将返回的结果传递给前端,使用Model
        model.addAttribute("msg","UserController");
        //3:视图跳转
        return "hello";
    }
后台输出kuangshen
3:提交的是一个对象
要求提交的表单域名和对象的属性名一致,参数使用对象即可
(1):实体类
package com.kuang.pojo;

import lombok.AllArgsConstructor;
import lombok.Data;
import lombok.NoArgsConstructor;

@Data
@AllArgsConstructor
@NoArgsConstructor
public class User {
    private int id;
    private String name;
    private int age;
}
(2):提交数据:http://localhost:8080/user/t2?name=kuangshen&age=12&id=3
(3):处理方法:
//前端接收的是一个对象:id,name,age
    /*
    * 1:接收前端用户传递的参数,判断参数的名字,假设名字直接在方法的参数上,则可以直接使用,否则用@RequestParam即可
    * 2:假设传递的是一个对象User,匹配User对象中的字段名;如果名字一致则OK,否则匹配不到!
    *
    * */
    @GetMapping("/t2")
    public String test2(User user, Model model){
        //1:接收前端参数
        System.out.println("从前端接收的参数为"+user);
        //2:将返回结果传递给前端,使用Model
        model.addAttribute("msg","UserTest");
        //3:视图跳转
        return "hello";
    }
后台输出:

说明:如果使用对象的话,前端传递的参数名和对象名必须一致,否则就是null


数据显示到前端:
第一种:通过ModelAndView
我们前面一直都是如此。就不过多解释:
public class ControllerTest implements Controller {
    @Override
    public ModelAndView handleRequest(HttpServletRequest httpServletRequest, HttpServletResponse httpServletResponse) throws Exception {
        ModelAndView modelAndView = new ModelAndView();
        //封装对象
        modelAndView.addObject("msg","ControllerTest");
        // 封装要跳转的视图
        modelAndView.setViewName("test");
        return modelAndView;
    }
}
第二种:通过ModelMap
//ModelMap
    @GetMapping("/t3")
    public String test3(ModelMap modelMap){
        //1:将返回结果传递给前端,使用ModelMap
        modelMap.addAttribute("msg","UserTest");
        //2:视图跳转
        return "hello";
    }
第三种:通过Model
@GetMapping("/t2")
    public String test2(User user, Model model){
        //1:接收前端参数
        System.out.println("从前端接收的参数为"+user);
        //2:将返回结果传递给前端,使用Model
        model.addAttribute("msg","UserTest");
        //3:视图跳转
        return "hello";
    }
对比:
对于新手而言简单来说使用区别就是:
Model:只有寥寥几个方法适用于储存数据,简化了新手对Model对象的操作和理解
ModelMap:继承了 LinkedMap,除了实现自身的一些方法,同样的继承了LinkedMap的方法和特性;
ModelAndView:可以在储存数据的同时,可以进行设置返回的逻辑视图,进行控制展示层的跳转。
当然更多的以后开发考虑的更多的是性能和优化,就不能单单仅限于对此的了解。
框架的官方文档永远是最好的教程。

 浙公网安备 33010602011771号