
ETH搭建本地私有链(多节点互通)
本教程基于CentOS7.9 x64上部署以太坊的私链。
安装go(可以自行安装最新版本)
1、搭建Go软件环境
安装方法,请参考这篇文章:https://blog.csdn.net/sanqima/article/details/113623784
2、设置Go访问代理
go env -w GOPROXY=https://goproxy.cn,direct
3、设置CentOS的镜像源
将CentOS的镜像源设置为阿里云,具体请参考这篇文章:https://blog.csdn.net/sanqima/article/details/117634934
4、安装工具软件
yum install git wget bzip2 vim gcc-c++ ntp epel-release nodejs cmake -y
yum update
5、下载以太坊源码(Go Ethereum)
可以自行在:https://github.com/ethereum/go-ethereum/ 查看最新tag的源码编译。
5.1 下载源码并编译
这里选择 Go Ethereum v1.9.25
下载地址: https://github.com/ethereum/go-ethereum/archive/refs/tags/v1.9.25.tar.gz
将go-ethereum-1.9.25.tar.gz存放到目录:/opt
依次使用如下命令:
cd /opt
sudo tar -zxvf go-ethereum-1.9.25.tar.gz
cd go-ethereum-1.9.25
make all
5.2 设置geth环境
a) 打开/etc/profile
nano /etc/profile
b) 在/etc/profile里,添加如下语句:
export GOROOT=/usr/local/go
export GOPATH=/usr/local/gocode
export ETH_Base=/opt/go-ethereum-1.9.25
export PATH=$PATH:$GOROOT/bin:$GPPATH/bin:${ETH_Base}/build/bin
c) 使能profile
source /etc/profile
d) 查看geth的版本信息
geth version
效果如下:
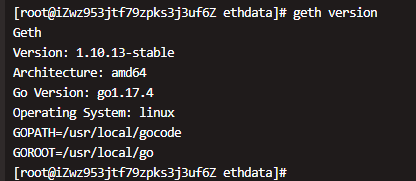
若可以查看geth的版本信息,则说明geth环境配置成功。
6、升级cmake到3.x(可选)
//卸载旧版本的cmake
yum remove cmake
//安装cmake 3.19.8
wget -c https://github.com/Kitware/CMake/releases/download/v3.19.8/cmake-3.19.8.tar.gz
sudo tar -zxvf cmake-3.19.8.tar.gz
cd cmake-3.19.8
./bootstrap && make && make install
7、启动网络时间同步
systemctl enable ntpd
systemctl start ntpd
8、关闭防火墙
geth会用到8078和30303端口,放开防火墙端口 8078与30303
systemctl stop firewalld
9、设置ETH环境
在/opt 里新建一个文件夹名称为ethdata
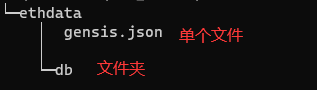
cd /opt
mkdir ethdata
cd ethdata
mkdir db
touch gensis.json
其目录结构如下:
ethdata的目录结构
gensis.json的内容如下:
{
"config": {
"chainId": 666666,
"homesteadBlock": 0,
"eip150Block": 0,
"eip155Block": 0,
"eip158Block": 0,
"byzantiumBlock": 0,
"constantinopleBlock": 0,
"petersburgBlock": 0,
"istanbulBlock": 0
},
"alloc": {"0x3Ecb2d7d3622d8FB030330D2c284dF77DE50d303":{"balance":"9000000000000000000000000000"}},
"coinbase": "0x3Ecb2d7d3622d8FB030330D2c284dF77DE50d303",
"difficulty": "0x400",
"extraData": "0x00",
"gasLimit": "0x80000000",
"nonce": "0x0000000000000042",
"mixhash": "0x0000000000000000000000000000000000000000000000000000000000000000",
"parentHash": "0x0000000000000000000000000000000000000000000000000000000000000000",
"timestamp": "0x00"
}
初始化
cd /opt/ethdata
geth --datadir "./db" init gensis.json
初始化之后,会生成db/geth、db/keystore等文件夹; 其中,db/geth/chaindata中存放的是区块数据,db/keystore中存放的是账户数据。
启动私有链
cd /opt/ethdata
geth --datadir "./db" console 2>>geth.log --nodiscover --http --http.addr 0.0.0.0 --http.port=12345 --http.api eth,net,web3
开始挖矿
控制台:指定coinbase用户,启动挖矿
miner.setEtherbase("0x3Ecb2d7d3622d8FB030330D2c284dF77DE50d303")

miner.start(2)     //启动几个线程挖矿
用户的公钥文件保存在 ethdata/db/keystore里
ls /home/levent/myProject/unit01/ethBase/ethdata/db/keystore
查看挖矿地址
eth.coinbase
停止挖矿
miner.stop()
如果关掉了geth console,可以通过下面命令进入控制台
geth attach console http://localhost:12345
本地多节点连接
说明:如果需要本地连接多节点,需要注意以下几点:
- 两个节点客户端的创世文件genesis.json需要一致(两节点要加入同一条私链);
- 启动节点的时候要使用同样的networkid(即genesis.json中chanlid参数);
- 节点间的port和rpcport要不同
启动
创建创世区块:
geth --datadir "./db" init gensis.json
如若启动多节点需要将上面私有链部署的启动命令修改如下
节点1:


geth --datadir "./db" console 2>>geth.log --networkid 666666 --http --http.addr 172.22.0.55 --http.port=18340 --http.corsdomain "*" --http.api eth,net,web3,db --maxpeers=3 --allow-insecure-unlock --port 3000
节点2:
geth --datadir "./db" console 2>>geth.log --networkid 666666 --http --http.addr 172.22.0.52 --http.port=12345 --http.corsdomain "*" --http.api eth,net,web3,db --maxpeers=3 --allow-insecure-unlock --port 3001
连接
获取节点2信息
admin.nodeInfo.enode
结果:
"enode://eb72c7e321e68f07c4113668fab81a8b098fb0518c167a50e6c6e4f1f99f411359dc111064fa58869b4646635cbf588df3a39f176e27556c9246d2e88737cc81@169.254.128.131:3001"
注意:将红色部分改为节点2的真实ip地址(查看网络设置中的IPv4地址),因为admin.nodeInfo.enode输出的不一定是正确的
在节点1中加入节点2:
admin.addPeer("enode://eb72c7e321e68f07c4113668fab81a8b098fb0518c167a50e6c6e4f1f99f411359dc111064fa58869b4646635cbf588df3a39f176e27556c9246d2e88737cc81@169.254.128.131:3001")
用net.peerCount和admin.peers命令查看是否连接成功,连接成功后两个区块间会相互同步。
验证成功的简单方法:在节点1跟节点2的geth控制台查看区块高度,如果一样则连接成功。
eth.blockNumber
如果以上多节点搭建有问题,可以参考这篇博文:https://blog.csdn.net/Khazking/article/details/122083702

 浙公网安备 33010602011771号