zabbix基础之环境搭建
zabbix入门
环境部署
安装mysql
#安装MySQL,官方的MySQL的repo源地址:http://repo.mysql.com/
#选择指定的MySQL版本,我这里选mysql5.7的版本,复制对应版本的链接地址。
wget http://repo.mysql.com/mysql57-community-release-el7-10.noarch.rpm
rpm -ivh mysql57-community-release-el7-10.noarch.rpm

yum repolist all |grep mysql
mysql-cluster-7.5-community/x86_64 MySQL Cluster 7.5 Community   disabled
mysql-cluster-7.5-community-source MySQL Cluster 7.5 Community - disabled
mysql-connectors-community/x86_64  MySQL Connectors Community    enabled:    118
mysql-connectors-community-source  MySQL Connectors Community -  disabled
mysql-tools-community/x86_64       MySQL Tools Community         enabled:     95
mysql-tools-community-source       MySQL Tools Community - Sourc disabled
mysql-tools-preview/x86_64         MySQL Tools Preview           disabled
mysql-tools-preview-source         MySQL Tools Preview - Source  disabled
mysql55-community/x86_64           MySQL 5.5 Community Server    disabled
mysql55-community-source           MySQL 5.5 Community Server -  disabled
mysql56-community/x86_64           MySQL 5.6 Community Server    disabled
mysql56-community-source           MySQL 5.6 Community Server -  disabled
mysql57-community/x86_64           MySQL 5.7 Community Server    enabled:    364
mysql57-community-source           MySQL 5.7 Community Server -  disabled
mysql80-community/x86_64           MySQL 8.0 Community Server    disabled
mysql80-community-source           MySQL 8.0 Community Server -  disabled
#最后面的enabled代表已开启版本的MySQL源
yum-config-manager --enable mysql57-community #开启mysql57-community的源
yum-config-manager --disable mysql57-community #关闭mysql57-community的源
#无论哪个版本,必须有mysqlxx-community、mysql-connectors-community、mysql-tools-community这三个源是开启的,开启的是哪个版本的源,安装的就是哪个的版本。

#安装mysql
yum -y install mysql-community-server
#启动/关闭/重启:systemctl start/stop/restart mysqld
#开机自启:systemctl enable mysqld
安装php&httpd
#php7.x版本的,web UI安装后在最新数据的底部会有报错:count(): Parameter must be an array or an object that implements Countable [ in latest.php:103]。介意的话用5.4版本的没有报错。
#安装php7.2,php的repo源地址:https://mirror.webtatic.com/yum/el7/webtatic-release.rpm
yum -y install epel-release
rpm -ivh https://mirror.webtatic.com/yum/el7/webtatic-release.rpm
yum -y install php72w httpd php72w-mysql php72w-mbstring php72w-gd php72w-bcmath php72w-ldap php72w-xml
初始化MySQL(修改MySQL初始密码)
必须初始化修改密码,否则大部分操作会报错,如:
mysql> show databases;
ERROR 1820 (HY000): Unknown error 1820
mysql> use mysql;
ERROR 1820 (HY000): Unknown error 1820
systemctl start mysqld  #先启动mysql
sudo grep 'temporary password' /var/log/mysqld.log #获取初始密码
2019-09-17T10:32:39.902324Z 1 [Note] A temporary password is generated for root@localhost: eQj:=VuCw43h 	# “eQj:=VuCw43h” 即为初始密码

mysql -uroot -p
ALTER USER 'root'@'localhost' IDENTIFIED BY 'MyNewPass4!'; #修改登录密码
flush privileges;
#修改密码的复杂性规则:
set global validate_password_policy=0;
#上面这个参数用于控制validate_password的验证策略 0-->low  1-->MEDIUM  2-->strong。
set global validate_password_mixed_case_count=0; #大小写的最小个数。
set global validate_password_number_count=3;	#密码中数字的最小个数。
set global validate_password_special_char_count=0;#特殊字符的最小个数。
set global validate_password_length=3; 			#密码长度的最小值。
#查看密码策略设置
mysql> SHOW VARIABLES LIKE 'validate_password%';
+--------------------------------------+-------+
| Variable_name                        | Value |
+--------------------------------------+-------+
| validate_password_check_user_name    | OFF   |
| validate_password_dictionary_file    |       |
| validate_password_length             | 3     |
| validate_password_mixed_case_count   | 0     |
| validate_password_number_count       | 3     |
| validate_password_policy             | LOW   |
| validate_password_special_char_count | 0     |
+--------------------------------------+-------+
创建zabbix数据库
mysql -uroot -p
password:

create database zabbix charset 'utf8';
Query OK, 1 row affected (0.00 sec)

#将zabbix用户授予所有对zabbix数据库的权限(授权时自动创建zabbix用户)
grant all privileges on zabbix.* to zabbix@localhost identified by '123123';
Query OK, 1 row affected (0.00 sec)

flush privileges;
Query OK, 1 row affected (0.00 sec)
安装配置zabbix 3.0
官方安装文档:https://www.zabbix.com/cn/download?zabbix=3.0&os_distribution=centos&os_version=7&db=mysql
#获取zabbix3.0的repo源,
rpm -Uvh https://repo.zabbix.com/zabbix/3.0/rhel/7/x86_64/zabbix-release-3.0-1.el7.noarch.rpm
#安装zabbix服务端和agent和web组件
yum -y install zabbix-server-mysql zabbix-web-mysql zabbix-web zabbix-agent zabbix-get
#解压zabbix自带的数据库表
cd /usr/share/doc/zabbix-server-mysql-3.0.28/
gunzip create.sql.gz
#导入到MySQL
mysql -uroot -p -Dzabbix <create.sql
password: #输入密码可以看到zabbix数据库中的表
mysql -uzabbix -p
password:
use zabbix
Reading table information for completion of table and column names
You can turn off this feature to get a quicker startup with -A
Database changed
mysql> show tables;
+----------------------------+
| Tables_in_zabbix |
+----------------------------+
| acknowledges |
| actions |
| alerts |
| application_discovery |
| application_prototype |
| application_template |
| applications |
| auditlog |
| auditlog_details |
| autoreg_host |
| conditions |
| config |
...
#修改zabbix-server配置文件
vim /etc/zabbix/zabbix_server.conf
#取消下面参数的备注并修改为数据库中设置的参数
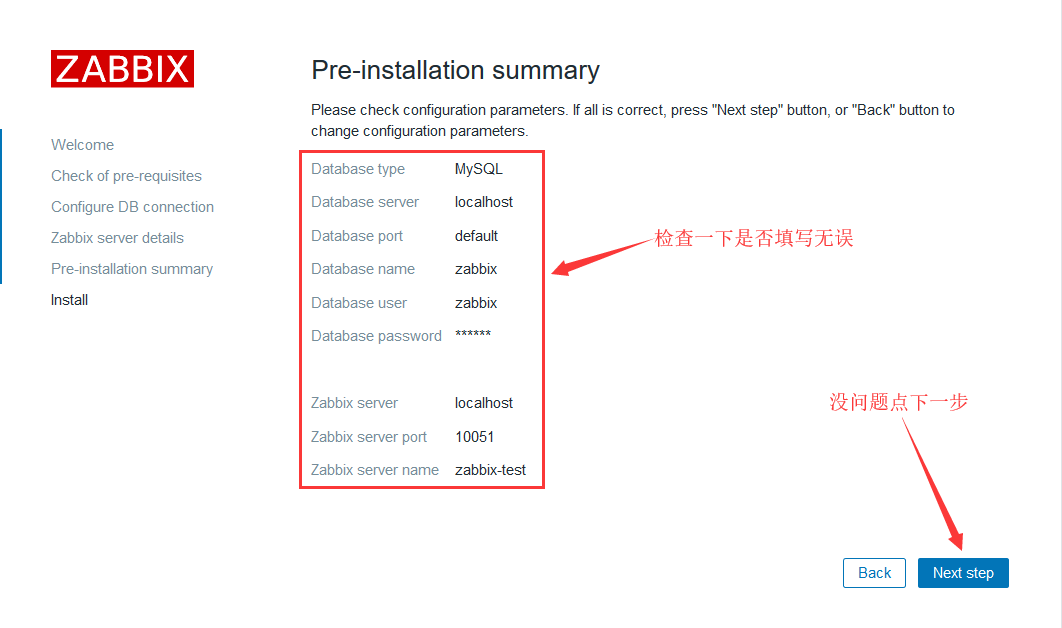
DBName=zabbix
...
DBUser=zabbix
...
DBPassword=123123
...
DBPort=3306
...
#保存退出
#修改zabbix-web配置文件
vim /etc/httpd/conf.d/zabbix.conf
#将如下这行取消注释,并修改时区为亚洲上海
php_value date.timezone Asia/Shanghai
#修改zabbix-agent配置文件
vim /etc/zabbix/zabbix_agentd.conf
#agent的被动模式,允许哪台服务器拉取当前服务器的数据。server端的agent最好写本地lo+网卡IP,被监控端只写监控端的IP,这个IP只能写本端到目标主机的最后一跳IP。多个IP用逗号隔开。
Server=127.0.0.1
#agent的主动模式,将本端服务器的数据主动推送给哪个主机。server端的agent写本地回环,被监控端写监控端的IP
ServerActive=127.0.0.1
#主机名称,使用hosts文件中对应显示的名称
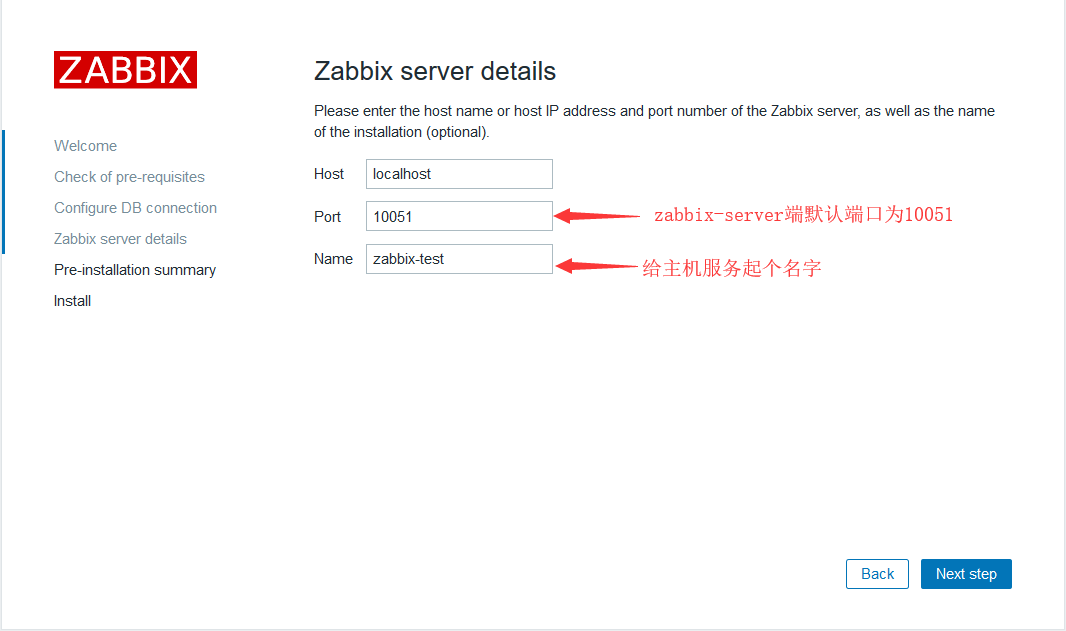
Hostname=zabbix-server
#注:主动模式和被动模式可以同时存在,但是server端的agent会报错,但是不影响使用。
启动服务
systemctl start mysqld
systemctl enable mysqld

systemctl start zabbix-server
systemctl enable zabbix-server

systemctl start zabbix-agent
systemctl enable zabbix-agent

systemctl start httpd
systemctl enable httpd
查看监听端口
ss tnl
State      Recv-Q Send-Q        Local Address:Port                       Peer Address:Port            LISTEN     0      128                       *:22                                    *:*
LISTEN     0      128                       *:10050    #agent监听端口                *:*
LISTEN     0      128                       *:10051    #server端监听端口             *:*
LISTEN     0      128               127.0.0.1:9000     #PHP监听端口                  *:*
LISTEN     0      128                      :::80       #httpd监听端口                :::*
LISTEN     0      128                      :::22                                    :::*
LISTEN     0      128                      :::10050                                 :::*
LISTEN     0      128                      :::10051                                 :::*
LISTEN     0      80                       :::3306      #MySQL监听端口               :::*
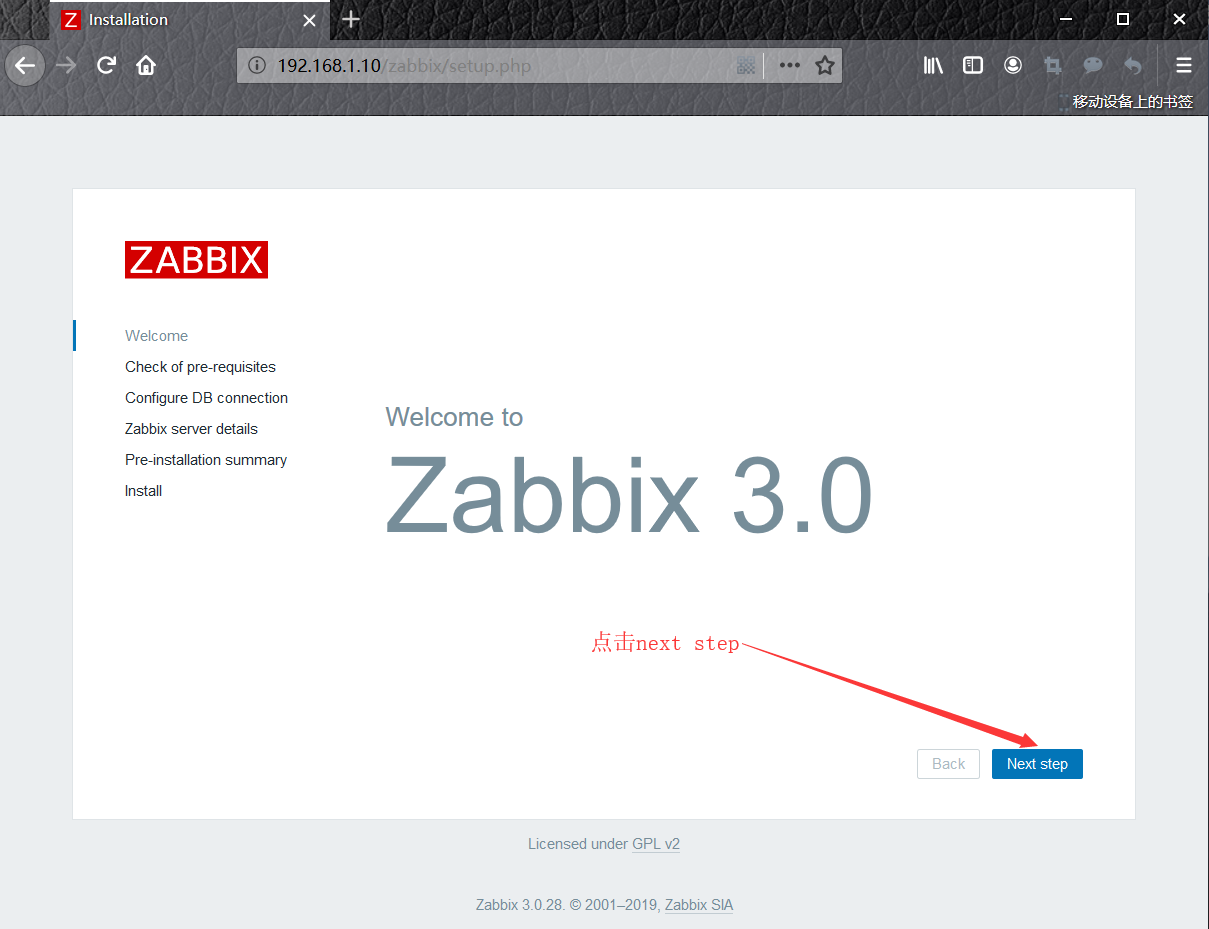
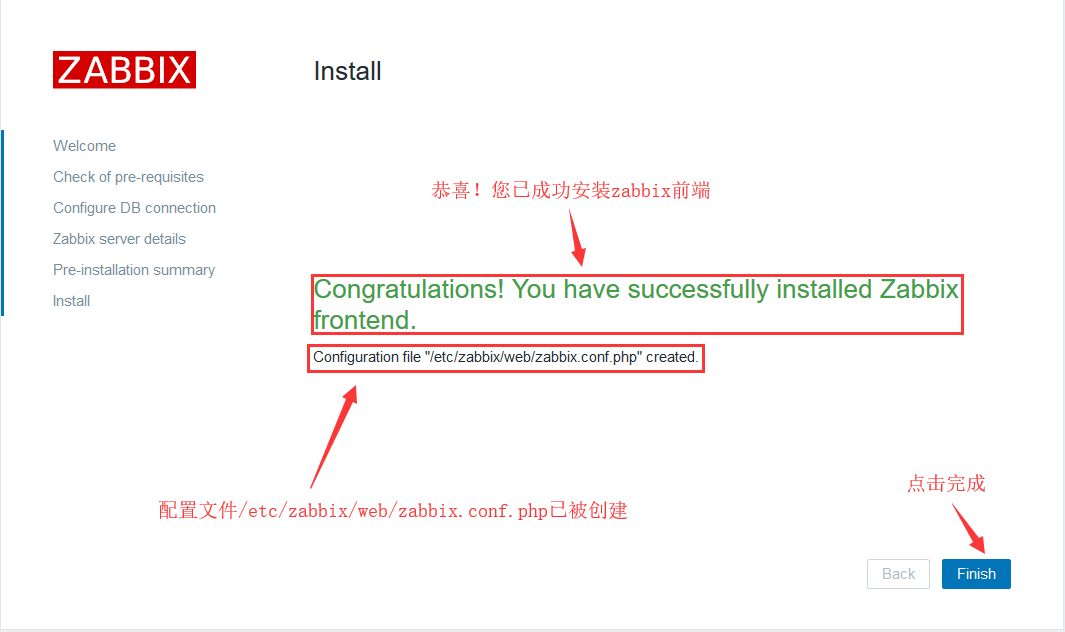
使用浏览器访问:hostIP/zabbix
一般报错的项是php的参数不符合要求,在/etc/php.ini中找到报错的项,将参数改为图中Required对应的参数即可

vim /etc/php.ini
post_max_size = 16M
max_execution_time = 300
max_input_time = 300
date.timezone =Asia/Shanghai
#保存退出,重启httpd和zabbix-server,刷新浏览器网页


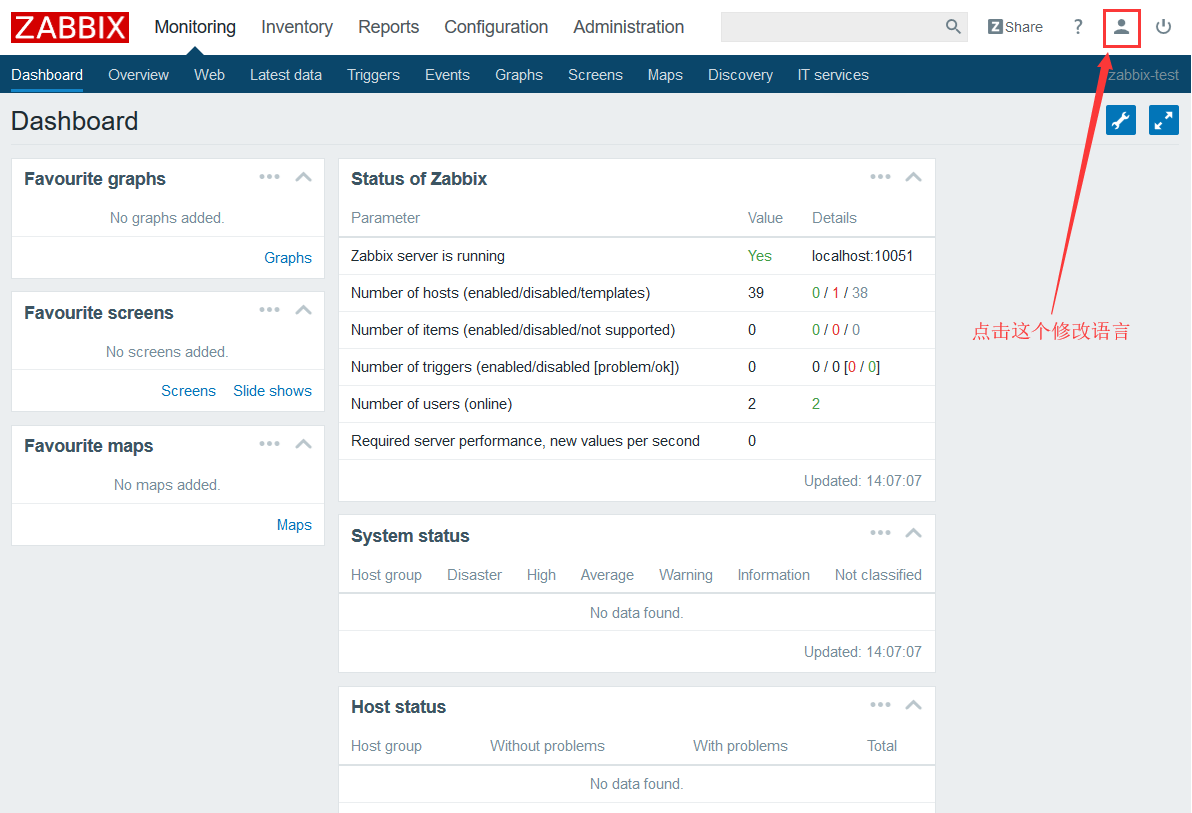
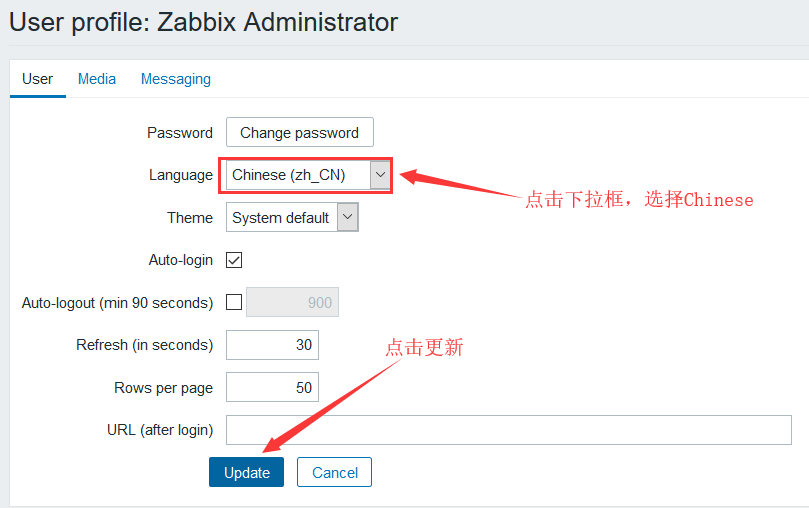
修改语言
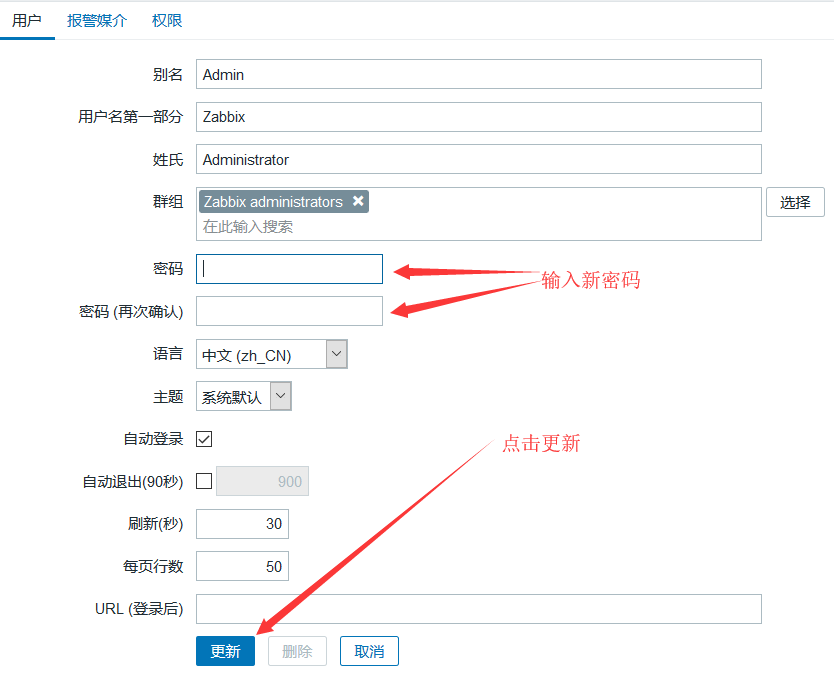
修改管理员登陆密码


图表字体乱码,更换字体
#在控制面版中,查看方式设置为大图标,然后找到“字体”,选择字体文件。
#将windows中的字体文件放在如下目录,一般文件后缀为TTF,将大写的后缀改为小写的ttf。
cd /usr/share/zabbix/fonts
#编辑配置文件
vim /usr/share/zabbix/include/defines.inc.php
#找到如下两项,将引号中的graphfont改为目标字体名称,不用带后缀
define('ZBX_GRAPH_FONT_NAME',           'STFANGSO');
define('ZBX_FONT_NAME', 'STFANGSO');

#改完保存退出即可,刷新网页,即可看到图表中的乱码已为中文。
可能遇到的问题
Zabbix discoverer processes more than 75% busy
严重性:Average
建议:
1:内存调度问题
在zabbix_server.conf配置文件中
增加初始化进程 StartPollers=12
重启zabbix-server
2:进程占用问题
修改zabbix_server.conf中discovery进程数量
StartDiscoverers=5
重启zabbix-server
count(): Parameter must be an array or an object that implements Countable [ in latest.php:103]
PHP7.x以上版本的报错,尚未解决

 浙公网安备 33010602011771号