新鲜出炉:appium2.0+ 单点触控和多点触控新的解决方案
在 appium2.0 之前,在移动端设备上的触屏操作,单手指触屏和多手指触屏分别是由 TouchAction 类,Multiaction 类实现的。
在 appium2.0 之后,这 2 个方法将会被舍弃。
"[Deprecated] 'TouchAction' action is deprecated. Please use W3C actions instead."

1、w3c action 是什么?
在 w3c 的 actions 当中,将输入源分为了三类:
- 键盘类 - Key
- 指针类 - Pointer
- None
对于 Pointer 指针类输入源,共有 3 种:Mouse 鼠标、Touch 触屏、Pen 笔触
输入源,是提供输入事件的虚拟设备。
每一个输入源,都是一个输入 id,输入源 type。与真实设备一样,每一个输入源都有状态的,有输入事件。
在 python selenium 的源码当中,selenium/common/actions/input_devices.py 里 InputDevices 类定义了输入源类。
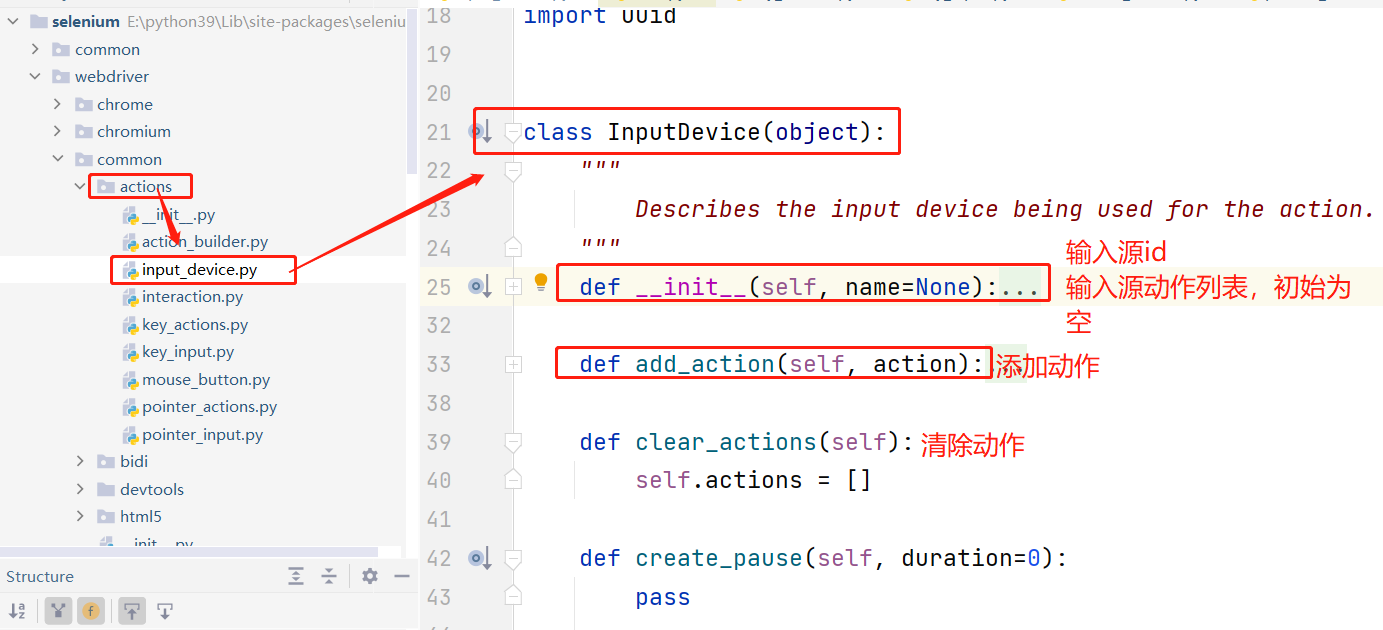
1、空输入源(null input source)
提供以下行为:
pause:不做任何操作一段时间,或者动作的持续时间
2、键盘输入源(key input source)
提供以下行为:
KeyDown:按下某个键
KeyUp:释放某个键
在 python selenium 的源码当中,selenium/common/actions/key_input.py 里 KeyInput 类定义了按钮输入源类。
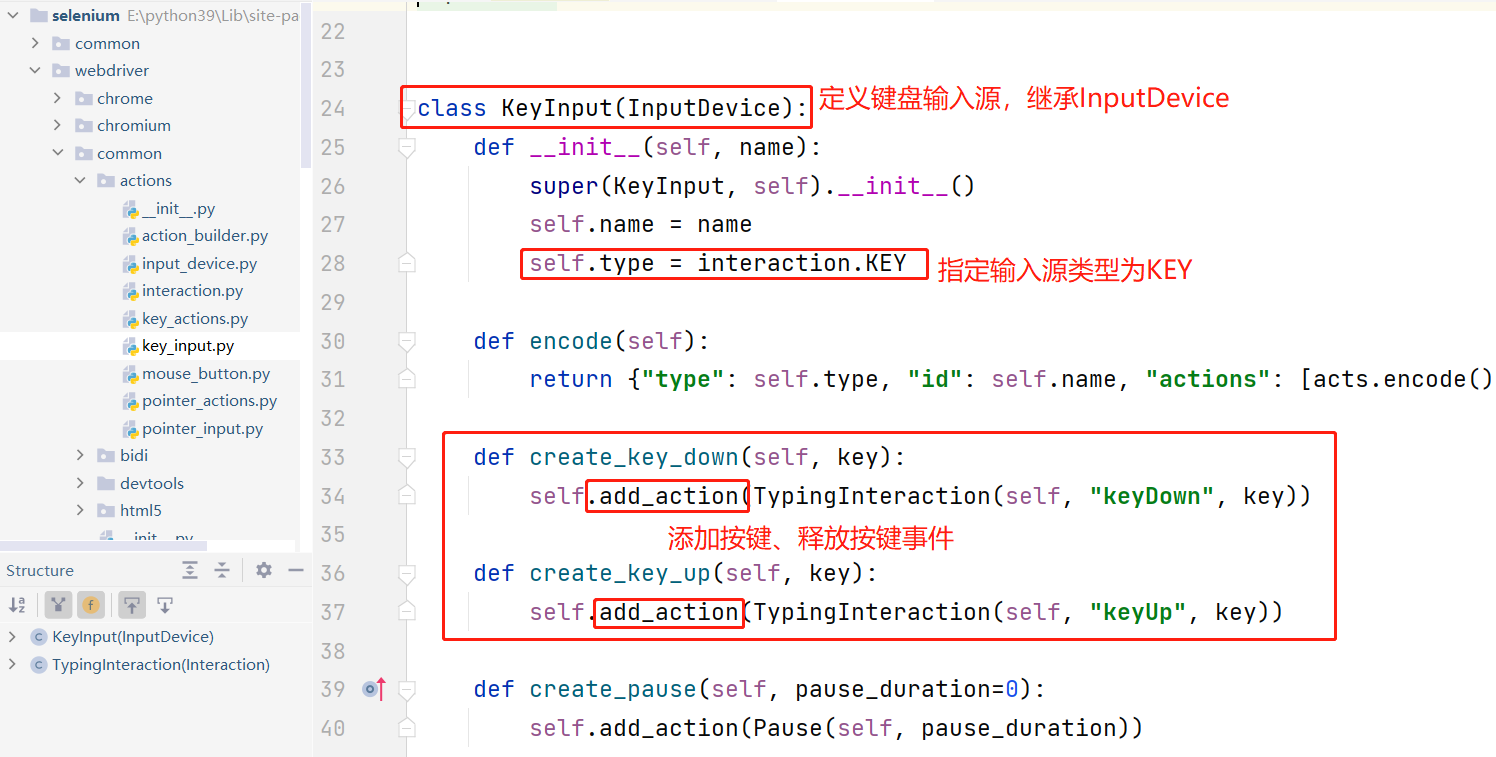
3、指针输入源(pointer input source),提供以下行为:
PointerDown:按下鼠标键,或者触屏或者触屏笔触屏
PointerUp:松开鼠标键,或者手离开屏幕,或者触屏笔离开屏幕
PointerMove:移动到屏幕某个点
PointerCancel:删除某个指针操作
在 python selenium 的源码当中,selenium/common/actions/pointer_input.py 里 PointerInput 类定义了指针输入源类。

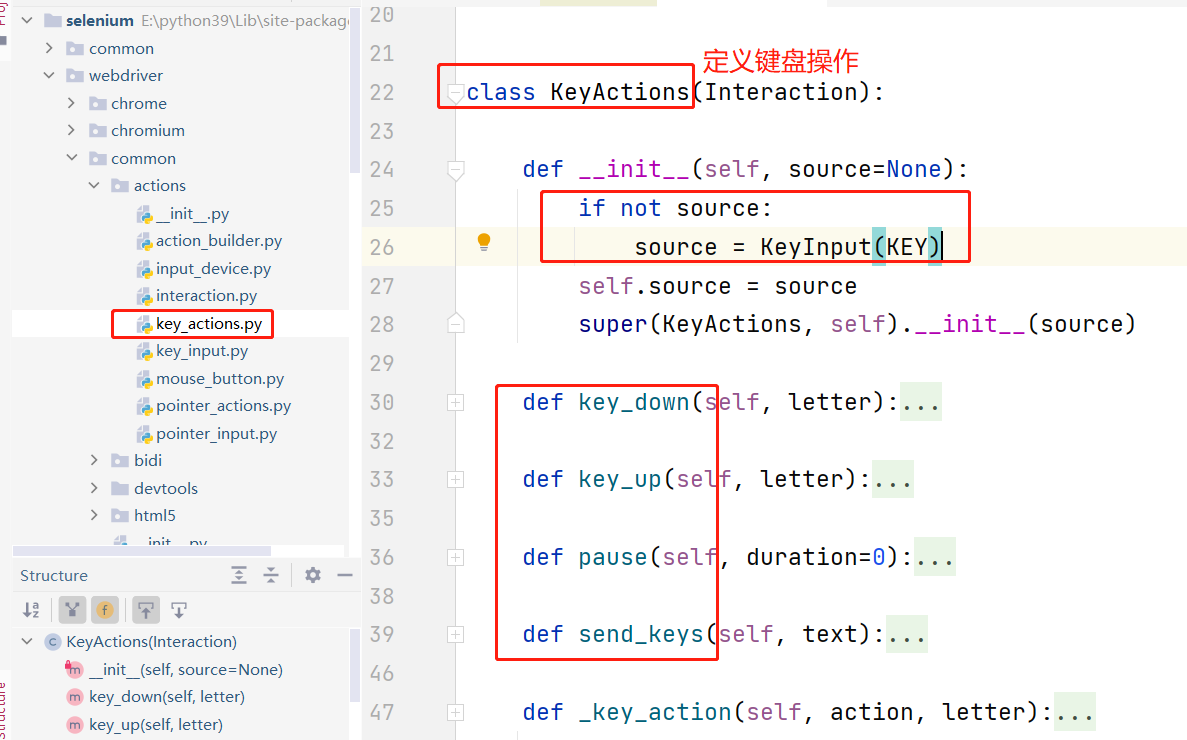
4、在输入源基础上,定义了键盘操作类 KeyActions
在 python selenium 的源码当中,selenium/common/actions/key_actions.py 里 KeyActions 类定义了键盘操作类。
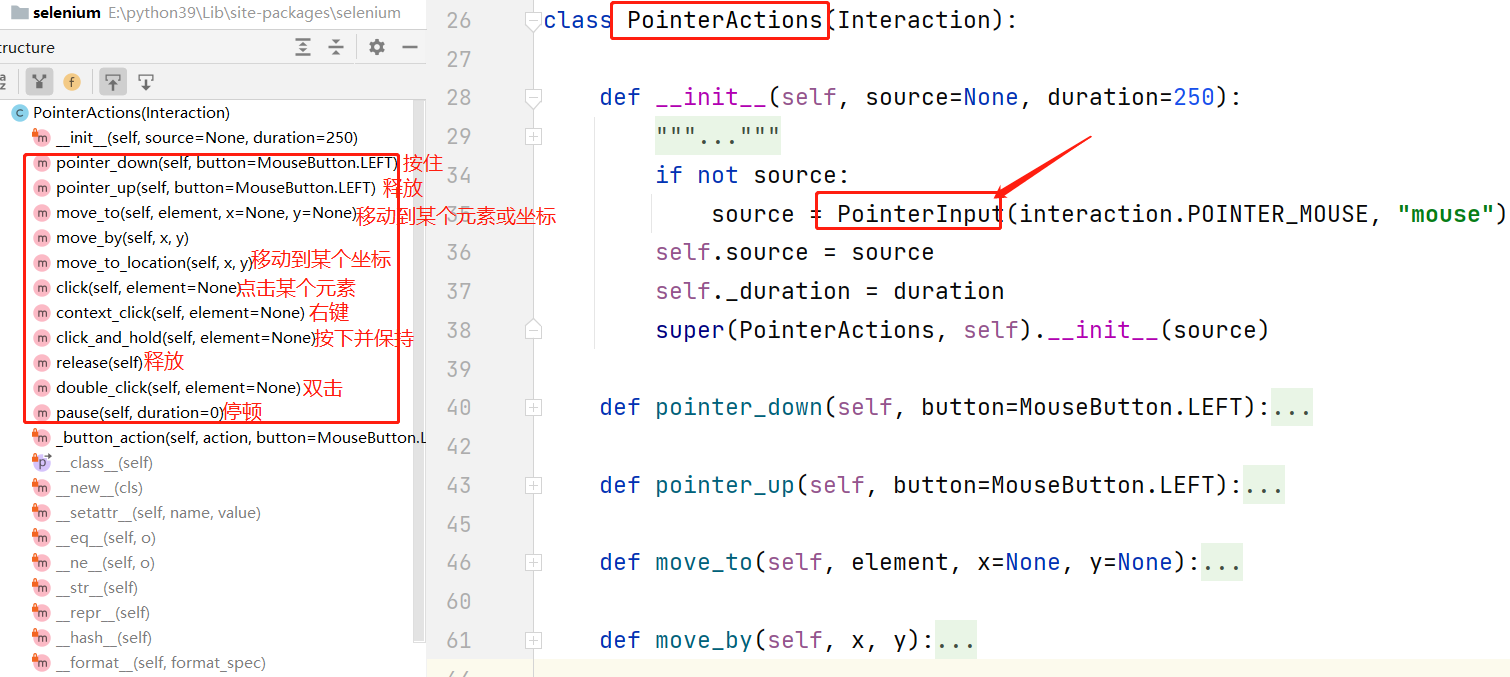
5、在输入源基础上,定义了鼠标/触屏操作 PointerActions 类:
在 python selenium 的源码当中,selenium/common/actions/pointer_actions.py 里 PointerActions 类定义了鼠标/触屏操作类。

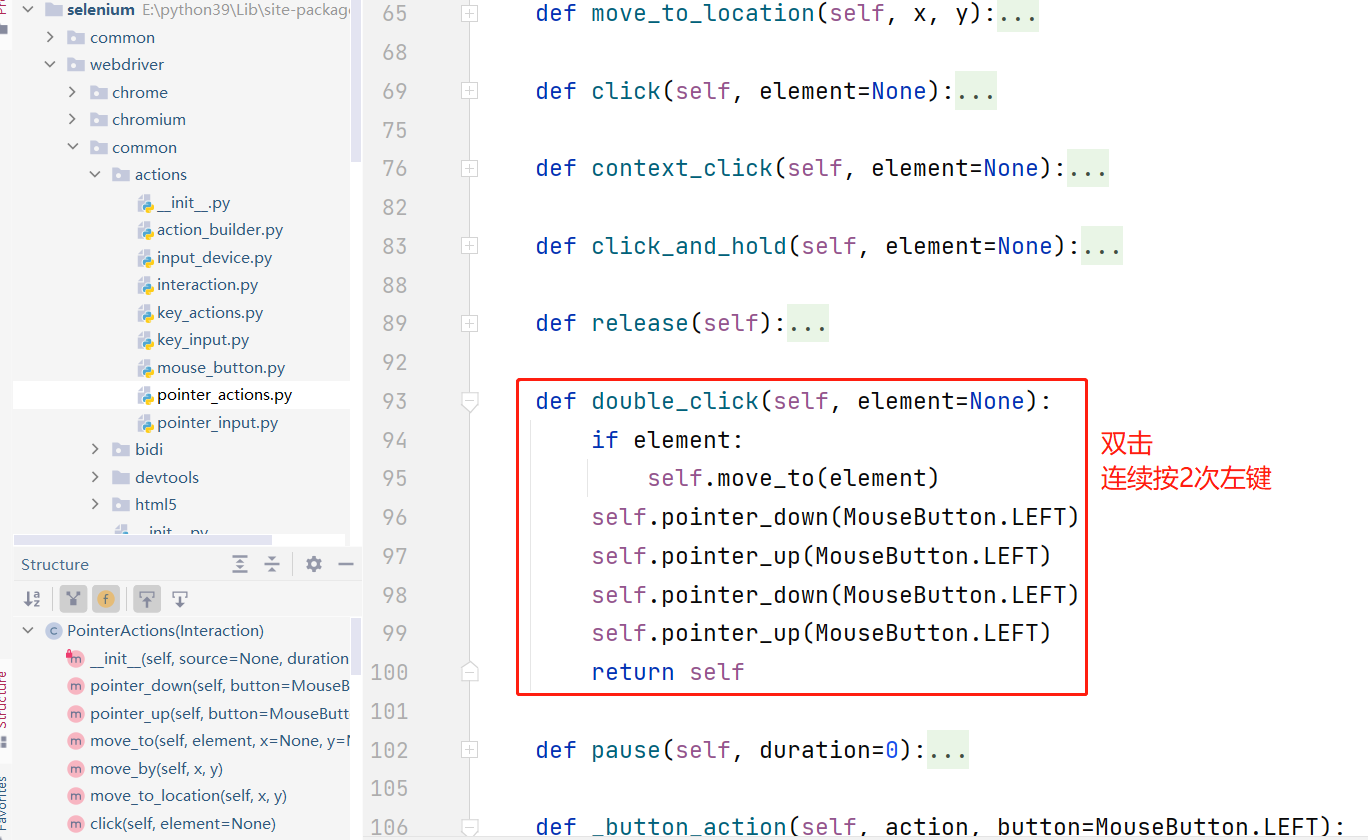
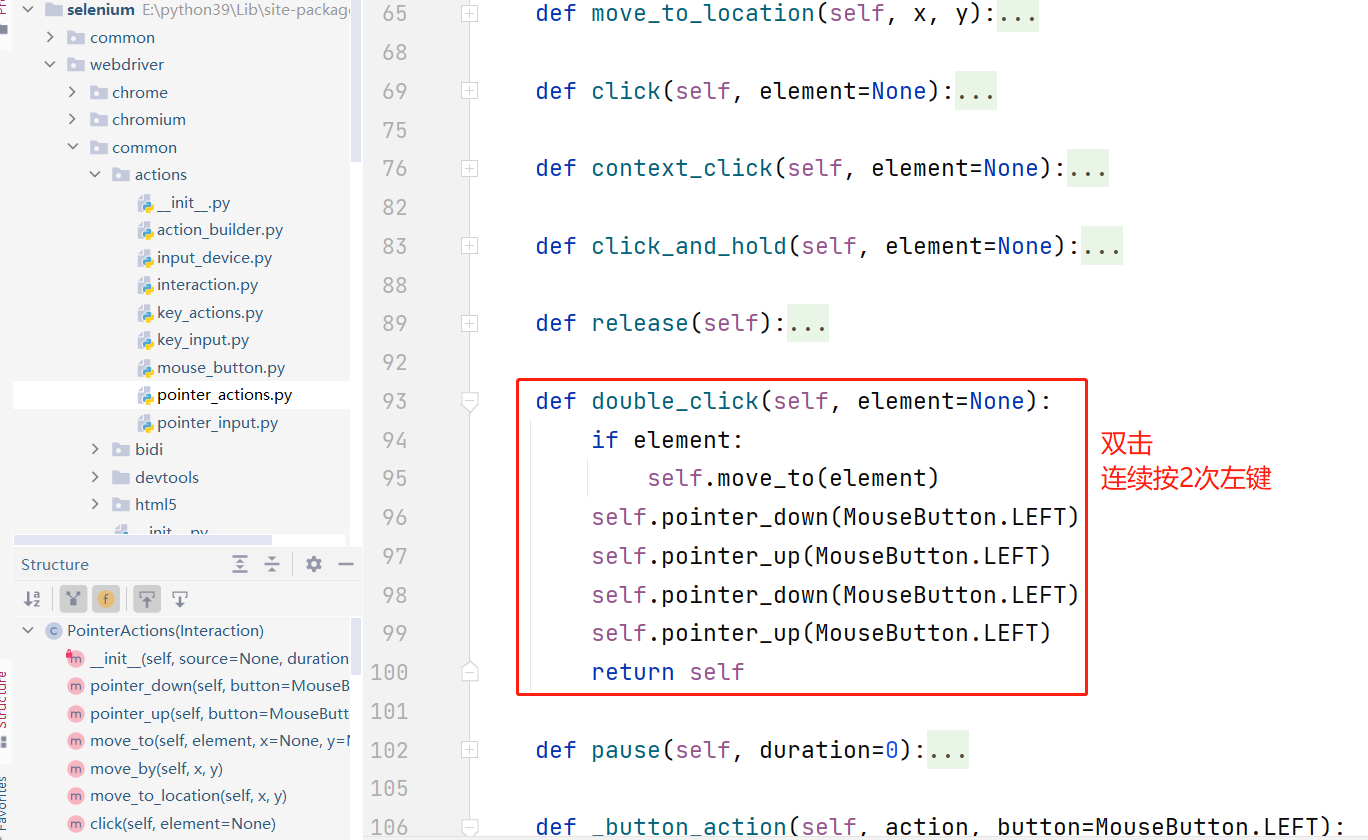
汇总一下上面几个类:

6、ActionBuilder 类
初始化方法:
- 输入源设备列表,会放 2 个输入源:鼠标输入源、键盘输入源。
- 有 2 个私有属性:键盘操作对象(KeyActions 类实例化**)**,鼠标/触屏操作对象(PointerActions 类实例化)

属性:key_action,pointer_action
在 ActionChains 类当中,就是通过这 2 个属性来调用鼠标和键盘的操作的。

添加新的输入源:add_key_input,add_pointer_input

2、ActionChains 类
selenium 中的鼠标操作类,鼠标行为都是使用的 ActionBuilder 类。
初始化:


3、单点触控 - ActionChains 类
直接使用 ActionChains 类里的,w3c_actions 去实现。
比如 appium 当中的 swipe 滑屏方法:
移动到某一个坐标点 → 按下 → 移动到另一个坐标点 → 释放

4、多点触控 - ActionChains 类
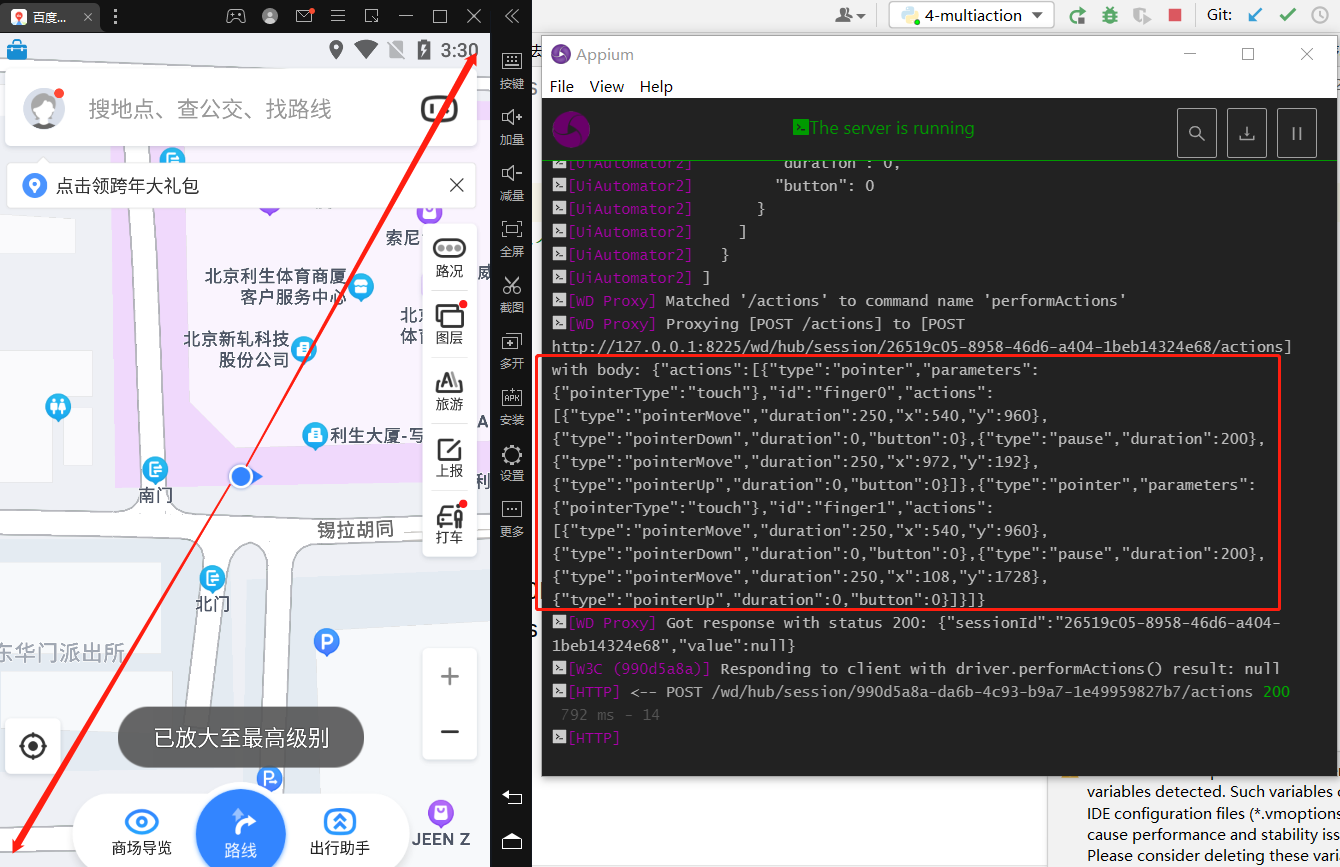
多点触控,是个单点触控操作同时发生,比如 2 个手指,同时在屏幕上进行滑动操作。
仍然是 ActionChains 类,不过需要在里面,添加新的单点触控操作。
actions = ActionChains(driver)
# 输入源设备列表为空
actions.w3c_actions.devices = []

# 添加一个新的输入源到设备到中,输入源类型为Touch
new_input = actions.w3c_actions.add_pointer_input('touch', f'finger{finger}')
# 输入源的动作:移动到某个点,按下,移动到另外一点,释放
new_input.create_pointer_move(x=start_x, y=start_y)
new_input.create_pointer_down(MouseButton.LEFT)
new_input.create_pause(duration / 1000)
new_input.create_pointer_move(x=end_x, y=end_y)
new_input.create_pointer_up(MouseButton.LEFT)

# 以此类推,可以添加多个输入源操作到设备当中。可以是鼠标操作,也可以是触屏,按键等操作
比如,对百度地图 app 进行放大操作的代码如下:
from time import sleep
from appium import webdriver

from selenium.webdriver import ActionChains
from selenium.webdriver.common.actions.mouse_button import MouseButton

#我要在android7.1.2设备上,打开百度地图app
desired_caps = {
"automationName":"UiAutomator2",
"platformName":"Android",
"platformVersion":"7.1.2",
"deviceName":"HuaWei",
"noReset":True,
"appPackage":"com.baidu.BaiduMap",
"appActivity":"com.baidu.baidumaps.WelcomeScreen",
"systemPort": 8225,
"newCommandTimeout": 1200
}

#先连接appium server。传递指令。 appium server连接地址
driver = webdriver.Remote('<http://127.0.0.1:4723/wd/hub>', desired_caps)

sleep(20)

#获取设备的大小 - size
size_dict = driver.get_window_size()

# ==========放大地图:从地图中心分别向对角线滑动放大 - 2个手指同时执行滑动操作  ==================
actions = ActionChains(driver)
#输入源设备列表为空
actions.w3c_actions.devices = []

# ========== 第1个手指:从正中心向右上角滑动  ==================
#添加一个新的输入源到设备到中,输入源类型为Touch,id为finger0
new_input = actions.w3c_actions.add_pointer_input('touch','finger0')
#输入源的动作:移动到某个点,按下,移动到另外一点,释放
new_input.create_pointer_move(x=size_dict["width"] * 0.5, y=size_dict["height"] * 0.5)
new_input.create_pointer_down()
# new_input.create_pointer_down(MouseButton.LEFT)
new_input.create_pause(0.2) # 200ms
new_input.create_pointer_move(x=size_dict["width"] * 0.9, y=size_dict["height"] * 0.1)
new_input.create_pointer_up(MouseButton.LEFT)

# ========== 第2个手指:从正中心向左下角滑动  ==================
#添加一个新的输入源到设备到中,输入源类型为Touch。id为finger1
new_input = actions.w3c_actions.add_pointer_input('touch','finger1')
#输入源的动作:移动到某个点,按下,移动到另外一点,释放
new_input.create_pointer_move(x=size_dict["width"] * 0.5, y=size_dict["height"] * 0.5)
new_input.create_pointer_down()
# new_input.create_pointer_down(MouseButton.LEFT)
new_input.create_pause(0.2) # 200ms
new_input.create_pointer_move(x=size_dict["width"] * 0.1, y=size_dict["height"] * 0.9)
new_input.create_pointer_up(MouseButton.LEFT)

#执行动作
actions.perform()
*******有任何疑问,欢迎加微:qd20150815 (加时请备注:博客园-简)*******


 浙公网安备 33010602011771号