2019 SDN上机第4次作业
2019 SDN上机第4次作业
1. 解压安装OpenDayLight控制器
下载完成后,在下在目录打开终端执行以下指令解压:
tar -zxvf distribution-karaf-0.4.4-Beryllium-SR4.tar.gz

启动之前需要预先配置java环境,参考链接
我电脑上的Ubuntu用java写过程序,已经配置好java环境,不再演示。。。
2. 启动并安装插件
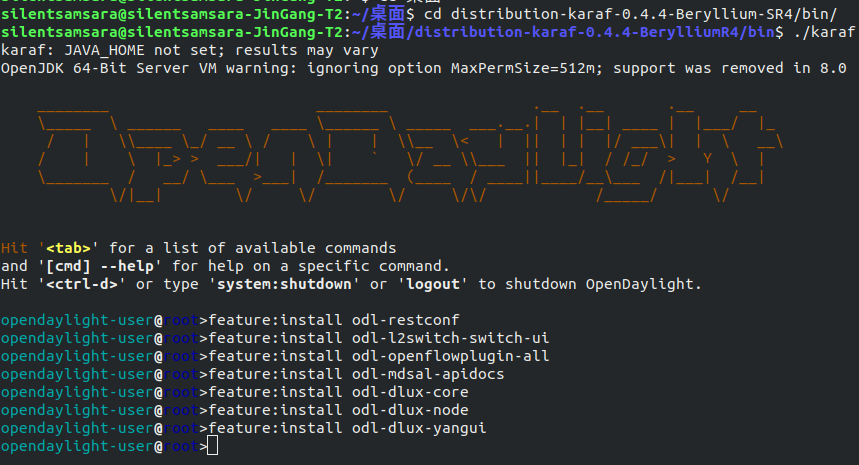
(1)解压完成后进入bin文件夹
cd distribution-karaf-0.4.4-Beryllium-SR4/bin/
(2)运行karaf
./karaf
(3)安装并配置
feature:install odl-restconf
feature:install odl-l2switch-switch-ui
feature:install odl-openflowplugin-all
feature:install odl-mdsal-apidocs
feature:install odl-dlux-core
feature:install odl-dlux-node
feature:install odl-dlux-yangui
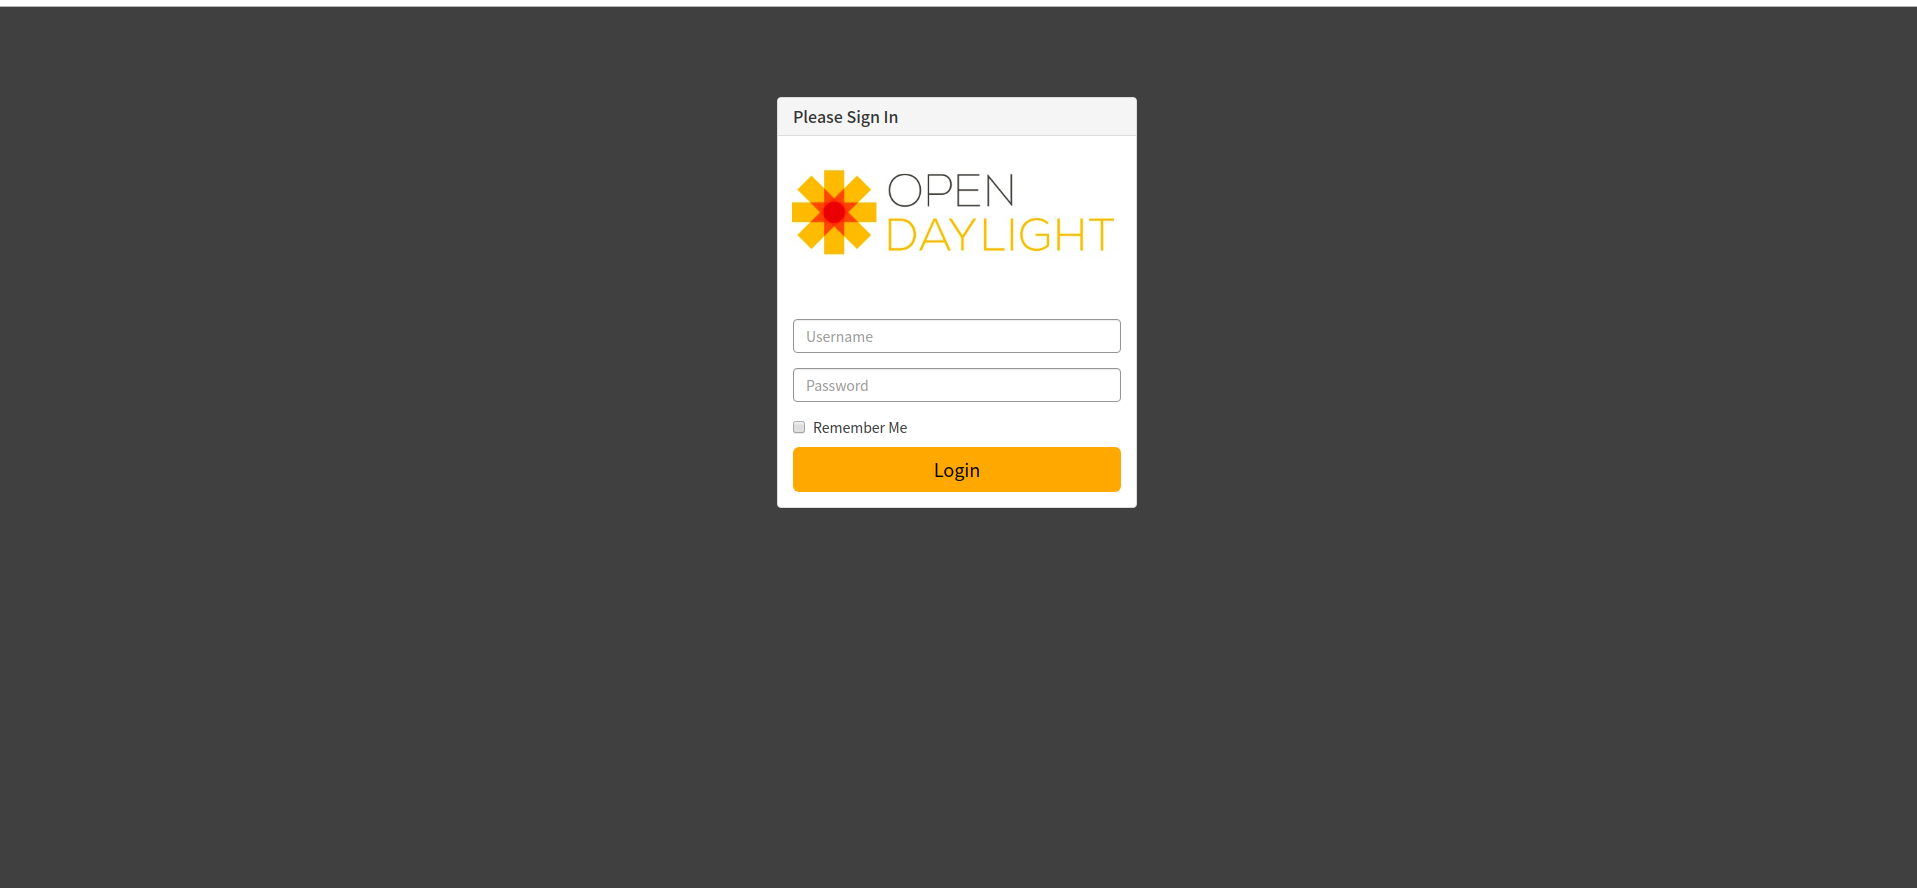
打开浏览器在地址栏输入127.0.0.1:8181/index.html,可看到如下界面:
3. 用Python脚本搭建如下拓扑,连接OpenDayLight控制器
Python脚本建立拓扑:
from mininet.topo import Topo

class Topo2( Topo ):

    def __init__( self ):

	# 初始化拓扑
	Topo.__init__( self )

	# 添加一台SDN交换机和三台主机
	h1 = self.addHost('h1')
	h2 = self.addHost('h2')
	h3 = self.addHost('h3')
	sw1 = self.addSwitch('s1')

	# 添加连接
	self.addLink(h1,sw1,1,1)
	self.addLink(h2,sw1,1,2)
	self.addLink(h3,sw1,1,3)

topos = { 'mytopo': ( lambda: Topo2() ) }
新建的py脚本文件权限要改为可执行

运行拓扑:
sudo mn --custom mytopo.py --topo mytopo --controller=remote,ip=127.0.0.1,port=6633 --switch ovsk,protocols=OpenFlow13

在控制器端查看拓扑:

4. 在控制器提供的WEB UI中下发流表使h2 20s内ping不通h3,20s后恢复
(1)选择PUT方式下发流表,node填入openflow:1,table为0,flow为1
http://127.0.0.1:8181/restconf/config/opendaylight-inventory:nodes/node/openflow:1/flow-node-inventory:table/0/flow/1

(2) 点击添加flow list,id为0,in-port输入端口选择2(交换机连接h2的端口),ethernet-type写入0x0800(表示以太网帧是ip协议)

(3)layer-3-match:ipv4-match 三层匹配为ipv4匹配,ipv4-source:数据包源ip匹配项(这里由于port2进入的数据包只可能是h2发送的所以可以不填),ipv4-destination:数据包目的ip匹配项
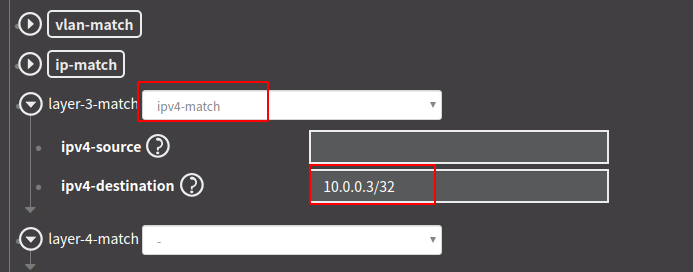
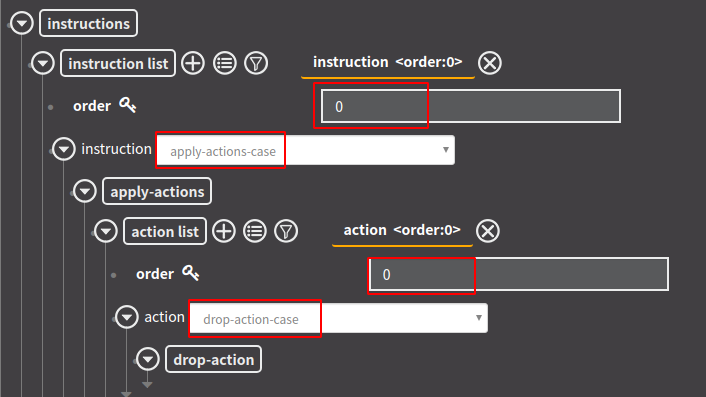
(4)新增instruction list这是流表项匹配到数据报后要执行的指令,order:0 指令id0, instruction:apply-actions-case 执行动作
新增action list ,action drop-action-case 丢包动作(转发动作为output-action 并要在output-node-connector填写转发端口),order:0 动作id0
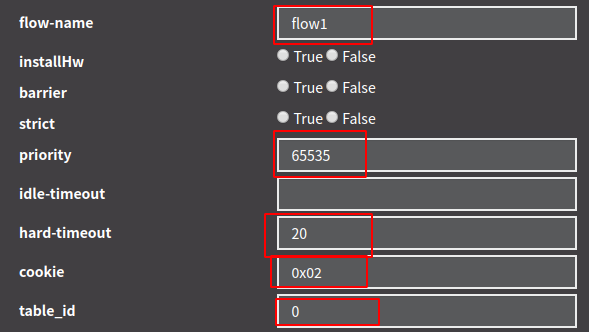
(5)flow-name 流表项名字,可不填
priority 流表项优先级,要大于odl下发的默认流表,这里设置成最大65535
hard-timeout 硬超时,流表项下发后生效时长,这里设置为20
cookie 可不填,为方便在ovs中查找下发成功的流表项可以设置成容易找的到值如0x02(要填16进制)
table_id 流表id 默认为0
(6)在send之前,先在mininet中执行
h2 ping h3
然后将刚刚配置好的流表下发

5. 借助Postman通过OpenDayLight的北向接口下发流表,再利用OpenDayLight北向接口查看已下发的流表。
解压Postman:
tar -zxvf Postman-linux-x64-7.9.0.tar.gz
Postman下发流表:

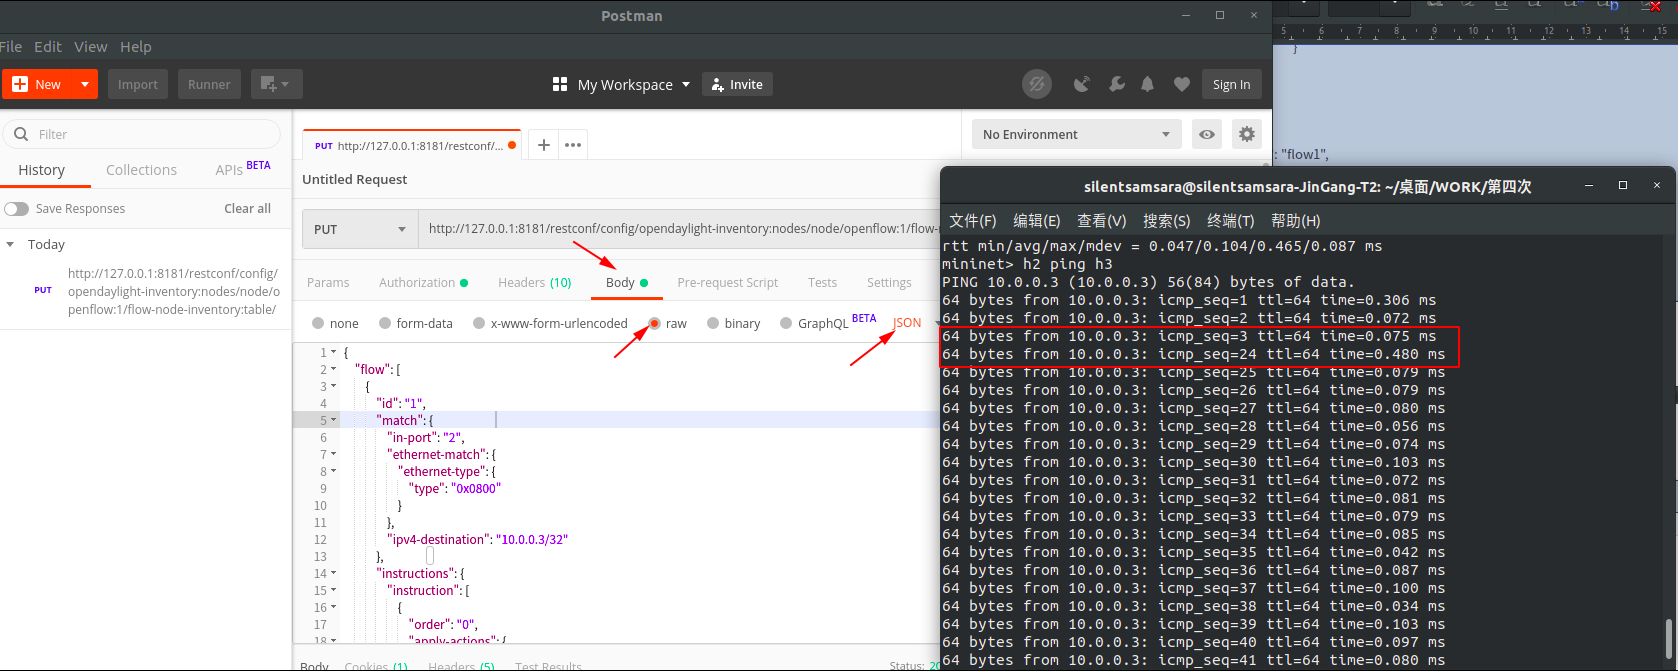
地址设置为
http://127.0.0.1:8181/restconf/config/opendaylight-inventory:nodes/node/openflow:1/flow-node-inventory:table/0/flow/1
body:
{
    "flow": [
        {
            "id": "1",
            "match": {
                "in-port": "2",
                "ethernet-match": {
                    "ethernet-type": {
                        "type": "0x0800"
                    }
                },
                "ipv4-destination": "10.0.0.3/32"
            },
            "instructions": {
                "instruction": [
                    {
                        "order": "0",
                        "apply-actions": {
                            "action": [
                                {
                                    "order": "0",
                                    "drop-action": {}
                                }
                            ]
                        }
                    }
                ]
            },
            "flow-name": "flow1",
            "priority": "65535",
            "hard-timeout": "20",
            "cookie": "0x02",
            "table_id": "0"
        }
    ]
}
在ODL里面用GET方式查看流表:


【推荐】国内首个AI IDE,深度理解中文开发场景,立即下载体验Trae
【推荐】编程新体验,更懂你的AI,立即体验豆包MarsCode编程助手
【推荐】抖音旗下AI助手豆包,你的智能百科全书,全免费不限次数
【推荐】轻量又高性能的 SSH 工具 IShell:AI 加持,快人一步
· 如何编写易于单元测试的代码
· 10年+ .NET Coder 心语,封装的思维:从隐藏、稳定开始理解其本质意义
· .NET Core 中如何实现缓存的预热?
· 从 HTTP 原因短语缺失研究 HTTP/2 和 HTTP/3 的设计差异
· AI与.NET技术实操系列:向量存储与相似性搜索在 .NET 中的实现
· 周边上新:园子的第一款马克杯温暖上架
· Open-Sora 2.0 重磅开源!
· 分享 3 个 .NET 开源的文件压缩处理库,助力快速实现文件压缩解压功能!
· Ollama——大语言模型本地部署的极速利器
· [AI/GPT/综述] AI Agent的设计模式综述