【转】http://blog.csdn.net/et_sandy/article/details/41415047
环境:
win7 64位
Cocos2d-JS v3.1
Cocos Code IDE v1.0.0.Final
本文介绍的方法比较随意,另官方也有规范的教程:http://www.cocos2d-x.org/docs/manual/framework/html5/v2/customize-loading-screen/zh
在非web上进行测试,web版的话大家自己改改,本文后面也会介绍。
正文:
1.在main.js里面把这个方法
cc.LoaderScene.preload(g_resources, function () {
        cc.director.runScene(new HelloWorldScene());
    }, this);
改为(其实就是不用cc.LoaderScene.preload这个函数...):
//    cc.LoaderScene.preload(g_resources, function () {
        cc.director.runScene(new HelloWorldScene());
//    }, this);
2.在src下新建一个loading.js文件,然后在project.json里面注册
"jsList":[
        "src/resource.js",
        "src/app.js",
        "src/loading.js"
    ]
3.在loading.js里面添加以下代码
var loadindLayer = cc.LayerColor.extend({//继承LayerColor,初始化的时候可以直接改背景颜色
    a:0,//记录当前加载了多少个文件
    ctor : function() {
        this._super(cc.color(100, 0, 0, 255));
        var size = cc.winSize;
        //添加一个文本框显示
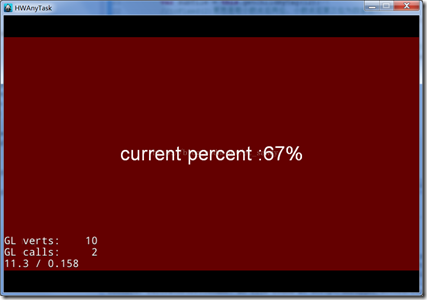
        var l = new cc.LabelTTF("current percent : 0%", "Arial", 38);
        //居中
        l.x = size.width * 0.5;
        l.y = size.height * 0.5;
        this.addChild(l, 11, 12);
        //加载文件的几种方式,特别是在cc.loader里面,还有好多种加载的函数,记得把加载的资源路径和文件名改掉
        ccs.armatureDataManager.addArmatureFileInfoAsync("res/armatures/logo.png","res/armatures/logo.plist","res/armatures/logo.xml",this.loadCall,this);
        cc.textureCache.addImage("res/armatures/robot.png",this.loadCall,this);
        cc.loader.load("res/armatures/bg.jpg", this.loadCall,this);
    },
    loadCall : function() {
        //每次调用进行计数
        this.a ++;
        //以tag的形式获取文本框对象
        var subTile = this.getChildByTag(12);
        //toFixed(2)意思是取小数点后两位,小数点后第三位为四舍五入
        subTile.setString("current percent :" + (this.a / 3).toFixed(2) *100 + "%");
        //加载完毕,貌似好多教程都是用百分比判断( >= 1 )
        if (this.a == 3) {
            //带翻页动画的场景跳转,第一个参数为动画的执行时间,第二个为跳到的场景,第三个为false时从右下角往左边翻页,true时左边往右边翻页
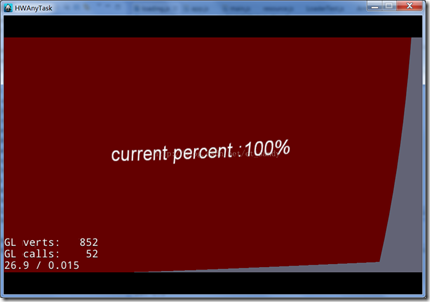
            var trans = new cc.TransitionPageTurn(0.5, new HelloScene(), false);
            cc.director.runScene(trans);
        }
    },
});

var HelloScene = cc.Scene.extend({
    onEnter:function () {
        this._super();
        //加载app.js的layer
        var layer = new HelloWorldLayer();
        this.addChild(layer);
    }
});
注意加载文件函数里面加载的文件要改为自己工程当前目录下的文件路径和文件名称
4.app.js里面最后的场景加载的layer改为loading的layer
var HelloWorldScene = cc.Scene.extend({
    onEnter:function () {
        this._super();
        //自定义loading的layer
        var layer = new loadindLayer();
        this.addChild(layer);
    }
});
5.web上的建议修改
不能用这个方法加载文件
ccs.armatureDataManager.addArmatureFileInfoAsync("res/armatures/logo.png","res/armatures/logo.plist","res/armatures/logo.xml",this.loadCall,this);
然后loading跳转后的场景里面用上的资源请在loading的时候加载


