vue学习笔记
vue学习笔记
一vue环境搭建/目录结构
Vue-cli的安装
yarn add global add @vue/cli
npm install -g @vue/cli
cnpm install -g @vue/cli
安装cnmp命令:
npm install -g cnpm --registry=https://registry.npm.taobao.org
安装yarn命令
npm install -g yarn
一.通过Vue-cli创建项目
vue create hello-vue3
yarn serve
二.通过Vite创建项目
2.1使用npm创建
npm init vite-app <project-name>
cd <project-name>
npm install
npm run dev
2.2使用yarn创建
yarn create vite-app <project-name>
cd <project-name>
yarn
yarn dev
三.目录结构

二Vue3.x绑定数据、绑定html、绑定属性、循环数据
1.1 Vue3.x数据绑定
业务逻辑
export default {
  name: "",

  data() {
    return {
      msg: "你好vue",
      userInfo: {
        name: "make",
        age: 18,
      },
    };
  },

  mounted() {},

  methods: {},
};
template模板
<template>
  <h2>msg:{{ msg }}</h2>
  <h2>name:{{ userInfo.name }}</h2>
</template>
1.2 Vue3.x v-html绑定html
业务逻辑
export default {
  name: "",

  data() {
    return {
      msg: "你好vue",
    };
  },

  mounted() {},

  methods: {},
};
template模板
<template>
  <h2 v-html="msg"></h2>
</template>
1.3、Vue3.x v-bind绑定属性
业务逻辑:
export default {
  name: "",

  data() {
    return {
      logSrc:  "https://gitee.com/ShihaoHuang310/images/raw/master/202109161035849.png",
    };
  },

  mounted() {},

  methods: {},
};
template模板
<template>
  <!-- 1、绑定属性的第一种写法v-bind: -->
  <img v-bind:src="logSrc" alt="logo" />
  <!-- 2、绑定属性的第二种写法: -->
  <img :src="logSrc" alt="logo" />
</template>
1.4、v-bind动态参数
<a v-bind:[attributeName]="url"> ...
这里attributeName将被动态地评估为JavaScript表达式,并且其评估值将用作参数的最终值。例如,如果您的组件实例具有一个数据属性attributeName,其值为"href",则此绑定将等效于v-bind:href
业务逻辑
export default {
  name: "",

  data() {
    return {
      attributeName: "href",
      linkUrl: "http://www.baidu.com",
    };
  },

  mounted() {},

  methods: {},
};
template模板
<template>
  <!-- 1、绑定属性的第一种写法v-bind: -->
  <a v-bind:[attributeName]="linkUrl">百度</a>
  <!-- 2、绑定属性的第二种写法: -->
  <a :[attributeName]="linkUrl">百度</a>
</template>
1.5、v-for循环数组
逻辑代码
<script>
export default {
  name: "",

  data() {
    return {
      list1: ["c++", "c#", "java", "python"],
      list2: [
        { id: 1, name: "make1", age: 18 },
        { id: 2, name: "make2", age: 19 },
        { id: 3, name: "make3", age: 20 },
      ],
      list3: [
        {
          cate: "国内新闻",
          list: [{ title: "国内新闻1" }, { title: "国内新闻2" }],
        },
        {
          cate: "国外新闻",
          list: [{ title: "国外新闻1" }, { title: "国外新闻2" }],
        },
      ],
    };
  },

  mounted() {},

  methods: {},
};
</script>
template模板
<template>
  <h2>list1</h2>
  <ul>
    <li v-for="(item, index) in list1" :key="index">{{ item }}</li>
  </ul>
  <hr />
  <h2>list2</h2>
  <ul v-for="(item, index) in list2" :key="index">
    <li>{{ item.id }}</li>
    <li>{{ item.name }}</li>
    <li>{{ item.age }}</li>
  </ul>
  <hr />
  <h2>list3</h2>
  <ul v-for="(item, index) in list3" :key="index">
    <li>
      <h2>{{ item.cate }}</h2>
      <p v-for="(list, index) in item.list" :key="index">{{ list.title }}</p>
    </li>
  </ul>
</template>
1.6、v-for循环对象
业务逻辑:
<script>
export default {
  name: "HelloWorld",

  data() {
    return {
      listObject: {
        title: "how to do lists in vue!",
        author: "make",
        publishedAt: "2021-05-06",
      },
    };
  },

  mounted() {},

  methods: {},
};
</script>
template模板:
<template>
  <ul v-for="(k, v, i) in listObject" :key="i">
    <li>{{ k }}----{{ v }}---{{ i }}</li>
  </ul>
</template>
三Vue3.x中的事件方法入门、模板语法模板中类和样式绑定
一、Vue3.x中的事件方法入门
业务逻辑
<script>
export default {
  name: "HelloWorld",

  data() {
    return {
      num: 1,
      msg: "hello vue",
    };
  },

  mounted() {},

  methods: {
    setMsg() {
      this.msg = "change msg";
    },
    getMsg() {
      alert(this.msg);
    },
  },
};
</script>
template模板:
<template>
  <h2>Num:{{ num }}</h2>
  <button @click="num += 1">+</button>
  <h2>msg:{{ msg }}</h2>
  <button @click="setMsg">设置msg</button>
  <button @click="getMsg">获取msg</button>
</template>
二、Vue3 v-bind绑定Class
当v-bind与class和一起使用时,Vue提供了特殊的增强功能style。除了字符串外,表达式还可以求值为对象或数组。
1.1、v-bind:class绑定字符串
业务逻辑:
<template>
  <div :class="isActive">hello</div>
</template>

<script>
export default {
  name: "HelloWorld",

  data() {
    return {
      isActive: "active",
    };
  },

  mounted() {},

  methods: {
    setMsg() {
      this.msg = "change msg";
    },
    getMsg() {
      alert(this.msg);
    },
  },
};
</script>

<style scoped>
.active {
  width: 100px;
  height: 100px;
  background: red;
}
</style>
1.2、v-bind:class绑定对象
<template>
  <div :class="{ active: 'isActive', error: 'hasError' }">v-bind:class演示</div>
</template>

<script>
export default {
  name: "HelloWorld",

  data() {
    return {
      isActive: true,
      hasError: false,
    };
  },

  mounted() {},

  methods: {},
};
</script>

<style scoped>
.active {
  width: 100px;
  height: 100px;
  background: red;
}
.error {
  color: blue;
}
</style>
1.3、v-bind:class 结合 class的使用
<template>
  <div class="static" :class="{ active: 'isActive', error: 'hasError' }">
    v-bind:class演示
  </div>
</template>

<script>
export default {
  name: "HelloWorld",

  data() {
    return {
      isActive: true,
      hasError: false,
    };
  },

  mounted() {},

  methods: {},
};
</script>

<style scoped>
.static {
  font-size: 20px;
}
.active {
  width: 100px;
  height: 100px;
  background: red;
}
.error {
  color: blue;
}
</style>
1.4、数组语法
<template>
  <div :class="[activeClass, errorClass]"></div>
</template>

<script>
export default {
  name: "HelloWorld",

  data() {
    return {
      activeClass: "active",
      errorClass: "text-danger",
    };
  },

  mounted() {},

  methods: {},
};
</script>

<style scoped></style>
1.5、数组语法 结合三目运算
<template>
  <div :class="[isActive ? activeClass : errorClass]"></div>
</template>

<script>
export default {
  name: "HelloWorld",

  data() {
    return {
      isActive: true,
      activeClass: "active",
      errorClass: "text-danger",
    };
  },

  mounted() {},

  methods: {},
};
</script>

<style scoped>
.active {
  width: 100px;
  height: 100px;
  background: red;
}

.error {
  color: blue;
}
</style>
三、v-bind:style 绑定内联样式
2.1、第一种绑定方式
<template>
  <div :style="{ color: activeColor, fontSize: fontSize + 'px' }">hello</div>
</template>

<script>
export default {
  name: "HelloWorld",

  data() {
    return {
      activeColor: "red",
      fontSize: 30,
    };
  },

  mounted() {},

  methods: {},
};
</script>

<style scoped></style>
2.2、第二种绑定方式
<template>
  <div :style="styleObject">hello</div>
</template>

<script>
export default {
  name: "HelloWorld",

  data() {
    return {
      styleObject: {
        color: "red",
        fontSize: "13px",
      },
    };
  },

  mounted() {},

  methods: {},
};
</script>

<style scoped></style>
2.3、第三种绑定方式 数组方式
<template>
  <div :style="[baseStyles, overridingStyles]">hello</div>
</template>

<script>
export default {
  name: "HelloWorld",

  data() {
    return {
      baseStyles: {
        color: "orange",
        fontSize: "17px",
      },
      overridingStyles: {
        width: "100px",
        height: "100px",
        background: "blue",
      },
    };
  },

  mounted() {},

  methods: {},
};
</script>

<style scoped></style>
2.4、自动前缀
当您使用需要一个CSS属性供应商前缀的
:style,例如transform,Vue公司会自动检测并添加适当的前缀到应用的样式。
2.5、多个值
您可以为样式属性提供多个(前缀)值的数组,例如:
<div :style="{ display: ['-webkit-box', '-ms-flexbox', 'flex'] }"></div>
这只会呈现浏览器支持的数组中的最后一个值。在此示例中,它将display: flex为支持非前缀版本的flexbox的浏览器呈现。
四、案例:循环数据 第一个数据高亮显示
<template>
  <ul v-for="(item, index) in list" :key="index">
    <li :class="{ red: index == 0, blue: index == 1 }">{{ item }}</li>
  </ul>
</template>

<script>
export default {
  name: "HelloWorld",

  data() {
    return {
      list: ["马化腾", "马云", "刘强东"],
    };
  },

  mounted() {},

  methods: {},
};
</script>

<style scoped>
.red {
  color: red;
}

.blue {
  color: blue;
}
</style>
四Vue3.x中的事件方法详解、事件监听、方法传值、事件对象、多事件处理程序、事件修饰符、按键修饰符
一、Vue3.x监听事件
vue中监听事件可以使用
v-on:click或者@click,@click为v-on:click的简写,例如
<template>
  <h2>{{ counter }}</h2>
  <button @click="counter += 1">+1</button>
</template>

<script>
export default {
  name: "HelloWorld",

  data() {
    return {
      counter: 1,
    };
  },

  mounted() {},

  methods: {},
};
</script>

<style scoped></style>
二、Vue3.x定义方法 执行方法 获取数据 改变数据
<template>
  <h2>{{ msg }}</h2>

  <button @click="setMsg()">设置msg</button>
  <br />
  <br />
  <button @click="getMsg()">获取msg</button>

  <br />
  <br />
  <h2>Num:{{ num }}</h2>

  <button @click="num += 1">Add 1</button>
</template>

<script>
export default {
  name: "HelloWorld",

  data() {
    return {
      num: 1,
      msg: "你好vue",
    };
  },

  mounted() {},

  methods: {
    setMsg() {
      this.msg = "我是方法里改变后的msg";
    },
    getMsg() {
      alert(this.msg);
    },
  },
};
</script>

<style scoped></style>
三、Vue3.x方法传值、方法的相互调用
<template>
  <h2>{{ msg }}</h2>

  <button @click="setMsg('只执行方法传值改变msg')">设置msg</button>
  <br />
  <br />
  <button @click="run()">获取msg</button>
</template>

<script>
export default {
  name: "HelloWorld",

  data() {
    return {
      num: 1,
      msg: "你好vue",
    };
  },

  mounted() {},

  methods: {
    setMsg(msg) {
      this.msg = msg;
    },
    run() {
      this.getMsg();
    },
    getMsg() {
      alert(this.msg);
    },
  },
};
</script>

<style scoped></style>
四、事件对象
一、单个参数
<template>
  <button data-aid="123" @click="eventFn($event)">事件对象</button>
</template>

<script>
export default {
  name: "HelloWorld",

  data() {
    return {
      msg: "hello vue",
    };
  },

  mounted() {},

  methods: {
    eventFn(e) {
      console.log(e);
      e.srcElement.style.background = "red";
      console.log(e.srcElement.dataset.aid);
    },
  },
};
</script>

<style scoped></style>
二、多个参数
<template>
  <button data-aid="123" @click="eventFn('HELLO VUE', $event)">事件对象</button>
</template>

<script>
export default {
  name: "HelloWorld",

  data() {
    return {
      msg: "hello vue",
    };
  },

  mounted() {},

  methods: {
    eventFn(msg, e) {
      if (e) {
        e.preventDefault();
      }
      alert(msg);
    },
  },
};
</script>

<style scoped></style>
五、Vue3.x 多事件处理程序
您可以在事件处理程序中使用逗号分隔多个事件处理程序,如下所示:
业务逻辑:
methods: {
  one(event) {
    // first handler logic...
  },
  two(event) {
    // second handler logic...
  }
}
template模板:
<button @click="one($event), two($event)">
  Submit
</button>
六、事件修饰符
vue中阻止冒泡 阻止默认行为,可以通过事件对象event.preventDefault()或event.stopPropagation()实现,还可以通过事件修饰符实现。
.stop
.prevent
.capture
.self
.once
.passiv
stopPropagation:
<a @click.stop="doThis"></a>
preventDefault:
<a @click.prevent="doThat"></a>
stopPropagation And preventDefault
<a @click.stop.prevent="doThat"></a>
七、按键修饰符
监听键盘事件时,我们通常需要检查特定的键。Vue允许在监听关键事件时v-on或@在监听关键事件时添加按键修饰符:
<input @keyup.enter="submit" />
Vue为最常用的键提供别名:
.enter
.tab
.delete (同时捕获“删除”和“退格”键)
.esc
.space
.up
.down
.left
.right
五Vue3.x中Dom操作$refs 以及表单( input、checkbox、radio、select、 textarea )结合双休数据绑定实现在线预约功能
一、Vue3.x中的双休数据绑定实现人员登记系统
二、Vue3.x Dom操作
1、第一种方法 原生js
<template>
  <div class="people_list">
    <ul>
      <li>姓名:<input type="text" id="username" /></li>
    </ul>
    <button @click="doSubmit()" class="submit">获取表单内容</button>
  </div>
</template>

<script>
export default {
  name: "HelloWorld",

  data() {
    return {
      msg: "hello vue",
    };
  },

  mounted() {},

  methods: {
    doSubmit() {
      var username = document.querySelector("#username");
      alert(username.value);
    },
  },
};
</script>

<style scoped></style>
2、第二种方法 ref获取dom节点
<template>
  <div class="people_list">
    <ul>
      <li>姓名:<input type="text" id="username" /></li>
      <li>年龄:<input type="text" ref="age" /></li>
    </ul>
    <button @click="doSubmit()" class="submit">获取表单内容</button>
  </div>
</template>

<script>
export default {
  name: "HelloWorld",

  data() {
    return {
      msg: "hello vue",
    };
  },

  mounted() {},

  methods: {
    doSubmit() {
      var username = document.querySelector("#username");
      alert(username.value);
      var age = this.$refs.age;
      alert(age.value);
    },
  },
};
</script>

<style scoped></style>
三、Vue3.x双休数据绑定
<template>
  <div class="people_list">
    <ul>
      <li>姓名:<input type="text" v-model="peopleInfo.username" /></li>
      <li>年龄:<input type="text" v-model="peopleInfo.age" /></li>
    </ul>
    <button @click="doSubmit()" class="submit">获取表单内容</button>
  </div>
</template>

<script>
export default {
  name: "HelloWorld",

  data() {
    return {
      peopleInfo: {
        username: "",
        age: "",
      },
    };
  },

  mounted() {},

  methods: {
    doSubmit() {
      alert(this.peopleInfo.username);
      alert(this.peopleInfo.age);
    },
  },
};
</script>

<style scoped></style>
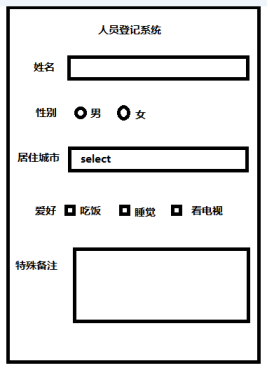
四、 input、checkbox、radio、select、 textarea中的双休数据绑定
<template>
  <h2>人员登录系统</h2>
  <div class="people_list">
    <ul>
      <li>姓名:<input type="text" v-model="peopleInfo.username" /></li>
      <li>年龄:<input type="text" v-model="peopleInfo.age" /></li>
      <li>性别:</li>
      <input type="radio" value="1" id="sex1" v-model="peopleInfo.sex" />
      <label for="sex1">男</label>
      <input type="radio" value="2" id="sex2" v-model="peopleInfo.sex" />
      <label for="sex2">女</label>
      <li>
        城市:
        <select name="city" id="city" v-model="peopleInfo.city">
          <option
            v-for="(item, index) in peopleInfo.cityList"
            :key="index"
            :value="item"
          >
            {{ item }}
          </option>
        </select>
      </li>
      <li>
        爱好:
        <span v-for="(item, index) in peopleInfo.hobby" :key="index">
          <input type="checkbox" :id="'check' + index" v-model="item.checked" />
          <label :for="'check' + key">{{ item.title }}</label>
        </span>
      </li>
      <li>
        备注:
        <textarea
          name="mark"
          id="mark"
          cols="30"
          rows="5"
          v-model="peopleInfo.mark"
        ></textarea>
      </li>
    </ul>
    <button @click="doSubmit()" class="submit">获取表单内容</button>
  </div>
</template>

<script>
export default {
  name: "HelloWorld",

  data() {
    return {
      peopleInfo: {
        username: "",
        age: "",
        sex: "2",
        cityList: ["北京", "上海", "深圳"],
        city: "上海",
        hobby: [
          {
            title: "吃饭",
            checked: false,
          },
          {
            title: "睡觉",
            checked: false,
          },
          {
            title: "敲代码",
            checked: false,
          },
        ],
      },
      mark: "",
    };
  },

  mounted() {},

  methods: {
    doSubmit() {
      alert(this.peopleInfo.username);
      alert(this.peopleInfo.age);
    },
  },
};
</script>

<style scoped>
ul {
  list-style-type: none;
}

h2 {
  text-align: center;
}

.people_list {
  width: 400px;
  margin: 40px auto;
  padding: 40px;
  border: 1px solid #eee;
}

.people_list li {
  height: 50px;
  line-height: 50px;
}

.form_input {
  width: 300px;
  height: 28px;
}

.submit {
  float: right;
  margin-top: 10px;
}
</style>
六Vue3.x中使用JavaScript表达式 、条件判断、 计算属性和watch侦听
一、Vue3.x模板中使用JavaScript表达式
<template>
  {{ number + 1 }}
  {{ ok ? "yes" : "no" }}
  {{
    message
      .split("")
      .reverse()
      .join("-")
  }}
</template>

<script>
export default {
  name: "HelloWorld",

  data() {
    return {
      number: 1,
      message: "hello world",
    };
  },

  mounted() {},

  methods: {},
};
</script>

<style scoped></style>
二、 v-if v-else v-else-if v-show
2.1 v-if
<template>
  <p v-if="flag">v-if flag=true</p>
</template>

<script>
export default {
  name: "HelloWorld",

  data() {
    return {
      flag: 1,
    };
  },

  mounted() {},

  methods: {},
};
</script>

<style scoped></style>
2.2 v-if v-else
v-else元素必须紧跟在带v-if或者v-else-if的元素的后面,否则它将不会被识别。
<template>
  <p v-if="Math.random() > 0.5">大于0.5</p>
  <p v-else>小于0.5</p>
</template>
2.3、v-else-if
与相似
v-else,v-else-if元素必须紧随v-if或v-else-if元素
<template>
  <div v-if="type === 'A'">
    A
  </div>
  <div v-else-if="type === 'B'">
    B
  </div>
  <div v-else-if="type === 'C'">
    C
  </div>
  <div v-else>
    D
  </div>
</template>

<script>
export default {
  name: "HelloWorld",

  data() {
    return {
      type: "A",
    };
  },

  mounted() {},

  methods: {},
};
</script>

<style scoped></style>
2.4、在 <template> 元素上使用 v-if 条件渲染分组
因为
v-if是一个指令,所以必须将它添加到一个元素上。但是如果想切换多个元素呢?此时可以把一个<template>元素当做不可见的包裹元素,并在上面使用v-if。最终的渲染结果将不包含<template>元素。
<template v-if="false">
  <h1>Title</h1>
  <p>Paragraph 1</p>
  <p>Paragraph 2</p>
</template>
2.5、v-show
另一个用于根据条件展示元素的选项是
v-show指令
<template v-if="false">
  <h2 v-show="ok">hello</h2>
</template>

<script>
export default {
  name: "HelloWorld",

  data() {
    return {
      ok: true,
    };
  },

  mounted() {},

  methods: {},
};
</script>

<style scoped></style>
2.6、v-if 和 v-show的区别
v-if是dom操作,v-show只是css的显示隐藏,一般来说,
v-if有更高的切换开销,而v-show有更高的初始渲染开销。因此,如果需要非常频繁地切换,则使用v-show较好。
三、计算属性
3.1 计算属性入门
1、在模板中表达式非常便利,但是它们实际上只用于简单的操作。
2、模板是为了描述视图的结构。在模板中放入太多的逻辑会让模板过重且难以维护。这就是为什么 Vue.js 将绑定表达式限制为一个表达式。如果需要多于一个表达式的逻辑,应当使用计算属性。
<template>
  {{ reverseMsg }}
  <button @click="setMsg()">改变数据</button>
</template>

<script>
export default {
  name: "HelloWorld",

  data() {
    return {
      a: 12,
      flag: true,
      message: "三国演义",
    };
  },
  computed: {
    reverseMsg() {
      return this.message
        .split(" ")
        .reverse()
        .join("*");
    },
  },
  mounted() {},

  methods: {
    setMsg() {
      this.message = "Ni HAO VUE";
    },
  },
};
</script>

<style scoped></style>
四、watch监听数据变化
Vue.js 提供了一个方法 watch ,它用于观察 Vue 实例上的数据变动。当一些数据需要根据其它数据变化时,watch 很诱人 —— 特别是如果你来自 AngularJS 。不过,通常更好的办法是使用计算属性而不是一个命令式的 watch 回调。
<template>
  {{ fullName }}
  <input type="text" v-model="firstName" />
  <input type="text" v-model="lastName" />
</template>

<script>
export default {
  name: "Helloworld",

  data() {
    return {
      firstName: "",
      lastName: "",
      fullName: "",
    };
  },
  watch: {
    firstName: function(val) {
      this.fullName = val + this.lastName;
    },
    lastName: function(val) {
      this.fullName = this.firstName + val;
    },
  },
  mounted() {},

  methods: {},
};
</script>

<style lang="scss" scoped></style>
todoList案例
<template>
  <h2>Vue实现TodoList</h2>
  <div class="todolist">
    <input type="text" v-model="todo" @keyup.enter="addData()" />
    <hr />
    <h4>正在进行</h4>
    <ul>
      <!-- <li v-for="(item, index) in list" :key="index" v-show="!item.checked">
        <input type="checkbox" v-model="item.checked" />
        {{ item.title }}----<button @click="deleteData(index)">删除</button>
      </li> -->
      <template v-for="(item, index) in list" :key="index">
        <li v-if="!item.checked">
          <input type="checkbox" v-model="item.checked" />
          {{ item.title }}----<button @click="deleteData(index)">删除</button>
        </li>
      </template>
    </ul>
    <h4>已经完成</h4>
    <ul>
      <!-- <li v-for="(item, index) in list" :key="index" v-show="item.checked">
        <input type="checkbox" v-model="item.checked" />
        {{ item.title }}----<button @click="deleteData(index)">删除</button>
      </li> -->
      <template v-for="(item, index) in list" :key="index">
        <li v-if="item.checked">
          <input
            type="checkbox"
            v-model="item.checked"
            @change="setTodoList()"
          />
          {{ item.title }}----<button @click="deleteData(index)">删除</button>
        </li>
      </template>
    </ul>
  </div>
</template>

<script>
import storage from "../models/storage";
export default {
  name: "Helloworld",

  data() {
    return {
      todo: "",
      list: [],
    };
  },

  mounted() {
    console.log("mount");
    let todoList = storage.get("todoList");
    if (todoList) {
      this.list = todoList;
    }
  },

  methods: {
    addData() {
      this.list.push({
        title: this.todo,
        checked: false,
      });
      this.todo = "";
      storage.set("todoList", this.list);
    },
    deleteData(index) {
      this.list.splice(index, 1);
      storage.set("todoList", this.list);
    },
    setTodoList() {
      storage.set("todoList", this.list);
    },
  },
};
</script>

<style scoped>
h2 {
  text-align: center;
}
.todolist {
  width: 500px;
  border: 1px solid #eee;
  margin: 0 auto;
  padding: 20px;
}
</style>
localStorage封装
1、新建models/storage.js
2、import storage from './model/storage.js';
const storage = {
  set(key, value) {
    localStorage.setItem(key, JSON.stringify(value));
  },
  get(key) {
    return JSON.stringify(localStorage.getItem(key));
  },
  remove(key) {
    localStorage.remove(key);

  }
}
export default storage
一、 localStorage里面的方法
localStorage.setItem(key,value)

localStorage.getItem(key)

localStorage.removeItem(key);

localStorage.clear();
Vue3.x父组件给子组件传值、Props、Props验证、单向数据流
父组件给子组件传值
1、父组件调用子组件的时候传值
<template>
  <HelloWorld :title="title" />
</template>

<script>
import HelloWorld from "./components/HelloWorld.vue";

export default {
  name: "App",
  data() {
    return {
      title: "hello vue",
    };
  },
  components: {
    HelloWorld,
  },
};
</script>

<style>
#app {
}
</style>
2、子组件接收父组件传值
<template>
  <div>{{ title }}</div>
</template>

<script>
export default {
  name: "HelloWorld",
  props: ["title"],
  data() {
    return {};
  },

  mounted() {},

  methods: {},
};
</script>

<style lang="scss" scoped></style>
Props验证
 props: {
    // 基础的类型检查 (`null` 和 `undefined` 会通过任何类型验证)
    propA: Number,
    // 多个可能的类型
    propB: [String, Number],
    // 必填的字符串
    propC: {
      type: String,
      required: true
    },
    // 带有默认值的数字
    propD: {
      type: Number,
      default: 100
    },
    // 带有默认值的对象
    propE: {
      type: Object,
      // 对象或数组默认值必须从一个工厂函数获取
      default: function() {
        return { message: 'hello' }
      }
    },
    // 自定义验证函数
    propF: {
      validator: function(value) {
        // 这个值必须匹配下列字符串中的一个
        return ['success', 'warning', 'danger'].indexOf(value) !== -1
      }
    },
    // 具有默认值的函数
    propG: {
      type: Function,
      // 与对象或数组默认值不同,这不是一个工厂函数 —— 这是一个用作默认值的函数
      default: function() {
        return 'Default function'
      }
    }
Vue3.x父组件主动获取子组件的数据和执行子组件方法 、子组件主动获取父组件的数据和执行父组件方法
父组件主动获取子组件的数据和执行子组件方法
调用子组件的时候定义一个ref
父组件主动获取子组件数据
this.$refs.header.属性
父组件主动执行子组件方法
this.$refs.header.方法
子组件主动获取父组件的数据和执行父组件方法
子组件主动获取父组件的数据
this.$parent.数据
子组件主动获取父组件的数据
this.$parent.方法
Vue3.x组件自定义事件实现子组件给父组件传值
ue官方推荐你始终使用 kebab-case 的事件名。
子组件DatePicker.vue
<template>
<button @click="run">通过广播方式实现子组件给父组件传值</button>
</template>

<script>
export default {
    // 建议定义所有发出的事件,以便更好地记录组件应该如何工作。
    emits: ["run-parent"],
    data() {
        return {}
    },
    methods: {
        run() {
            this.$emit("run-parent", "这是子组件穿过来的值")
        }
    }
}
</script>
父组件Home.vue
<template>
<div>
    <date-picker @run-parent="getChild">
    </date-picker>
</div>
</template>

<script>
import DatePicker from "./DatePicker"
export default {
    data() {
        return {
            title: "你好vue"
        }
    },
    components: {
        DatePicker
    },
    methods: {
        getChild(data) {
            alert(data)
        }
    }
}
</script>

<style lang="scss">

</style>
Vue3.x组件自定义事件验证
子组件:
<template>
<input type="text" v-model="username" />
<br>
<br>
<input type="text" v-model="password" />
<br>
<br>

<button @click="run">通过广播方式实现子组件给父组件传值</button>
</template>

<script>
export default {
    // 建议定义所有发出的事件,以便更好地记录组件应该如何工作。
    emits: {
        submit: ({
            username,
            password
        }) => {
            if (username && password) {
                return true
            } else {
                console.warn('传入的参数不能为空!')
                return false
            }
        }
    },
    data() {
        return {
            username: "张三",
            password: ""
        }
    },
    methods: {
        run() {
            this.$emit("submit", {
                username: this.username,
                password: this.password
            })
        }
    }
}
</script>
父亲组件:
<template>
<div>
    <login @submit="getChild">
    </login>
</div>
</template>

<script>
import Login from "./Login"
export default {
    data() {
        return {
            title: "你好vue"
        }
    },
    components: {
        Login
    },
    methods: {
        getChild(data) {
            alert(data)
        }
    }
}
</script>

<style lang="scss">

</style>
vue3.x第三方插件mitt 实现非父子组件传值
https://github.com/developit/mitt
Vue3.x以后从实例中移除了
$on,$off和$once方法,$emit仍然是现有 API 的一部分,只能实现子组件触发父组件的方法。
使用mitt之前先安装mitt模块
npm install --save mitt
新建model/event.js
import mitt from 'mitt'
const VueEvent = mitt();

export default VueEvent;
Header组件
<template>
<div>
    <button @click="doLogin">非父子组件传值</button>
</div>
</template>

<script>
import VueEvent from '../model/event'

export default {
    data() {
        return {}
    },
    methods: {
        doLogin() {
            VueEvent.emit("login");
        }
    }
}
</script>
Login组件
<template>
我是用户登录组件
</template>

<script>
import VueEvent from '../model/event'
export default {
    mounted() {
        VueEvent.on("login", () => {
            alert("doLogin")
        })
    }
}
</script>
Vue3.x中全局绑定属性、使用Axios和fetchJsonp请求真实api接口数据、函数防抖实现百度搜索
Vue3.x中使用Axios请求远程真实Api接口数据
1、安装
npm install axios --save
或者
yarn add axios
或者
cnpm install axios --save
2、引入使用
import Axios from "axios";

axios.get('/user?ID=12345')
  .then(function (response) {
    // handle success
    console.log(response);
  })
  .catch(function (error) {
    // handle error
    console.log(error);
  })
  .then(function () {
    // always executed
  });
完整代码:
<template>
  <button @click="getData()">获取数据</button>
  <ul v-for="(item, index) in list" :key="index">
    <li>{{ item.title }}</li>
  </ul>
</template>

<script>
export default {
  name: "VueprojectAxios",

  data() {
    return {
      list: [],
    };
  },

  mounted() {},

  methods: {
    getData() {
      var api =
        "http://www.phonegap100.com/appapi.php?a=getPortalList&catid=20&page=1";
      this.Axios(api)
        .then((res) => {
          // console.log(res.data.result);
          this.list = res.data.result;
          console.log(this.list);
        })
        .catch((err) => {
          console.log(err);
        });
    },
  },
};
</script>

<style lang="scss" scoped></style>
Vue3.x全局绑定Axios
import { createApp } from 'vue'
import App from './App.vue'
import axios from 'axios';

var app=createApp(App)
app.config.globalProperties.axios=axios
app.mount('#app')
Vue3.x中使用fetch-jsonp请求jsonp接口
axios不支持jsonp请求,如果我们要用jsonp来请求数据可以使用fetch-jsonp这个模块。
this.fetchJsonp(
        "https://sp0.baidu.com/5a1Fazu8AA54nxGko9WTAnF6hhy/su?wd=php",
        { jsonpCallback: "cb" }
      )
        .then(function(response) {
          return response.json();
        })
        .then(function(json) {
          console.log(json);
        })
        .catch(function(ex) {
          console.log("parsing failed", ex);
        });
使用函数防抖实现百度搜索
<template>
<div class="home">
    <button @click="getData()">获取数据</button>

    <input type="text" v-model="keyword" @keyup="getData" />
    <br>
    <ul>
        <li v-for="(item,index) in list" :key="index">{{item}}</li>
    </ul>
</div>
</template>

<script>
import fetchJsonp from 'fetch-jsonp';
export default {
    data() {
        return {
            keyword: "",
            list: [],
            timer: ""
        }
    },
    methods: {
        getData() {
            if (this.keyword != "") {
                clearTimeout(this.timer);
                this.timer = setTimeout(() => {
                    var api = "https://sp0.baidu.com/5a1Fazu8AA54nxGko9WTAnF6hhy/su?wd=" + this.keyword
                    fetchJsonp(api, {
                            jsonpCallback: 'cb',
                        })
                        .then(function (response) {
                            return response.json()
                        }).then((json) => {
                            this.list = json.s
                        })

                }, 200)

            }
        }
    },

}
</script>

<style lang="scss">
.home {
    padding: 20px;
}
</style>
Vue3.x中的mixin介绍使用
混入 (mixin) 提供了一种非常灵活的方式,来分发 Vue 组件中的可复用功能。一个混入对象可以包含任意组件选项。当组件使用混入对象时,所有混入对象的选项将被“混合”进入该组件本身的选项。
1、新建mixin/base.js
const baseMixin = {
    data() {
       return{
            apiDomain: "http://www.itying.com"
       }

    },
    methods: {
        success() {
            console.log('succss')
        },
        error() {
            console.error('error')
        }
    }
}
2、使用mixin
<template>
<div>
    首页模板--{{apiDomain}}
</div>
</template>

<script>
import BaseMixin from '../mixin/base'
export default {
    mixins: [BaseMixin],
    data() {
        return {

        }
    }
}
</script>
关于Mixin的选项合并
当组件和混入对象含有同名选项时,这些选项将以恰当的方式进行“合并”。
1、比如,数据对象在内部会进行递归合并,并在发生冲突时以组件数据优先。
const myMixin = {
  data() {
    return {
      message: 'hello',
      foo: 'abc'
    }
  }
}

const app = Vue.createApp({
  mixins: [myMixin],
  data() {
    return {
      message: 'goodbye',
      bar: 'def'
    }
  },
  created() {
    console.log(this.$data) // => { message: "goodbye", foo: "abc", bar: "def" }
  }
})
2、同名钩子函数将合并为一个数组,因此都将被调用。另外,混入对象的钩子将在组件自身钩子之前调用。
const myMixin = {
  created() {
    console.log('mixin hook called')
  }
}

const app = Vue.createApp({
  mixins: [myMixin],
  created() {
    console.log('component hook called')
  }
})

// => "混入对象的钩子被调用"
// => "组件钩子被调用"
3、值为对象的选项,例如 methods、components,将被合并为同一个对象。两个对象键名冲突时,取组件对象的键值对
const myMixin = {
  methods: {
    foo() {
      console.log('foo')
    },
    conflicting() {
      console.log('from mixin')
    }
  }
}

const app = Vue.createApp({
  mixins: [myMixin],
  methods: {
    bar() {
      console.log('bar')
    },
    conflicting() {
      console.log('from self')
    }
  }
})

const vm = app.mount('#mixins-basic')

vm.foo() // => "foo"
vm.bar() // => "bar"
vm.conflicting() // => "from self"
全局配置Mixin
const app = Vue.createApp({
  myOption: 'hello!'
})

// 为自定义的选项 'myOption' 注入一个处理器。
app.mixin({
  created() {
    const myOption = this.$options.myOption
    if (myOption) {
      console.log(myOption)
    }
  }
})

app.mount('#mixins-global') // => "hello!"
import { createApp } from 'vue'
import App from './App.vue'
import BaseMixin from './mixin/base'

//原来的代码
// createApp(App).mount('#app')

//修改后的代码
const app=createApp(App);

app.mixin(BaseMixin)

app.mount('#app');
Vue3.x Teleport、使用Teleport自定义一个模态对话框的组件
Vue3.x中的组件模板属于该组件,有时候我们想把模板的内容移动到当前组件之外的DOM 中,这个时候就可以使用 Teleport。
表示teleport内包含的内容显示到body中
<teleport to="body">
内容
</teleport>
<teleport to="#app">
内容
</teleport>
Modal.vue
<template>
  <teleport to="body">
    <div class="model-bg" v-show="visible">
      <div class="modal-content">
        <button class="close" @click="$emit('close-model')">X</button>
        <div class="model-title">{{ title }}</div>
        <div class="model-body">
          <slot>
            第一个对话框
          </slot>
        </div>
      </div>
    </div>
  </teleport>
</template>

<script>
export default {
  name: "VueprojectTeleport",
  props: ["visible", "title"],
  data() {
    return {};
  },

  mounted() {},

  methods: {},
};
</script>

<style scoped>
.model-bg {
  background: #000;
  opacity: 0.7;
  width: 100%;
  height: 100%;
  position: absolute;
  top: 0px;
}

.modal-content {
  width: 600px;
  min-height: 300px;
  border: 1px solid #eee;
  position: absolute;
  top: 50%;
  left: 50%;
  transform: translate(-50%, -50%);
  background: #fff;

  .model-title {
    background: #eee;
    color: #000;
    height: 32px;
    line-height: 32px;
    text-align: center;
  }

  .model-body {
    padding: 40px;
  }

  .close {
    position: absolute;
    right: 10px;
    top: 5px;
    padding: 5px;
    border: none;
    cursor: pointer;
  }
}
</style>
Home.vue使用model
<template>
<div class="home">
    <button @click="isVisible=true">弹出一个模态对话框</button>
    <modal :visible="isVisible" :title="用户登录" @close-model="isVisible=false"></modal>
</div>
</template>

<script>
import Modal from "./Modal"
export default {
    data() {
        return {
            isVisible: false
        }
    },
    components: {
        Modal
    }

}
</script>

<style lang="scss">
.home {
    position: relative;
}
</style>
Vue3.x Composition API 详解
compositon-api提供了以下几个函数:
setup

ref

reactive

watchEffect

watch

computed

toRefs

生命周期的hooks
setup 组件选项
新的 setup 组件选项在创建组件之前执行,一旦 props 被解析,并充当合成 API 的入口点。
提示:
由于在执行 setup 时尚未创建组件实例,因此在 setup 选项中没有 this。这意味着,除了props 之外,你将无法访问组件中声明的任何属性——本地状态、计算属性或方法。
使用 setup 函数时,它将接受两个参数:
propscontext
让我们更深入地研究如何使用每个参数。
Props
setup 函数中的第一个参数是 props。正如在一个标准组件中所期望的那样,setup 函数中的 props 是响应式的,当传入新的 prop 时,它将被更新。
export default {
  props: {
    title: String
  },
  setup(props) {
    console.log(props.title)
  }
}
<template>
  {{ msg }}
  <input type="text" v-model="msg" />
  <button @click="getMsg()">获取msg</button>
  <button @click="setMsg()">修改msg</button>
  <br />
  {{ userInfo.username }}---{{ userInfo.age }}
  <br />
  <button @click="getUserName()">获取username</button>
  <button @click="setUserName()">修改username</button>
  <br />
  {{ title }}
  <input type="text" v-model="title" />
</template>

<script>
import { ref, reactive, toRefs } from "vue";
export default {
  name: "VueprojectHome",
  setup() {
    const msg = ref("hello");
    const userInfo = reactive({
      username: "make",
      age: 18,
    });
    const article = reactive({
      title: "hello vue",
      auth: "coder",
    });

    const getMsg = () => {
      alert(msg.value);
    };
    var getUserName = () => {
      alert(userInfo.username);
    };

    const setMsg = () => {
      msg.value = "修改后的msg";
    };
    var setUserName = () => {
      userInfo.username = "axl";
    };
    return {
      msg,
      userInfo,
      ...toRefs(article),
      getUserName,
      getMsg,
      setMsg,
      setUserName,
    };
  },
};
</script>

<style lang="scss" scoped></style>
<template>
  <div>
    <h2>获取用户信息</h2>
    <input type="text" v-model="firstName" placeholder="firstName" />
    <input type="text" v-model="lastName" placeholder="lastName" />
    {{ fullName }}
    <input type="text" v-model="score" placeholder="score" />
    {{ pass }}
  </div>
</template>

<script>
import { reactive, toRefs, computed } from "vue";
export default {
  setup() {
    const userInfo = reactive({
      firstName: "",
      lastName: "",
      score: 60,
    });
    let fullName = computed(() => {
      return userInfo.firstName + " " + userInfo.lastName;
    });
    let pass = computed(() => {
      if (userInfo.score > 60) {
        return "及格";
      } else {
        return "不及格";
      }
    });
    return {
      ...toRefs(userInfo),
      fullName,
      pass,
    };
  },
};
</script>

<style lang="scss" scoped></style>
watch 、watch 与watchEffect区别
<template>
  {{ num }}
  <input type="text" v-model="msg" />
  {{ msg }}
</template>

<script>
import { ref, reactive, toRefs, watch } from "vue";
export default {
  setup() {
    let msg = ref("");
    let data = reactive({
      num: 1,
      count: 1,
    });
    watch(msg, (newData, oldData) => {
      console.log(newData, oldData);
    });
    // watch(data, () => {
    //   console.log(`num=${data.num}`);
    // },);
    // watchEffect(() => {
    //   console.log(`num=${data.num}`);
    // });
    setInterval(() => {
      data.num++;
    }, 1000);
    return {
      ...toRefs(data),
      msg,
    };
  },
};
</script>

<style lang="scss" scoped></style>
组合式api生命周期钩子
你可以通过在生命周期钩子前面加上 “on” 来访问组件的生命周期钩子。
下表包含如何在 setup () 内部调用生命周期钩子:
| 选项式 API | Hook inside setup |
|---|---|
beforeCreate |
Not needed* |
created |
Not needed* |
beforeMount |
onBeforeMount |
mounted |
onMounted |
beforeUpdate |
onBeforeUpdate |
updated |
onUpdated |
beforeUnmount |
onBeforeUnmount |
unmounted |
onUnmounted |
errorCaptured |
onErrorCaptured |
renderTracked |
onRenderTracked |
renderTriggered |
onRenderTriggered |
因为 setup 是围绕 beforeCreate 和 created 生命周期钩子运行的,所以不需要显式地定义它们。换句话说,在这些钩子中编写的任何代码都应该直接在 setup 函数中编写。
export default {
  setup() {
    // mounted
    onMounted(() => {
      console.log('Component is mounted!')
    })
  }
}
Provider Inject
非组合式api中的写法:
<!-- src/components/MyMap.vue -->
<template>
  <MyMarker />
</template>

<script>
import MyMarker from './MyMarker.vue'

export default {
  components: {
    MyMarker
  },
  provide: {
    location: 'North Pole',
    geolocation: {
      longitude: 90,
      latitude: 135
    }
  }
}
</script>
<!-- src/components/MyMarker.vue -->
<script>
export default {
  inject: ['location', 'geolocation']
}
</script>
组合式api中的写法:
父组件:
<template>
  <h1>根组件title---{{ title }}</h1>
  <br />
  username:<input
    type="text"
    v-model="userInfo.username"
    placeholder="username"
  />
  age:<input type="text" v-model="userInfo.age" placeholder="username" />
  <br />

  {{ userInfo.username }}---{{ userInfo.age }}
  <User></User>
</template>

<script>
import { ref, provide, reactive } from "vue";
import User from "./components/User";
export default {
  setup() {
    let title = ref("app跟组件的title");
    let userInfo = reactive({
      username: "coder",
      age: 20,
    });
    setInterval(() => {
      title.value = "改变后的title";
    }, 2000);
    provide("title", title);
    provide("userInfo", userInfo);
    return {
      title,
      userInfo,
    };
  },
  components: {
    User,
  },
};
</script>

<style lang="scss" scoped></style>
子组件:
<template>
  <h2>子组件的title---{{ title }}</h2>
  <br />
  username:<input
    type="text"
    v-model="userInfo.username"
    placeholder="username"
  />
  age:<input type="text" v-model="userInfo.age" placeholder="username" />
  {{ userInfo.username }}---{{ userInfo.age }}
</template>

<script>
import { inject } from "vue";
export default {
  setup() {
    let title = inject("title");
    let userInfo = inject("userInfo");
    return {
      title,
      userInfo,
    };
  },
};
</script>

<style lang="scss" scoped></style>
Vue3.x集成Typescript
# 1. Install Vue CLI, if it's not already installed
npm install --global @vue/cli

# 2. Create a new project, then choose the "Manually select features" option
vue create my-project-name

# If you already have a Vue CLI project without TypeScript, please add a proper Vue CLI plugin:
vue add typescript
Vue3.x集成Typescript后定义组件
vue3.x中集成ts后请确保组件的
script部分已将语言设置为 TypeScript
<script lang="ts">
  ...
</script>
要让 TypeScript 正确推断 Vue 组件选项中的类型,需要使用 defineComponent 全局方法定义组件
import { defineComponent } from 'vue'

const Component = defineComponent({
  // 已启用类型推断
})
定义一个基于ts的Home组件
<template>
<div>
    home组件
    <br>
    {{book.title}}
    <br>
    {{book.author}}
    <br>
    {{book.year}}
    <br>

</div>
</template>

<script lang="ts">
import {
    defineComponent
} from 'vue';

export default defineComponent({
    name: 'App',
    data() {
        return {
            book: {
                title: 'Vue 3 Guide',
                author: 'Vue Team',
                year: 2020
            }
        }
    }

});
</script>

<style>

</style>
定义一个接口约束Home组件中data的数据类型
<template>
<div>
    home组件
    <br />
    {{ book.title }}
    <br />
    {{ book.author }}
    <br />
    {{ book.year }}
    <br />
</div>
</template>

<script lang="ts">
import {
    defineComponent
} from 'vue';

interface Book {
    title: string
    author: string
    year: number
}
var book: Book = {
    title: 'Vue 3 Guide',
    author: 'Vue Team',
    year: 2020
}
export default defineComponent({
    name: 'App',
    data() {
        return {
            book
        }
    }

});
</script>
<style>
</style>
方法、计算属性中约束数据类型
<template>
<div>
    home组件
    <br /> <br />
    {{ book.title }}
    <br /> <br />
    {{ book.author }}
    <br /> <br />
    {{ book.year }}
    <br /> <br />

    <button @click="setTitle()">设置数据</button>
    <br /> <br />

    {{greeting}}

</div>
</template>

<script lang="ts">
import {
    defineComponent
} from 'vue';

interface Book {
    title: string
    author: string
    year: number
}
var book: Book = {
    title: 'Vue 3 Guide',
    author: 'Vue Team',
    year: 2020
}
export default defineComponent({
    name: 'App',
    data() {
        return {
            book
        }
    },
    methods: {
        setTitle(): void {
            this.book.title = "你好vue3.0"
        }
    },
    computed: {
        // 需要注释
        greeting(): string {
            return this.book.title + '!'
        }
    }
});
</script>

<style>
</style>
Vue3.x集成Typescript与组合式 API 一起使用
<template>
<div>
    home组件
</div>
</template>

<script lang="ts">
import {
    defineComponent,
    ref,
    reactive
} from 'vue';

interface Book {
    title: string
    year ? : number
}
export default defineComponent({
    name: 'App',
    setup() {
        const year1 = ref < string | number > ('2020');

        const book1 = reactive < Book > ({
            title: 'Vue 3 Guide'
        })
        // or
        const book2: Book = reactive({
            title: 'Vue 3 Guide'
        })
        // or
        const book3 = reactive({
            title: 'Vue 3 Guide'
        }) as Book

        return {
            year1,
            book1,
            book2,
            book3
        }

    }
});
</script>

<style>
</style>
**Vue-Router **
Vue3.x中的路由
npm install vue-router@next --save
Vue3.x路由的基本配置
1、安装路由模块
npm install vue-router@next --save
2、新建组件
components/Home.vue
<template>
<div>
    Home组件
</div>
</template>

<script lang="ts">
import {
    defineComponent,
} from 'vue';

export default defineComponent({
    name: 'Home',
});
</script>

<style>
</style>
components/News.vue

<template>
<div>
    News组件
</div>
</template>

<script lang="ts">
import {
    defineComponent,
} from 'vue';

export default defineComponent({
    name: 'News',
});
</script>

<style>
</style>
3、配置路由
新建src/routes.ts 配置路由
import {createRouter,createWebHashHistory} from 'vue-router'

import Home from "./components/Home.vue"
import News from "./components/News.vue"

const router = createRouter({
  // 4. Provide the history implementation to use. We are using the hash history for simplicity here.
  history: createWebHashHistory(),
  routes: [
    { path: '/', component: Home },
    { path: '/news', component: News }
  ],
})

export default router
4、挂载路由
在main.ts中挂载路由
import { createApp } from 'vue'
import App from './App.vue'
import router from './routes'

// createApp(App).mount('#app')

const app = createApp(App)
//挂载路由
app.use(router)

app.mount('#app')
5、渲染组件
App.vue中通过router-view渲染组件
<template>
<ul>
    <li>
        <router-link to="/">首页</router-link>
    </li>
    <li>
        <router-link to="/news">新闻</router-link>
    </li>
</ul>
<router-view></router-view>
</template>

<script lang="ts">
import {
    defineComponent
} from 'vue';
export default defineComponent({
    name: 'App',
});
</script>

<style>

</style>
Vue3.x动态路由
1、配置动态路由
const router = createRouter({
  // 4. Provide the history implementation to use. We are using the hash history for simplicity here.
  history: createWebHashHistory(),
  routes: [
    { path: '/', component: Home },
    { path: '/news', component: News },
    { path: '/newsContent/:id', component: NewsContent },
  ],
})
2、路由跳转
<li v-for="(item,index) in list" :key="index">
	<router-link :to="`/newsContent/${index}`">{{item}}</router-link>
</li>
3、获取路由
this.$route.params
Vue3.x Get传值
<router-link to="/newsContent?id=2">Get传值</router-link>

this.$route.query
Vue3.x路由编程式导航(Js跳转路由)
this.$router.push({ path: 'news' })

this.$router.push({
     path: '/newsContent/495'
});

this.$router.push({ path: '/newscontent',  query:{aid:14} }

this.$router.push({ path: '/newscontent/123'})
Vue3.x路由HTML5 History 模式和 hash 模式
hash 模式
import { createRouter, createWebHashHistory } from 'vue-router'

const router = createRouter({
  history: createWebHashHistory(),
  routes: [
    //...
  ],
})
http://localhost:8080/#/user

http://localhost:8080/#/news
如果想把上面的路由改变成下面方式:
http://localhost:8080/news

http://localhost:8080/user
我们就可以使用HTML5 History 模式
HTML5 History 模式
import { createRouter, createWebHistory } from 'vue-router'

const router = createRouter({
  history: createWebHistory(),
  routes: [
    //...
  ]
})
注意:开启Html5 History模式后,发布到服务器需要配置伪静态:
https://router.vuejs.org/zh/guide/essentials/history-mode.html
Vue3.x命名路由
有时候,通过一个名称来标识一个路由显得更方便一些,特别是在链接一个路由,或者是执行一些跳转的时候。你可以在创建 Router 实例的时候,在 routes 配置中给某个路由设置名称。
const router = new VueRouter({
  routes: [
    {
      path: '/user/:userId',
      name: 'user',
      component: User
    }
  ]
})
要链接到一个命名路由,可以给 router-link 的 to 属性传一个对象:
<router-link :to="{ name: 'user', params: { userId: 123 }}">User</router-link>
这跟代码调用 router.push() 是一回事:
this.$router.push({ name: 'user', params: { userId: 123 }})
这两种方式都会把路由导航到 /user/123 路径。
this.$router.push({name:'content',query:{aid:222}})
路由重定向
重定向也在routes配置中完成。要从重定向/a到/b:
const routes = [{ path: '/home', redirect: '/' }]
重定向也可以针对命名路由:
const routes = [{ path: '/home', redirect: { name: 'homepage' } }]
甚至使用函数进行动态重定向:
const routes = [
  {
    // /search/screens -> /search?q=screens
    path: '/search/:searchText',
    redirect: to => {
      // the function receives the target route as the argument
      // we return a redirect path/location here.
      return { path: '/search', query: { q: to.params.searchText } }
    },
  },
  {
    path: '/search',
    // ...
  },
]
相对重定向
也可以重定向到相对位置:
const routes = [
  {
    path: '/users/:id/posts',
    redirect: to => {
      // the function receives the target route as the argument
      // return redirect path/location here.
    },
  },
]
路由别名
重定向是指用户访问时/home,URL将被替换/,然后与匹配/。但是什么是别名?
别名/as/home表示用户访问时/home,URL保持不变/home,但将被匹配,就像用户正在访问时一样/。
以上内容可以在路由配置中表示为:
const routes = [{ path: '/', component: Homepage, alias: '/home' }]
别名使您可以自由地将UI结构映射到任意URL,而不受配置的嵌套结构的约束。使别名以a开头,/以使路径在嵌套路由中是绝对的。您甚至可以将两者结合起来,并为数组提供多个别名:
const routes = [
  {
    path: '/users',
    component: UsersLayout,
    children: [
      // this will render the UserList for these 3 URLs
      // - /users
      // - /users/list
      // - /people
      { path: '', component: UserList, alias: ['/people', 'list'] },
    ],
  },
]
如果您的路线包含参数,请确保将其包含在任何绝对别名中:
const routes = [
  {
    path: '/users/:id',
    component: UsersByIdLayout,
    children: [
      // this will render the UserDetails for these 3 URLs
      // - /users/24
      // - /users/24/profile
      // - /24
      { path: 'profile', component: UserDetails, alias: ['/:id', ''] },
    ],
  },
]
嵌套路由
配置News组件的子组件
1、新建news/Add.vue
<template>
    <div>
      增加新闻
    </div>
</template>

<script lang="ts">
import { defineComponent } from 'vue';
export default defineComponent({
    data(){
        return{}
    },methods:{

    }
})
</script>
2、新建news/Edit.vue
<template>
    <div>
      修改新闻
    </div>
</template>

<script lang="ts">
import { defineComponent } from 'vue';
export default defineComponent({
    data(){
        return{
        }
    },methods:{
    }
})
</script>
3、配置嵌套路由
import { createRouter, createWebHistory } from 'vue-router'
//引入组件
import Home from "./components/Home.vue"

import News from "./components/News.vue"
import NewsAdd from "./components/News/Add.vue"
import NewsEdit from "./components/News/Edit.vue"

import User from "./components/User.vue"

//配置路由
const router = createRouter({
    history: createWebHistory(),
    routes: [
        { path: '/', component: Home, alias: '/home' },
        {
            path: '/news', component: News,
            children: [  //子路由
                { path: '', redirect:"/news/add"},
                { path: 'add', component: NewsAdd },
                { path: 'edit', component: NewsEdit },
            ]
        },
        { path: '/user', component: User },
    ],
})
export default router
4、News.vue中挂载路由
<template>
  <div class="content">
    <div class="left">
      <ul>
        <li><router-link to="/news/add">增加新闻</router-link></li>
        <li><router-link to="/news/edit">修改新闻</router-link></li>
      </ul>
    </div>
    <div class="right">
          <router-view></router-view>
    </div>
  </div>
</template>

<script lang="ts">
import { defineComponent } from "vue";
export default defineComponent({
  data() {
    return {};
  },
});
</script>

<style lang="scss">
.content {
  display: flex;
  padding: 20px;
  .left {
    width: 200px;
    border-right: 1px solid #ddd;
    min-height: 400px;
  }
  .right {
    flex: 1;
  }
}
</style>
Vuex教程-Vuex 中的 State Mutation Getters mapGetters Actions Modules
一、Vuex
Vuex 是一个专为 Vue.js 应用程序开发的状态管理模式。
官网:https://next.vuex.vuejs.org/
主要功能:
1、vuex可以实现vue不同组件之间的状态共享 (解决了不同组件之间的数据共享)
2、可以实现组件里面数据的持久化。
Vuex的几个核心概念:
State
Getters
Mutations
Actions
Modules
二、Vuex的基本使用
1、安装依赖
NPM
npm install vuex@next --save
yarn
yarn add vuex@next --save
2、src目录下面新建一个vuex的文件夹,vuex 文件夹里面新建一个store.js
import { createStore } from 'vuex'
const store = createStore({
    state () {
      return {
        count: 1
      }
    },
    mutations: {
        increment (state) {
          state.count++
        }
      }
  })

export default store;
3、main.ts中挂载Vuex
import { createApp } from 'vue'
import App from './App.vue'
import route from './routes'
import store from './vuex/store'


let app=createApp(App);
//挂载路由
app.use(route)
//挂载vuex
app.use(store)
app.mount('#app')
4、获取 修改state里面的数据
<template>
    <div>
      增加新闻--{{count}}
      <br>
      <button @click="incCount">改变Vuex里面的count</button>
    </div>
</template>

<script lang="ts">
import { defineComponent } from 'vue';
export default defineComponent({
    data(){
        return{}
    },methods:{
        incCount(){
            this.$store.commit('increment')
        }
    },
    computed:{
        count():number{
            return this.$store.state.count
        }
    }
})
</script>
三、Vuex中的State
State在Vuex中主要用于存储数据,State是存储在 Vuex 中的数据和 Vue 实例中的 data 遵循相同的规则。
import { createStore } from 'vuex'
const store = createStore({
    state () {
      return {
        count: 1,
        list:['马总','雷总','王总']
      }
    },
    mutations: {
        increment (state) {
          state.count++
        }
      }
  })

export default store;
3.1、第一种获取State的方法(不推荐)
用到的组件里面引入store,然后计算属性里面获取
computed: {
    count () {
      return store.state.count
    }
  }
3.2、第二种获取State的方法
由于全局配置了Vuex app.use(store),所以直接可以通过下面方法获取store里面的值。
computed: {
    count () {
      return this.$store.state.count
    }
}
3.3、第三种获取State的方法-通过mapState助手
方法 1:
<template>
  <div>修改新闻--{{ count }}</div>

  <br />
  <ul>
    <li v-for="(item, index) in list" :key="index">{{ item }}</li>
  </ul>
  <br />
</template>

<script>
import { defineComponent } from "vue";
import { mapState } from "vuex";
export default defineComponent({
  data() {
    return {};
  },
  methods: {},
  computed: {
    ...mapState({
      count: (state) => state.count,
      list: (state) => state.list,
    }),
  },
});
</script>
方法 2:
<template>
  <div>修改新闻--{{ count }}</div>

  <br>
  <ul>
    <li v-for="(item,index) in list" :key="index">{{item}}</li>
  </ul>
  <br>

</template>

<script>
import { defineComponent } from "vue";
import { mapState } from "vuex";
export default defineComponent({
  data() {
    return {};
  },
  methods: {},
  computed: {
    ...mapState([
      "count",
      "list"
    ]),
  },
});
</script>
四:Vuex中的Getters
Getter有点类似我们前面给大家讲的计算属性。
Vuex 允许我们在 store 中定义“getter”(可以认为是 store 的计算属性)。就像计算属性一样,getter 的返回值会根据它的依赖被缓存起来,且只有当它的依赖值发生了改变才会被重新计算。
4.1 、定义Getter
const store = createStore({
  state: {
    todos: [
      { id: 1, text: '...', done: true },
      { id: 2, text: '...', done: false }
    ]
  },
  getters: {
    doneTodos: state => {
      return state.todos.filter(todo => todo.done)
    }
  }
})
4.2、访问Getter的第一种方法
Getter 会暴露为 store.getters 对象,你可以以属性的形式访问这些值:
store.getters.doneTodos
4.3、访问Getter的第二种方法
computed: {
  doneTodosCount () {
    return this.$store.getters.doneTodosCount
  }
}
4.4、访问Getter的第四种方法 通过mapGetters 辅助函数
import { mapGetters } from 'vuex'

export default {
  // ...
  computed: {
  // 使用对象展开运算符将 getter 混入 computed 对象中
    ...mapGetters([
      'doneTodosCount',
      'anotherGetter',
      // ...
    ])
  }
}
如果你想将一个 getter 属性另取一个名字,使用对象形式:
...mapGetters({
  // 把 `this.doneCount` 映射为 `this.$store.getters.doneTodosCount`
  doneCount: 'doneTodosCount'
})
五、Vuex中的Mutations
更改 Vuex 的 store 中的状态的唯一方法是提交 mutation。Vuex 中的 mutation 非常类似于事件:每个 mutation 都有一个字符串的 事件类型 (type) 和 一个 回调函数 (handler)。这个回调函数就是我们实际进行状态更改的地方,并且它会接受 state 作为第一个参数。
4.1、定义Mutations 触发Mutations里面的方法
const store = createStore({
  state: {
    count: 1
  },
  mutations: {
    increment (state) {
      // mutate state
      state.count++
    }
  }
})
触发mutations里面的方法:
store.commit('increment')
4.2、执行方法传入参数:
mutations: {
  increment (state, n) {
    state.count += n
  }
}
store.commit('increment', 10)
4.3 对象方式提交数据
mutations: {
  increment (state, payload) {
    state.count += payload.amount
  }
}
store.commit({
  type: 'increment',
  amount: 10
})
4.4 在组件中提交 Mutation
import { mapMutations } from 'vuex'

export default {
  // ...
  methods: {
    ...mapMutations([
      'increment', // 将 `this.increment()` 映射为 `this.$store.commit('increment')`

      // `mapMutations` 也支持载荷:
      'incrementBy' // 将 `this.incrementBy(amount)` 映射为 `this.$store.commit('incrementBy', amount)`
    ]),
    ...mapMutations({
      add: 'increment' // 将 `this.add()` 映射为 `this.$store.commit('increment')`
    })
  }
}
六、Vuex中的Actions
Action 类似于 mutation,不同在于:
- Action 提交的是 mutation,而不是直接变更状态。
- Action 可以包含任意异步操作。
6.1、定义Action
const store = createStore({
  state: {
    count: 0
  },
  mutations: {
    increment (state) {
      state.count++
    }
  },
  actions: {
    increment (context) {
      context.commit('increment')
    }
  }
})
另一种写法
actions: {
  increment ({ commit }) {
    commit('increment')
  }
}
6.2、分发 Action(触发Action中的方法)
store.dispatch('increment')
乍一眼看上去感觉多此一举,我们直接分发 mutation 岂不更方便?实际上并非如此,还记得 mutation 必须同步执行这个限制么?Action 就不受约束!我们可以在 action 内部执行异步操作:
actions: {
  incrementAsync ({ commit }) {
    setTimeout(() => {
      commit('increment')
    }, 1000)
  }
}
Actions 支持同样的载荷方式和对象方式进行分发:
// 载荷方式
store.dispatch('incrementAsync', {
  amount: 10
})

// 对象方式
store.dispatch({
  type: 'incrementAsync',
  amount: 10
})
来看一个更加实际的购物车示例,涉及到调用异步 API 和分发多重 mutation:
actions: {
  checkout ({ commit, state }, products) {
    // 把当前购物车的物品备份起来
    const savedCartItems = [...state.cart.added]
    // 发出结账请求,然后乐观地清空购物车
    commit(types.CHECKOUT_REQUEST)
    // 购物 API 接受一个成功回调和一个失败回调
    shop.buyProducts(
      products,
      // 成功操作
      () => commit(types.CHECKOUT_SUCCESS),
      // 失败操作
      () => commit(types.CHECKOUT_FAILURE, savedCartItems)
    )
  }
}
注意我们正在进行一系列的异步操作,并且通过提交 mutation 来记录 action 产生的副作用(即状态变更)
6.3 在组件中分发 Action
你在组件中使用 this.$store.dispatch('xxx') 分发 action,或者使用 mapActions 辅助函数将组件的 methods 映射为 store.dispatch 调用(需要先在根节点注入 store):
import { mapActions } from 'vuex'

export default {
  // ...
  methods: {
    ...mapActions([
      'increment', // map `this.increment()` to `this.$store.dispatch('increment')`

      // `mapActions` also supports payloads:
      'incrementBy' // map `this.incrementBy(amount)` to 		`this.$store.dispatch('incrementBy', amount)`
    ]),
    ...mapActions({
      add: 'increment' // map `this.add()` to `this.$store.dispatch('increment')`
    })
  }
}
6.4 组合 Action
Action 通常是异步的,那么如何知道 action 什么时候结束呢?更重要的是,我们如何才能组合多个 action,以处理更加复杂的异步流程?
首先,你需要明白 store.dispatch 可以处理被触发的 action 的处理函数返回的 Promise,并且 store.dispatch 仍旧返回 Promise:
actions: {
  actionA ({ commit }) {
    return new Promise((resolve, reject) => {
      setTimeout(() => {
        commit('someMutation')
        resolve()
      }, 1000)
    })
  }
}
现在你可以:
store.dispatch('actionA').then(() => {
  // ...
})
在另外一个 action 中也可以:
actions: {
  // ...
  actionB ({ dispatch, commit }) {
    return dispatch('actionA').then(() => {
      commit('someOtherMutation')
    })
  }
}
最后,如果我们利用 async / await,我们可以如下组合 action:
// assuming `getData()` and `getOtherData()` return Promises

actions: {
  async actionA ({ commit }) {
    commit('gotData', await getData())
  },
  async actionB ({ dispatch, commit }) {
    await dispatch('actionA') // wait for `actionA` to finish
    commit('gotOtherData', await getOtherData())
  }
}
七、Modules
由于使用单一状态树,应用的所有状态会集中到一个比较大的对象。当应用变得非常复杂时,store 对象就有可能变得相当臃肿。
为了解决以上问题,Vuex 允许我们将 store 分割成模块(module)。每个模块拥有自己的 state、mutation、action、getter、甚至是嵌套子模块——从上至下进行同样方式的分割:
const moduleA = {
  state: () => ({ ... }),
  mutations: { ... },
  actions: { ... },
  getters: { ... }
}

const moduleB = {
  state: () => ({ ... }),
  mutations: { ... },
  actions: { ... }
}

const store = createStore({
  modules: {
    a: moduleA,
    b: moduleB
  }
})

store.state.a // -> `moduleA`'s state
store.state.b // -> `moduleB`'s state
模块的局部状态
对于模块内部的 mutation 和 getter,接收的第一个参数是模块的局部状态对象。
const moduleA = {
  state: () => ({
    count: 0
  }),
  mutations: {
    increment (state) {
      // `state` is the local module state
      state.count++
    }
  },
  getters: {
    doubleCount (state) {
      return state.count * 2
    }
  }
}
八 、Vuex项目结构
Vuex 并不限制你的代码结构。但是,它规定了一些需要遵守的规则:
- 应用层级的状态应该集中到单个 store 对象中。
- 提交 mutation 是更改状态的唯一方法,并且这个过程是同步的。
- 异步逻辑都应该封装到 action 里面。
只要你遵守以上规则,如何组织代码随你便。如果你的 store 文件太大,只需将 action、mutation 和 getter 分割到单独的文件。
对于大型应用,我们会希望把 Vuex 相关代码分割到模块中。下面是项目结构示例:
├── index.html
├── main.js
├── api
│   └── ... # 抽取出API请求
├── components
│   ├── App.vue
│   └── ...
└── store
    ├── index.js          # 我们组装模块并导出 store 的地方
    ├── actions.js        # 根级别的 action
    ├── mutations.js      # 根级别的 mutation
    └── modules
        ├── cart.js       # 购物车模块
        └── products.js   # 产品模块
九、Vuex结合组合式合成API
组合式api中没有this.$store,可以使用useStore来替代
import { useStore } from 'vuex'

export default {
  setup () {
    const store = useStore()
  }
}
9.1、组合式api中访问state 和 getters
const store = new createStore({
  state: {
    todos: [
      { id: 1, text: '...', done: true },
      { id: 2, text: '...', done: false }
    ]
  },
  getters: {
    doneTodos: state => {
      return state.todos.filter(todo => todo.done)
    }
  }
})
import { computed } from 'vue'
import { useStore } from 'vuex'

export default {
  setup () {
    const store = useStore()

    return {
      // access a state in computed function
      count: computed(() => store.state.count),

      // access a getter in computed function
      double: computed(() => store.getters.double)
    }
  }
}
9.2、组合式api中访问 Mutations and Actions
import { useStore } from 'vuex'

export default {
  setup () {
    const store = useStore()

    return {
      // access a mutation
      increment: () => store.commit('increment'),

      // access an action
      asyncIncrement: () => store.dispatch('asyncIncrement')
    }
  }
}
十、Vue+Typescript的项目里面集成Vuex
首先需要在vue项目中集成typescript
vue add typescript
提示:如果配置完ts后调用this.$store有警告信息,请重启vscode,或者安装vue3的插件后重启vscode充实
一、修改store.js 为store.ts
二、配置store.ts中的代码
Vuex与TypeScript一起使用时,必须声明自己的模块扩充。
import { ComponentCustomProperties } from 'vue'
import { createStore,Store  } from 'vuex'

//配置让Vuex支持ts
declare module '@vue/runtime-core' {
  //declare your own store states
  interface State {
    count: number,
    list:string[]
  }

  // provide typings for `this.$store`
  interface ComponentCustomProperties {
    $store: Store<State>
  }
}

const store = createStore({
    state () {
      return {
        count: 1,
        list:['马总','雷总','王总']
      }
    },
    mutations: {
        increment (state:any):void {
          state.count++
        }
      }
  })
export default store;
三、main.ts中挂载
import { createApp } from 'vue'
import App from './App.vue'
import route from './routes'
import store from './vuex/store'


let app=createApp(App);
//挂载路由
app.use(route)
//挂载vuex
app.use(store)
app.mount('#app')
四、组件中使用挂载
<template>
  <div>修改新闻--{{ count }}</div>

  <br />
  <ul>
    <li v-for="(item, index) in list" :key="index">{{ item }}</li>
  </ul>
  <br />
</template>

<script lang="ts">
import { defineComponent } from "vue";
import { mapState } from "vuex";
export default defineComponent({
  data() {
    return {};
  },
  methods: {},
  computed: {
    mylist():string[]{
      return  this.$store.state.list
    },
    ...mapState({
      count: (state:any) => state.count,
      list: (state:any) => state.list,
    })
  },
});
</script>


【推荐】国内首个AI IDE,深度理解中文开发场景,立即下载体验Trae
【推荐】编程新体验,更懂你的AI,立即体验豆包MarsCode编程助手
【推荐】抖音旗下AI助手豆包,你的智能百科全书,全免费不限次数
【推荐】轻量又高性能的 SSH 工具 IShell:AI 加持,快人一步
· 阿里最新开源QwQ-32B,效果媲美deepseek-r1满血版,部署成本又又又降低了!
· SQL Server 2025 AI相关能力初探
· 单线程的Redis速度为什么快?
· AI编程工具终极对决:字节Trae VS Cursor,谁才是开发者新宠?
· 开源Multi-agent AI智能体框架aevatar.ai,欢迎大家贡献代码