netCore微服务学习笔记(二):NetCore Ocelot Api网关
一.API网关
API网关是微服务架构中的唯一入口,它提供一个单独且统一的API入口用于访问内部一个或多个API。API 网关会拦截所有传入的请求,然后通过 API 管理系统(该系统负责处理各种必要的功能)将其发送出去。具有一些常见的功能包括:身份验证、路由、负载均衡、缓存、熔断限流等;
二.Ocelot简介
Ocelot是.net下开源的API网关,它实现了包括路由,认证、授权、服务发现、负载均衡、限流熔断等功能;具体可以参照文档Ocelot;Ocelot各个功能的实现,都是通过json配置文件来实现的,配置文件基本格式如下:
{
    "Routes": [],
    "GlobalConfiguration": {}
}
配置信息包含两部分,一组路由,一个全局配置;路由作用是告诉Ocelot如何处理上游请求的对象。全局配置允许覆盖特定于路由的设置。
关于详细的配置文件,信息如下:
 1 {
 2           "DownstreamPathTemplate": "/",
 3           "UpstreamPathTemplate": "/",
 4           "UpstreamHttpMethod": [
 5               "Get"
 6           ],
 7           "DownstreamHttpMethod": "",
 8           "DownstreamHttpVersion": "",
 9           "AddHeadersToRequest": {},
10           "AddClaimsToRequest": {},
11           "RouteClaimsRequirement": {},
12           "AddQueriesToRequest": {},
13           "RequestIdKey": "",
14           "FileCacheOptions": {
15               "TtlSeconds": 0,
16               "Region": ""
17           },
18           "RouteIsCaseSensitive": false,
19           "ServiceName": "",
20           "DownstreamScheme": "http",
21           "DownstreamHostAndPorts": [
22               {
23                   "Host": "localhost",
24                   "Port": 51876,
25               }
26           ],
27           "QoSOptions": {//熔断
28               "ExceptionsAllowedBeforeBreaking": 0,
29               "DurationOfBreak": 0,
30               "TimeoutValue": 0
31           },
32           "LoadBalancer": "",//负载均衡
33           "RateLimitOptions": {//限流
34               "ClientWhitelist": [],
35               "EnableRateLimiting": false,
36               "Period": "",
37               "PeriodTimespan": 0,
38               "Limit": 0
39           },
40           "AuthenticationOptions": {//认证授权
41               "AuthenticationProviderKey": "",
42               "AllowedScopes": []
43           },
44           "HttpHandlerOptions": {
45               "AllowAutoRedirect": true,
46               "UseCookieContainer": true,
47               "UseTracing": true,
48               "MaxConnectionsPerServer": 100
49           },
50           "DangerousAcceptAnyServerCertificateValidator": false
51       }
- DownstreamPathTemplate:下游路径匹配模板
- UptreamPathTemplate:上游路径匹配模板即客户端访问地址匹配路径
- Aggregates: 服务聚合配置
- LoadBalancer:负载均衡配置
- AuthenticationOptions :服务认证、授权
- RateLimitOptions:限流
- FileCacheOptions 缓存配置
- QosOptions:熔断处理
三.集成网关
1.新建netcore项目命名OcelorApiGetway,在nuget中搜索并安装Ocelot;
2.新建json配置文件,命名configuration.json,右键属性“始终复制”,配置文件基本信息如下:
 1 /*基础配置*/
 2 {
 3   "GlobalConfiguration": {
 4
 5   },
 6   "ReRoutes": [
 7     {
 8       "DownstreamPathTemplate": "/api/values",
 9       "DownstreamScheme": "http",
10       "DownstreamHostAndPorts": [
11         {
12           "Host": "localhost",
13           "Port": 5001
14         },
15         {
16           "Host": "localhost",
17           "Port": 5002
18         }
19       ],
20       "UpstreamPathTemplate": "/api/values",
21       "UpstreamHttpMethod": [ "Get"],
22       "LoadBalancerOptions": {//负载均衡选项
23                 "Type": "RoundRobin"//轮询访问
24               }
25       }
26
27   ]
28 }
3.修改Starup文件,注册服务与管道配置:
 1      public void ConfigureServices(IServiceCollection services)
 2         {
 3             services.AddOcelot(new ConfigurationBuilder().AddJsonFile("configuration.json")
 4                 .Build()).AddConsul().AddPolly();
 5             services.AddControllers();
 6         }
 7
 8         // This method gets called by the runtime. Use this method to configure the HTTP request pipeline.
 9         public  void Configure(IApplicationBuilder app, IWebHostEnvironment env)
10         {
11             if (env.IsDevelopment())
12             {
13                 app.UseDeveloperExceptionPage();
14             }
15
16             app.UseHttpsRedirection();
17             app.UseOcelot();
18             app.UseRouting();
19             app.UseEndpoints(endpoints =>
20             {
21                 endpoints.MapControllers();
22             });
23
24         }
4.新建两个webapi项目,命名为WebApiA,WebApiB,分别新建ValuesController,添加Get方法:
        [HttpGet]
        public IEnumerable<string> Get()
        {
            return new string[] { "This is webApiA" };
        }
        [HttpGet]
        public IEnumerable<string> Get()
        {
            return new string[] { "This is webApiB" };
        }
修改两个项目中的launchSettings.json文件中的applicationUrl,分别对应5001,5002;
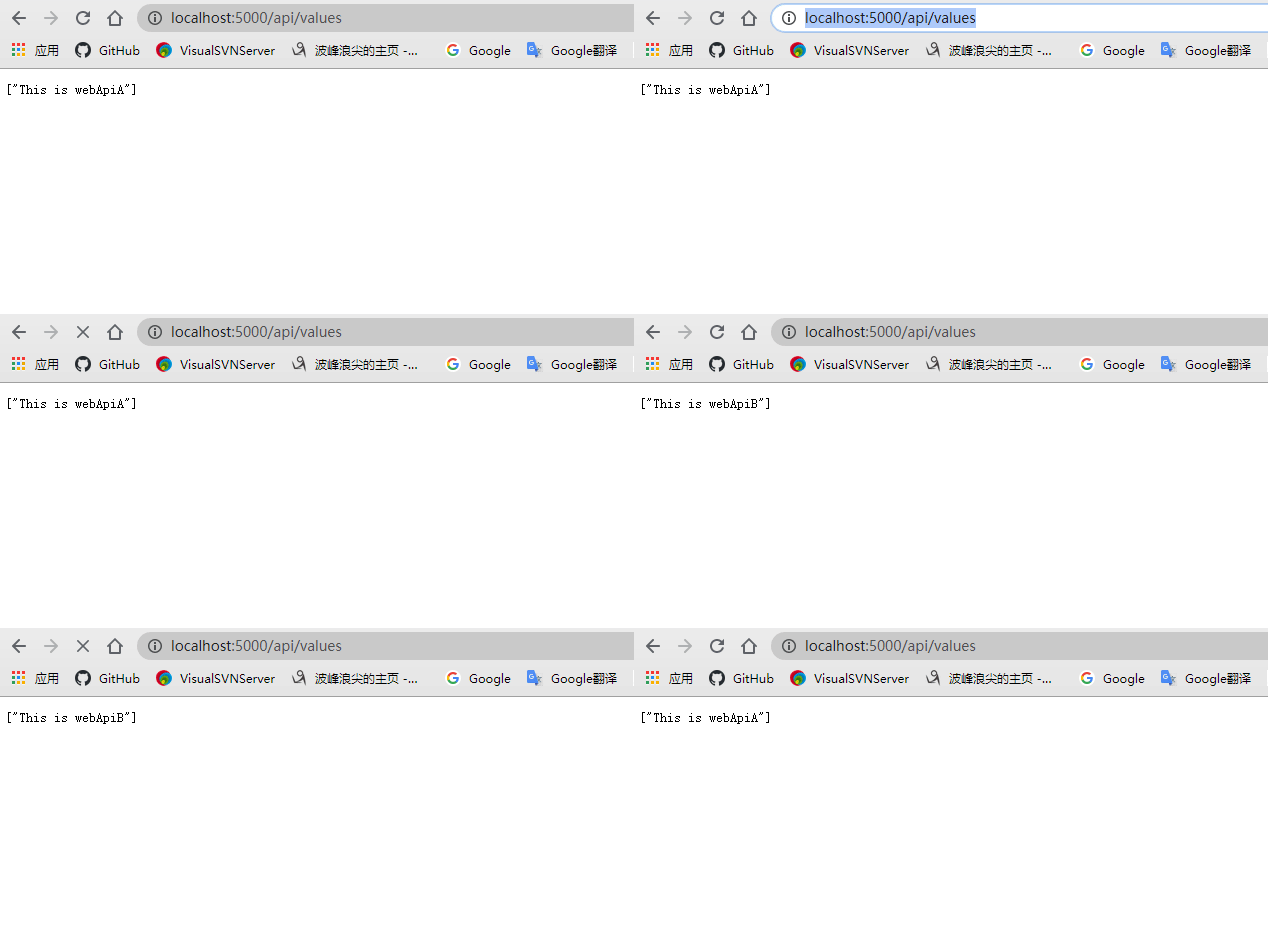
5.测试运行:先启动webApiA与WebApiB项目然后运行OcelorApiGetway,如下图:

四.认证和授权
在 Ocelot API 网关中,可使用提供身份验证令牌的 IdentityServer,在 API 网关外部或内部设置身份验证服务,例如 ASP.NET Core Web API 服务。
1.新建一项目,命名“WebApiIdentityServer”,添加引用程序:通过NuGet安装 IdentityServer4 或者通过程序包管理执行 Install-Package IdentityServer4 安装依赖包。
2.新建一个Config类,管理Identity资源,代码如下:

 1 using IdentityServer4.Models;
 2 using System.Collections.Generic;
 3 namespace IdentityClientDemo
 4 {
 5     public static class IdentityClientConfig
 6     {
 7         public static IEnumerable<IdentityResource> GetIdentityResourceResources()
 8         {
 9             return new List<IdentityResource>
10             {
11                 new IdentityResources.OpenId(),
12             };
13         }
14         // scopes define the API resources in your system
15         public static IEnumerable<ApiResource> GetApiResources()
16         {
17             //api资源({资源名称}{描述})
18             return new List<ApiResource>
19             {
20                 new ApiResource("Api", "Api"),
21             };
22         }
23
24         /// <summary>
25         /// 添加客户端
26         /// </summary>
27         /// <returns></returns>
28         public static IEnumerable<Client> GetClients()
29         {
30             return new List<Client>
31             {
32                 new Client
33                 {
34                     //客户端id,必须唯一
35                     ClientId = "client",
36                     AllowedGrantTypes = GrantTypes.ClientCredentials,//授权方式,这里采用的是客户端认证模式
37                     ClientSecrets =
38                     {
39                         new Secret("secret".Sha256())
40                     },
41                     AllowedScopes =
42                     {
43                         "Api",
44                     }
45                 }
46             };
47         }
48     }
49 }
3.在startup.class中注入服务:

 1 using Microsoft.AspNetCore.Builder;
 2 using Microsoft.AspNetCore.Hosting;
 3 using Microsoft.Extensions.Configuration;
 4 using Microsoft.Extensions.DependencyInjection;
 5 using Microsoft.Extensions.Hosting;
 6 namespace IdentityClientDemo
 7 {
 8     public class Startup
 9     {
10         public Startup(IConfiguration configuration)
11         {
12             Configuration = configuration;
13         }
14
15         public IConfiguration Configuration { get; }
16
17         // This method gets called by the runtime. Use this method to add services to the container.
18         public void ConfigureServices(IServiceCollection services)
19         {
20
21             services.AddIdentityServer()
22                  .AddDeveloperSigningCredential()
23                 .AddInMemoryApiResources(IdentityClientConfig.GetApiResources())//Api资源信息
24                 .AddInMemoryClients(IdentityClientConfig.GetClients());//客户端信息
25             services.AddControllers();
26         }
27
28         // This method gets called by the runtime. Use this method to configure the HTTP request pipeline.
29         public void Configure(IApplicationBuilder app, IWebHostEnvironment env)
30         {
31             if (env.IsDevelopment())
32             {
33                 app.UseDeveloperExceptionPage();
34             }
35
36             app.UseHttpsRedirection();
37
38             app.UseRouting();
39
40             app.UseAuthorization();
41             app.UseIdentityServer();
42             app.UseEndpoints(endpoints =>
43             {
44                 endpoints.MapControllers();
45             });
46         }
47     }
48 }
4.修改launchSetting.json文件,设置applicationUrl的端口为5003:

 1 {
 2   "$schema": "http://json.schemastore.org/launchsettings.json",
 3   "iisSettings": {
 4     "windowsAuthentication": false,
 5     "anonymousAuthentication": true,
 6     "iisExpress": {
 7       "applicationUrl": "http://localhost:5003",
 8       "sslPort": 0
 9     }
10   },
11   "profiles": {
12     "IIS Express": {
13       "commandName": "IISExpress",
14       "launchBrowser": true,
15       "launchUrl": "api/Token",
16       "environmentVariables": {
17         "ASPNETCORE_ENVIRONMENT": "Development"
18       }
19     },
20     "WebApiIdentityServer": {
21       "commandName": "Project",
22       "launchBrowser": true,
23       "launchUrl": "api/Token",
24       "applicationUrl": "https://localhost:5003;http://localhost:5003",
25       "environmentVariables": {
26         "ASPNETCORE_ENVIRONMENT": "Development"
27       }
28     }
29   }
30 }
5.修改OcelotApiGetway项目中的Startup文件,添加身份认证:
 1   public class Startup
 2     {
 3         public Startup(IConfiguration configuration)
 4         {
 5             Configuration = configuration;
 6         }
 7
 8         public IConfiguration Configuration { get; }
 9
10         // This method gets called by the runtime. Use this method to add services to the container.
11         public void ConfigureServices(IServiceCollection services)
12         {
13
14             services.AddOcelot(new ConfigurationBuilder().AddJsonFile("configuration.json")
15                 .Build()).AddConsul().AddPolly();
16
17             services
18              .AddAuthentication(JwtBearerDefaults.AuthenticationScheme)
19              .AddIdentityServerAuthentication("Bearer", options =>
20              {
21                  options.Authority = "http://localhost:5003";
22                  options.RequireHttpsMetadata = false;
23                  options.ApiName = "api1";
24                  options.ApiSecret = "secret";
25              });
26
27             services.AddControllers();
28         }
29
30         // This method gets called by the runtime. Use this method to configure the HTTP request pipeline.
31         public  void Configure(IApplicationBuilder app, IWebHostEnvironment env)
32         {
33             if (env.IsDevelopment())
34             {
35                 app.UseDeveloperExceptionPage();
36             }
37
38             app.UseHttpsRedirection();
39             app.UseOcelot();
40             app.UseRouting();
41
42             app.UseAuthentication();
43             app.UseAuthorization();
44
45             //app.UseMvc();
46             app.UseEndpoints(endpoints =>
47             {
48                 endpoints.MapControllers();
49             });
50
51         }
52     }
然后修改OcelotApiGetway中Ocelot配置文件,添加认证授权节点:
      //认证授权
      "AuthenticationOptions": {
        "AuthenticationProviderKey": "Bearer",//需要和startup文件中的authenticationScheme 保持一致
        "AllowedScopes": []
      },
完整配置如下:

 1 /* 认证授权*/
 2 {
 3   "GlobalConfiguration": {
 4     //  "ServiceDiscoveryProvider": {
 5     //    "Host": "localhost",
 6     //    "Port": 8500,
 7     //    "Type": "Consul"
 8     //  }
 9
10     "RateLimitOptions": {
11       "DisableRateLimitHeaders": true,
12       "QuotaExceededMessage": "Stop request plz!",
13       "HttpStatusCode": 666,
14       "ClientIdHeader": "cid"
15     }
16
17   },
18   "ReRoutes": [
19     {
20       "DownstreamPathTemplate": "/{url}",
21       "DownstreamScheme": "http",
22       "DownstreamHostAndPorts": [
23         {
24           "Host": "localhost",
25           "Port": 5001
26         },
27         {
28           "Host": "localhost",
29           "Port": 5002
30         },
31         {
32           "Host": "localhost",
33           "Port": 5003
34         }
35       ],
36       //认证授权
37       "AuthenticationOptions": {
38         "AuthenticationProviderKey": "Bearer",
39         "AllowedScopes": []
40       },
41       "UpstreamPathTemplate": "/Service1/{url}",
42       "UpstreamHttpMethod": [ "Get", "Post" ],
43       //限流
44       "RateLimitOptions": {
45         //"ClientWhitelist": [],
46         "EnableRateLimiting": true, //Boolean值,是否启用限流,只有为true时,配置生效。
47         "Period": "1m", //限流控制的时间段,可以输入 1s(1秒),1m(1分),1h(1小时),1d(1天)
48         "PeriodTimespan": 30, //多少秒之后客户端可以重试
49         "Limit": 200 //在Period时间内最大能访问的数量。
50       },
51       //1分钟之内该api最多被访问2次,如果已经达到2次,从第2次请求结束起30秒后才能进行下一次访问。
52       "LoadBalancerOptions": {
53         "Type": "RoundRobin"
54       },
55       //熔断
56       "QoSOptions": {
57         "ExceptionsAllowedBeforeBreaking": 1, //ExceptionsAllowedBeforeBreaking 允许多少个异常请求
58         "DurationOfBreak": 5000, //DurationOfBreak 熔断的时间,单位为秒
59         "TimeoutValue": 3000 //TimeoutValue 如果下游请求的处理时间超过多少则自如将请求设置为超时
60       }
61       //3秒算一次超时(TimeoutValue:3000),然后允许的异常请求是2次(ExceptionsAllowedBeforeBreaking:1),如果达到了允许异常请求的上限就触发5秒钟的熔断时间(DurationOfBreak:5000)
62     },
63     {
64       "DownstreamPathTemplate": "/{url}",
65       "DownstreamScheme": "http",
66       "DownstreamHostAndPorts": [
67         {
68           "Host": "localhost",
69           "Port": 5003
70         }
71       ],
72       "UpstreamPathTemplate": "/service2/{url}",
73       "UpstreamHttpMethod": [ "Get", "Post" ],
74       "AuthenticationOptions": {
75         "AuthenticationProviderKey": "Bearer",
76         "AllowedScopes": []
77       }
78
79     }
80
81   ]
82 }
6.测试运行,启动三个API项目然后运行OcelotApiGetway,可以发现会报401 Unauthorized异常:

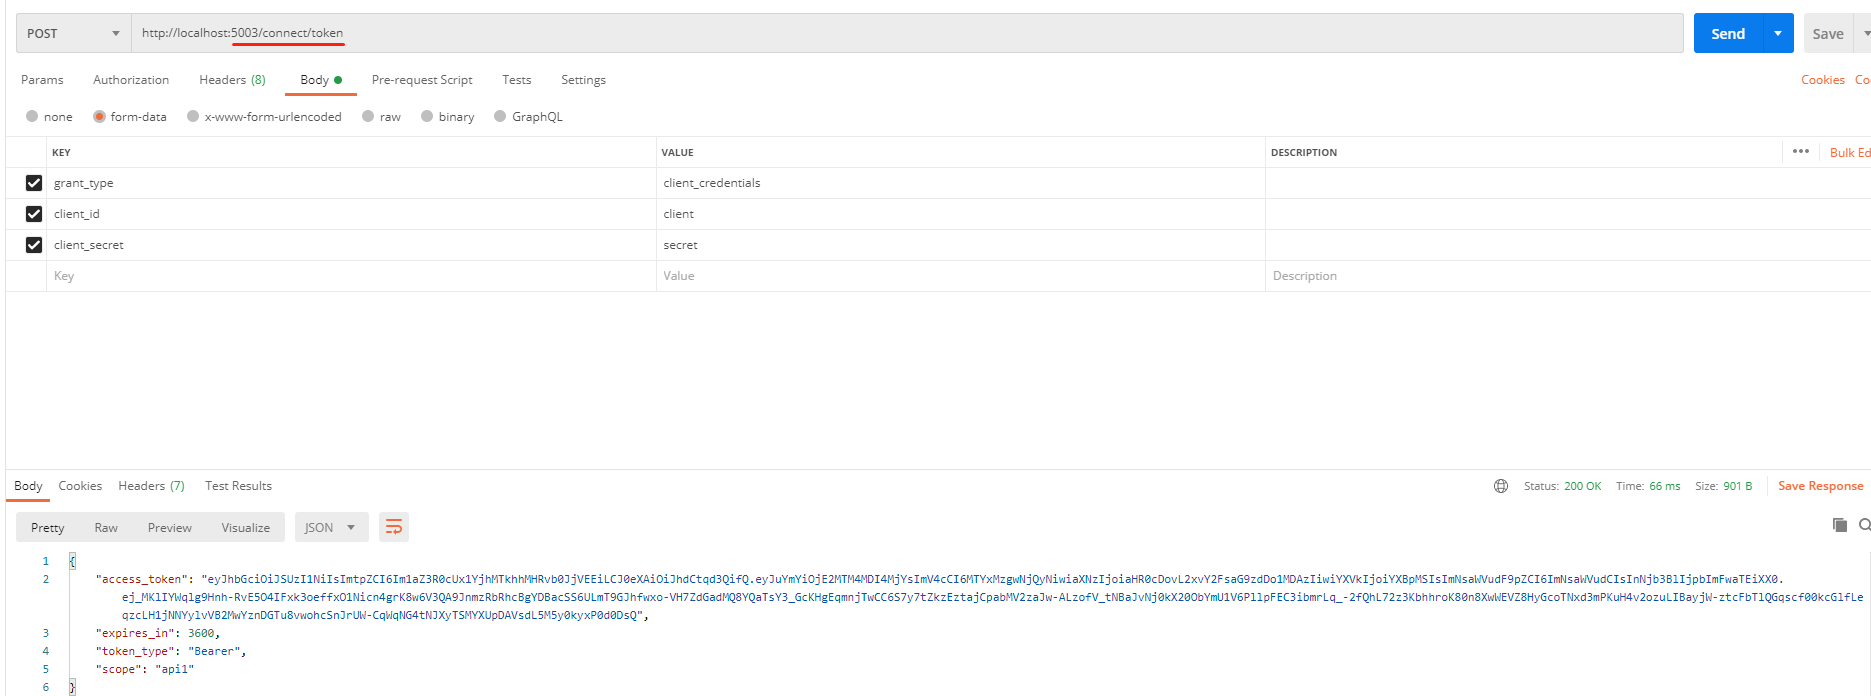
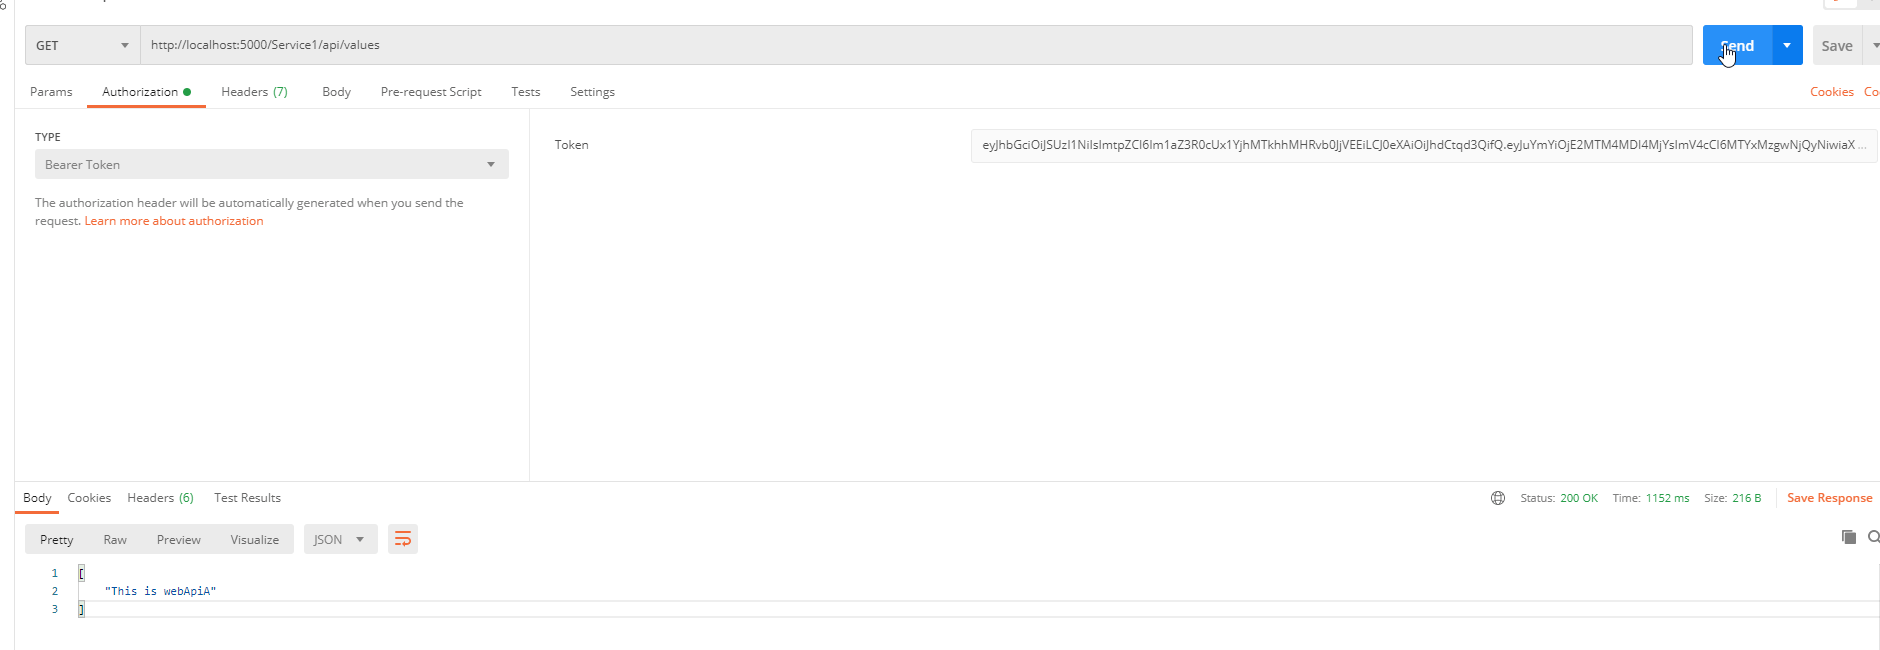
然后调用WebApiIdentityServer项目中的获取token方法,并携带token再次访问:


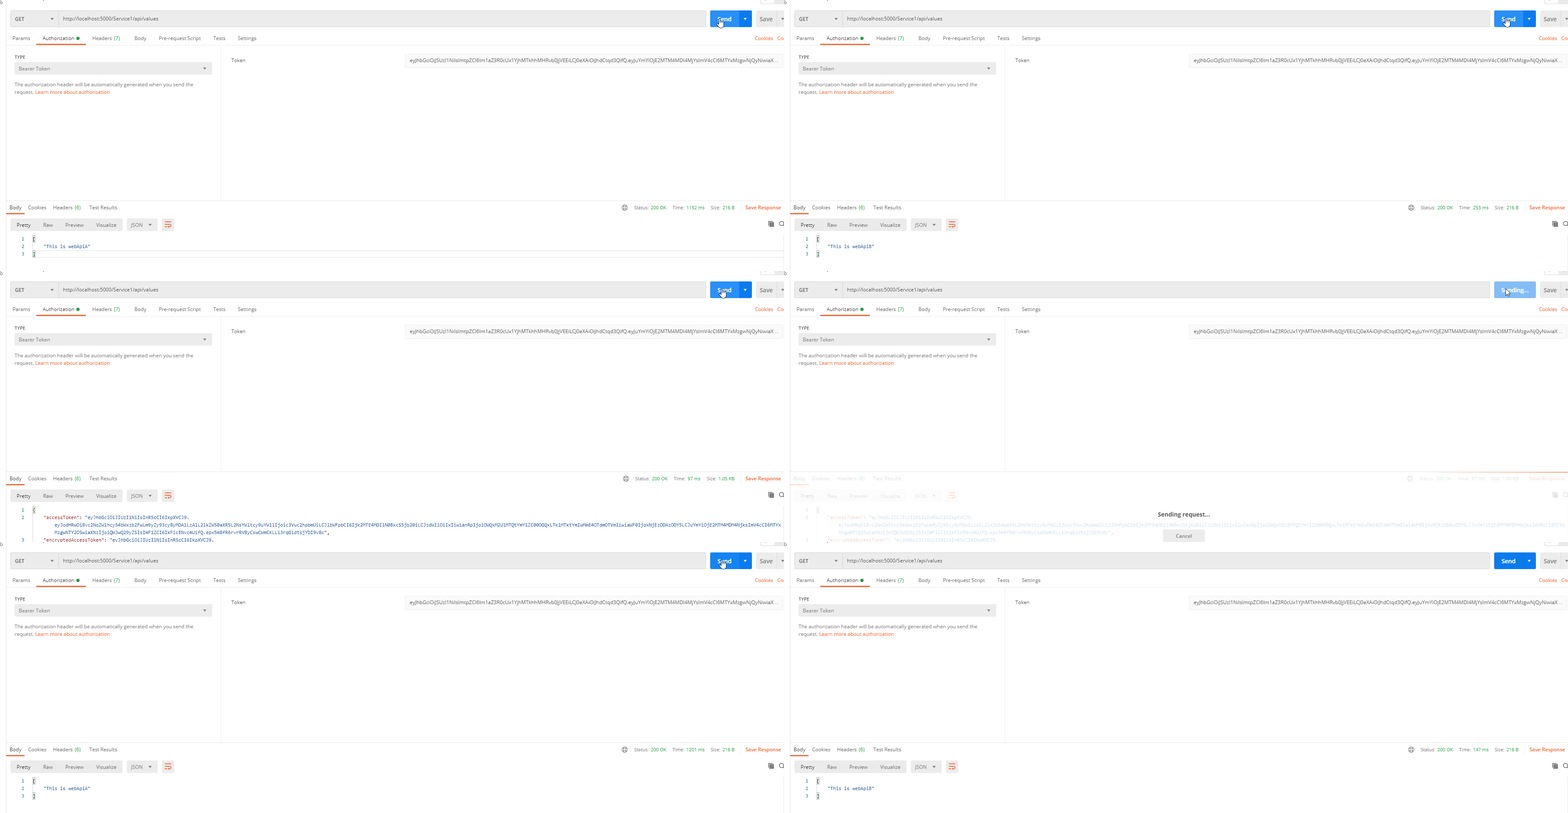
可以看到能正常请求到数据;


 浙公网安备 33010602011771号