netCore微服务学习笔记(一):IdentityServer4客户端授权
关于IdentityServer4介绍,可详见 https://www.cnblogs.com/sheng-jie/p/9430920.html;
1.搭建测试程序:
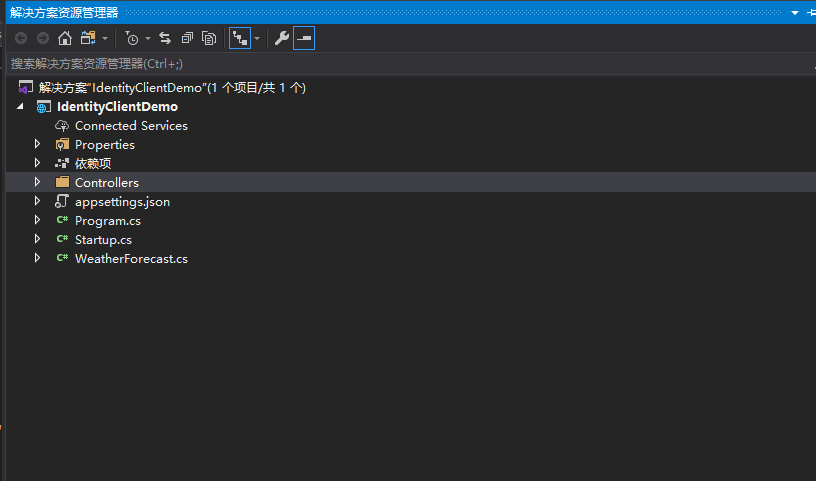
新建net Core应用:
2.添加引用程序:通过NuGet安装 IdentityServer4 或者通过程序包管理执行 Install-Package IdentityServer4 安装依赖包。
这里用的是3.14版本,使用4.1版本会出现问题HTTP : 400 { "error": "invalid_request" },在这边卡了好久才解决;
3:编辑代码
新建一个Config类,管理Identity资源,代码如下:
 1 using IdentityServer4.Models;
 2 using System.Collections.Generic;
 3 namespace IdentityClientDemo
 4 {
 5     public static class IdentityClientConfig
 6     {
 7         public static IEnumerable<IdentityResource> GetIdentityResourceResources()
 8         {
 9             return new List<IdentityResource>
10             {
11                 new IdentityResources.OpenId(),
12             };
13         }
14         // scopes define the API resources in your system
15         public static IEnumerable<ApiResource> GetApiResources()
16         {
17             //api资源({资源名称}{描述})
18             return new List<ApiResource>
19             {
20                 new ApiResource("Api", "Api"),
21             };
22         }
23
24         /// <summary>
25         /// 添加客户端
26         /// </summary>
27         /// <returns></returns>
28         public static IEnumerable<Client> GetClients()
29         {
30             return new List<Client>
31             {
32                 new Client
33                 {
34                     //客户端id,必须唯一
35                     ClientId = "client",
36                     AllowedGrantTypes = GrantTypes.ClientCredentials,//授权方式,这里采用的是客户端认证模式
37                     ClientSecrets =
38                     {
39                         new Secret("secret".Sha256())
40                     },
41                     AllowedScopes =
42                     {
43                         "Api",
44                     }
45                 }
46             };
47         }
48     }
49 }
然后再startup.class中注入服务:

 1 using Microsoft.AspNetCore.Builder;
 2 using Microsoft.AspNetCore.Hosting;
 3 using Microsoft.Extensions.Configuration;
 4 using Microsoft.Extensions.DependencyInjection;
 5 using Microsoft.Extensions.Hosting;
 6 namespace IdentityClientDemo
 7 {
 8     public class Startup
 9     {
10         public Startup(IConfiguration configuration)
11         {
12             Configuration = configuration;
13         }
14
15         public IConfiguration Configuration { get; }
16
17         // This method gets called by the runtime. Use this method to add services to the container.
18         public void ConfigureServices(IServiceCollection services)
19         {
20
21             services.AddIdentityServer()
22                  .AddDeveloperSigningCredential()
23                 .AddInMemoryApiResources(IdentityClientConfig.GetApiResources())//Api资源信息
24                 .AddInMemoryClients(IdentityClientConfig.GetClients());//客户端信息
25             services.AddControllers();
26         }
27
28         // This method gets called by the runtime. Use this method to configure the HTTP request pipeline.
29         public void Configure(IApplicationBuilder app, IWebHostEnvironment env)
30         {
31             if (env.IsDevelopment())
32             {
33                 app.UseDeveloperExceptionPage();
34             }
35
36             app.UseHttpsRedirection();
37
38             app.UseRouting();
39
40             app.UseAuthorization();
41             app.UseIdentityServer();
42             app.UseEndpoints(endpoints =>
43             {
44                 endpoints.MapControllers();
45             });
46         }
47     }
48 }
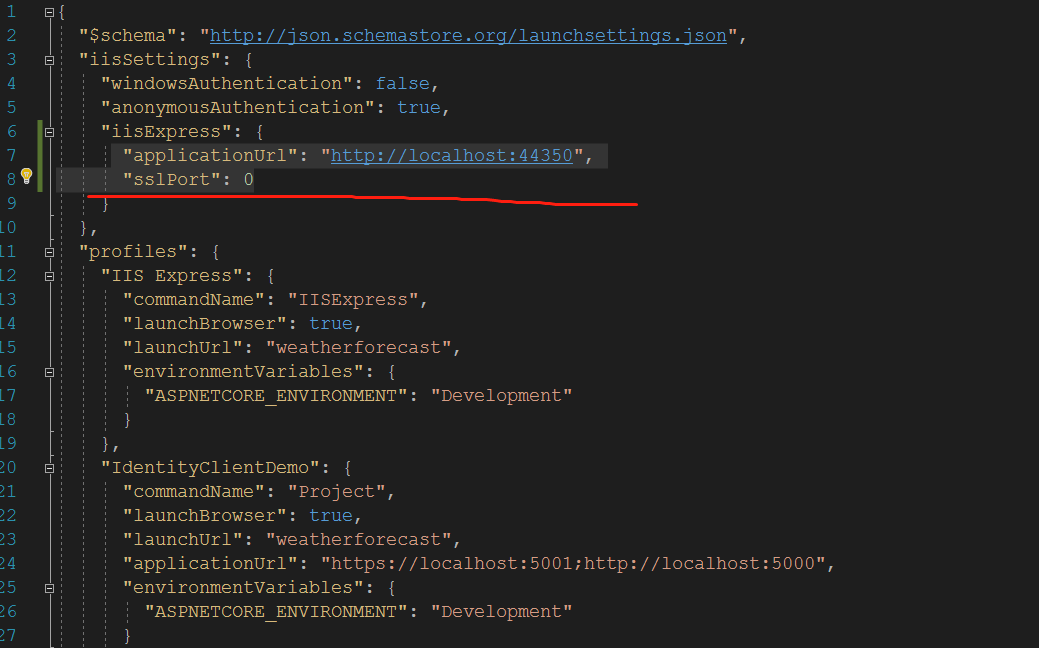
修改launchSetting.json文件,编辑
3.运行测试:
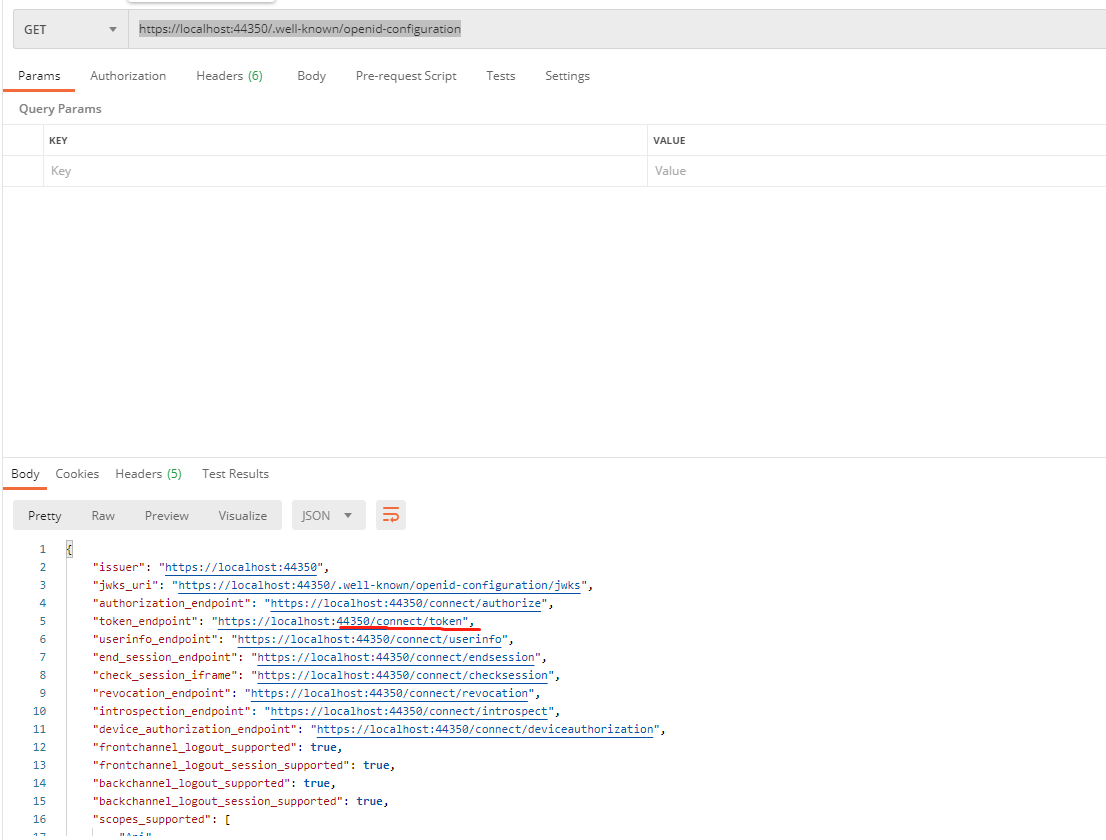
运行程序,在PostMan中输入网站https://localhost:44350/.well-known/openid-configuration,可看到下图:
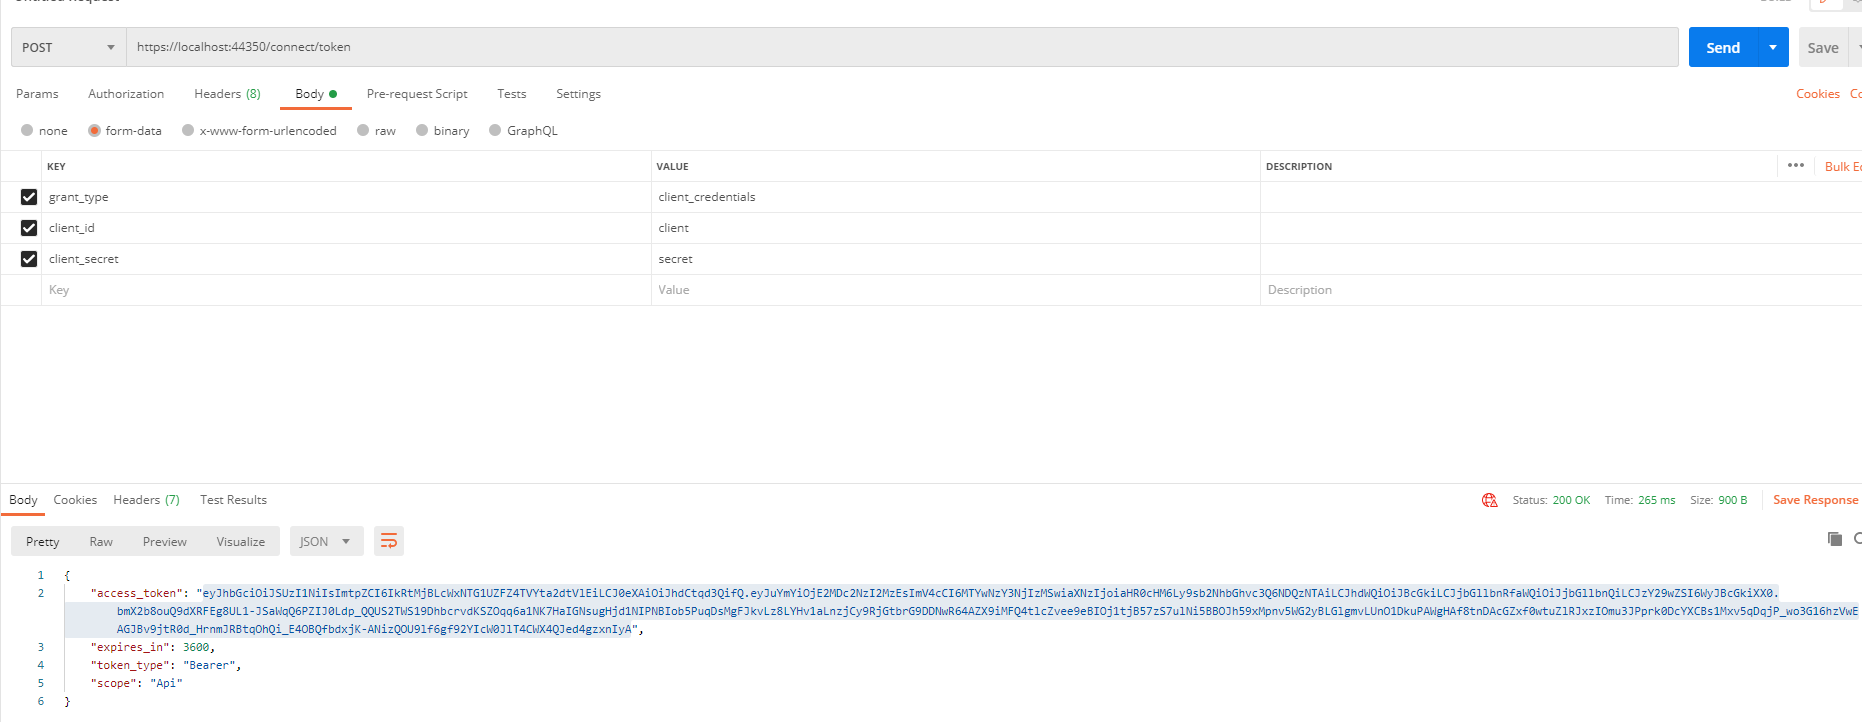
通过该路径"https://localhost:44350/connect/token",可以获取到token

其中body中的参数分别为:
grant_type :对应api AllowedGrantTypes 类型表示授权模式
client_id : 对应clentID
client_secret: 客户端秘钥
4.创建api服务程序:
添加“IdentityServer4.AccessTokenValidation“引用,然后再startup.class中注入服务,

 1 using Microsoft.AspNetCore.Authentication.JwtBearer;
 2 using Microsoft.AspNetCore.Builder;
 3 using Microsoft.AspNetCore.Hosting;
 4 using Microsoft.Extensions.Configuration;
 5 using Microsoft.Extensions.DependencyInjection;
 6 using Microsoft.Extensions.Hosting;
 7 namespace IdentityServerDemo
 8 {
 9     public class Startup
10     {
11         public Startup(IConfiguration configuration)
12         {
13             Configuration = configuration;
14         }
15
16         public IConfiguration Configuration { get; }
17
18         // This method gets called by the runtime. Use this method to add services to the container.
19         public void ConfigureServices(IServiceCollection services)
20         {
21
22             services
23              .AddAuthentication(JwtBearerDefaults.AuthenticationScheme)//JwtBearerDefaults.AuthenticationScheme为“Beaer"
24              .AddIdentityServerAuthentication("Bearer", options =>
25              {
26                  options.Authority = "http://localhost:44350";
27                  //options.Authority = "http://localhost:5003";
28                  options.RequireHttpsMetadata = false;
29                  options.ApiName = "Api"; //服务的名称,对应Identity Server当中的Api资源名称
30                  options.ApiSecret = "secret";
31              });
32             services.AddControllers();
33         }
34
35         // This method gets called by the runtime. Use this method to configure the HTTP request pipeline.
36         public void Configure(IApplicationBuilder app, IWebHostEnvironment env)
37         {
38             if (env.IsDevelopment())
39             {
40                 app.UseDeveloperExceptionPage();
41             }
42
43             app.UseHttpsRedirection();
44
45             app.UseRouting();
46             //添加authentication中间件到http管道
47             app.UseAuthentication();
48             app.UseAuthorization();
49
50             app.UseEndpoints(endpoints =>
51             {
52                 endpoints.MapControllers();
53             });
54         }
55     }
56 }
5.测试:
api服务控制器添加authorize认证:

 1 using System;
 2 using System.Collections.Generic;
 3 using System.Linq;
 4 using Microsoft.AspNetCore.Authorization;
 5 using Microsoft.AspNetCore.Mvc;
 6 using Microsoft.Extensions.Logging;
 7
 8 namespace IdentityServerDemo.Controllers
 9 {
10     [ApiController]
11     [Route("[controller]")]
12     [Authorize]
13     public class WeatherForecastController : ControllerBase
14     {
15         private static readonly string[] Summaries = new[]
16         {
17             "Freezing", "Bracing", "Chilly", "Cool", "Mild", "Warm", "Balmy", "Hot", "Sweltering", "Scorching"
18         };
19
20         private readonly ILogger<WeatherForecastController> _logger;
21
22         public WeatherForecastController(ILogger<WeatherForecastController> logger)
23         {
24             _logger = logger;
25         }
26
27         [HttpGet]
28         public IEnumerable<WeatherForecast> Get()
29         {
30             var rng = new Random();
31             return Enumerable.Range(1, 5).Select(index => new WeatherForecast
32             {
33                 Date = DateTime.Now.AddDays(index),
34                 TemperatureC = rng.Next(-20, 55),
35                 Summary = Summaries[rng.Next(Summaries.Length)]
36             })
37             .ToArray();
38         }
39     }
40 }
运行api服务程序,访问“WeatherForecastController”
可以看到,目前是未授权状态。访问认证网站http://localhost:44350/connect/token,获取access_token 然后用配置的client向IdentityServer申请token来访问Api资源:http://localhost:44344/weatherforecast,结果如下图:

可以看到,已经可以正常访问


 浙公网安备 33010602011771号