
Spring 实战4学习笔记(转)
http://blog.csdn.net/21aspnet/article/details/51386557
1.IOC装配Bean
参考【spring实战4 2.2】,作者提倡无XML配置化。
1.1接口只有一个现实类
可以自动装配
1 package demo;
2
3 public interface CompactDisc {
4     void play();
5 }
实现类
 1 package demo;
 2
 3 import org.springframework.stereotype.Component;
 4
 5 @Component
 6 public class SgtPeppers implements CompactDisc{
 7     private String title = "Sgt. Pepper's Lonely Hearts Club Band";
 8     private String artist = "http://blog.csdn.net/unix21";
 9
10     public void play() {
11         System.out.println("【非常醒目SgtPeppers 】>>>>>>>>>>>>>>>>>Playing " + title + " by " + artist);
12     }
13 }
配置类
 1 package demo;
 2
 3 import org.springframework.context.annotation.ComponentScan;
 4 import org.springframework.context.annotation.Configuration;
 5
 6 @Configuration
 7 @ComponentScan
 8 public class CDPlayerConfig {
 9
10 }
单元测试类
 1 package demo;
 2 import org.junit.Test;
 3 import org.junit.runner.RunWith;
 4 import org.springframework.beans.factory.annotation.Autowired;
 5 import org.springframework.beans.factory.annotation.Qualifier;
 6 import org.springframework.test.context.ContextConfiguration;
 7 import org.springframework.test.context.junit4.SpringJUnit4ClassRunner;
 8
 9 @RunWith(SpringJUnit4ClassRunner.class)
10 @ContextConfiguration(classes = CDPlayerConfig.class)
11 public class CDPlayerTest {
12     @Autowired
13     @Qualifier("spn")
14     private CompactDisc cd;
15
16     @Test
17     public void play() {
18         cd.play();
19     }
20 }
测试结果

1.2 接口有多个实现类
【参考 Spring实战4 3.3】
故意再写一个实现类
 1 package demo;
 2
 3 import org.springframework.context.annotation.Primary;
 4 import org.springframework.stereotype.Component;
 5
 6
 7 @Component
 8 public class SgtPeppersNew implements CompactDisc{
 9     private String title = "Sgt. Pepper's Lonely Hearts Club Band";
10     private String artist = "http://blog.csdn.net/unix21";
11
12     public void play() {
13         System.out.println("【非常醒目SgtPeppersNew 】>>>>>>>>>>>>>>>>>Playing " + title + " by " + artist);
14     }
15 }
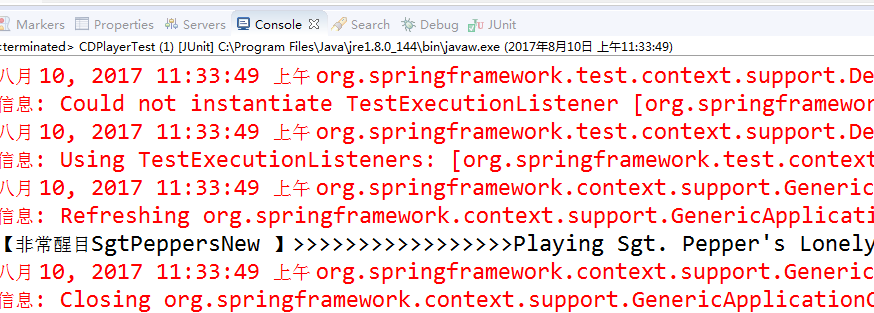
此时有两个实现类,如果这时执行单元测试类的时候,测试类不知道注入(DI)那个实现类,所以会报错。
两种解决方案:1,加@Primary 首选标识的bean 2, 使用@Qualifier注解@Qualifier("SgtPeppersNew"), 改变@Component("SgtPeppersNew") 或者@Qualifier 注解中用实现类,但id是小写@Qualifier("sgtPeppersNew"),不需要改变@Component
 1 package demo;
 2
 3 import org.springframework.stereotype.Component;
 4
 5
 6 @Component
 7 public class SgtPeppersNew implements CompactDisc{
 8     private String title = "Sgt. Pepper's Lonely Hearts Club Band";
 9     private String artist = "http://blog.csdn.net/unix21";
10
11     public void play() {
12         System.out.println("【非常醒目SgtPeppersNew 】>>>>>>>>>>>>>>>>>Playing " + title + " by " + artist);
13     }
14 }
 1 package demo;
 2 import org.junit.Test;
 3 import org.junit.runner.RunWith;
 4 import org.springframework.beans.factory.annotation.Autowired;
 5 import org.springframework.beans.factory.annotation.Qualifier;
 6 import org.springframework.test.context.ContextConfiguration;
 7 import org.springframework.test.context.junit4.SpringJUnit4ClassRunner;
 8
 9 @RunWith(SpringJUnit4ClassRunner.class)
10 @ContextConfiguration(classes = CDPlayerConfig.class)
11 public class CDPlayerTest {
12     @Autowired
13     @Qualifier("sgtPeppersNew")
14     private CompactDisc cd;
15
16     @Test
17     public void play() {
18         cd.play();
19     }
20 }
打印结果
1.3 为组件扫描的bean命名
【参考 Spring实战4 2.2.2】
1 import org.springframework.stereotype.Component;
2
3 @Component("spn")
4 public class SgtPeppersNew implements CompactDisc {
1     @Autowired
2     @Qualifier("spn")
3     private CompactDisc cd;
也可以使用@Named效果是一样的,这是java依赖注入规范
1 import javax.inject.Named;
2
3 @Named("spn")
4 public class SgtPeppersNew implements CompactDisc {
1.4 设定组件扫描的指定包
【参考 Spring实战4 2.2.3】
如果@ComponentScan默认不设置只扫描配置类所在的包作为基础包
@Configuration
@ComponentScan("blog.csdn.net.unix21")
public class CDPlayerConfigTest
设置@ComponentScan的value属性就可以指明包名称。
如果想更清晰的表明设置的是基础包
@ComponentScan(basePackages="指定包")
指定多个
@ComponentScan(basePackages={"指定包1","指定包2"})
也可以将其指定为包中所包含的类或者接口
@ComponentScan(basePackages={"XXX.class","XX.class"})
1.5 自动装配
【参考 Spring实战4 2.2.4】
声明自动装配需要@Autowired注解
1.5.1 在构造方法上使用自动装配
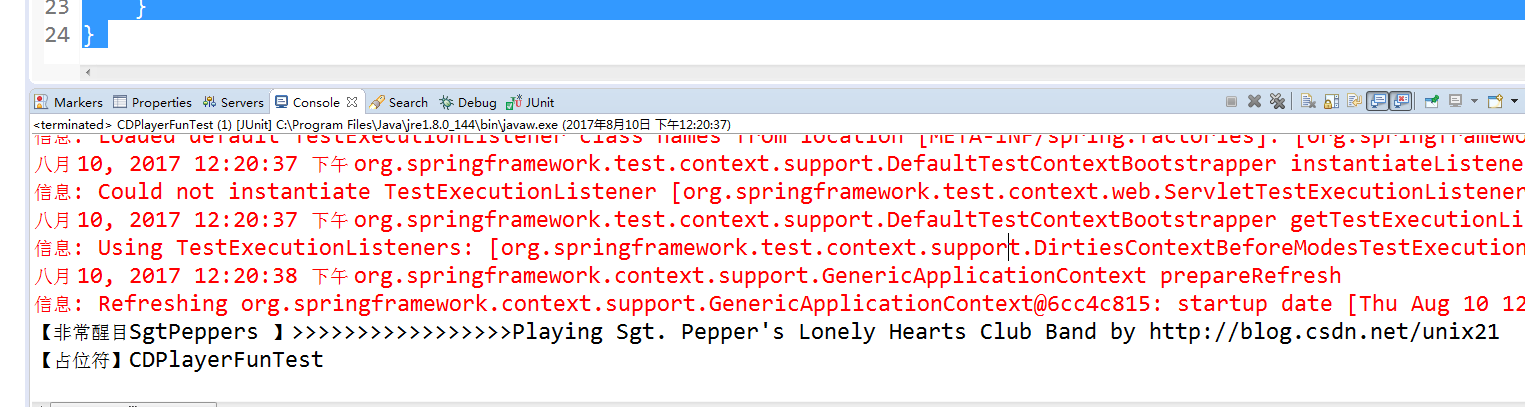
 1 package demo;
 2 import org.junit.Test;
 3 import org.junit.runner.RunWith;
 4 import org.springframework.beans.factory.annotation.Autowired;
 5 import org.springframework.beans.factory.annotation.Qualifier;
 6 import org.springframework.test.context.ContextConfiguration;
 7 import org.springframework.test.context.junit4.SpringJUnit4ClassRunner;
 8
 9 @RunWith(SpringJUnit4ClassRunner.class)
10 @ContextConfiguration(classes = CDPlayerConfigTest.class)
11 public class CDPlayerFunTest {
12     private CompactDisc cd;
13     @Autowired
14     @Qualifier("spn")
15     public void CDPlayer(CompactDisc cd) {
16         this.cd = cd;
17     }
18
19     @Test
20     public void play() {
21         cd.play();
22         System.out.println("【占位符】CDPlayerFunTest");
23     }
24 }
另一种写法
 1 @Component
 2 public class CDPlayer implements MediaPlayer {
 3   private CompactDisc cd;
 4
 5   @Autowired
 6   public CDPlayer(@Qualifier("spn")CompactDisc cd) {
 7     this.cd = cd;
 8   }
 9
10   public void play() {
11     cd.play();
12   }
13
14 }
1.5.2 在属性Setter方法上使用自动装配
 1 @Component
 2 public class CDPlayer implements MediaPlayer {
 3   private CompactDisc cd;
 4
 5   @Autowired
 6   @Qualifier("spn")
 7   public void setCompactDisc(CompactDisc cd) {
 8     this.cd = cd;
 9   }
10
11   public void play() {
12     cd.play();
13   }
14 }
避免异常声明 @Autowired(required = false),如果没有匹配的bean,Spring会让这个bean处于未装配转态,但是需要谨慎对待这个设置,代码需要做null检查。
@Autowired是Spring特有的注解,可以替换为@Inject,@Inject来源自Jave依赖注入规范。
1.6 创建自定义的限定符
【参考 Spring实战4 3.3.2】
@Component
@Qualifier("cold")
public class IceCream implements CompactDisc {

    private String title = "Sgt. Pepper's Lonely Hearts Club Band";
    private String artist = "The Beatles";

    public void play() {
        System.out.println("【非常醒目 IceCream】>>>>>>>>>>>>>>>>>>>>>>>>>>>>>>>>Playing " + title + " by " + artist);
    }
}
 1 @RunWith(SpringJUnit4ClassRunner.class)
 2 @ContextConfiguration(classes=CDPlayerConfigTest.class)
 3 public class CDPlayerLogTest {
 4
 5   @Autowired
 6   private MediaPlayer player;
 7
 8   @Autowired
 9   @Qualifier("sp")
10   private CompactDisc cd;
11
12   @Autowired
13   @Qualifier("cold")
14   private CompactDisc cd2;
15
16   @Test
17   public void cdShouldNotBeNull() {
18     assertNotNull(cd);
19   }
20
21   @Test
22   public void play() {
23     player.play();
24     cd.play();
25     cd2.play();
26   }
27 }
好处:这样做的好处限定符不耦合类名,所以可以随意重构类名。
问题:重复的限定符出现在多个类上这是不允许的,因为Java不允许同一个条目上重复出现相同类型的多个注解。
注意:此时我用本地测试时发现 private MediaPlayer player; 这个player 并不能注入到测试类中,需要以后解决。
解决:注意其实CDplayer 也是需要创建的组件类,所以也要加上@Component
1.7 使用自定义限定符注解
针对上述问题可以创建自定义的限定符注解。
1 @Retention(RetentionPolicy.RUNTIME) // 注解会在class字节码文件中存在,在运行时可以通过反射获取到
2 @Target({ElementType.CONSTRUCTOR,ElementType.FIELD,ElementType.METHOD,ElementType.TYPE})//定义注解的作用目标**作用范围字段、枚举的常量/方法
3 @Qualifier
4 public @interface Cold {}
1 @Retention(RetentionPolicy.RUNTIME) // 注解会在class字节码文件中存在,在运行时可以通过反射获取到
2 @Target({ElementType.CONSTRUCTOR,ElementType.FIELD,ElementType.METHOD,ElementType.TYPE})//定义注解的作用目标**作用范围字段、枚举的常量/方法
3 @Qualifier
4 public @interface Creamy {}
1 @Retention(RetentionPolicy.RUNTIME) // 注解会在class字节码文件中存在,在运行时可以通过反射获取到
2 @Target({ElementType.CONSTRUCTOR,ElementType.FIELD,ElementType.METHOD,ElementType.TYPE})//定义注解的作用目标**作用范围字段、枚举的常量/方法
3 @Qualifier
4 public @interface Fruity {}
 1 @Component
 2 @Cold
 3 @Creamy
 4 public class IceCream implements CompactDisc {
 5
 6     private String title = "Spring 实现 第4版 读书笔记";
 7     private String artist = "http://blog.csdn.net/unix21";
 8
 9     public void play() {
10         System.out.println("【非常醒目 IceCream】>>>>>>>>>>>>>>>>>>>>>>>>>>>>>>>>Playing " + title + " by " + artist);
11     }
12 }
 1 @Component
 2 @Cold
 3 @Fruity
 4 public class Popsicle implements CompactDisc {
 5
 6     private String title = "Spring 实现 第4版 读书笔记";
 7     private String artist = "http://blog.csdn.net/unix21";
 8
 9     public void play() {
10         System.out.println("【非常醒目 Popsicle】>>>>>>>>>>>>>>>>>>>>>>>>>>>>>>>>Playing " + title + " by " + artist);
11     }
12 }
 1 @RunWith(SpringJUnit4ClassRunner.class)
 2 @ContextConfiguration(classes = CDPlayerConfigTest.class)
 3 public class CDPlayerLogTest {
 4
 5     @Autowired
 6     private MediaPlayer player;
 7
 8     @Autowired
 9     @Qualifier("sp")
10     private CompactDisc cd;
11
12     @Autowired
13     @Cold
14     @Creamy
15     private CompactDisc cd2;
16
17     @Autowired
18     @Cold
19     @Fruity
20     private CompactDisc cd3;
21
22     @Test
23     public void cdShouldNotBeNull() {
24         assertNotNull(cd);
25     }
26
27     @Test
28     public void play() {
29         player.play();
30         cd.play();
31         cd2.play();
32         cd3.play();
33     }
34 }
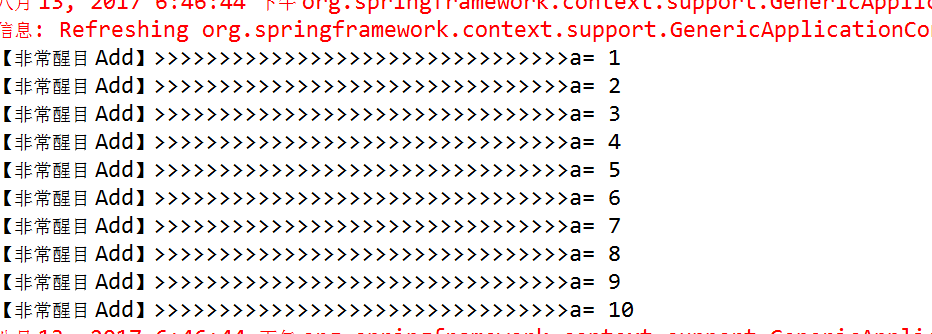
1.8 bean的作用域
Spring定义了多重作用域,singleton单例,prototype原型等
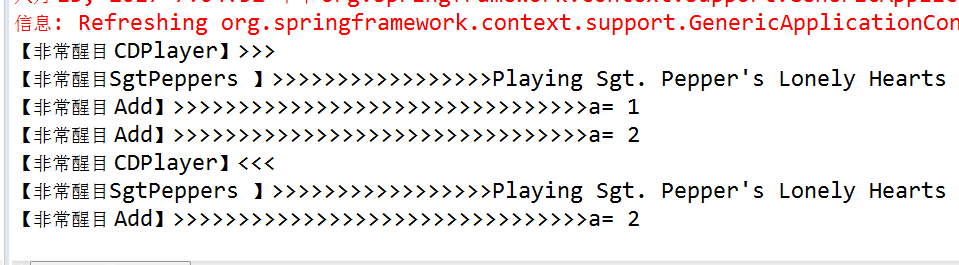
singleton单例:整个应用中,只创建bean的一个实例,默认Spring上下文中所有的bean都是单例。
prototype原型:每次注入或者通过Spring应用上下文获取的时候,都会创建一个新的bean实例。
 1 @Component
 2 public class Add implements AddI {
 3     public  int a=0;
 4
 5     public  void Add() {
 6         a++;
 7     }
 8
 9     public  void getA() {
10         System.out.println("【非常醒目 Add】>>>>>>>>>>>>>>>>>>>>>>>>>>>>>>>>a= " +a+"");
11     }
12 }
1 public interface AddI {
2 void Add();
3     void getA();
4 }
 1 @Component
 2 public class CDPlayer implements MediaPlayer {
 3
 4     @Autowired
 5     @Qualifier("sp")
 6     private CompactDisc cd;
 7
 8     @Autowired
 9     private AddI a;
10
11     public void play() {
12         System.out.println("【非常醒目 CDPlayer】>>>");
13         cd.play();
14         a.Add();
15         a.getA();
16         a.Add();
17         a.getA();
18         System.out.println("【非常醒目 CDPlayer】<<<");
19     }
20 }
测试用例
 1 @RunWith(SpringJUnit4ClassRunner.class)
 2 @ContextConfiguration(classes = CDPlayerConfigTest.class)
 3 public class CDPlayerLogTest {
 4
 5     @Autowired
 6     private MediaPlayer player;
 7
 8     @Autowired
 9     @Qualifier("sp")
10     private CompactDisc cd;
11
12     @Autowired
13     @Cold
14     @Creamy
15     private CompactDisc cd2;
16
17     @Autowired
18     @Cold
19     @Fruity
20     private CompactDisc cd3;
21
22     @Test
23     public void cdShouldNotBeNull() {
24         assertNotNull(cd);
25     }
26
27     @Autowired
28     private AddI a;
29
30     @Test
31     public void play() {
32         player.play();
33         cd.play();
34         cd2.play();
35         cd3.play();
36         a.getA();
37     }
38 }
再写一个多线程
 1 public class ClientThread extends Thread {
 2
 3     @Autowired
 4     private AddI a;
 5
 6     @Autowired
 7     public ClientThread(AddI a) {
 8         this.a = a;
 9     }
10
11     public void run() {
12         a.Add();
13         a.getA();
14     }
15 }
调用多线程
 1 @RunWith(SpringJUnit4ClassRunner.class)
 2 @ContextConfiguration(classes = CDPlayerConfigTest.class)
 3 public class SpringScopeTest {
 4
 5     @Autowired
 6     private AddI a;
 7
 8     @Test
 9     public void Scope() {
10         for (int i = 0; i < 10; i++) {
11             ClientThread t = new ClientThread(a);
12             t.start();
13         }
14     }
15 }
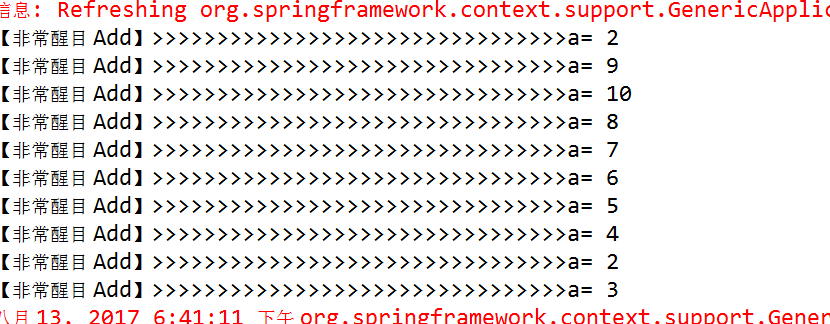
此时add实现类如下
@Component
//@Scope(ConfigurableBeanFactory.SCOPE_SINGLETON)
@Scope(ConfigurableBeanFactory.SCOPE_PROTOTYPE)
public class Add implements AddI{
    public  int a=0;
    public void Add() {
        // TODO Auto-generated method stub
        a++;
    }

    public void getA() {
        // TODO Auto-generated method stub
        System.out.println("【非常醒目 Add】>>>>>>>>>>>>>>>>>>>>>>>>>>>>>>>>a= " +a+"");
    }

}
如果使用单例模式则
补充说明:@Repository、@Service、@Controller 和 @Component将类标识为Bean,都是一样的,用在不同的地方而已。
2.AOP切面编程
定义接口
1 public interface PerformanceI {
2     public void perform();
3 }
实现类
1 import org.springframework.stereotype.Component;
2
3 @Component
4 public class Performance implements PerformanceI{
5     public void perform(){
6     System.out.println("【非常醒目  Performance perform 调用中】 By http://blog.csdn.net/unix21");
7     }
8 }
定义切面
 1 import org.aspectj.lang.annotation.After;
 2 import org.aspectj.lang.annotation.AfterThrowing;
 3 import org.aspectj.lang.annotation.Aspect;
 4 import org.aspectj.lang.annotation.Before;
 5
 6 @Aspect
 7 public class MyAspect {
 8     @Before("execution(* com.demo.PerformanceI.perform(..))")
 9     public void before(){
10     System.out.println("【非常醒目 [方法调用前] 】");
11     }
12
13     @After("execution(* com.demo.PerformanceI.perform(..))")
14     public void after(){
15     System.out.println("【非常醒目 [方法调用后] 】");
16     }
17
18     @AfterThrowing("execution(* com.demo.PerformanceI.perform(..))")
19     public void afterThrowing(){
20     System.out.println("【非常醒目 [方法异常后] 】");
21     }
22 }
配置文件
 1 import com.demo.*;
 2 import org.springframework.context.annotation.Bean;
 3 import org.springframework.context.annotation.ComponentScan;
 4 import org.springframework.context.annotation.Configuration;
 5 import org.springframework.context.annotation.EnableAspectJAutoProxy;
 6
 7 @Configuration
 8 @EnableAspectJAutoProxy
 9 @ComponentScan("com.demo")
10 public class AppConfig {
11     @Bean
12     public MyAspect myAspect() {
13         return new MyAspect();
14     }
15
16 }
测试用例
 1 import org.junit.Test;
 2 import org.junit.runner.RunWith;
 3 import org.springframework.beans.factory.annotation.Autowired;
 4 import org.springframework.test.context.ContextConfiguration;
 5 import org.springframework.test.context.junit4.SpringJUnit4ClassRunner;
 6
 7 @RunWith(SpringJUnit4ClassRunner.class)
 8 @ContextConfiguration(classes = AppConfig.class)
 9 public class MyTest {
10
11     @Autowired
12     private PerformanceI p1;
13
14     @Test
15     public void play() {
16         p1.perform();
17     }
18 }
此时在本地运行报错··········
后来加入了 aopalliance.jar 包后解决问题 已经写入到 博客园内 问题3.
实现了方法调用前后的AOP效果。

这个Spring官方参考做的不错:http://docs.spring.io/spring/docs/4.2.5.RELEASE/javadoc-api/
这里选不同的版本:http://docs.spring.io/spring/docs/
4.3.2 创建环绕通知
哈哈此小结个人觉得挺有意思所以也就拿上来了。
环绕通知是最为强大的通知类型。它能够让你所编写的逻辑将被通知的目标方法完全包装起 来。实际上就像在一个通知方法中同时编写前置通知和后置通知。
环绕通知,直接上代码说事情。
 1 package concert;
 2
 3 import org.aspectj.lang.ProceedingJoinPoint;
 4 import org.aspectj.lang.annotation.Around;
 5 import org.aspectj.lang.annotation.Aspect;
 6 import org.aspectj.lang.annotation.Pointcut;
 7 @Aspect
 8 public class MyAspect {
 9     @Pointcut("execution(* concert.PerformanceI.perform(..))")
10     public void perform(){}
11     @Around("perform()")
12     public void watchPerformance(ProceedingJoinPoint jp){
13         try{
14             System.out.println("【非常醒目 [方法调用前] 】");
15             jp.proceed();
16             System.out.println("【非常醒目 [方法调用后] 】");
17         } catch (Throwable e){
18             System.out.println("【非常醒目 [方法异常后] 】");
19         }
20     }
21 }
@Around 是环绕通知的 注释,ProceedingJoinPoint 作为参数用来通知“自己想做的业务逻辑” 个人理解就是切点。
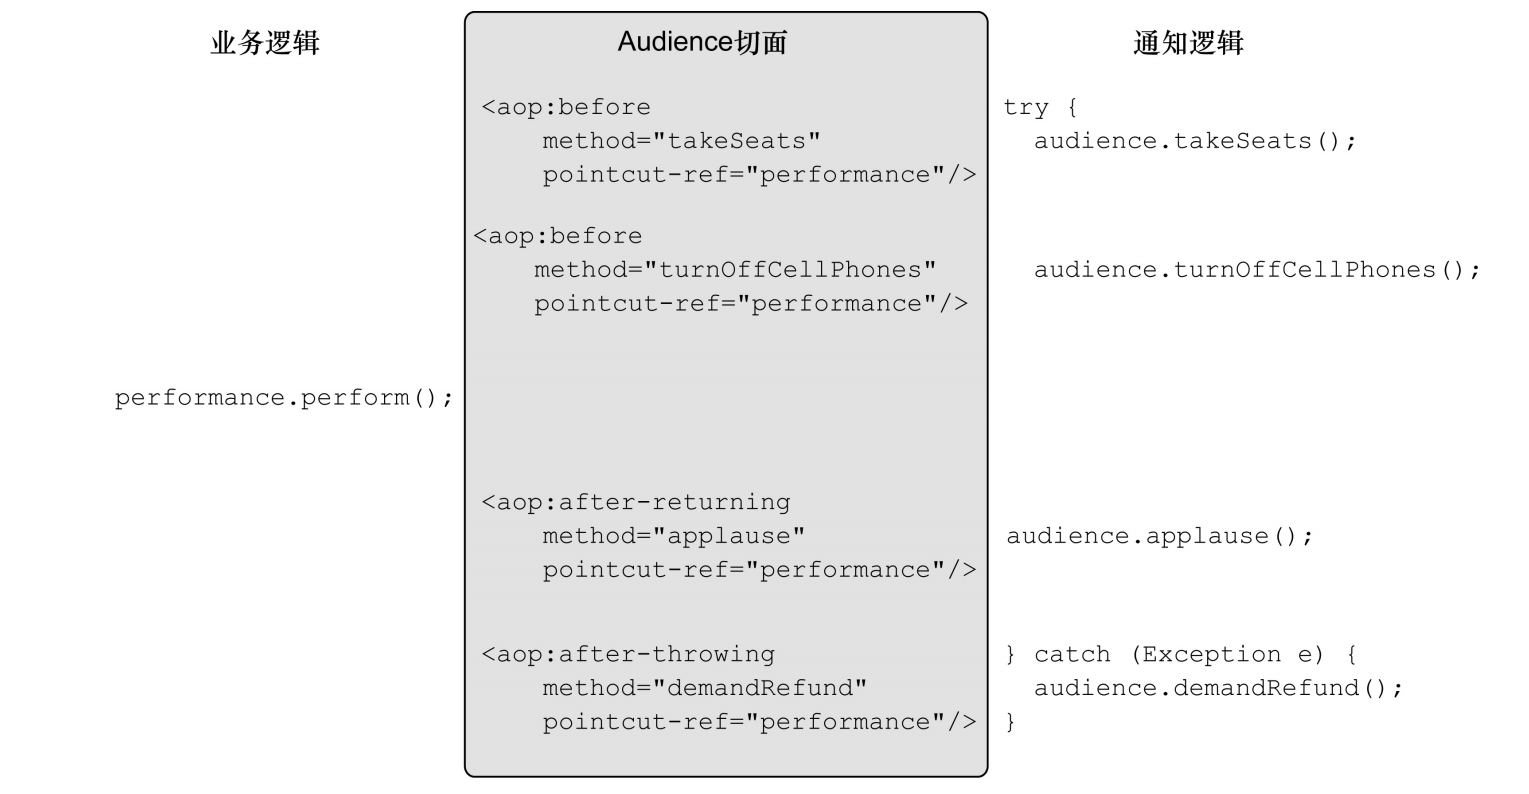
粘贴过来一张原图,是通过XML配置来实现AOP切面功能,跟上面 通过基于AspectJ注解 @EnableAspectJAutoProxy 引入是一个意思。
![]()
3.Spring MVC
DispatcherServlet是Spring MVC的核心,每当应用接受一个HTTP请求,由DispatcherServlet负责将请求分发给应用的其他组件。
首选给出一张Spring MVC的组件图,也是Spring mvc 的流程图
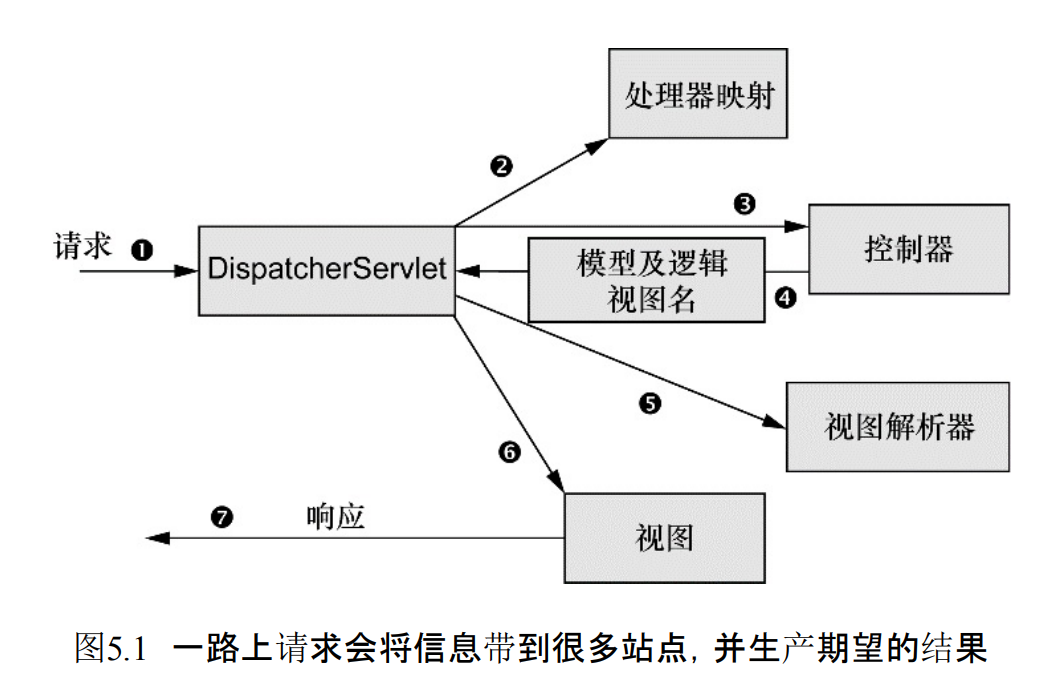
在旧版本中,DispatcherServlet之类的servlet一般在web.xml文件中配置;但是Spring 3.1引入了注解就无需再使用web.xml文件。
下面配置DispatcherServlet
 1 import org.springframework.web.servlet.support.AbstractAnnotationConfigDispatcherServletInitializer;
 2
 3 public class SpitterWebInitializer extends AbstractAnnotationConfigDispatcherServletInitializer {
 4
 5     @Override
 6     protected Class<?>[] getRootConfigClasses() {
 7         return new Class<?>[]{RootConfig.class};
 8     }
 9
10     @Override
11     protected Class<?>[] getServletConfigClasses() {
12         return new Class<?>[]{WebConfig.class};
13     }
14
15     @Override
16     protected String[] getServletMappings() {
17         return new String[]{"/"};
18     }
19
20 }

 浙公网安备 33010602011771号