Arch配置安装使用
Arch日常使用
使用Linux
Linux学习时间不长不短,但是深深的爱上了这个简洁,高效,自由可定制化的操作系统,随着对Linux操作系统了解使用的越多,对Windows的厌恶程度与日俱增,很早的时候就想将自己电脑更换成Linux发行版,在使用 Linux 系统的过程中,可以无形中接触到各个方面的计算机知识,并且在未来的工作中也会为你带来相关方面的优势。
Arch linux
Arch Linux 的软件包是最新的,这在日常使用中非常必要,你可以第一时间享受到新软件的特性。ArchLinux 可以以超高的自由度来定制自己的系统,并且其拥有最完善的文档,使得绝大多数问题都可以通过查看官方文档的方式解决。同时在Arch发行版本上开发出来了BlackArch Linux系统该系统非常适合进行信安学习,因此我们只需要在Arch源添加BlackArch源既可以当做日常使用又可以进行工具使用
清华源下载地址
基础配置
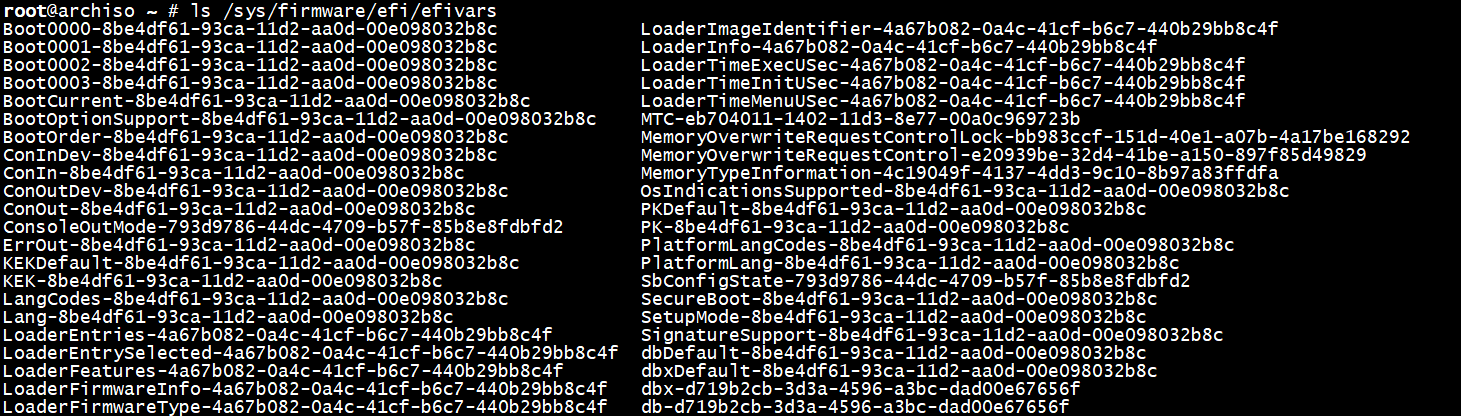
检查安装环境
# 查看启动方式是否为uefi

ls /sys/firmware/efi/efivars
网络连接
# 无线网络

# 进入交互式命令行
iwctl

# 列出设备名,比如无线网卡看到叫 wlan0
device list

# 扫描网络
station wlan0 scan

# 列出网络 比如想连接CMCC-5AQ7这个无线
station wlan0 get-networks

# 进行连接 输入密码即可
station wlan0 connect CMCC-5AQ7

# 成功后exit退出
exit

# 网络测试
ping www.baidu.com
禁用reflector
# reflector会自动更新mirrorlist 可能在某些情况下会删除有用的源信息

systemctl stop reflector.service && systemctl disable reflector.service

更新时钟
# ntp同步
timedatectl set-ntp true

# 查看ntp
timedatectl status

更换网络源
vim /etc/pacman.d/mirrorlist

    # 添加如下镜像 放在最上面
	Server = http://mirrors.tuna.tsinghua.edu.cn/archlinux/$repo/os/$arch
    Server = http://mirrors.ustc.edu.cn/archlinux/$repo/os/$arch
    Server = http://mirrors.aliyun.com/archlinux/$repo/os/$arch

# 系统更新镜像源
pacman -Syy
分区
- EFI:
- 根目录
- 用户家目录
# # 磁盘类型选择gpt
cfdisk
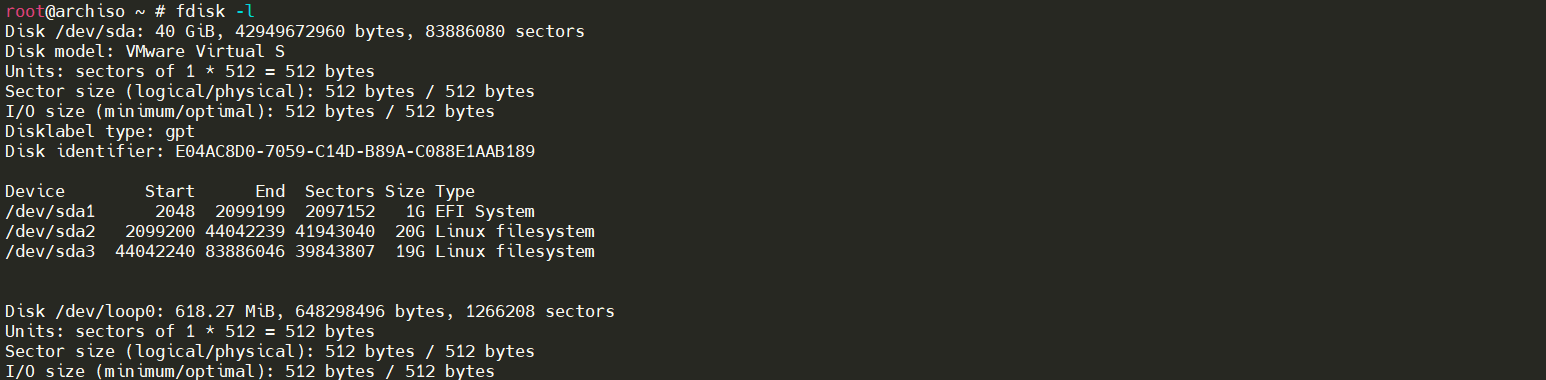
# 查看分区
fdsik -l
格式化
# efi格式化
mkfs.vfat /dev/sda1

# 根目录格式化
mkfs.ext4 /dev/sda2

# 家目录格式化
mkfs.ext4 /dev/sda3
挂载
# 挂载根目录
mount /dev/sda2 /mnt

# 创建家目录
mkdir /mnt/home

# 挂载家目录
mount /dev/sda3 /mnt/home

# 创建efi分区
mkdir /mnt/efi

# 挂载efi
mount /dev/sda1 /mnt/efi

安装系统
# 安装系统以及基础软件

pacstrap /mnt base base-devel linux linux-firmware dhcpcd  iwd vim sudo bash-completion
生成fstab文件
# 定义磁盘分区
genfstab -U /mnt >> /mnt/etc/fstab

# 检查
cat /mnt/etc/fstab

更换系统
# 环境更换到/mnt下系统
arch-chroot /mnt
设置主机名称
# 设置用户sean
hostnamectl set-hostname sean

# 配置hosts文件
vim /etc/hosts
    127.0.0.1   localhost
    ::1         localhost
    127.0.1.1   sean.localdomain    sean
时区配置
# 设置时区为上海
ln -sf /usr/share/zoneinfo/Asia/Shanghai /etc/localtime

# 讲系统时间同步到硬件时间
hwclock --systohc
配置locale
# Locale 决定了软件使用的语言、书写习惯和字符集。
vim /etc/locale.gen
	# 取消en_US.UTF-8与zh_CN.UTF-8注释

	177 en_US.UTF-8
	500 zh_CN.UTF-8
# 生成locale
locale-gen

# 向 /etc/locale.conf 输入内容
echo 'LANG=en_US.UTF-8'  > /etc/locale.conf
安装引导程序
# grub是启动引导器,efibootmgr被 grub 脚本用来将启动项写入 NVRAM。
pacman -S grub efibootmgr --noconfirm

# 取名为GRUB 并将grubx64.efi安装到之前的指定位置
grub-install --target=x86_64-efi --efi-directory=/efi --bootloader-id=GRUB

# 生成配置文件
grub-mkconfig -o /boot/grub/grub.cfg
设置密码
# root配置密码

passwd root
完成安装
# 退回安装环境#
exit

# 卸载新分区
umount -R  /mnt

# 重启
reboot
开启DHCP
# 开启dhcp
systemctl start dhcpcd && systemctl enable dhcpcd

ip a

ping www.baidu.com

ssh开启
# 安装ssh方便使用远程工具进行连接
pacman -S --noconfirm openssh openssl
# 修改ssh配置文件允许root登陆
vim /ect/ssh/sshd_config
# 修改为yes
32 PermitRootLogin ---> yes
# 取消注释
57 PasswordAuthentication
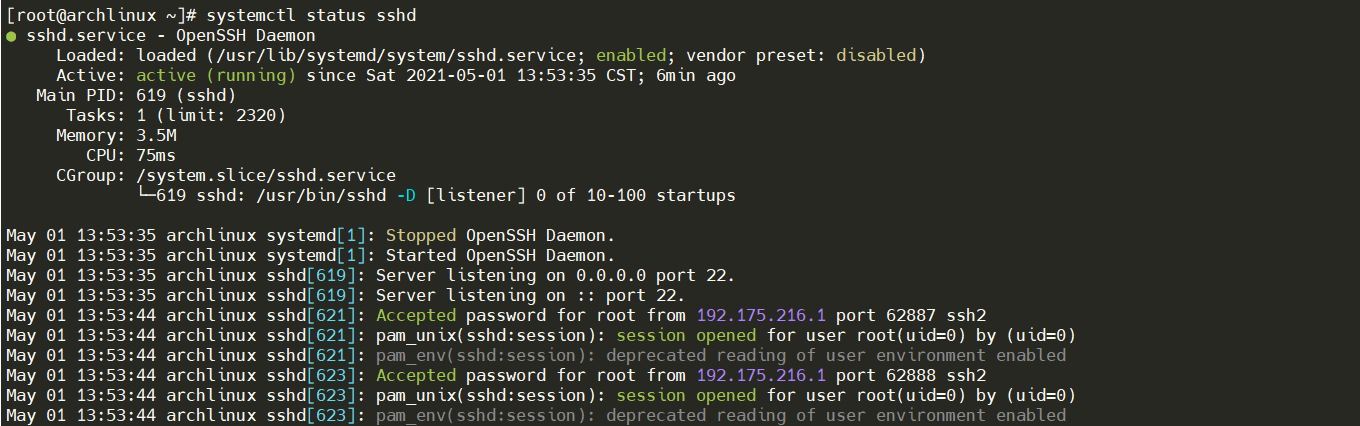
systemctl start sshd && systemctl enable sshd
配置桌面环境
上述配置如果没有问题则已经成功配置了Arch命令行版本,但是作为日常主力系统肯定需要有相应的桌面环境,来保证我们更加愉快的使用Arch Linux
系统更新
# 更新所有包
pacman -Syyu
生成非root用户
# 加入wheel附属组方便非root用户可以更好的提权
useradd -m -G wheel -s /bin/bash sean

# 创建密码
passwd sean

# 提权
EDITOR=vim visudo
# 将改行前面的注释取消
 %wheel ALL=(ALL) ALL

安装KDE桌面环境
#  安装软件包与文件管理器
pacman -S --noconfirm plasma-meta  dolphin konsole bash-completion
安装sddm桌面管理器
# 安装好了桌面环境包以后,我们需要安装一个图形化的桌面管理器来帮助我们登录并且选择我们使用的桌面环境。
pacman -S --noconfirm sddm

# 开启服务
systemctl start sddm && systemctl enable sddm
添加仓库地址
sudo cp /etc/pacman.conf /etc/pacman.conf.backup

sudo vim /etc/pacman.conf
	# 取消[multilib]一节中两行注释

    # 添加blackarch源
    [blackarch]
    SigLevel = Optional TrustAll
    Server = https://mirrors.tuna.tsinghua.edu.cn/blackarch/$repo/os/$arch

	# 末尾添加ArchLinuxCN源
	[archlinuxcn]
	SigLevel = Optional TrustAll
	Server = https://mirrors.tuna.tsinghua.edu.cn/archlinuxcn/$arch

# 刷新数据库
sudo pacman -Syyu

# 配置aur
sudo pacman -S --noconfirm yaourt
# 备份
sudo cp /etc/yaourtrc /etc/yaourtrc.backup
sudo vim /etc/yaourtrc
	# 取消#AURURL 的注释,并修改
    AURURL="https://aur.tuna.tsinghua.edu.cn"


# 添加yay源为国内源
yay --aururl "https://aur.tuna.tsinghua.edu.cn" --save

# 查看配置
yay -P -g

关闭无线网络防止冲突
# 确保iwd开机处于关闭状态,其无线连接会与NetworkManager冲突
sudo systemctl disable iwd
# 同上,立即关闭iwd
sudo systemctl stop iwd
# 确保先启动NetworkManager,并进行网络连接 若iwd已经与NetworkManager冲突 则执行完上一步重启一下电脑即可
sudo systemctl enable --now NetworkManager
基础安装包
# 识别NTFS格式的硬盘
sudo pacman -S --noconfirm ntfs-3g
# 安装几个开源中文字体 一般装上文泉驿就能解决大多wine应用中文方块的问题
sudo pacman -S --noconfirm adobe-source-han-serif-cn-fonts wqy-zenhei
# 安装谷歌开源字体及表情
sudo pacman -S --noconfirm  noto-fonts noto-fonts-cjk noto-fonts-emoji noto-fonts-extra
# 安装常用的谷歌浏览器
sudo pacman -S --noconfirm  chromium
# 与dolphin同用右键解压
sudo pacman -S --noconfirm  --noconfirm  ark
# 确保Discover(软件中心)可用 需重启
sudo pacman -S --noconfirm packagekit-qt5 packagekit appstream-qt appstream
# 图片查看器
sudo pacman -S --noconfirm  gwenview

# 安装yay
# cn源中的签名(archlinuxcn-keyring在archLinuxCn)
sudo pacman -S --noconfirm archlinuxcn-keyring
# yay命令可以让用户安装AUR中的软件(yay在archLinuxCn)
sudo pacman -S --noconfirm yay
配置输入法
# 安装软件包
sudo pacman -S --noconfirm fcitx5-im fcitx5-chinese-addons fcitx5-pinyin-moegirl fcitx5-material-color

# 配置环境变量
vim ~/.pam_environment
	INPUT_METHOD DEFAULT=fcitx5
    GTK_IM_MODULE DEFAULT=fcitx5
    QT_IM_MODULE DEFAULT=fcitx5
    XMODIFIERS DEFAULT=\@im=fcitx5
    SDL_IM_MODULE DEFAULT=fcitx
- 打开系统设置-->区域设置-->输入法,点击添加输入法,选择简体中文下的pinyin点击添加
- 点击pinyin右侧编辑,开启云拼音与在程序中显示预编辑文本
- 点击配置附加组件,选择classic user interface选择喜欢的主题
- 点击系统设置-->开机与关机-->自动启动-->添加-->添加应用-->fcitx5
- 注销重新登陆
检查家目录
# 检查家目录下的各个常见目录是否已经创建,若没有则需手动创建。
cd /home/sean

mkdir Desktop Documents Downloads Music Pictures Videos

ls

开启蓝牙
sudo systemctl enable --now bluetooth
Science Internet
终端代理配置
# 安装q*****与*****
# 由于不能出现某些非法字符 因此将2更改为Two
sudo pacman -S --noconfirm q***** *****

# 安装proxychains进行代理
sudo pacman -S --noconfirm proxychains-ng

# 配置代理
sudo vim /etc/proxychains.conf
	# 把配置文件中最后一行删除添加本地代理的 ip 和端口,如socks5 127.0.0.1 1089
    socks5  127.0.0.1 1089

# github设置全局代理
git config --global http.https://github.com.proxy socks5://127.0.0.1:1089
git config --global https.https://github.com.proxy socks5://127.0.0.1:1089

# 查看github代理
git config --global --list

配置分流
# 配置分流允许我们国内网络走直连 国外网络走代理点击如下代理地址

# 移动到*****下
sudo mv Downloads/geoip.dat geoip.site /etc/*****

使用方式
# 使用方式

proxychains + 需要被代理的命令
显卡驱动
英特尔核芯显卡
# 英特尔显卡

sudo pacman -S mesa lib32-mesa vulkan-intel lib32-vulkan-intel
英伟达独立显卡
# 新型号可以使用该命令
sudo pacman -S nvidia nvidia-settings lib32-nvidia-utils

# 如果是 GeForce 630 以下到 GeForce 400 系列的老卡
yay -S nvidia-390xx-dkms nvidia-settings lib32-nvidia-390xx-utils

# 在老的显卡使用开源驱动
sudo pacman -S mesa lib32-mesa xf86-video-nouveau
双显卡
若为同时拥有核芯显卡与英伟达独显的笔记本电脑,同样需要按照上述步骤先安装各个软件包。还需要安装 optimus-mmanager。可以在核芯显卡和独立显卡间轻松切换。optimus-manager 提供三种模式,分别为仅用独显,仅用核显,和 hybrid 动态切换模式。
yay -S optimus-manager optimus-manager-qt
安装完成后重启即可使用。optimus-manager 安装完成后会默认 enable optimus-manager 的服务,你可在重启前检查其状态,若没有 enable 则手动将其 enable。重启后在菜单栏搜索 optimus-manager 点击即可使用。可在其设置中设置开机自动启动。
sudo systemctl enable optimus-manager
软件安装
通信软件
# 基于deepin wine5的qq
yay -S com.qq.im.deepin

# 基于deepin wine5的wechat
yay -S com.qq.weixin.deepin
办公娱乐
# 深度截图
sudo pacman -S --noconfirm deepin-screenshot

# typora
sudo pacman -S --noconfirm typora

# wps
yay -S --noconfirm wps-office ttf-wps-fonts

# 网易云音乐
sudo pacman -S --noconfirm netease-cloud-music

# 百度网盘
yay -S --noconfirm baidunetdisk-bin

# picgo
yay -S picgo-appimage

# 向日葵
yay -S --noconfirm sunloginclient
开发工具
# Pycharm
sudo pacman -S --noconfirm pycharm-professional

# vscode
sudo pacman -S --noconfirm visual-studio-code-bin

# postman
sudo pacman -S --noconfirm postman-bin

# notepadqq
sudo pacman -S --noconfirm notepadqq

# dbeaver
sudo pacman -S --noconfirm dbeaver

# vmware
sudo pacman -S --noconfirm vmware-workstation
开发环境
LNMP搭建
Nginx
sudo pacman -S nginx --noconfirm
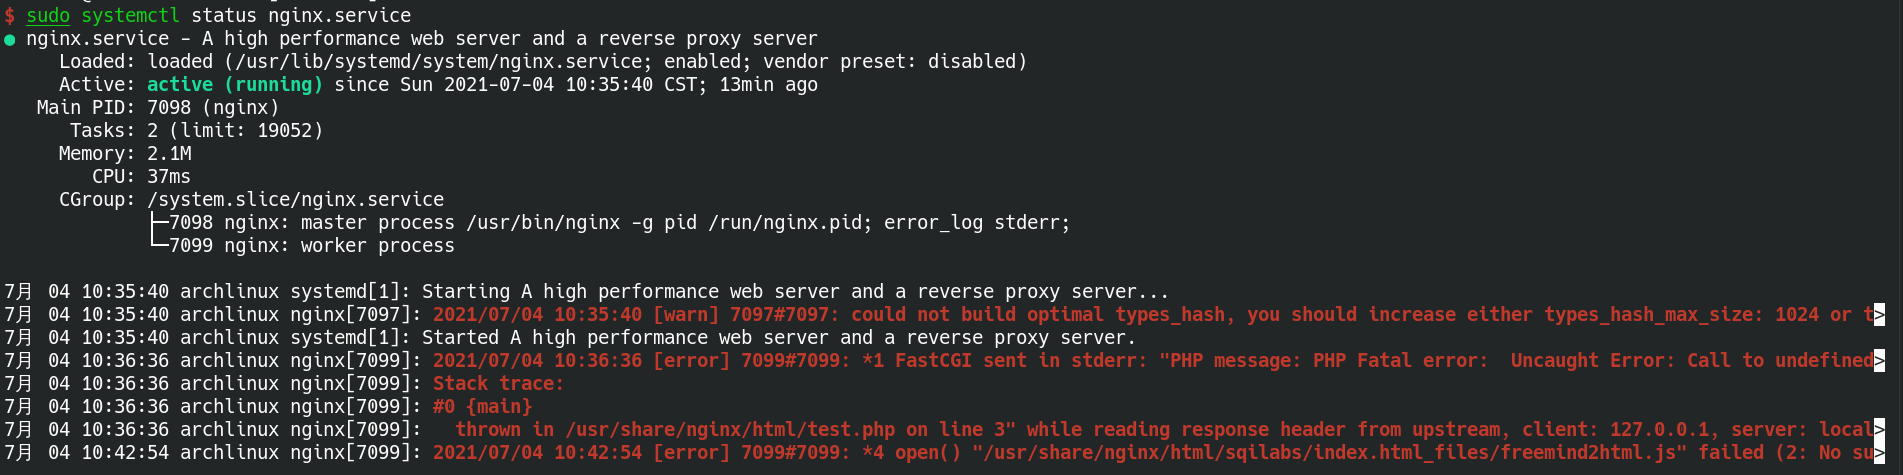
systemctl start nginx && systemctl enable nginx
systemctl status nginx
Php
sudo pacman -S php-fpm --noconfirm

# 配置nginx
sudo vim /etc/nginx/nginx.conf
	# 找到location ~ \.php$这部分的配置,将这部分配置修改成如下。
	location ~ \.php$ {
            root           /usr/share/nginx/html;
            fastcgi_pass   unix:/run/php-fpm/php-fpm.sock;
            fastcgi_index  index.php;
            fastcgi_param  SCRIPT_FILENAME  $document_root$fastcgi_script_name;
            include        fastcgi_params;
        }

sudo systemctl start php-fpm

sudo systemctl enable php-fpm

# 添加测试
sudo vim /usr/share/nginx/html/test.php
	<?php
      phpinfo();
    ?>

# 重启nginx
sudo systemctl restart nginx

MySQL
# 安装mysql5.7
yay -S --noconfirm mysql57

# 配置数据目录
sudo mysqld --initialize --user=mysql --basedir=/usr --datadir=/var/lib/mysql

# 启动mysql
sudo systemctl start mysqld && sudo systemctl enable mysqld

# 初始化密码登录
mysql -uroot -p

# 修改密码
alter user 'root'@'localhost' identified by 'root';

# 允许所有地址连接
use mysql;
update user set host = '%' where user = 'root';
flush privileges;
select host, user from user;

quit


 浙公网安备 33010602011771号