瑞吉外卖2.0 Redis 项目优化 Spring Cache MySQL主从复制 sharding-JDBC Nginx YApi Swagger

Git版本控制
Linux从安装到实战&瑞吉外卖项目部署
Redis基础

Redis入门 redis.io

nosql没有表的概念


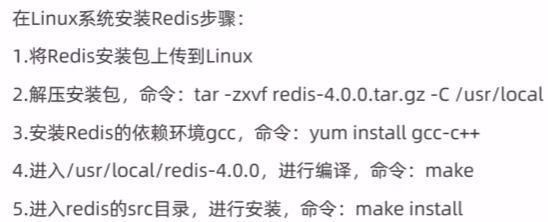
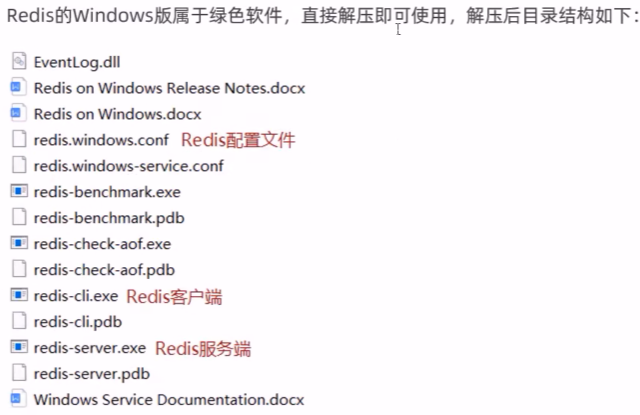
注意关闭防火墙
systemctl stop firewalld启动redis
src/redis-server ./redis.conf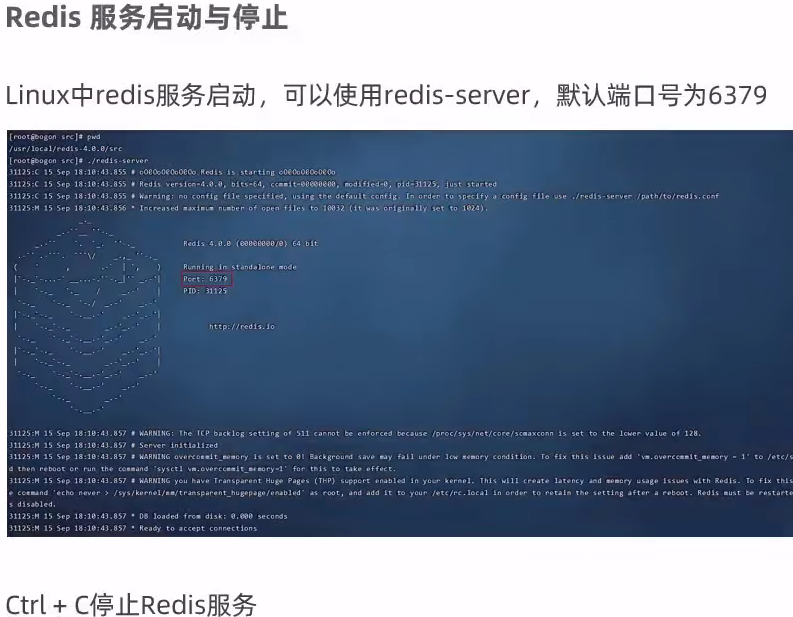

数据类型

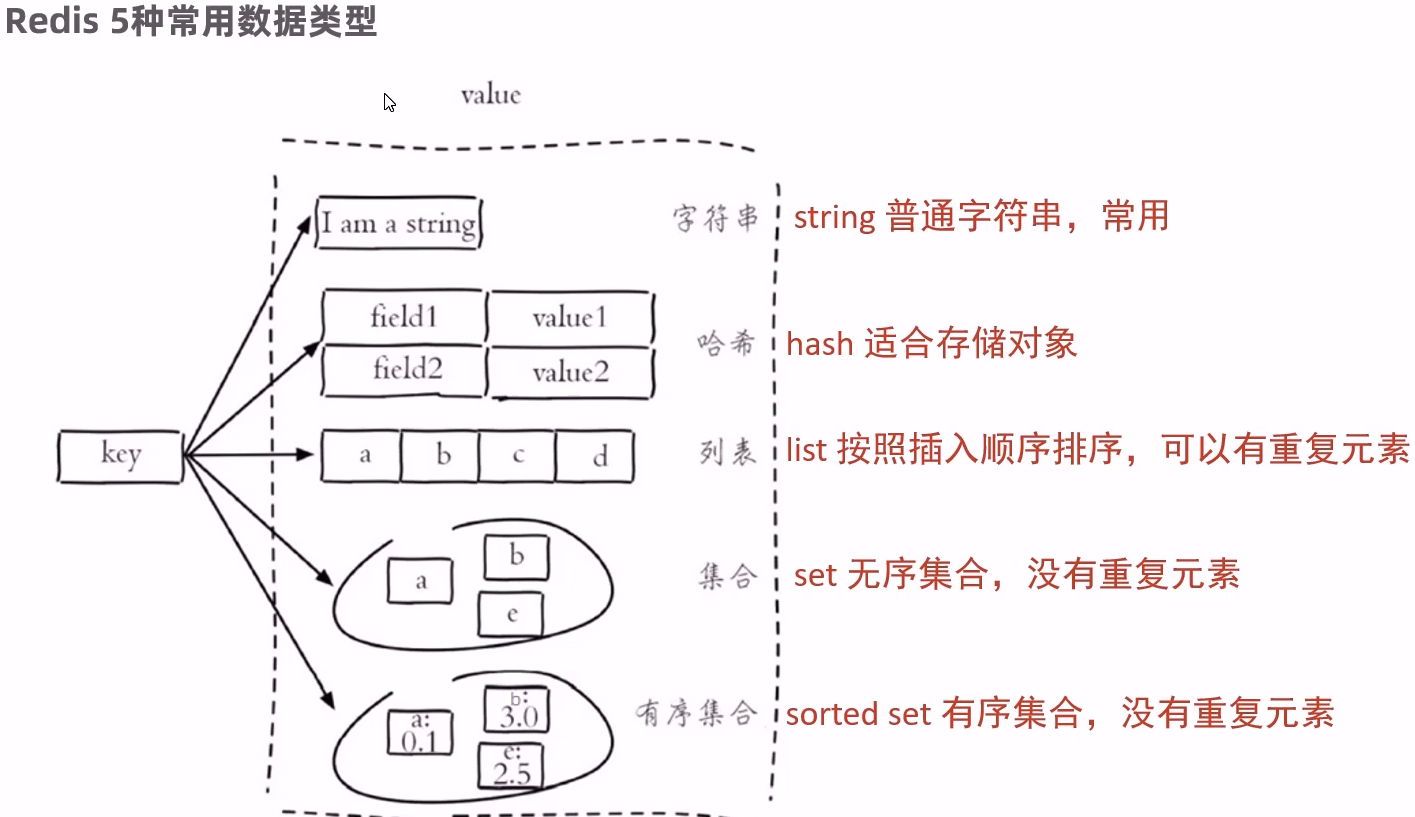
常用命令
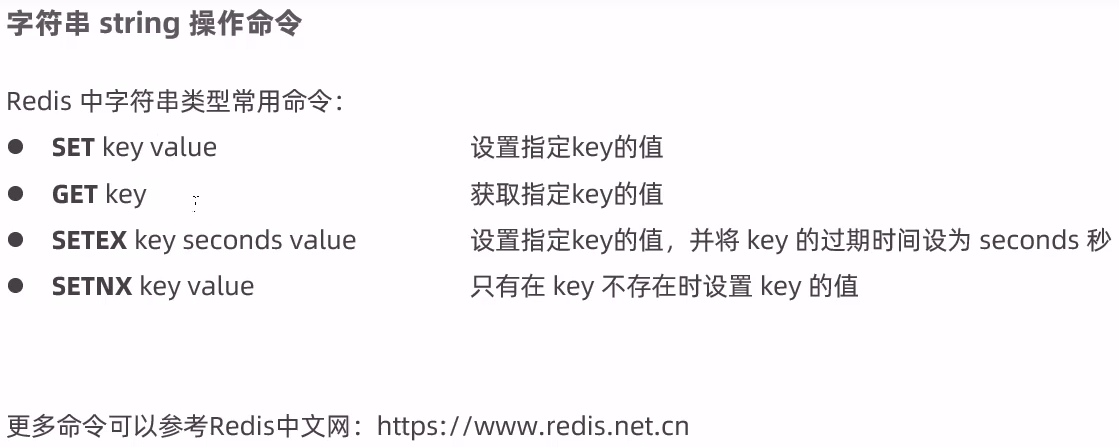
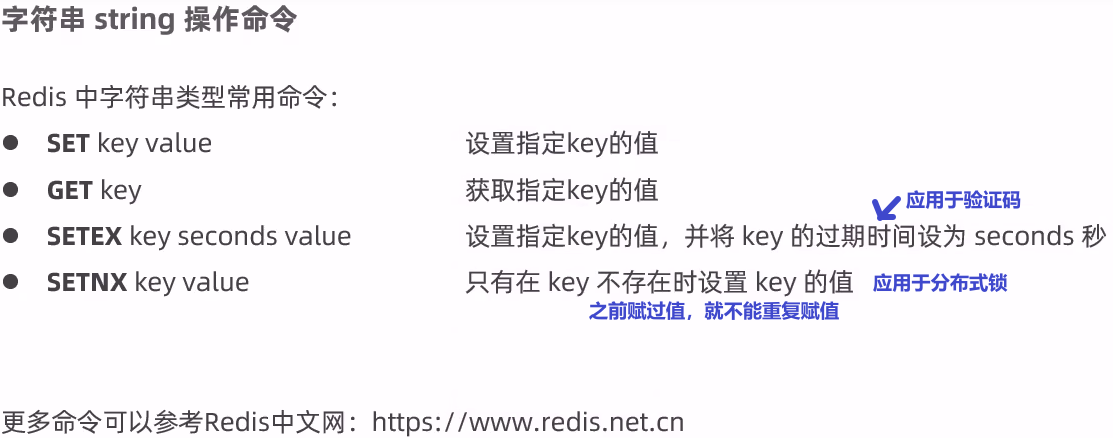
字符串 string 操作命令
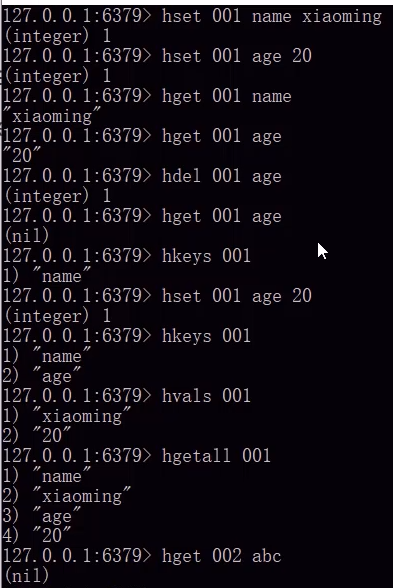
哈希 hash 操作命令

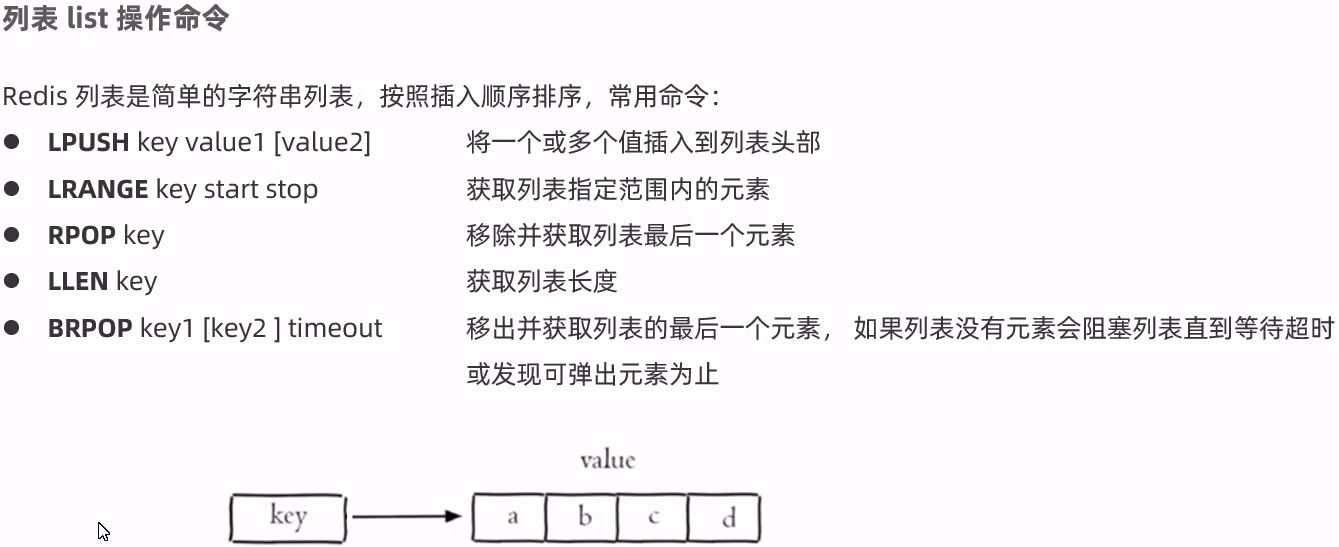
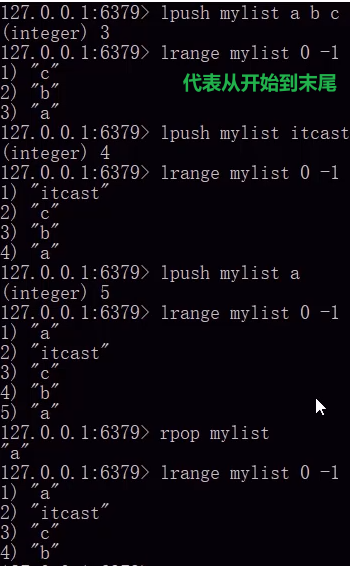
列表list(类似 栈 )操作命令
集合set 操作命令


sdiff key1 [key2] :key1-key2;
有序集合 sorted set (zset) 操作命令


通用命令

TTL return -1 表示永久;
在Java中操作Redis
介绍

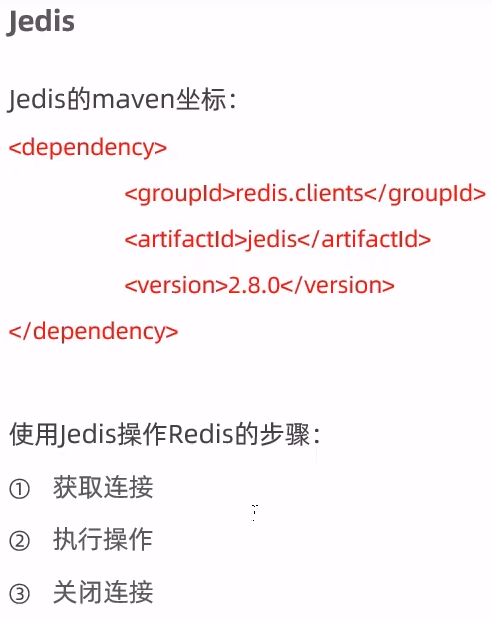
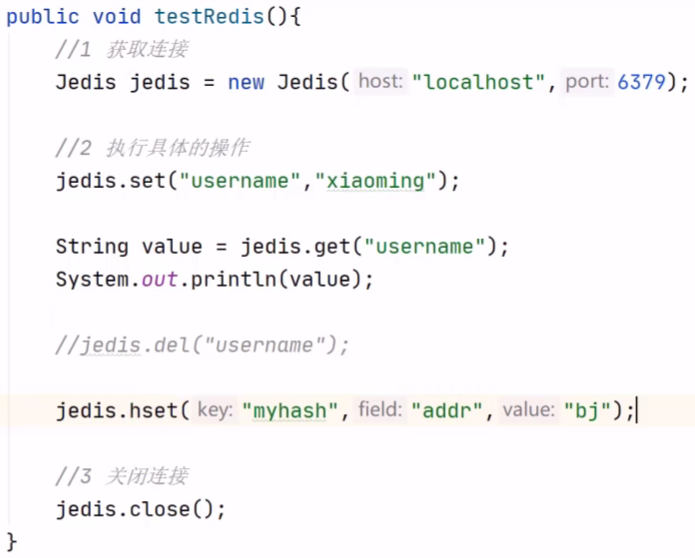
Jedis
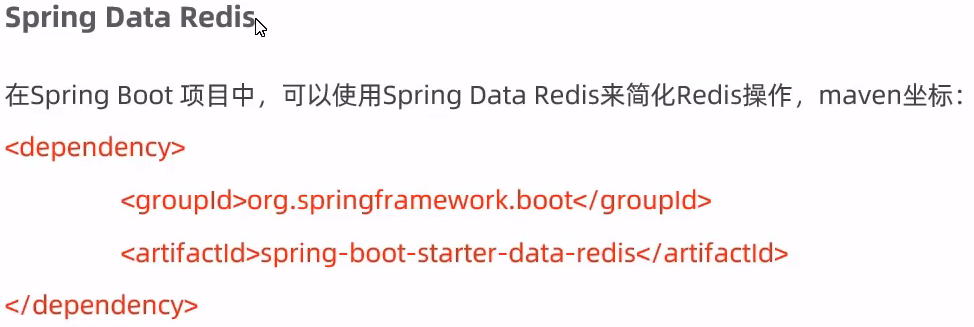
Spring Data Redis

Redis服务默认会给16个数据库在redis.windows.conf里面修改

默认是在0号数据库操作,更换数据库:select 1
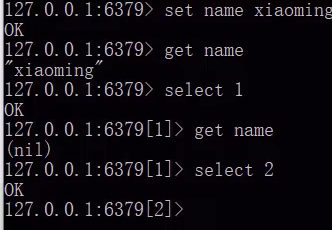
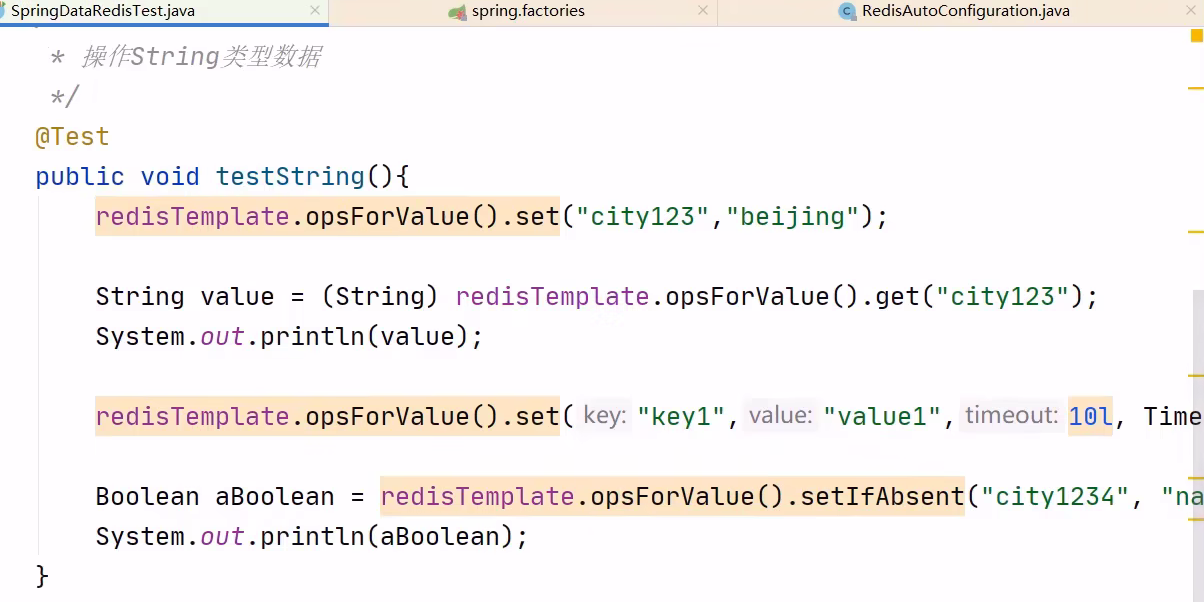
String
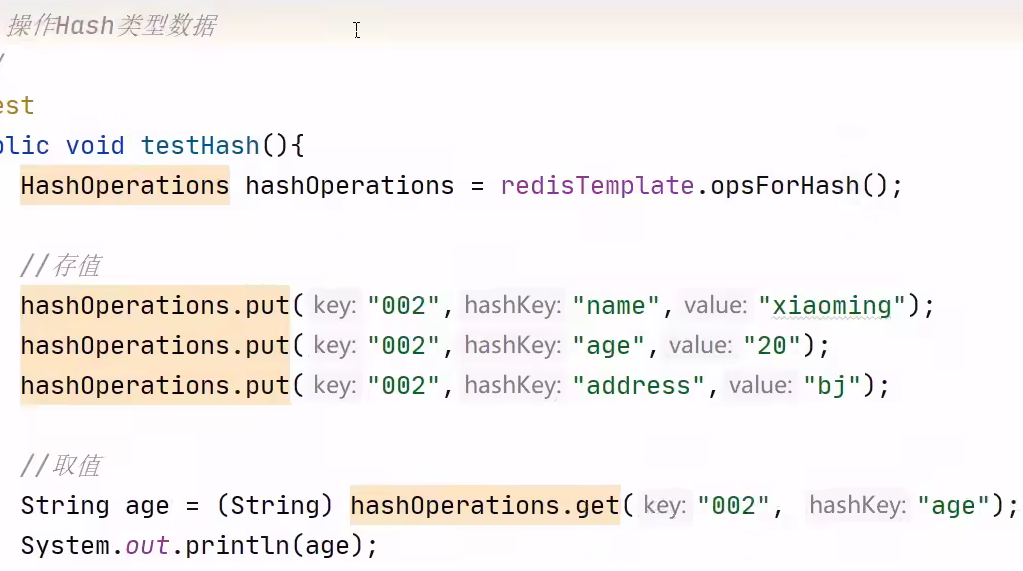
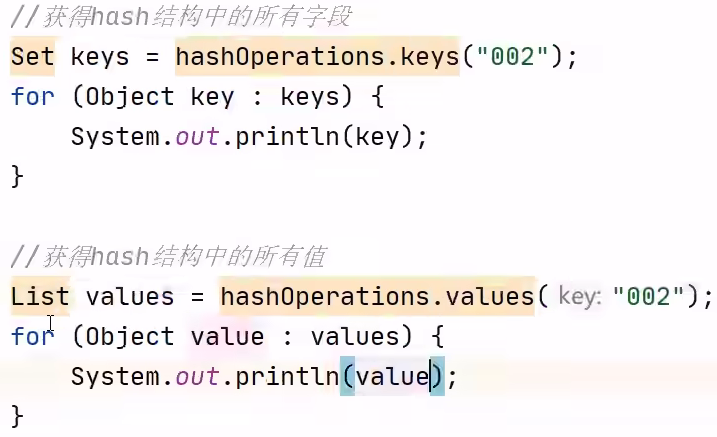
hash
List
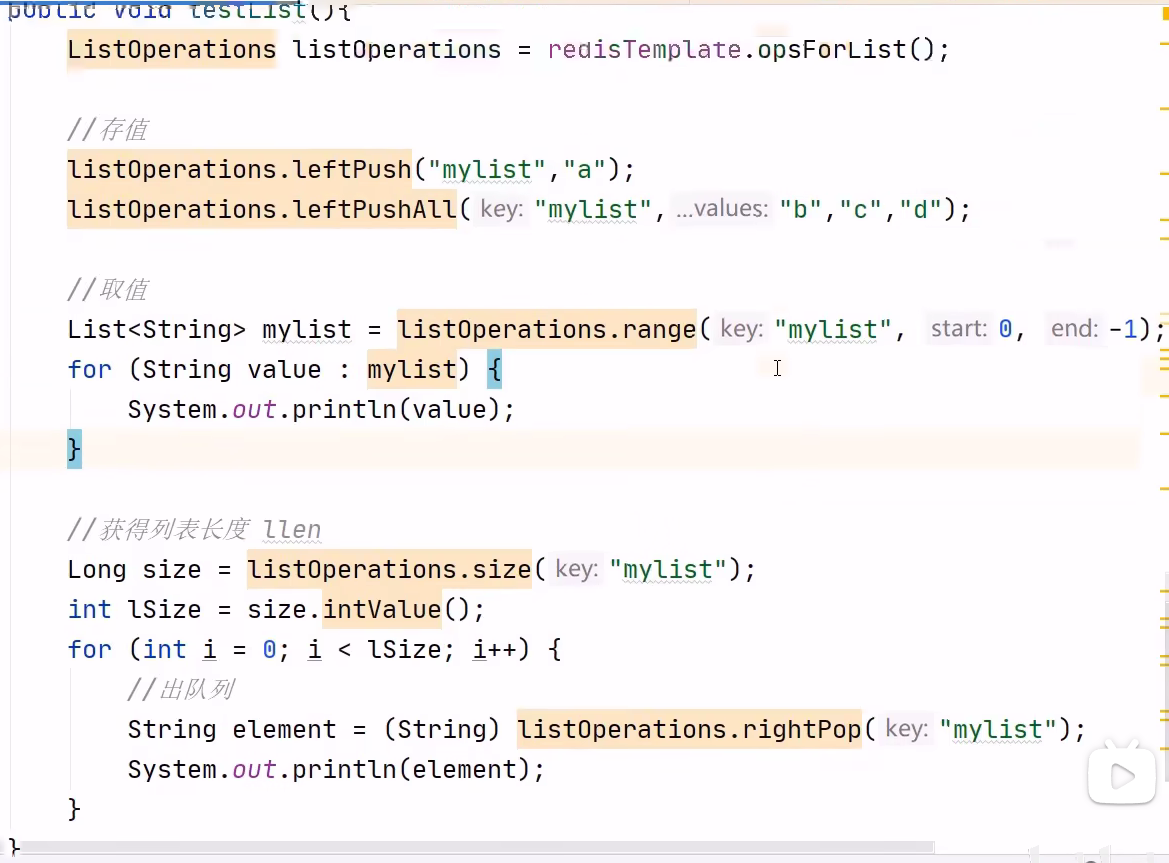
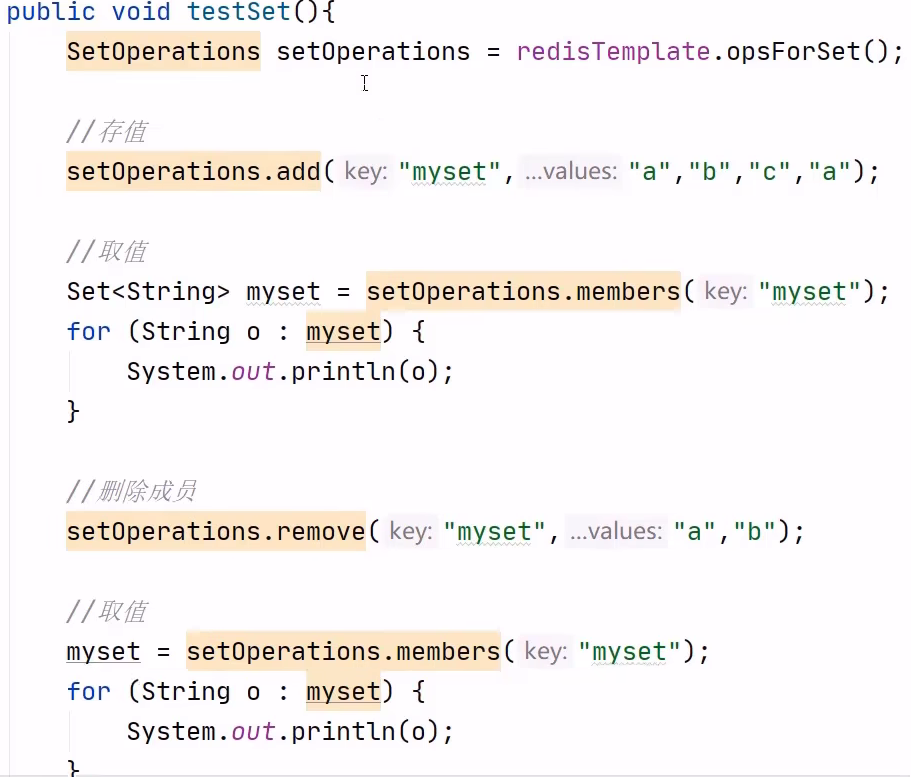
Set
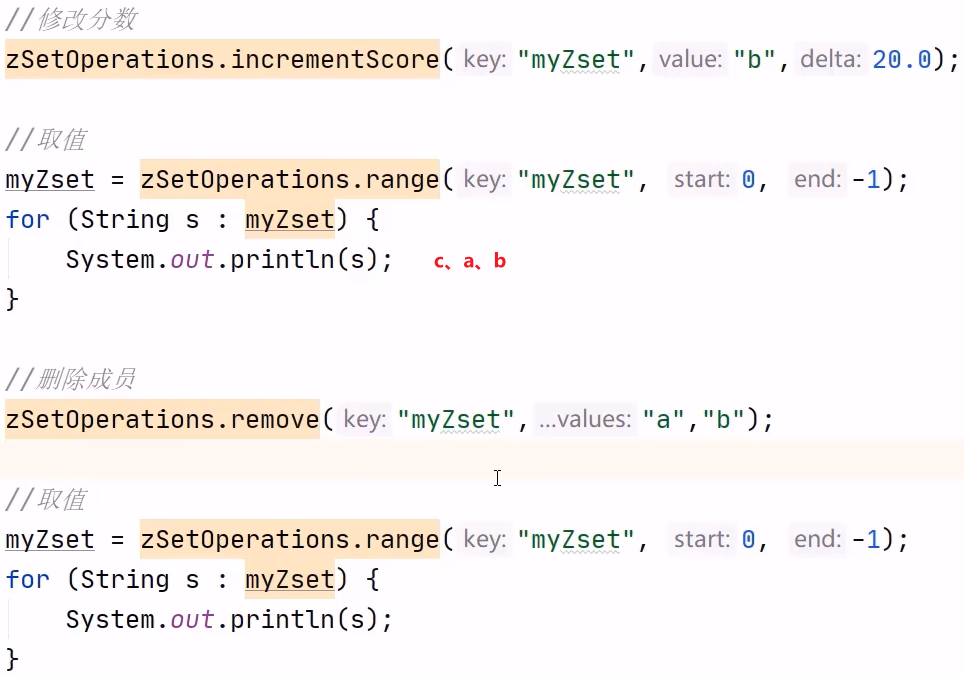
ZSet

通用操作,针对不同数据类型都可以操作

项目优化-缓存优化

环境搭建
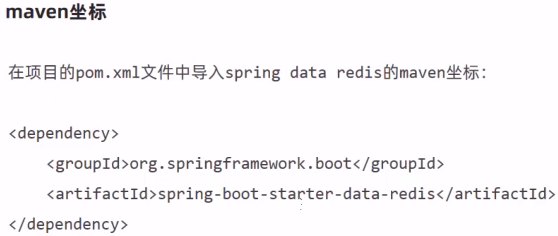

配置RedisConfig:为了自定义序列化器
@Configuration
public class RedisConfig extends CachingConfigurerSupport {
    @Bean
    public RedisTemplate<Object, Object> redisTemplate(RedisConnectionFactory connectionFactory) {
        RedisTemplate<Object, Object> redisTemplate = new RedisTemplate<>();
        //默认的Key序列化器为:JdkSerializationRedisSerializer
        redisTemplate.setKeySerializer(new StringRedisSerializer());
        redisTemplate.setConnectionFactory(connectionFactory);
        return redisTemplate;
    }
}
缓存短信验证码
保存方式:Session-->Redis

  @Autowired
    private RedisTemplate redisTemplate;
    @PostMapping("/sendMsg")
    public R<String> sendMsg(@RequestBody User user, HttpSession session){
        String phone = user.getPhone();//获取手机号

        if(StringUtils.isNotEmpty(phone)){//手机号非空
            //工具类 生成随机的4位验证码
            String code = ValidateCodeUtils.generateValidateCode(4).toString();
            log.info("code={}",code);

            //调用阿里云提供的短信服务API("签名","模板",手机号,动态验证码)完成发送短信
            //SMSUtils.sendMessage("瑞吉外卖","",phone,code);
            //需要将生成的验证码保存到Session
            //session.setAttribute(phone,code);
            //将生成的验证码保存到Session
            redisTemplate.opsForValue().set(phone,code,5, TimeUnit.MINUTES);

            return R.success("手机验证码短信发送成功");
        }
        return R.error("短信发送失败");
    }
    @PostMapping("/login")
    public R<User> login(@RequestBody Map map, HttpSession session){
        log.info(map.toString());
        //获取手机号
        String phone = map.get("phone").toString();
        //获取验证码
        String code = map.get("code").toString();

        //从Session中获取保存的验证码
        //Object codeInSession = session.getAttribute(phone);
        //从redis中获得缓存的验证码
        Object codeInSession = redisTemplate.opsForValue().get(phone);

        //进行验证码的比对(页面提交的验证码和Session中保存的验证码比对)
        if(codeInSession != null && codeInSession.equals(code)){
            //如果能够比对成功,说明登录成功
            LambdaQueryWrapper<User> queryWrapper = new LambdaQueryWrapper<>();
            queryWrapper.eq(User::getPhone,phone);

            User user = userService.getOne(queryWrapper);
            if(user == null){
                //判断当前手机号对应的用户是否为新用户,如果是新用户就自动完成注册
                user = new User();
                user.setPhone(phone);
                user.setStatus(1);
                userService.save(user);
            }
            session.setAttribute("user",user.getId());
            //如果用户登录成功,删除redis中缓存的验证码
            redisTemplate.delete(phone);
            return R.success(user);
        }
        return R.error("登录失败");
    }
链接redis报错 ERROR org.springframework.boot. ; ERR invalid password;java.io.IOException:
缓存菜品数据

 @GetMapping("/list")//改造list
    public R<List<DishDto>> list(Dish dish){
        List<DishDto> dishDtoList =null;
        //动态构造key
        String key="dish_"+dish.getCategoryId()+"_"+dish.getStatus();//

        //1.先从redis中获取缓存数据,按照菜单分类缓存
        dishDtoList= (List<DishDto>) redisTemplate.opsForValue().get(key);

        if(dishDtoList != null) {
            //2.如果存在!=null,直接返回,不用查询数据库
            return R.success(dishDtoList);
        }
        //构造查询条件
        LambdaQueryWrapper<Dish> queryWrapper = new LambdaQueryWrapper<>();
        queryWrapper.eq(dish.getCategoryId() != null ,Dish::getCategoryId,dish.getCategoryId());
        //添加条件,查询状态为1(起售状态)的菜品
        queryWrapper.eq(Dish::getStatus,1);

        //添加排序条件 排序顺序,创建时间倒序
        queryWrapper.orderByAsc(Dish::getSort).orderByDesc(Dish::getUpdateTime);
        List<Dish> list = dishService.list(queryWrapper);

        dishDtoList = list.stream().map((item) -> {
            DishDto dishDto = new DishDto();
            BeanUtils.copyProperties(item,dishDto);

            Long categoryId = item.getCategoryId();//分类id
            //根据id查询分类对象
            Category category = categoryService.getById(categoryId);

            if(category != null){
                String categoryName = category.getName();
                dishDto.setCategoryName(categoryName);
            }

            //当前菜品的id
            Long dishId = item.getId();
            LambdaQueryWrapper<DishFlavor> lambdaQueryWrapper = new LambdaQueryWrapper<>();
            lambdaQueryWrapper.eq(DishFlavor::getDishId,dishId);
            //SQL:select * from dish_flavor where dish_id = ?
            List<DishFlavor> dishFlavorList = dishFlavorService.list(lambdaQueryWrapper);
            dishDto.setFlavors(dishFlavorList);
            return dishDto;
        }).collect(Collectors.toList());
        //3.不存在,需要查询数据库,将查询到的数据缓存到redis
        redisTemplate.opsForValue().set(key,dishDtoList,60, TimeUnit.HOURS);//60分钟
        return R.success(dishDtoList);
    }
@PostMapping
public R<String> save(@RequestBody DishDto dishDto){
log.info(dishDto.toString());
dishService.saveWithFlavor(dishDto);
//1.更新完 就清理所有缓存数据
//Set keys = redisTemplate.keys("dish_*");//获得所有以‘dish_’开头的key
//redisTemplate.delete(keys);
//2.精确 清理缓存数据(只清理 被更新类别 的缓存数据)
String key="dish_" + dishDto.getCategoryId()+"_1";
redisTemplate.delete(key);
return R.success("新增菜品成功");
}
@PutMapping//改造update&save
public R<String> update(@RequestBody DishDto dishDto){
log.info(dishDto.toString());
dishService.updateWithFlavor(dishDto);
//1.更新完 就清理所有缓存数据
//Set keys = redisTemplate.keys("dish_*");//获得所有以‘dish_’开头的key
//redisTemplate.delete(keys);
//2.精确 清理缓存数据(只清理 被更新类别 的缓存数据)
String key="dish_" + dishDto.getCategoryId()+"_1";
redisTemplate.delete(key);
return R.success("修改菜品成功");
}Spring Cache框架
介绍 基于注解的缓存 (Cache译为缓存)
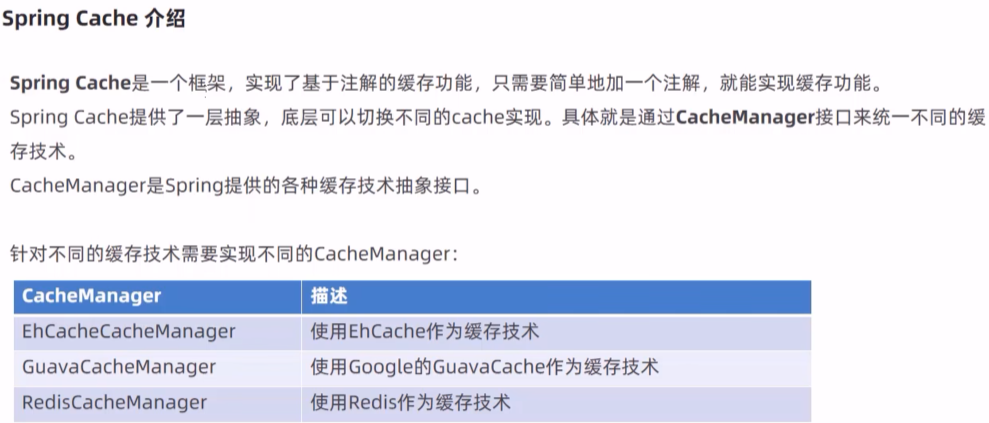
常用注解

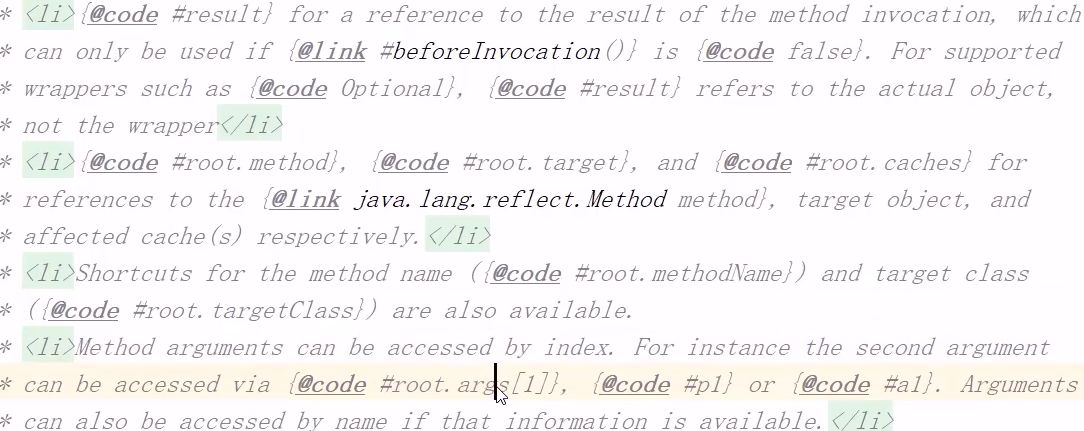
#result: 代表方法返回值(condition关键字里没有result用unless代替); #root.method: 方法对象 ;
#root.args[0] / #p0 / #a0(a0我感觉也行) : 方法第一个参数


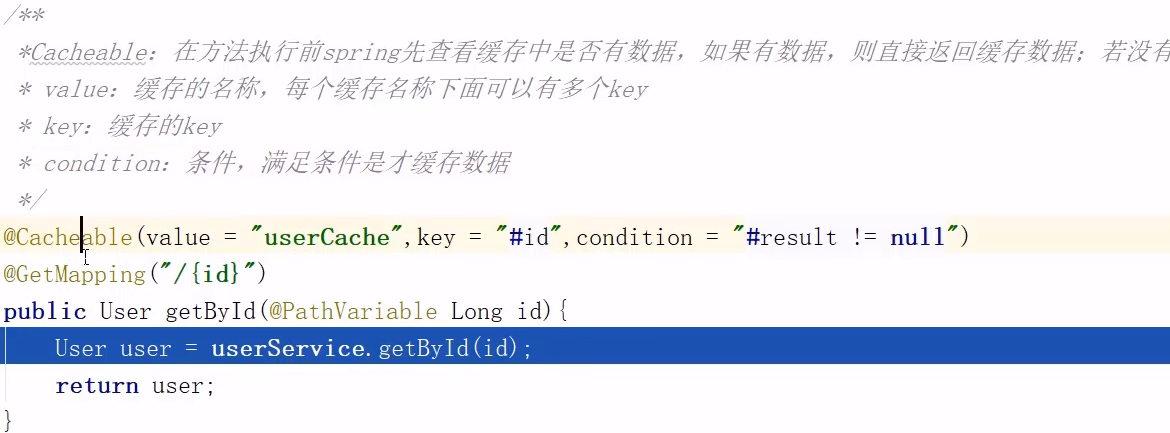
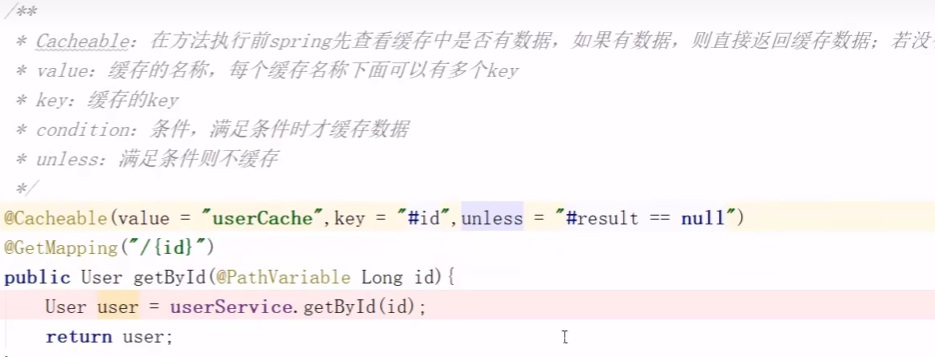
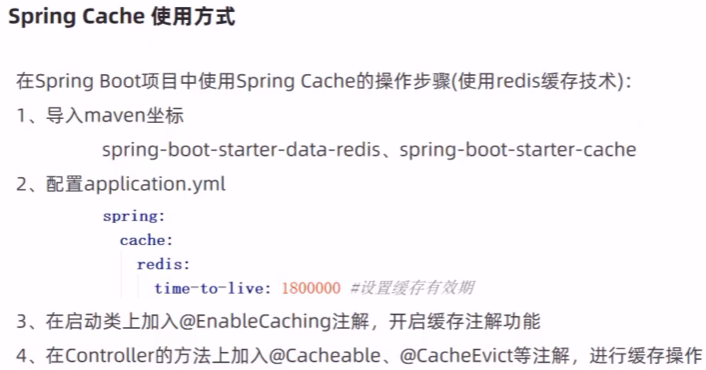
使用方式
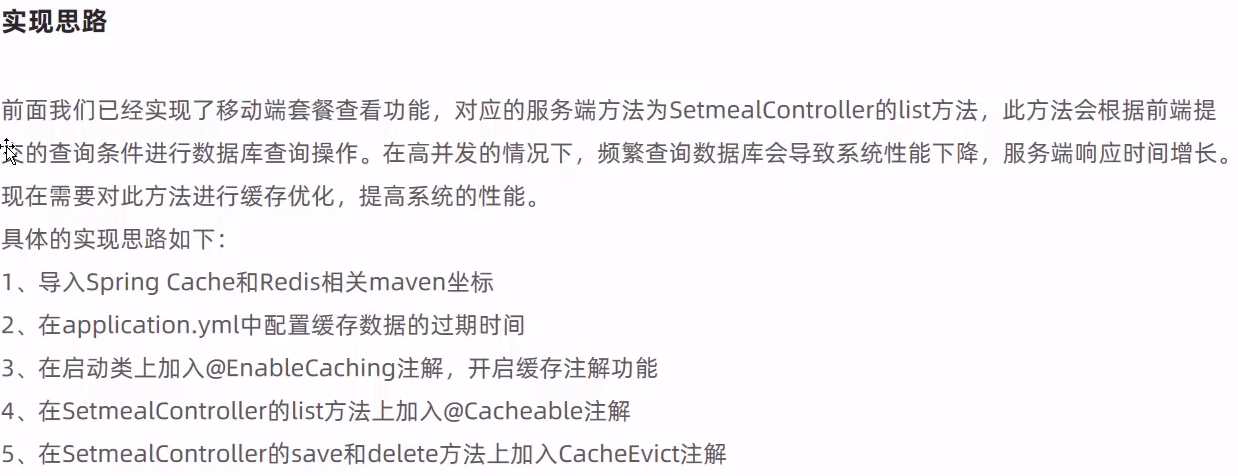
缓存套餐数据


项目优化2—读写分离


Mysql主从复制

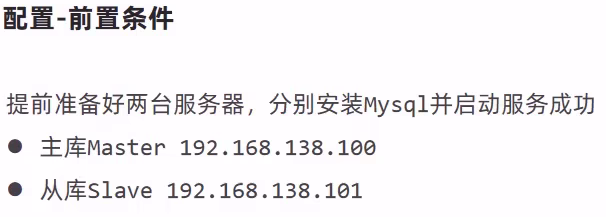
配置主库Master


先登录 mysql -uroot -p1234(你的密码)

GRANT REPLICATION SLAVE ON *.* to 'xiaoming'@'%' identified by 'Root@1234';(我的密码比他少两位)

从库Slave #192.168.138.132; root@1234
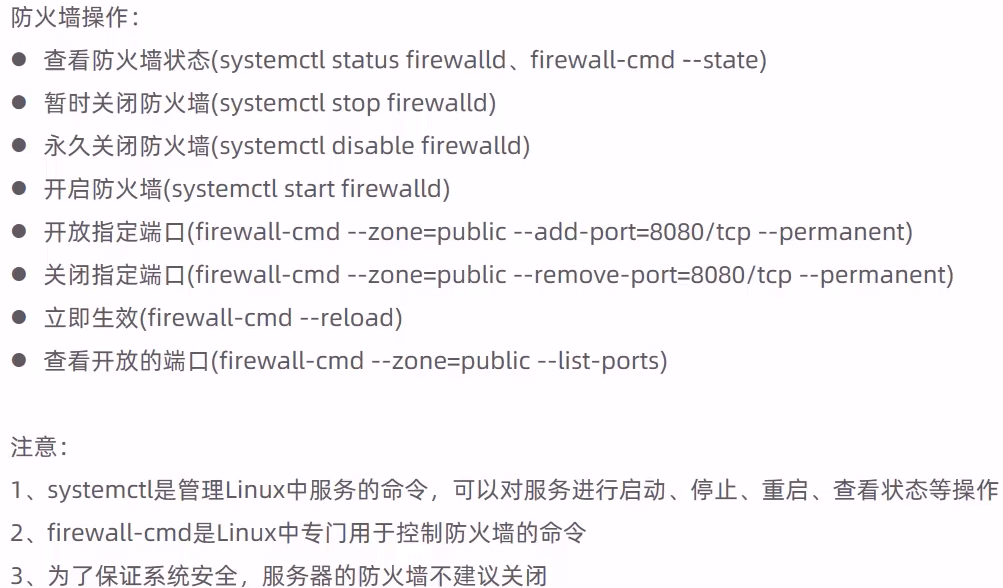
关闭防火墙链接mysql


change master to master_host='192.168.138.100',master_user='xiaoming',master_password='Root@1234',master_log_file='mysql-bin.000001',master_log_pos=439;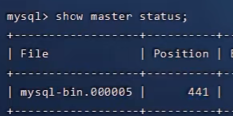
后两个要跟这里的对应;

测试主从复制连接
主库怎么操作,从库也会复制操作;就说明链接成功

读写分离案例
背景

sharding-JDBC介绍
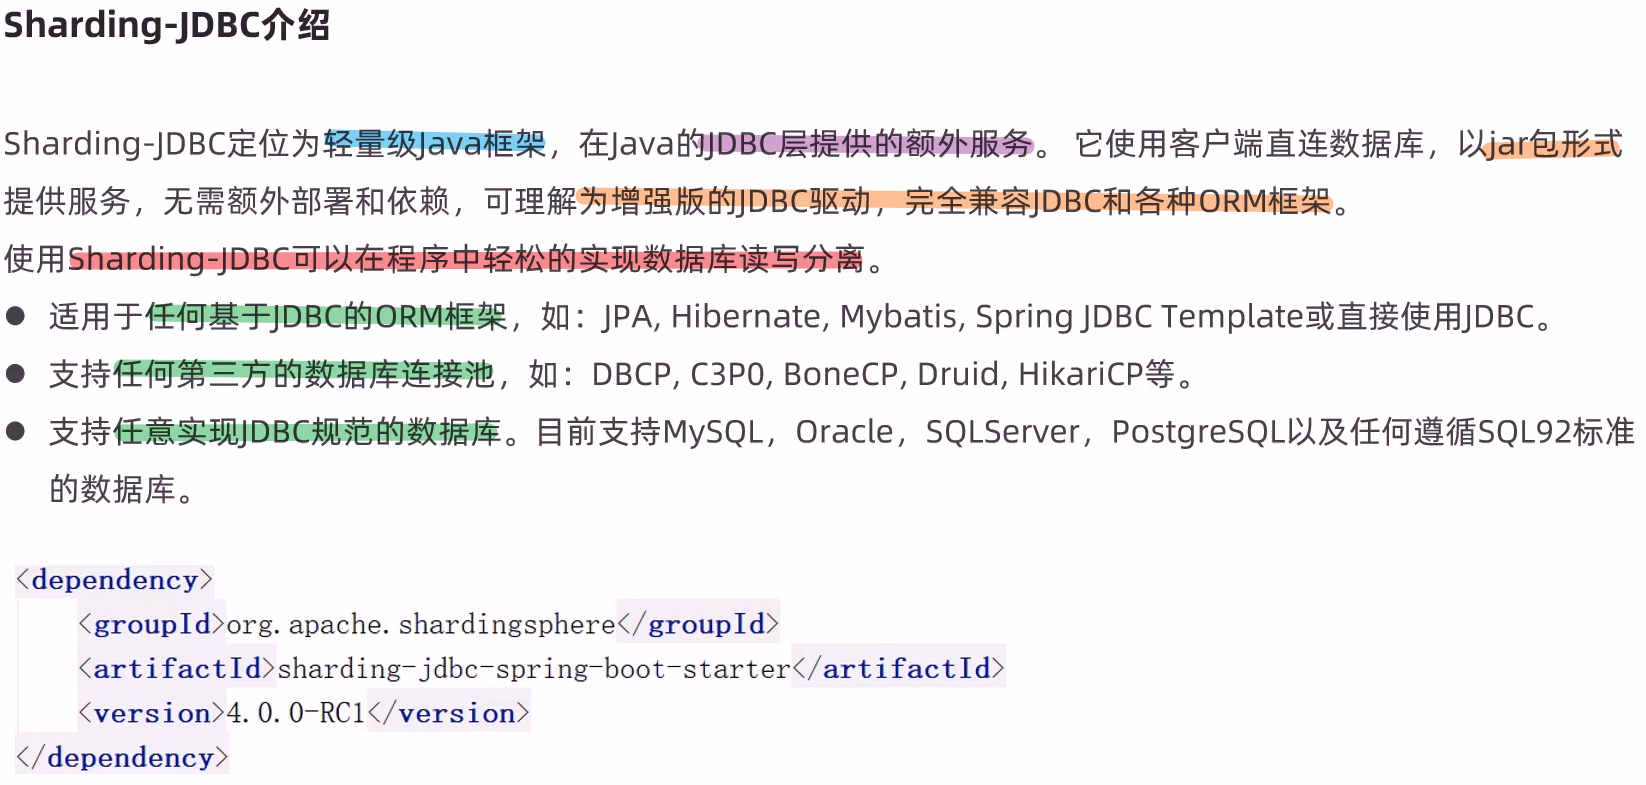
入门案例

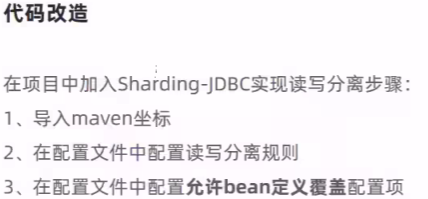
项目实现读写分离
直接往主库里面导入,从库就会自动复制;

报错:
create connection SQLException, url: jdbc:mysql://192.168.138.100:3306/reggie?characterEncoding=utf-8, errorCode 0, state 08S01
Failed to configure a DataSource: 'url' attribute is not specified and no embedded datasource could be configured.
修改两个URL:
url: jdbc:mysql://192.168.138.101:3306/rw?characterEncoding=utf-8&useSSL=false
Nginx
Nginx概述
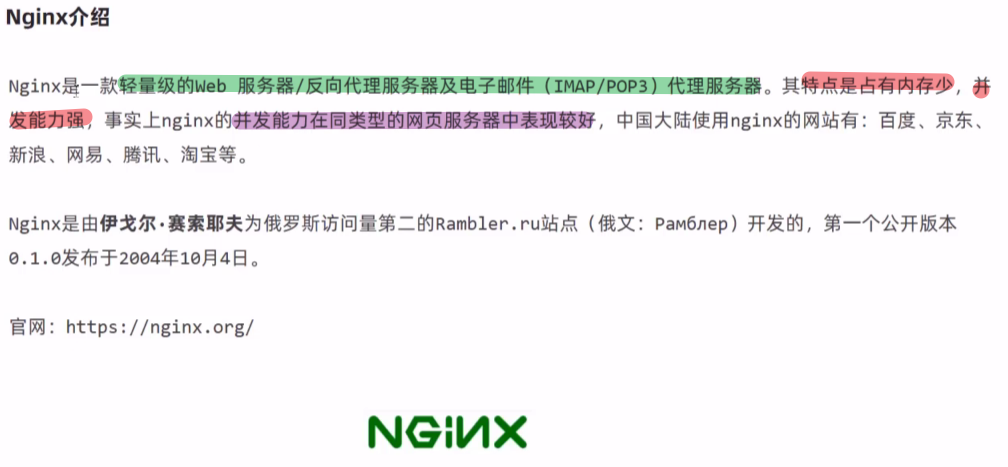


1.5安装wget

4.5 创建文件夹 :mkdir -p /usr/local/nginx ; 6:先编译然后 install; 安装tree命令查看目录结构


Nginx命令
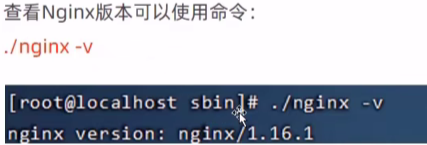
查看版本
要先cd /usr/local/nginx/sbin
检查配置文件正确性

启动和停止

关闭防火墙: systemctl stop firewalld ; 如下页面,访问成功

重新加载配置文件


要写路径启动nginx -->不想写路径;
解决方案:把nginx的二进制文件路径配置到系统的环境变量 实现 nginx 即可启动的效果
vim /etc/profile
PATH=$JAVA_HOME/bin:$PATH   # 追加成下面的
PATH=/usr/local/nginx/sbin:$JAVA_HOME/bin:$PATH
source /etc/profile
nginx -s reload  # 不报错说明添加环境变量成功
Nginx配置文件结构
全局块、Events块、Http块
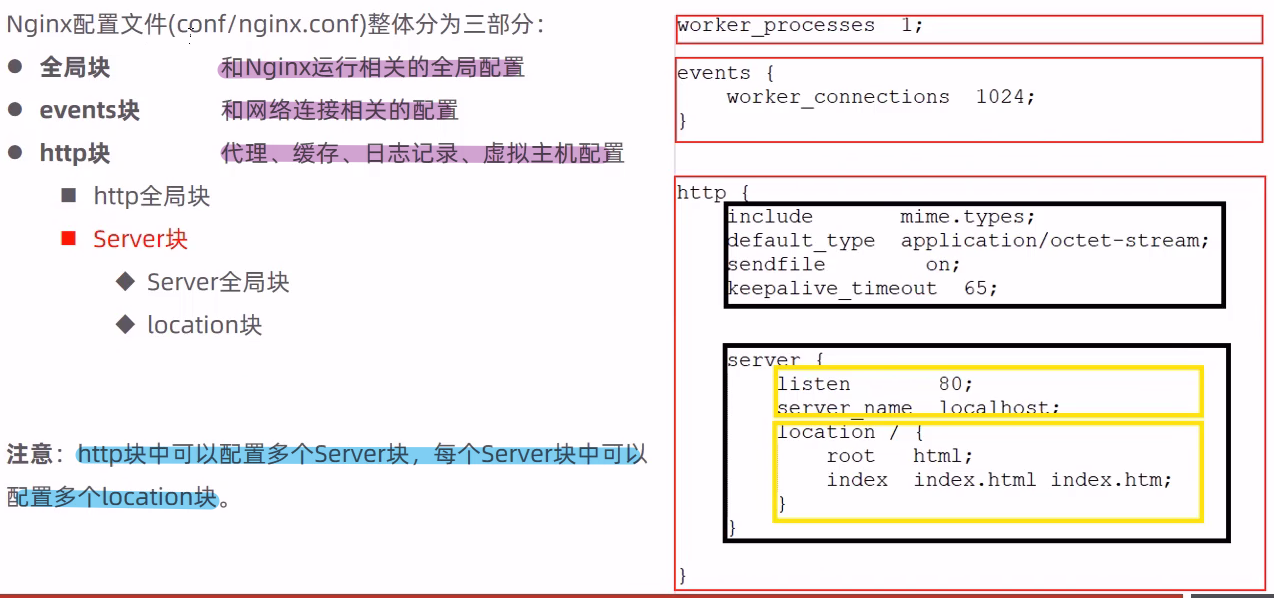
Nginx具体应用
部署静态资源
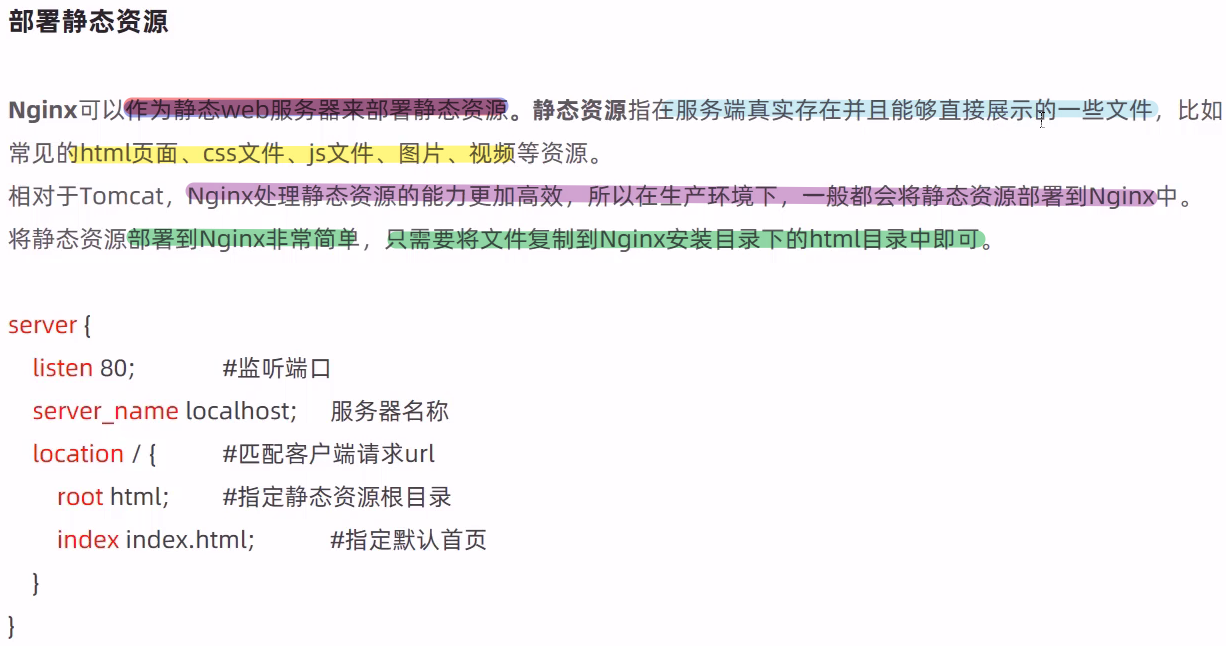
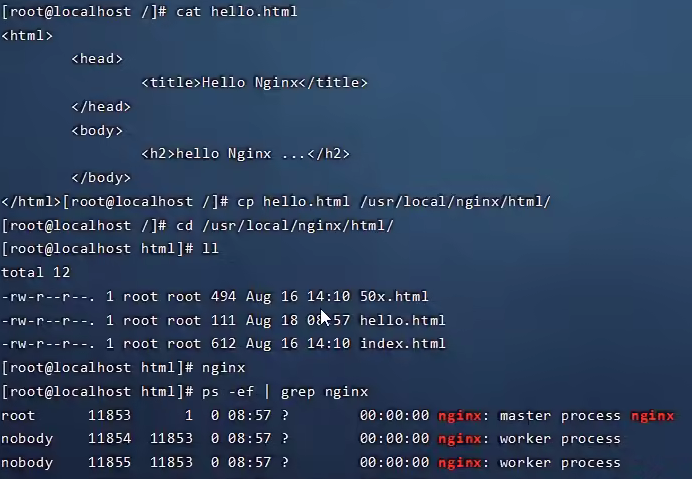

部署html成功
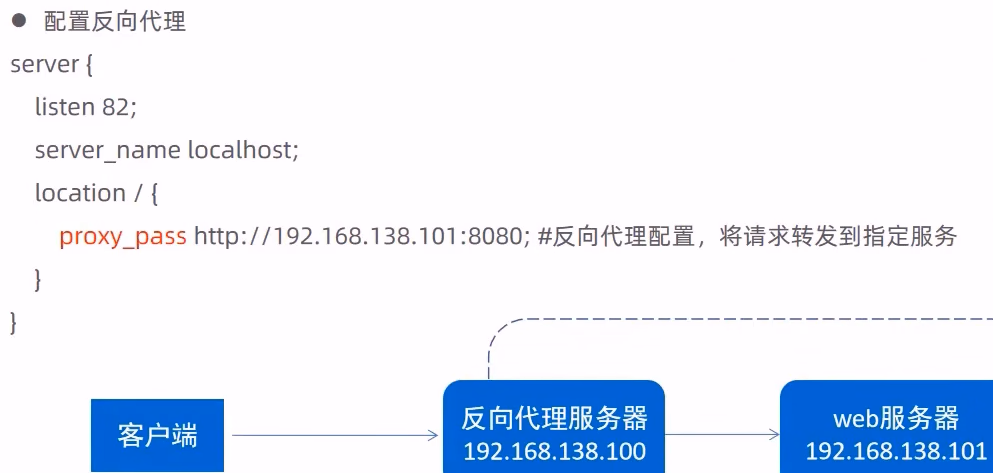
反向代理(用的最多)


区别:正向代理一般是在客户端设置代理服务器,
反向代理客户端不知道反向代理服务器的存在,客户端只需要访问服务器就会返回相应资源,用户不知道代理服务器存在。
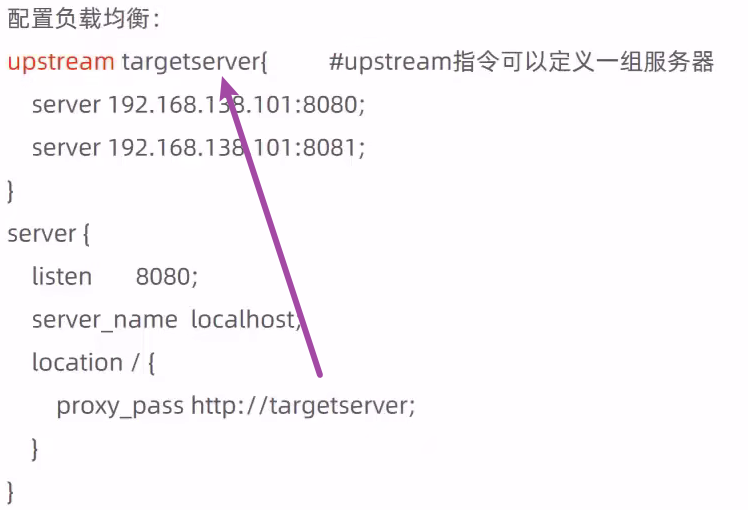
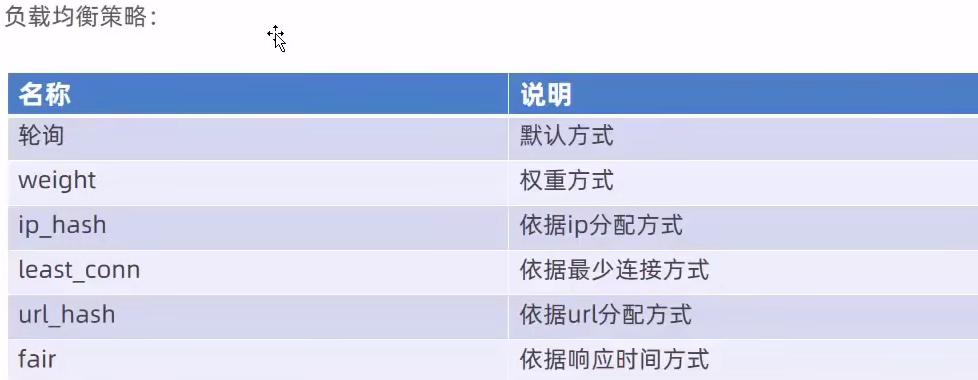
负载均衡
项目优化3—前后端分离开发
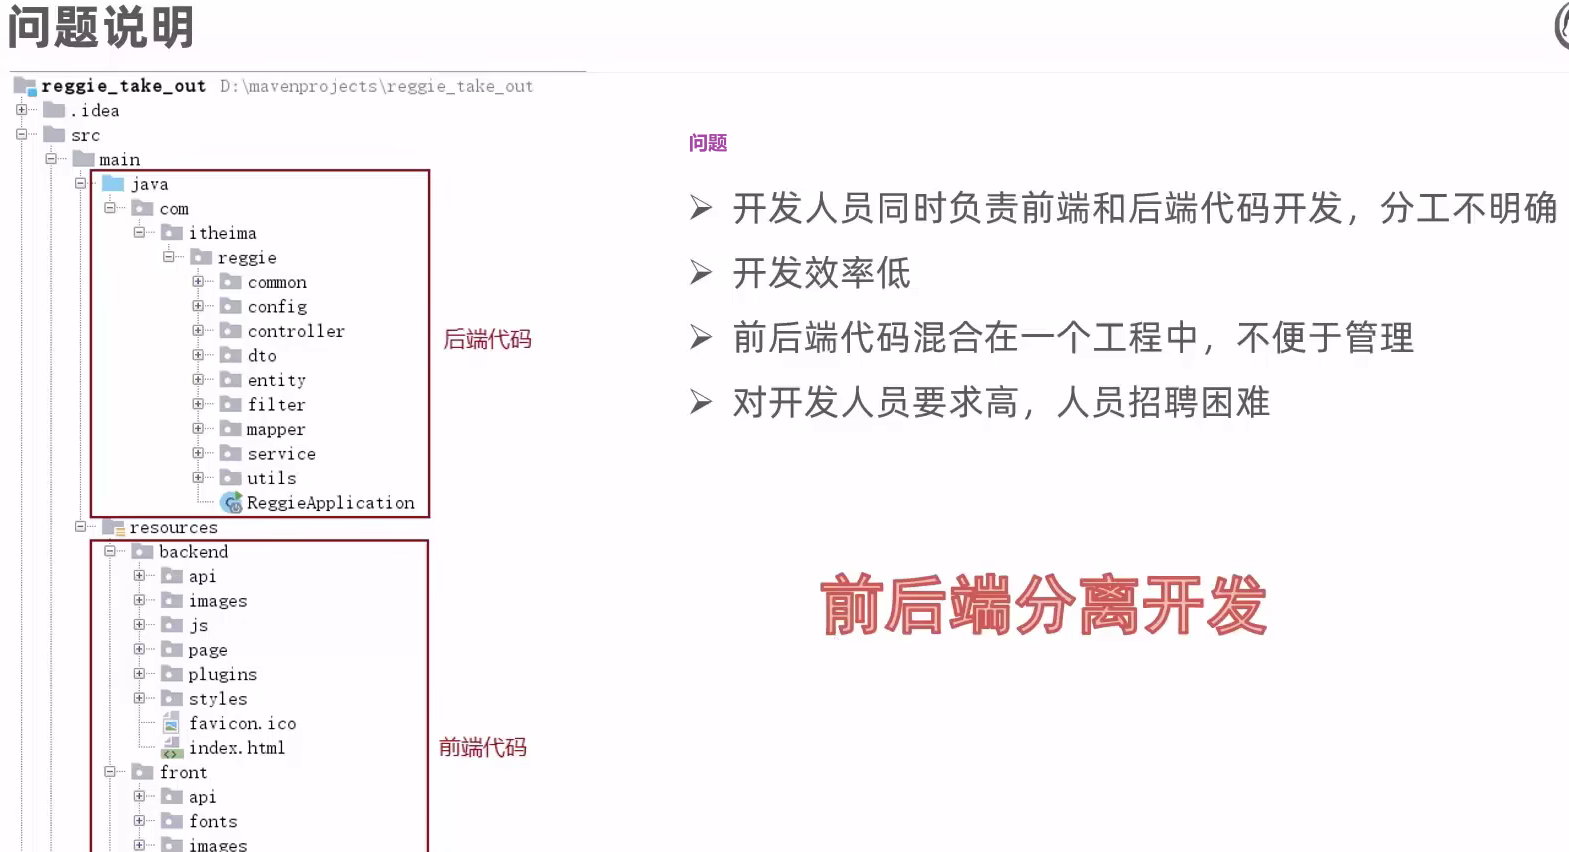
前后端分离开发
介绍

开发流程

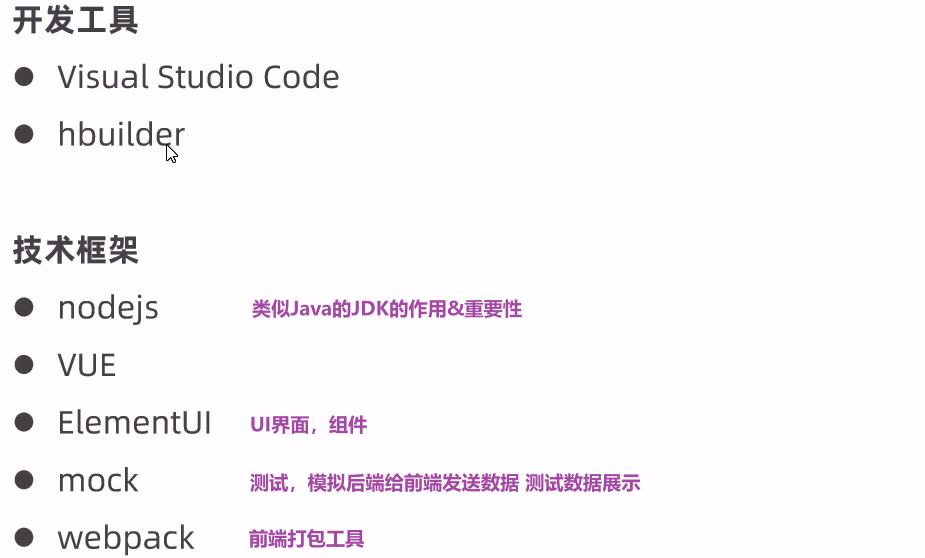
前端技术栈
Yapi (一种定义接口的Web服务)

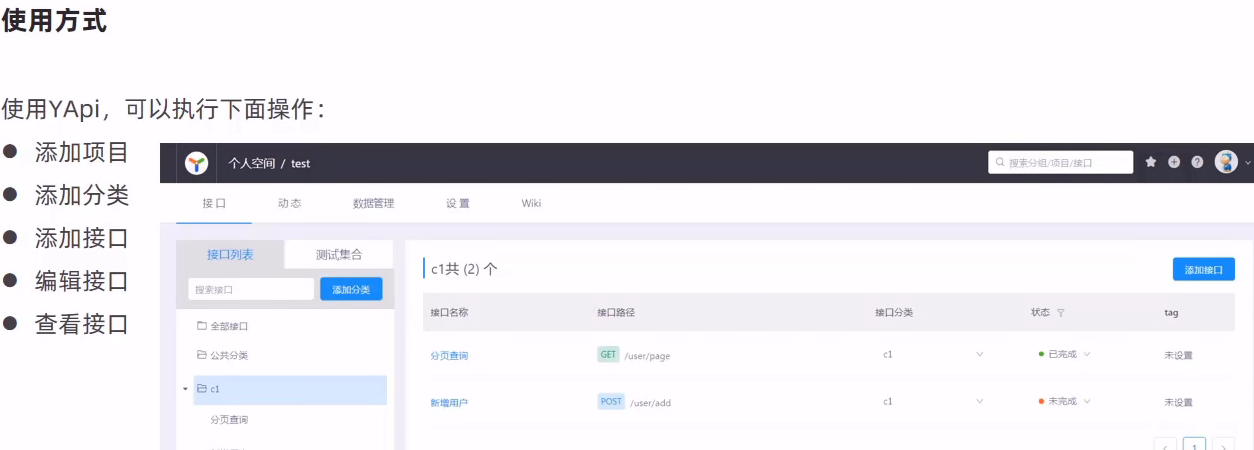
YApi-教程
YApi-内网搭建
windows环境下部署YApi
我没有跟 原因是需要mangoDB
Swagger
介绍

使用方式

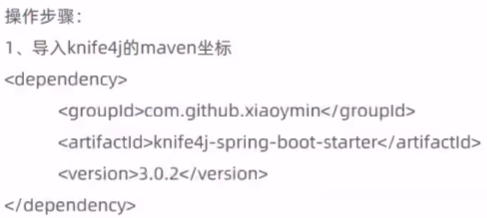
反正就是maven依赖冲突 卡了三个小时还是解决不了 先往后走吧 主要是knife4j的Swagger框架pom.xml导不进去;
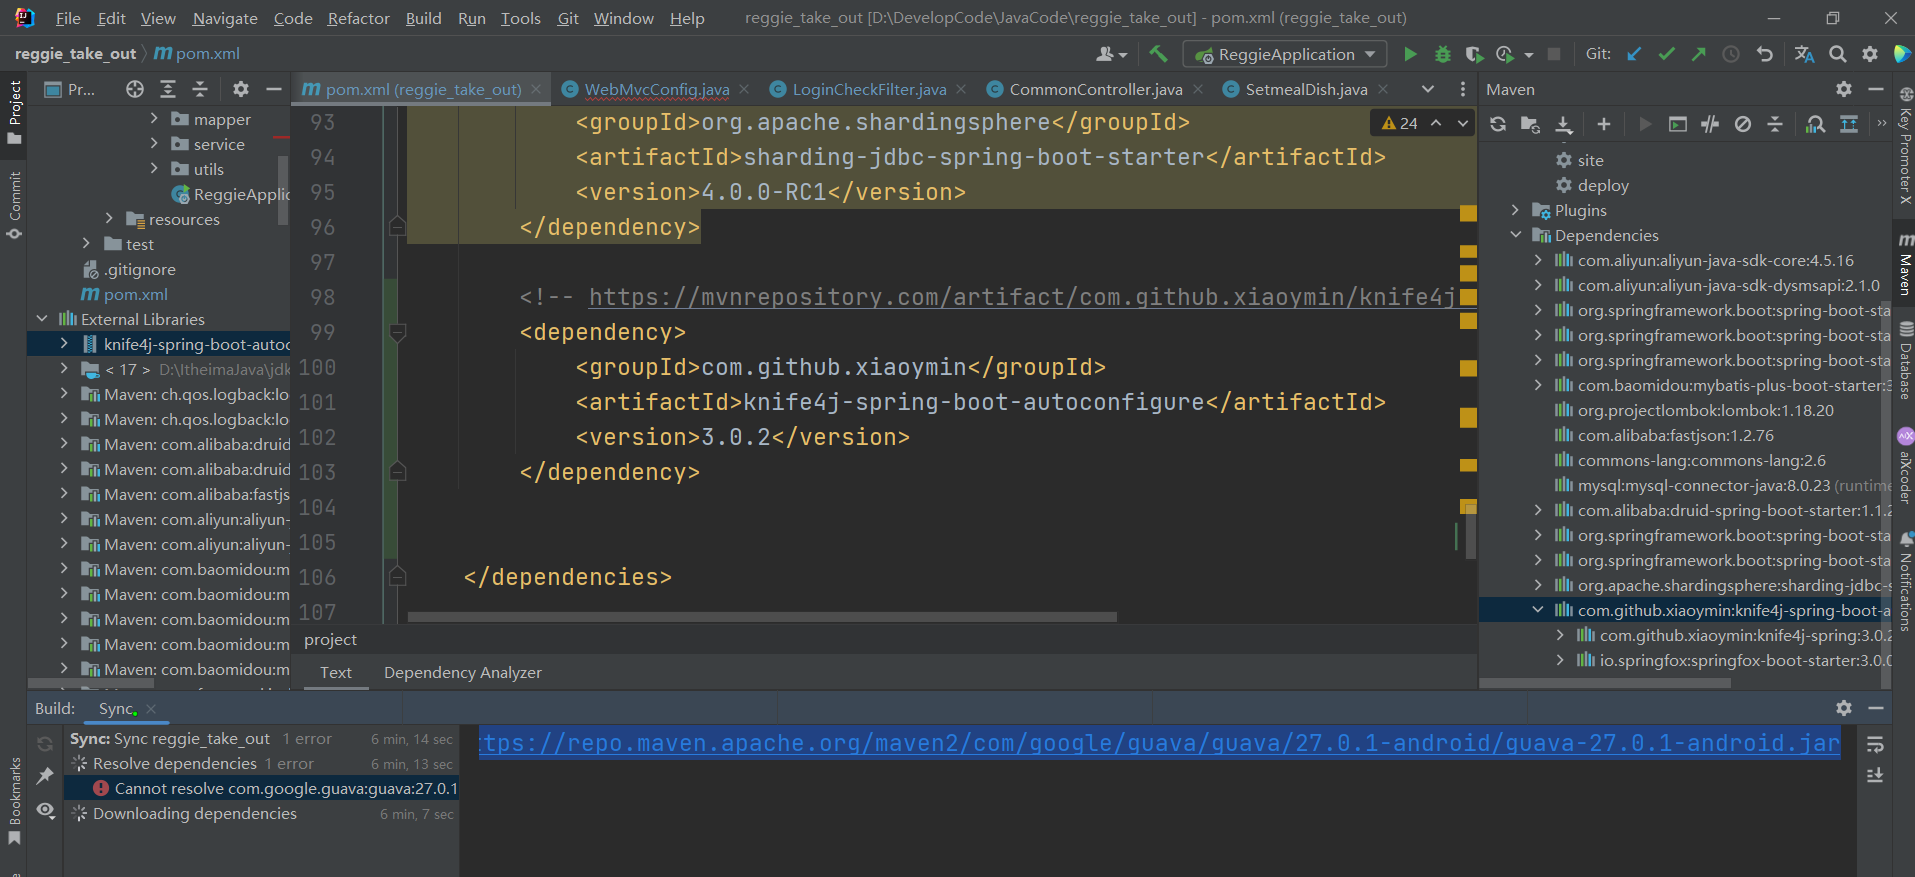
com.google.guava:guava:jar:27.0.1-android failed to transfer from https://repo.maven.apache.org/maven2 during a previous attempt. This failure was cached in the local repository and resolution is not reattempted until the update interval of central has elapsed or updates are forced. Original error: Could not transfer artifact com.google.guava:guava:jar:27.0.1-android from/to central (https://repo.maven.apache.org/maven2): transfer failed for https://repo.maven.apache.org/maven2/com/google/guava/guava/27.0.1-android/guava-27.0.1-android.jar

Try to run Maven import with -U flag (force update snapshots)
https://blog.csdn.net/yiguoxiaohai/article/details/125708088
几个月之后 ,当我又需要这个项目的时候又可以了 ,我想了一下 之前也总遇到导包不成功问题,有一次 我发现之前没设置Maven自动导包,后来设置上了;就导包成功了,可能是因为这个,又成了
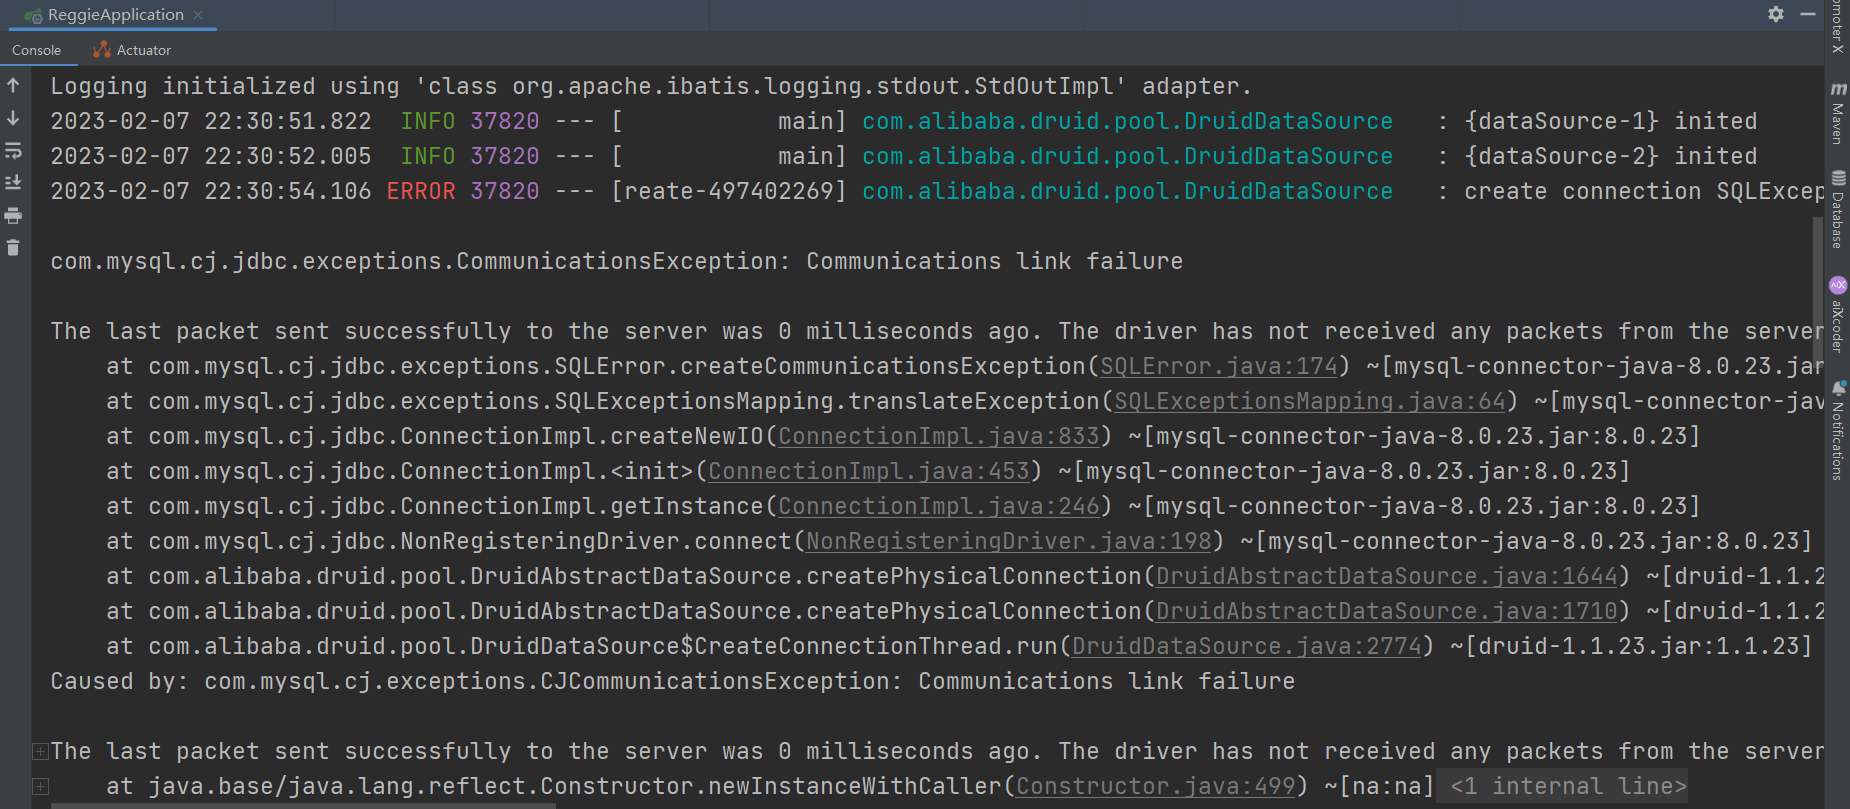
因为两个数据库对的 所以我觉得就是我第二个虚拟机的mysql的版本不对 瑞吉的mysql是5.几

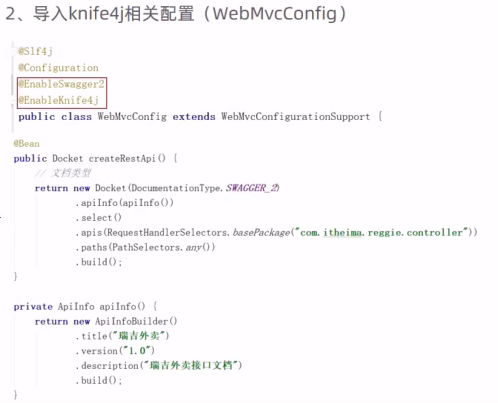

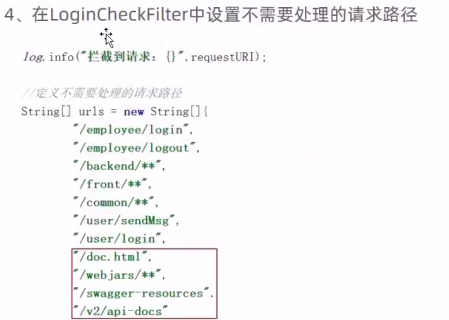
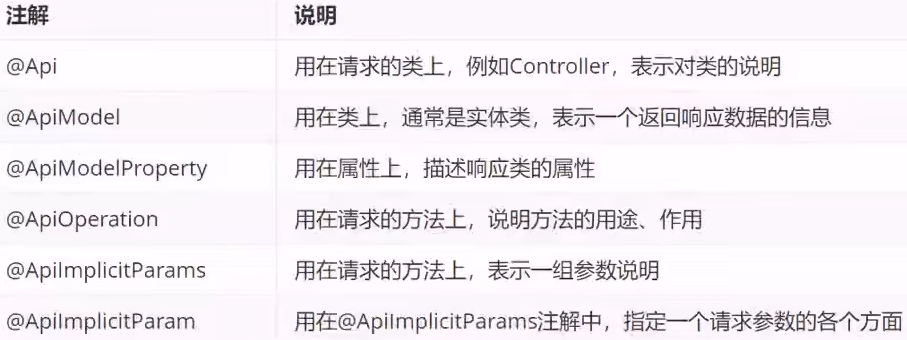
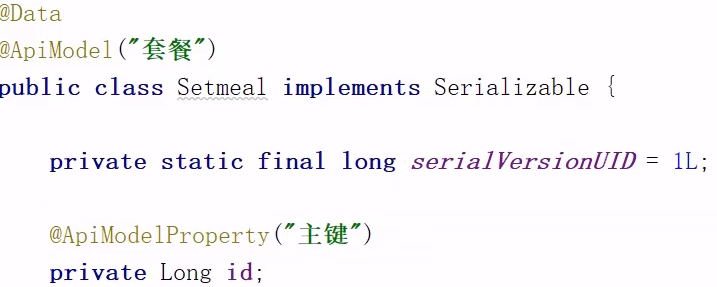
常用注解
项目部署
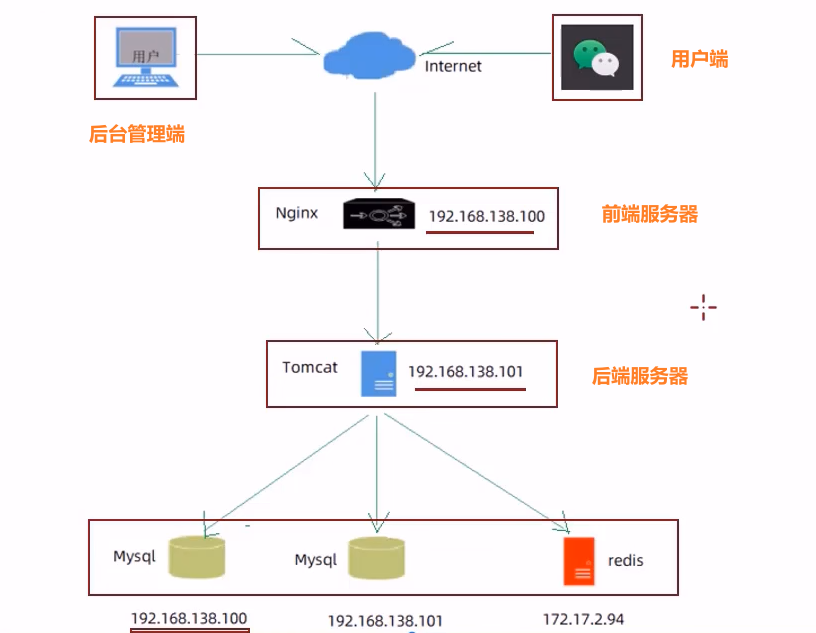
部署架构
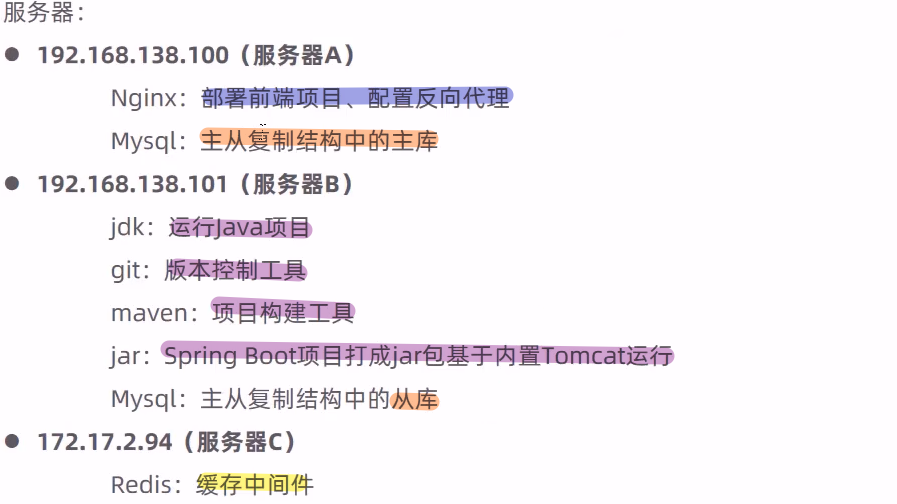
部署环境说明
麻烦没搞
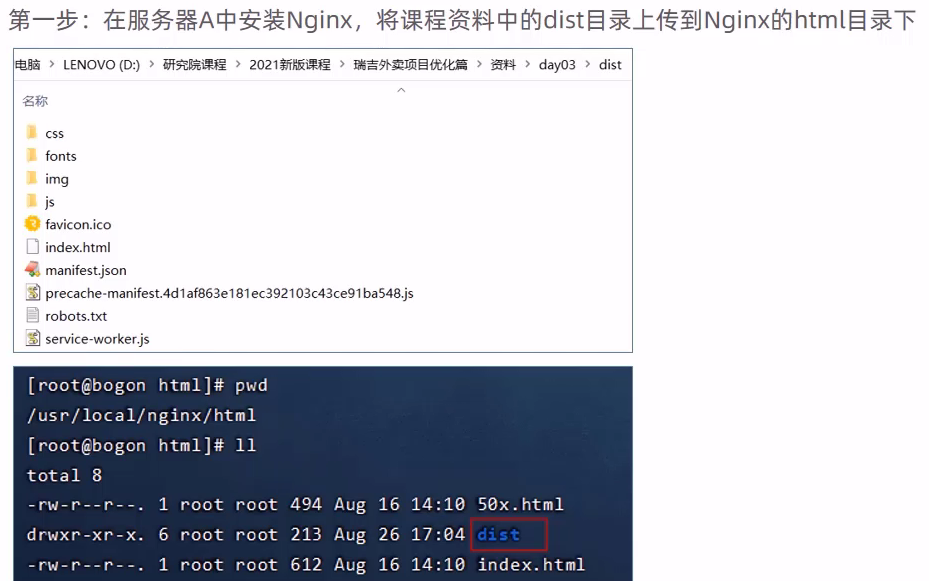
部署前端项目
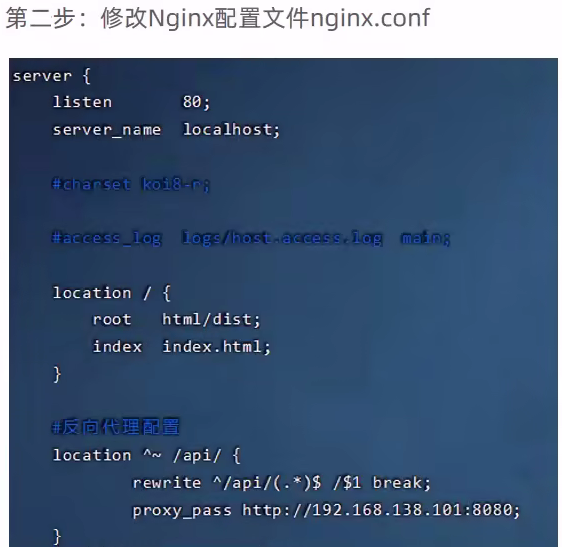
部署后端项目
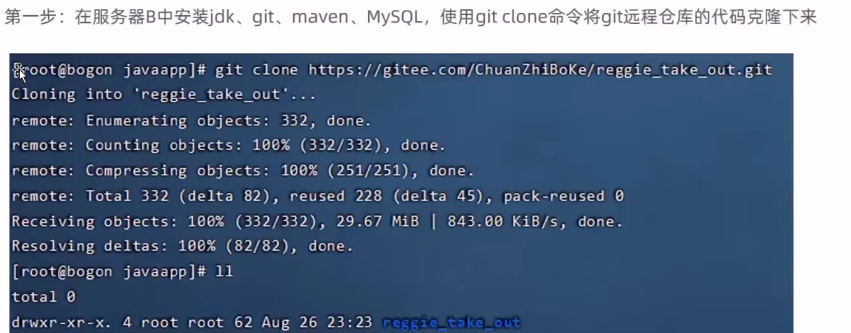

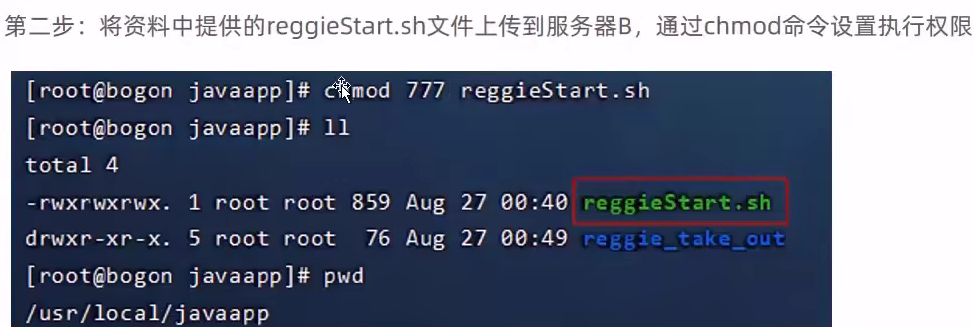

完结撒花!
本文来自博客园,作者:软工菜鸡,转载请注明原文链接:https://www.cnblogs.com/SElearner/p/17676681.html


 浙公网安备 33010602011771号