Arduino编写代码读取红外信号
一、准备工具
- 开发板(esp8266,esp32...)
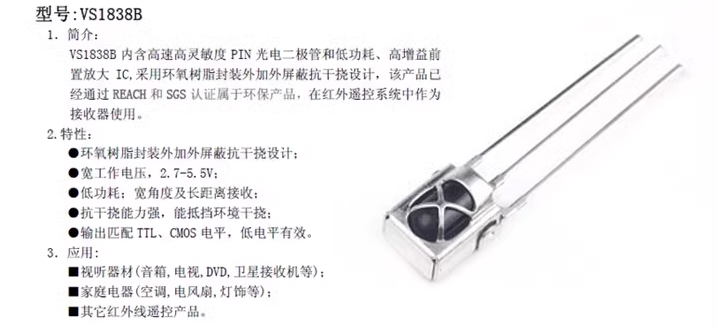
- 红外接收模块(右图)

- 数据线、跳线线和面包板(可选)
二、开发平台
软件:Arduino IDE v2.1.1
开发板sdk:esp8266 v3.1.2
红外接收库:IRremoteESP8266 v2.8.5
三、准备工作
将红外接收头与开发板通过跳线连接,红外接收头三条线分别为正、负和数据三条线,正负线连接至开发板正负引脚,将数据线连接至开发板任意一数据引脚,并记录引脚编号,引脚对应编号图,这里我们连接5号引脚(GPIO5)。最后将开发板是用数据线连接至电脑

四、代码部分
#include <Arduino.h>
#include <IRremoteESP8266.h>
#include <IRrecv.h>
#include <IRutils.h>

// 红外接收头连接的引脚编号
const uint16_t kRecvPin = 5;
// 初始化接收
IRrecv irrecv(kRecvPin);
// 接收数据缓存
decode_results results;

void setup() {
  Serial.begin(115200);
  irrecv.enableIRIn();  // Start the receiver
  while (!Serial)  // Wait for the serial connection to be establised.
    delay(50);
  Serial.println();
  Serial.print("IRrecvDemo is now running and waiting for IR message on Pin ");
  Serial.println(kRecvPin);
}

void loop() {
  Serial.println("loop");
  if (irrecv.decode(&results)) {
    // 打印接收到的数据
    serialPrintUint64(results.value, HEX);
    irrecv.resume();  // Receive the next value
  }
  delay(2000);
}
我们在Arduino IDE中安装过新程序库之后可以在Arduino IDE中查看并使用库中提供的示例来实现快速功能验证,通过File选项卡的Examples可以看到我们安装的IRRemoteEsp8266的示例,如下图

总结
对于一些简单的功能可以直接使用Arduino库提供的示例并简单修改就可验证我们需要的功能,再对若干功能进行拼接就可以实现一个系统性的功能了


