
五分钟搞懂Vuex
vuex 是一个专门为vue.js应用程序开发的状态管理模式。
这个状态我们可以理解为在data中的属性,需要共享给其他组件使用的部分。
也就是说,是我们需要共享的data,使用vuex进行统一集中式的管理。
vuex中,有默认的五种基本的对象:
- state:存储状态(变量)
- getters:对数据获取之前的再次编译,可以理解为state的计算属性。我们在组件中使用 $sotre.getters.fun()
- mutations:修改状态,并且是同步的。在组件中使用$store.commit('',params)。这个和我们组件中的自定义事件类似。
- actions:异步操作。在组件中使用是$store.dispath('')
- modules:store的子模块,为了开发大型项目,方便状态管理而使用的。这里我们就不解释了,用起来和上面的一样。
下面我们正式开始,一步步使用vuex
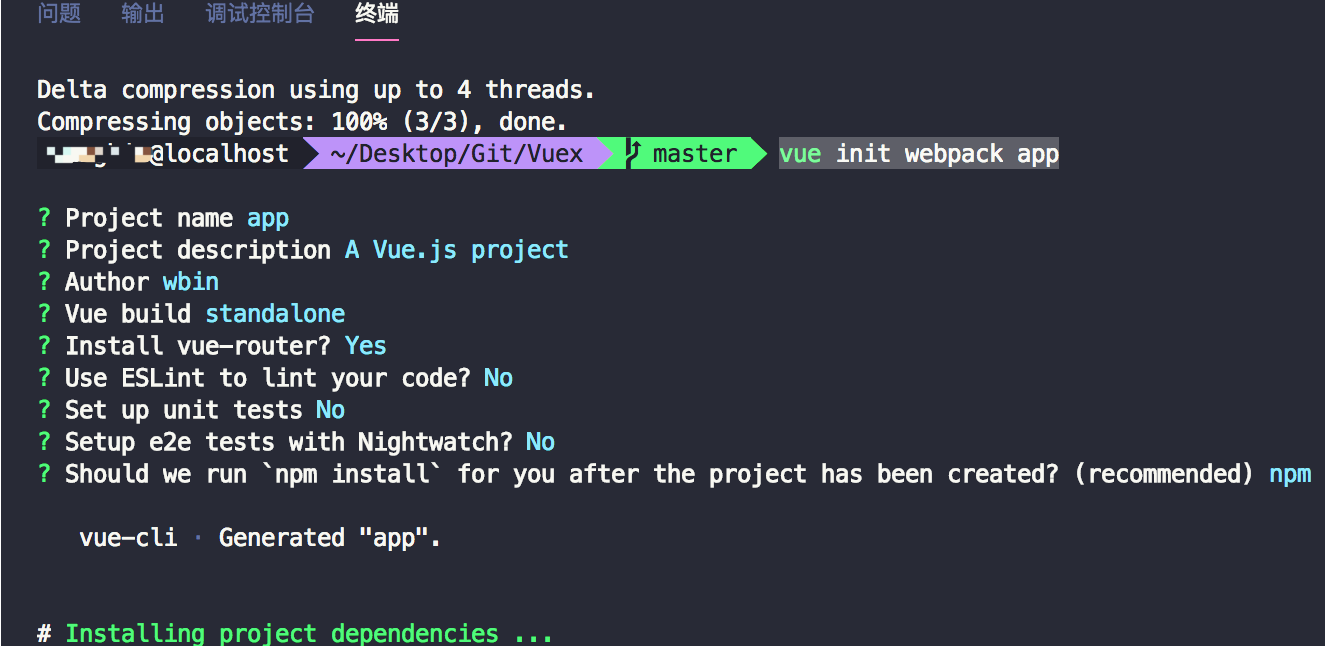
1、首先创建一个vue-cli项目
执行下面的命令,创建一个app项目(这里也可以使用其他非webpack模板,以及非app名称)
vue init webpack app
2、创建完成之后,我们进入文件夹下,并且运行项目
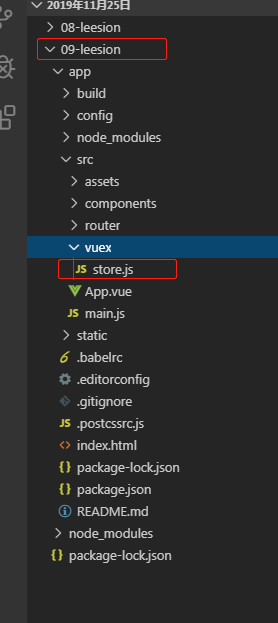
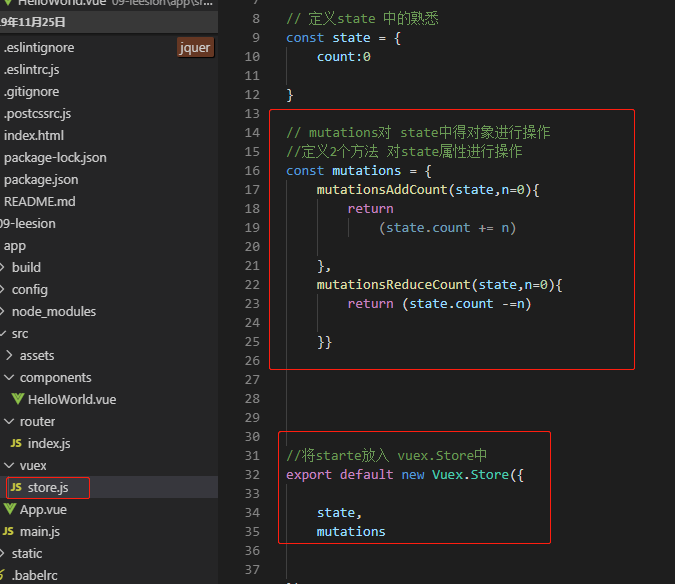
接下来我们在src目录下创建一个vuex文件夹
并在vuex文件夹下创建一个store.js文件
文件夹目录长得是这个样子
3、目前我们还没有引入vuex,我们需要先下载vuex,并且引入它
在保证我们处于我们项目下,在命令行输入下面命令,安装vuex
npm install vuex --save
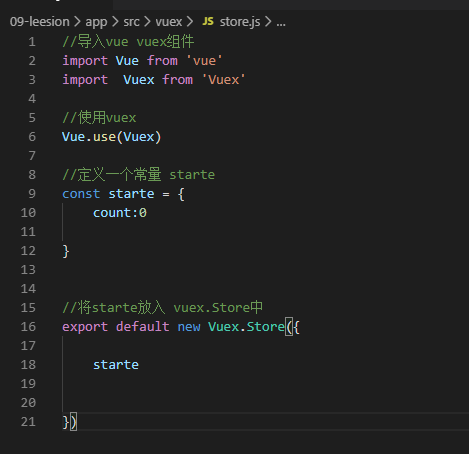
4、安装成功之后,我们就可以在store.js中尽情玩耍我们的vuex了! state不要写错了
在store.js文件中,引入vuex并且使用vuex,这里注意我的变量名是大写Vue和Vue
//导入vue vuex组件
import Vue from 'vue'
import  Vuex from 'Vuex'

//使用vuex
Vue.use(Vuex)

//定义一个常量 starte
const state = {
    count:0

}

//将starte放入 vuex.Store中
export default new Vuex.Store({

    state


})
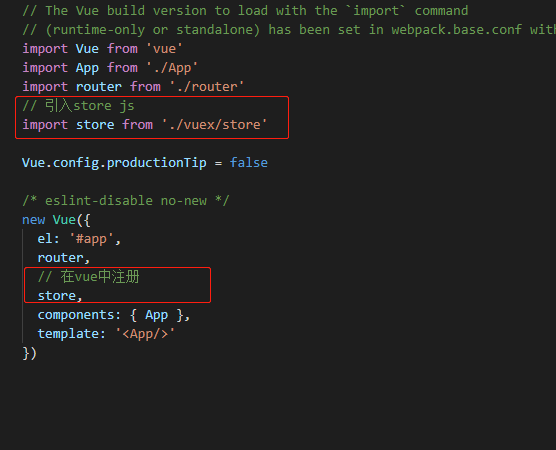
5.接下来,在main.js中引入store
import Vue from 'vue'
import App from './App'
import router from './router'
// 引入store js
import store from './vuex/store'

Vue.config.productionTip = false

/* eslint-disable no-new */
new Vue({
  el: '#app',
  router,
  // 在vue中注册
  store,
  components: { App },
  template: '<App/>'
})
然后我们在任意一个组件中都可以使用我们定义的count属性了。
这里我们在内置的helloWorld中使用一下,去除helloworld.vue中不用的标签
到这一步,已经成功了一小半!vuex很简单吧?
回想一下,我们只需要在下载安装使用vuex,
在我们定义的store.js中定义state对象,并且暴露出去。
在main.js中使用我们的store.js(这里是为了防止在各个组件中引用,因为main.js中,有我们的new Vue 实例啊!)
二. mutations

对vuex中的state进行操作
我们在sotre.js中定义mutations对象,该对象中有两个方法,mutations里面的参数,
第一个默认为state,接下来的为自定义参数。
我们在mutations中定义两个方法,增加和减少,
并且设置一个参数n,默认值为0,然后在Vuex.Store中使用它
// mutations对 state中得对象进行操作
//定义2个方法 对state属性进行操作
const mutations = {
    mutationsAddCount(state,n=0){
        return
            (state.count += n)

    },
    mutationsReduceCount(state,n=0){
        return (state.count -=n)

    }}

//将starte放入 vuex.Store中
export default new Vuex.Store({

    state,
    mutations
})
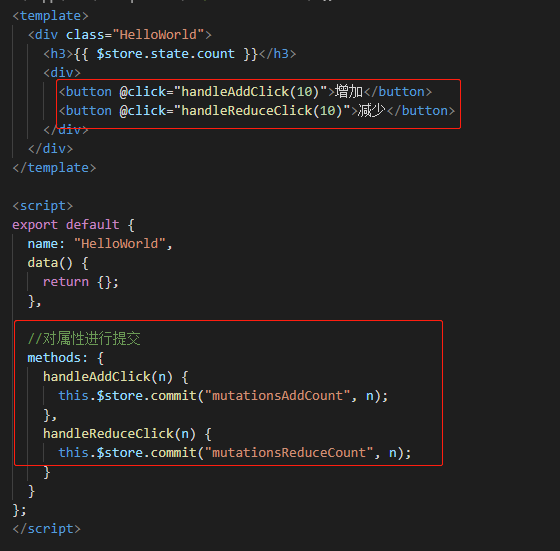
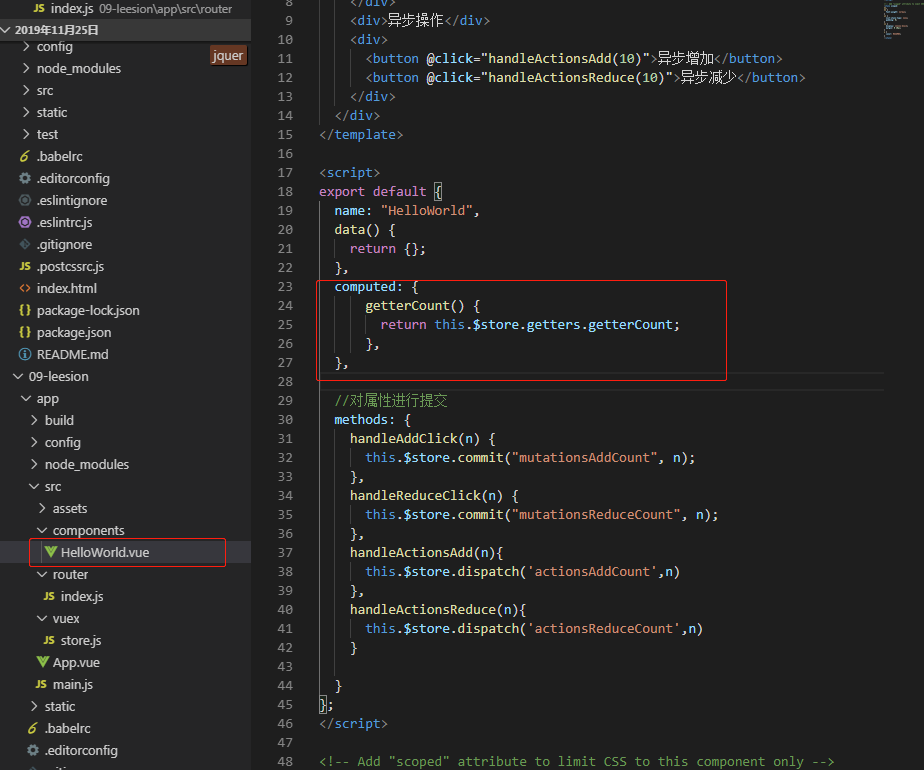
然后我们在helloWorld.vue中,使用这个方法
还记得我们如何在组件中使用mutations吗?就和自定义事件非常相似
在组件中的使用:
页面:
<template>
  <div class="HelloWorld">
    <h3>{{ $store.state.count }}</h3>
    <div>
      <button @click="handleAddClick(10)">增加</button>
      <button @click="handleReduceClick(10)">减少</button>
    </div>
  </div>
</template>
方法:
  //对属性进行提交
  methods: {
    handleAddClick(n) {
      this.$store.commit("mutationsAddCount", n);
    },
    handleReduceClick(n) {
      this.$store.commit("mutationsReduceCount", n);
    }
  }
};
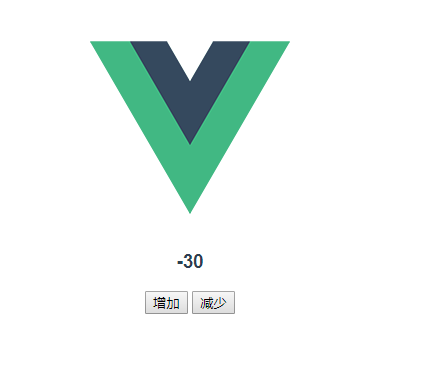
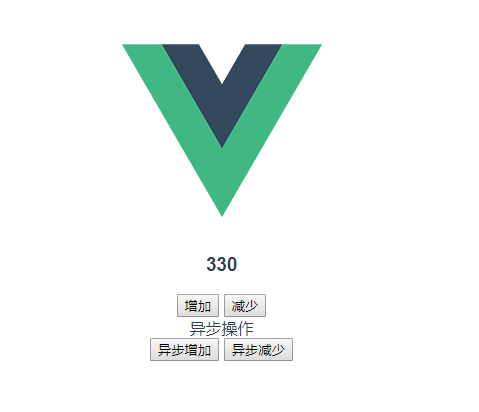
来浏览器看一下效果如何!
我们可以看到每当触发事件时,
我们都可以在vue开发工具中看到我们触发的mutations方法,以及参数
完美!
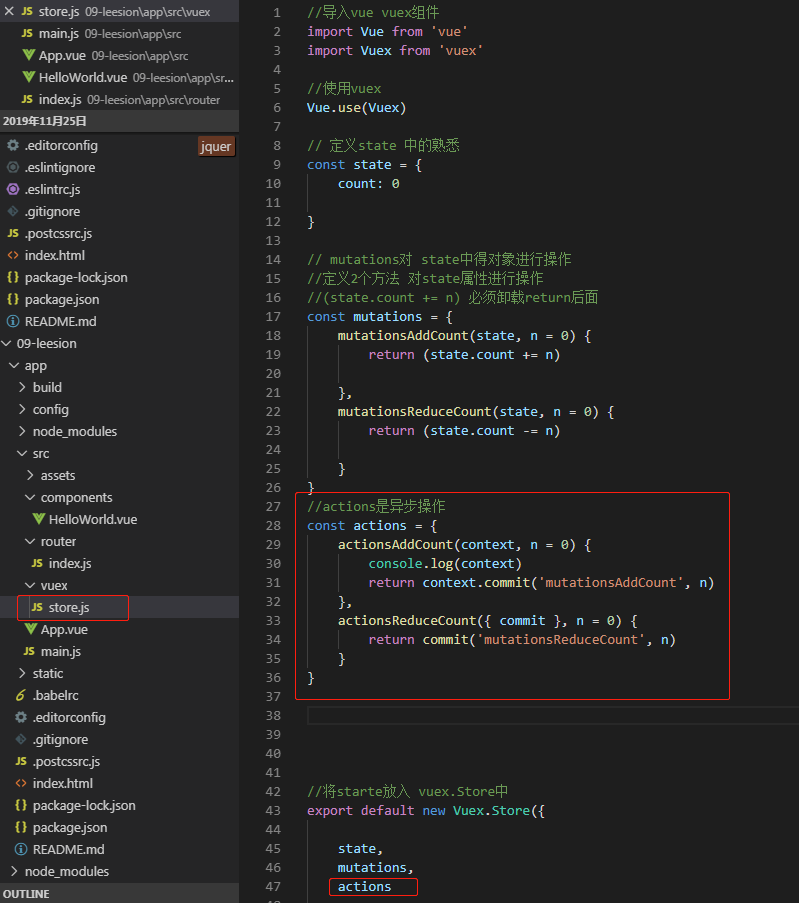
6.接下来就是actions,actions是异步操作
这里我在两个方法中使用了两个不同的参数,一个是context,它是一个和store对象具有相同对象属性的参数。在第二个函数中,我是直接使用了这个对象的commit的方法
//actions是异步操作
const actions = {
    actionsAddCount(context, n = 0) {
        console.log(context)
        return context.commit('mutationsAddCount', n)
    },
    actionsReduceCount(context, n = 0) {
        return commit('mutationsReduceCount', n)
    }
}
  //对属性进行提交
  methods: {
    handleAddClick(n) {
      this.$store.commit("mutationsAddCount", n);
    },
    handleReduceClick(n) {
      this.$store.commit("mutationsReduceCount", n);
    },
    handleActionsAdd(n){
      this.$store.dispatch('actionsAddCount',n)
    },
    handleActionsReduce(n){
      this.$store.dispatch('actionsReduceCount',n)
    }

  }
};
<template>
  <div class="HelloWorld">
    <h3>{{ $store.state.count }}</h3>
    <div>
      <button @click="handleAddClick(10)">增加</button>
      <button @click="handleReduceClick(10)">减少</button>
    </div>
    <div>异步操作</div>
    <div>
      <button @click="handleActionsAdd(10)">异步增加</button>
      <button @click="handleActionsReduce(10)">异步减少</button>
    </div>
  </div>
</template>
进入浏览器看下效果如何!
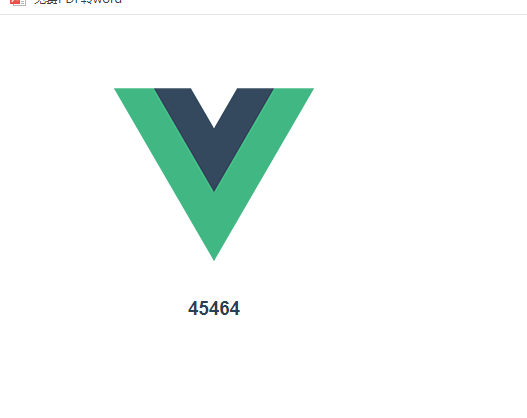
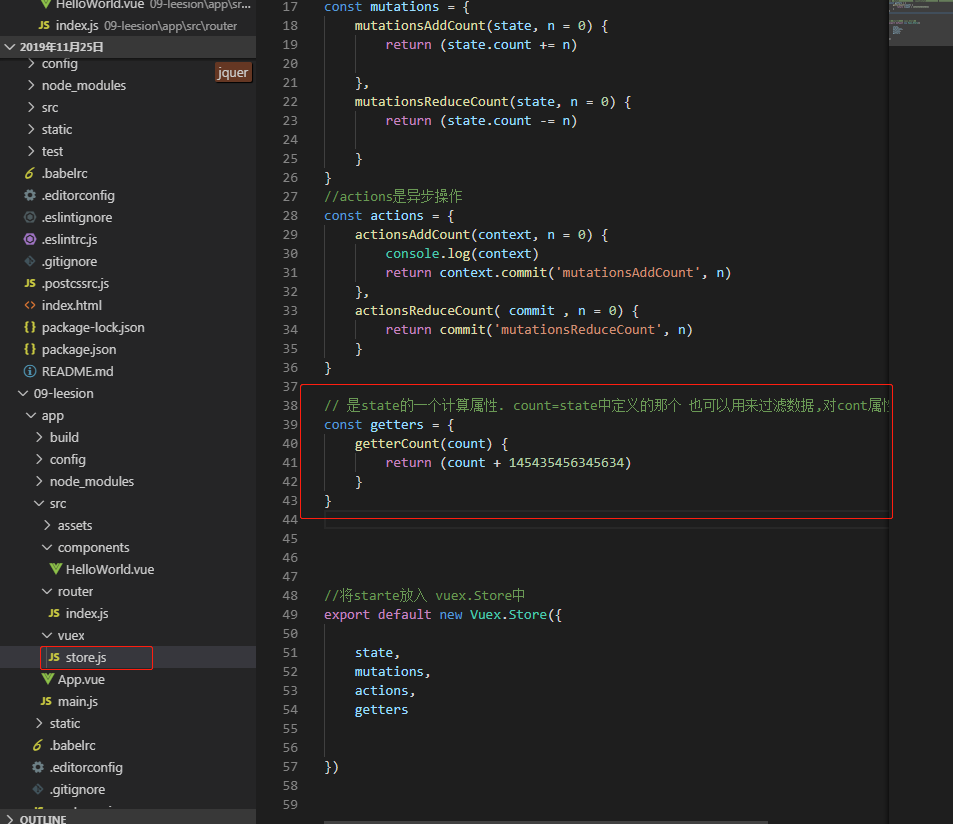
7.最后就是getters
我们一般使用getters来获取我们的state,因为它算是state的一个计算属性
// 是state的一个计算属性
const getters = {
    getterCount(state, n = 0) {
        return (state.count += n)
    }
}
// 是state的一个计算属性. count=state中定义的那个 也可以用来过滤数据,对cont属性进行一次操作后返回
const getters = {
    getterCount(count) {
        return (count + 145435456345634)
    }
}
页面上的使用:
computed: {
      getterCount() {
        return this.$store.getters.getterCount;
      },
  },
待续。。。。。。。。

 浙公网安备 33010602011771号