wsl安装ollama webui
0.win配置
wsl安装cuda环境, 按照NVIDIA给出的教程,首先需要安装Windows平台上的NVIDIA显卡驱动。
首先win安装cuda环境 查看指令 nvidia-smi
win能看到 那wsl中也能看到 然后安装
参考链接
https://www.ppmy.cn/news/227349.html?action=onClick
https://zhuanlan.zhihu.com/p/681092042
0.可以参考这个
langchain+ollama+mistral
https://www.atyun.com/57706.html
点击查看代码
参考
https://www.atyun.com/57706.html

实施技术栈
	Chromadb — 向量存储
	gpt4all — 文本嵌入
	langchain — 促进使用LLM进行应用开发的框架
	chainlit — 构建类似ChatGPT的界面(UI)

安装所需的依赖项:
	pip install chromadb -i https://pypi.tuna.tsinghua.edu.cn/simple requests_mock
	pip install langchain -i https://pypi.tuna.tsinghua.edu.cn/simple requests_mock
	pip install BeautifulSoup4 -i https://pypi.tuna.tsinghua.edu.cn/simple requests_mock
	pip install gpt4all -i https://pypi.tuna.tsinghua.edu.cn/simple requests_mock
	pip install langchainhub -i https://pypi.tuna.tsinghua.edu.cn/simple requests_mock
	pip install pypdf -i https://pypi.tuna.tsinghua.edu.cn/simple requests_mock
	pip install chainlit -i https://pypi.tuna.tsinghua.edu.cn/simple requests_mock

	pip install chromadb
	pip install langchain
	pip install BeautifulSoup4
	pip install gpt4all
	pip install langchainhub
	pip install pypdf
	pip install chainlit

OSError: /lib/x86_64-linux-gnu/libc.so.6: version `GLIBC_2.32' not found (required by /ro/build/libllmodel.so)
参考
https://blog.csdn.net/huazhang_001/article/details/128828999
sudo apt update
sudo apt install libc6

raw.githubusercontent.com 无法访问
https://blog.csdn.net/Tsing12138/article/details/122109529
sudo vim /etc/hosts
185.199.108.133 raw.githubusercontent.com   #comments. put the address here

C:\Windows\System32\drivers\etc\hosts


ollama run mistral


生成向量数据库
python3 load_data_vdb.py

load_data_vdb.py代码
from langchain.text_splitter import RecursiveCharacterTextSplitter
from langchain.document_loaders import PyPDFLoader, DirectoryLoader
from langchain.document_loaders.pdf import PyPDFDirectoryLoader
from langchain.document_loaders import UnstructuredHTMLLoader, BSHTMLLoader
from langchain.vectorstores import Chroma
from langchain.embeddings import GPT4AllEmbeddings
from langchain.embeddings import OllamaEmbeddings
import os
DATA_PATH="data/"
DB_PATH = "vectorstores/db/"
def create_vector_db():
    loader = PyPDFDirectoryLoader(DATA_PATH)
    documents = loader.load()
    print(f"Processed {len(documents)} pdf files")
    text_splitter = RecursiveCharacterTextSplitter(chunk_size=1000, chunk_overlap=50)
    texts=text_splitter.split_documents(documents)
    vectorstore = Chroma.from_documents(documents=texts, embedding=GPT4AllEmbeddings(),persist_directory=DB_PATH)
    vectorstore.persist()
if __name__=="__main__":
    create_vector_db()


运行代码
chainlit run RAG.py

Chainlit界面快照
应用接口:http://localhost:8000

代码RAG.py
#import required dependencies
from langchain import hub
from langchain.embeddings import GPT4AllEmbeddings
from langchain.vectorstores import Chroma
from langchain.llms import Ollama
from langchain.callbacks.manager import CallbackManager
from langchain.callbacks.streaming_stdout import StreamingStdOutCallbackHandler
import chainlit as cl
from langchain.chains import RetrievalQA, RetrievalQAWithSourcesChain

# Set up RetrievelQA model
QA_CHAIN_PROMPT = hub.pull("rlm/rag-prompt-mistral")# load the LLM
def load_llm():
    llm = Ollama(
        model = "mistral",
        verbose = True,
        callback_manager = CallbackManager([
            StreamingStdOutCallbackHandler()
        ]),
    )
    return llm

def retrieval_qa_chain(llm, vectorstore):
    qa_chain = RetrievalQA.from_chain_type(
        llm,
        retriever = vectorstore.as_retriever(),
        chain_type_kwargs = {
            "prompt": QA_CHAIN_PROMPT
        },
        return_source_documents = True,
    )
    return qa_chain

def qa_bot():
    llm = load_llm()
    DB_PATH = "vectorstores/db/"
    vectorstore = Chroma(persist_directory = DB_PATH, embedding_function =
    GPT4AllEmbeddings())
    qa = retrieval_qa_chain(llm, vectorstore)
    return qa

@ cl.on_chat_start
async def start():
    chain = qa_bot()
    msg = cl.Message(content = "Firing up the research info bot...")
    await msg.send()
    msg.content = "Hi, welcome to research info bot. What is your query?"
    await msg.update()
    cl.user_session.set("chain", chain)

@ cl.on_message
async def main(message):
    chain = cl.user_session.get("chain")
    cb = cl.AsyncLangchainCallbackHandler(
        stream_final_answer = True,
        answer_prefix_tokens = ["FINAL", "ANSWER"]
    )
    cb.answer_reached = True
    # res = await chain.acall(message, callbacks = [cb])
    res = await chain.acall(message.content, callbacks = [cb])
    print(f"response: {res}")
    answer = res["result"]
    answer = answer.replace(".", ".\n")
    sources = res["source_documents"]
    if sources:
        answer += f"\nSources: " + str(str(sources))
    else :
        answer += f"\nNo Sources found"
    await cl.Message(content = answer).send()
1.wsl常用指令
查看运行版本号
wsl -l -v
更新wsl,查看版本
wsl --update
wsl --version
注销指定wsl镜像(注意就相当于删除系统,资料全丢的那种,慎重操作)
wsl --unregister wsl_01_ollama_webui_ubuntu2004
导入导出,从网上下载好镜像,解压,用这种方式导入,可以指定安装目录,并指定名称
wsl --import wsl_00_ollama_webui_langchain E:\wsl2\img_wsl_00_ollama_webui_langchain E:\wsl2\wsl_img\Ubuntu_2004.2021.825.0_x64\install.tar.gz
wsl --export wsl_ollama_webui_ubuntu2004 E:\wsl2\export\wsl_ollama_webui_ubuntu2004.tar.gz
运行关闭指令 -u是以指定用户运行
wsl -d wsl_ollama_webui_ubuntu2004
wsl -d wsl_ollama_webui_ubuntu2004 -u root
wsl -t wsl_ollama_webui_ubuntu2004
使用非root用户,默认登录即解决方案先添加book用户
adduser book
sudo adduser book sudo
再添加以下内容,
sudo vim /etc/wsl.conf
[user]
default = book
可以不用vim指令,使用echo也可以达到同样效果
echo "[user]" >> /etc/wsl.conf
echo "default = book" >> /etc/wsl.conf
Vmmem介绍
Vmmem 进程是系统合成的一个虚拟进程,用于表示虚拟机消耗的内存和 CPU 资源。 换句话说,如果您看到 Vmmem 消耗大量内存和 CPU 资源,那么这意味着您的虚拟机正在消耗大量内存和 CPU 资源。如果要让它停止,请关闭您的虚拟机。
具体步骤
- 按下Windows + R 键,输入 %UserProfile% 并运行进入用户文件夹
- 新建文件 .wslconfig ,然后记事本编辑
- 填入以下内容并保存, memory为系统内存上限,这里我限制最大2GB,可根据自身电脑配置设
[wsl2]
memory=2GB
swap=0
localhostForwarding=true
- 然后启动cmd命令提示符,输入 wsl --shutdown 来关闭当前的子系统
2.ubuntu更新
sudo apt-get update
sudo apt-get upgrade
3.ollama相关
一键安装ollama,运行serve 在运行模型,此处下载并运行llama2
curl -fsSL https://ollama.com/install.sh | sh
ollama serve
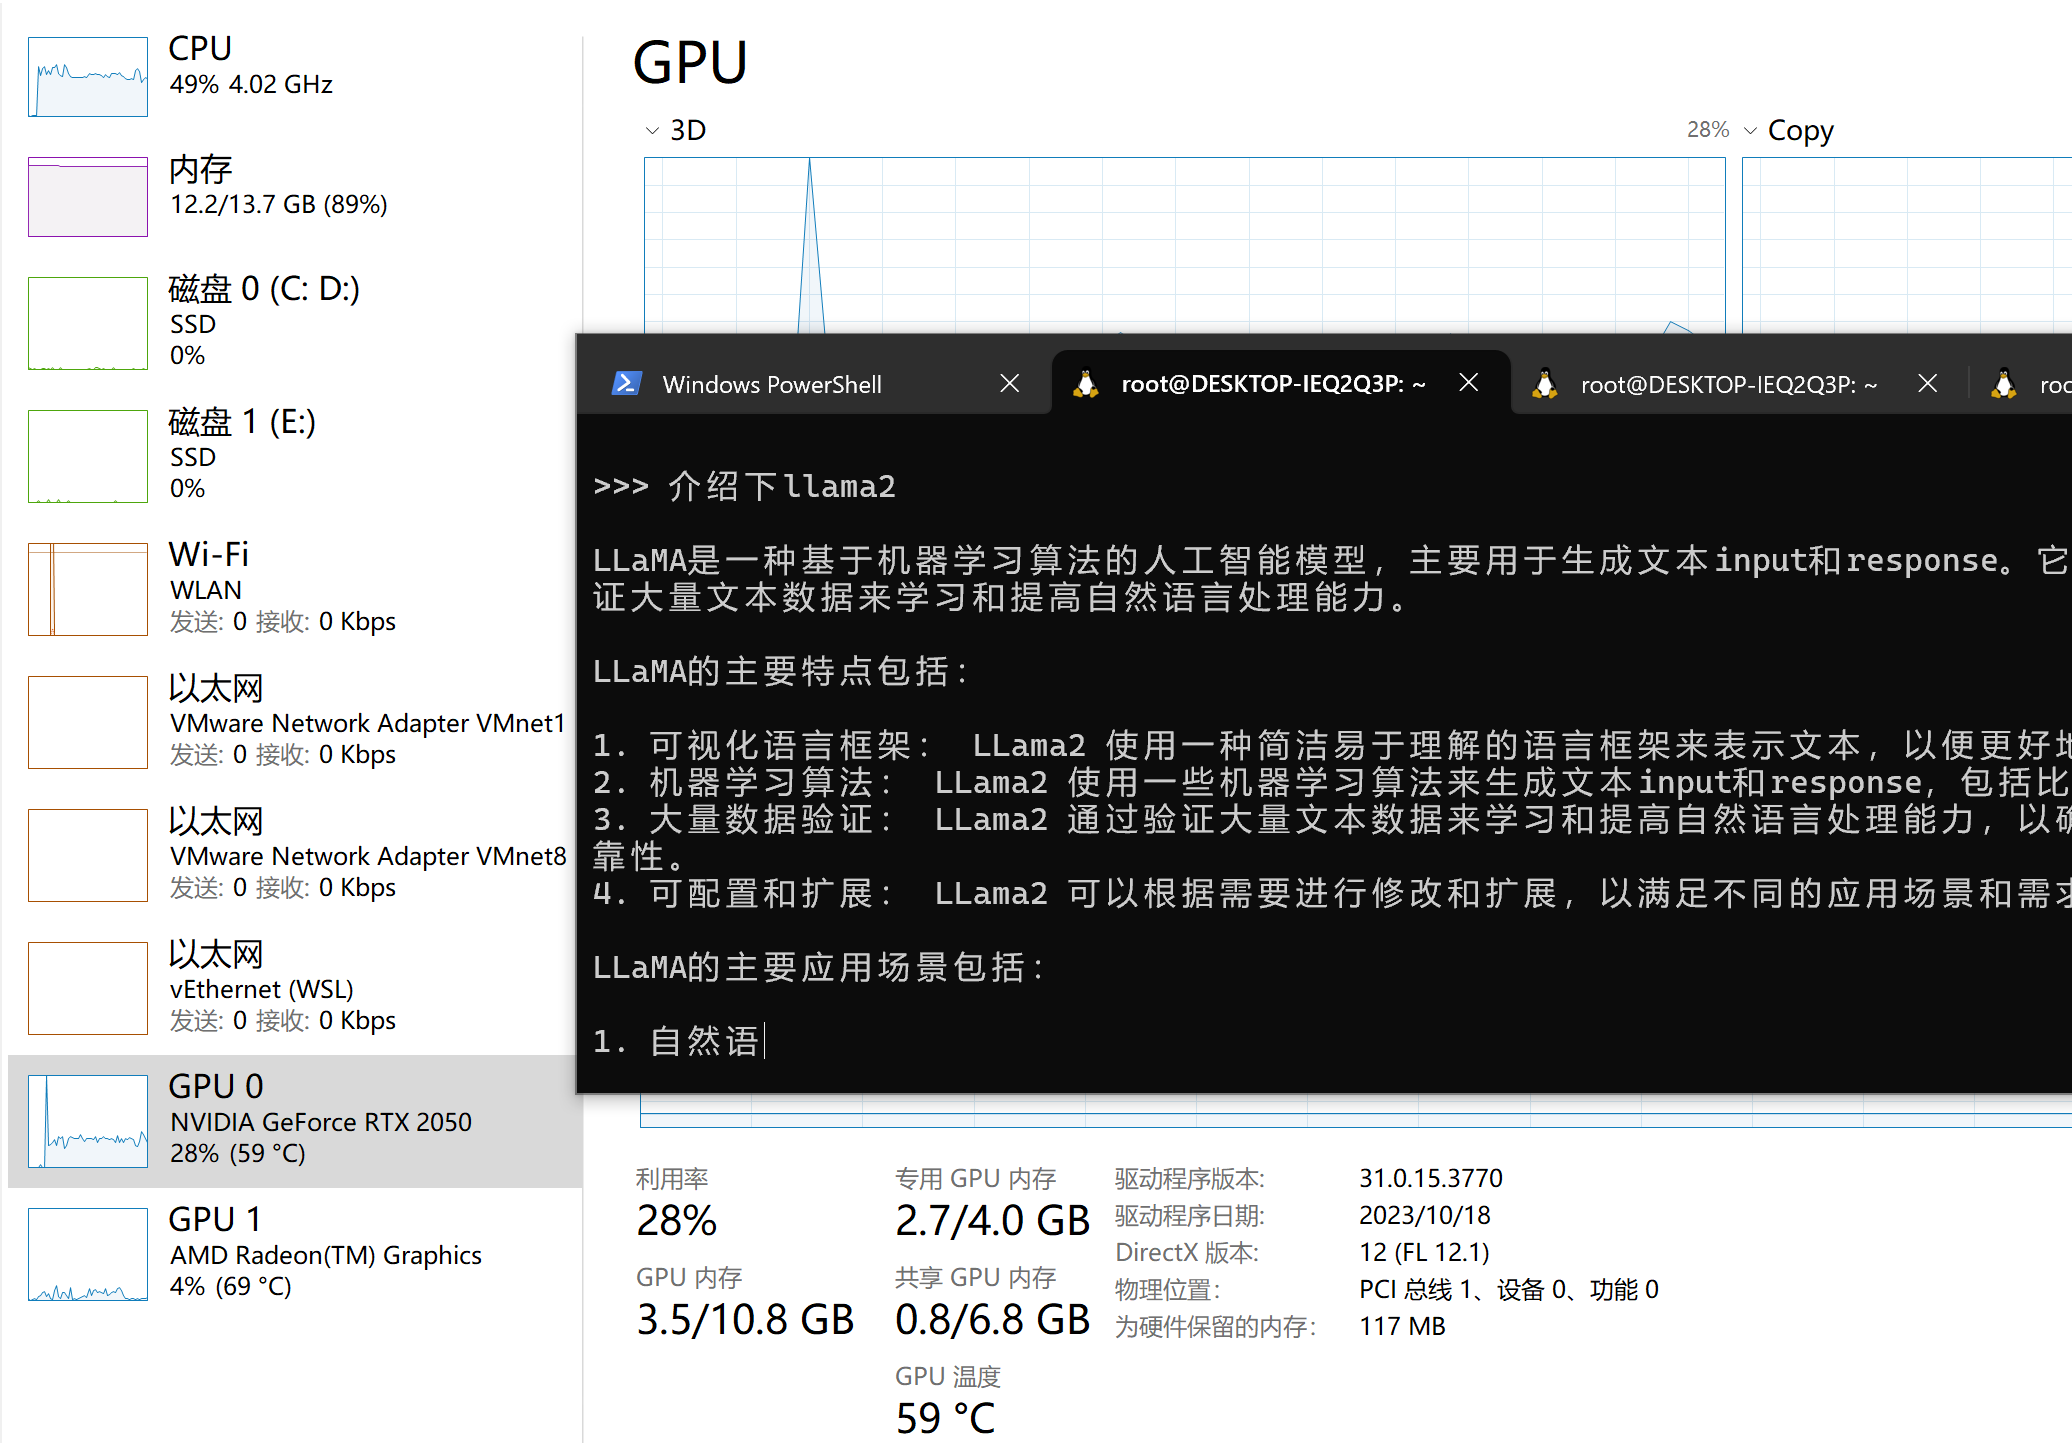
ollama run llama2
运行如下
ollama常用网址
https://github.com/ollama/ollama
https://ollama.com/library
常用模型
- ollama run llama2
- ollama run tinyllama
- ollama run qwen:0.5b
- ollama run qwen:1.8b
- ollama run qwen:4b
- ollama run qwen:7b
- ollama run qwen:14b
- ollama run qwen:72b
4.安装web环境(先安装docker(wsl))
chatbox还有安装包
https://github.com/Bin-Huang/chatbox/releases
https://download.chatboxai.app/releases/Chatbox-1.3.1-Setup.exe
其他的都有些麻烦,推荐用chatbox,有win安装包简单方便
1.安装docker
参考
https://zhuanlan.zhihu.com/p/344978737
sudo apt update
sudo apt install apt-transport-https ca-certificates curl software-properties-common
curl -fsSL https://download.docker.com/linux/ubuntu/gpg | sudo apt-key add -
sudo apt update
sudo apt install docker-ce
sudo service docker start
2.安装webui运行(时间比较久)
如果ollama在本地
docker run -d -p 3000:8080 --add-host=host.docker.internal:host-gateway -v open-webui:/app/backend/data --name open-webui --restart always ghcr.io/open-webui/open-webui:main
如果ollama在远端
docker run -d -p 3000:8080 -e OLLAMA_BASE_URL=https://example.com -v open-webui:/app/backend/data --name open-webui --restart always ghcr.io/open-webui/open-webui:main
注意修改地址,官方原话
To connect to Ollama on another server, change the OLLAMA_BASE_URL to the server's URL:
官方链接
https://github.com/open-webui/open-webui
3.另一个 webui方案Chatbox 需要安装node.js
安装nodejs
curl -sL https://deb.nodesource.com/setup_lts.x | sudo -E bash -
sudo apt-get update
sudo apt-get install nodejs -y
node -v
npm -v
nodejs报错处理方式参考
https://blog.csdn.net/weixin_38469592/article/details/119567776
https://blog.csdn.net/weixin_45078861/article/details/123044976

env | grep -i "_PROXY"
根据显示出来的,删除以 _proxy结尾的
unset  https_proxy
unset  http_proxy

经过多次尝试
npm config set proxy http://127.0.0.1:38457
安装chatbox(源码安装)
git clone https://github.com/Bin-Huang/chatbox.git
git submodule update --init
cd chatbox
npm install
npm run start:react

chatbox还有安装包
https://github.com/Bin-Huang/chatbox/releases


其他指令
npm install -g npm
npm cache clean --force
以下为非必须安装,根据实际需要进行即可
5.安装安装fastgithub_linux加快github的访问速度
参考 https://blog.csdn.net/Telly_/article/details/131640003
//下载FastGithub Linux版安装包
wget -c https://github.com/dotnetcore/FastGithub/releases/download/2.1.4/fastgithub_linux-x64.zip

//解压
unzip fastgithub_linux-x64.zip

//移动到/opt目录
sudo mv fastgithub_linux-x64 /opt

//删除FastGithub Linux版安装包
rm fastgithub_linux-x64.zip

//切换目录
cd /opt/fastgithub_linux-x64

//以systemd服务自动启动(推荐)
//启动服务
sudo ./fastgithub start
//卸载服务
sudo ./fastgithub stop

//手动启动
sudo ./fastgithub

这个写入/etc/profile,会导致nodejs下载
export http_proxy=http://127.0.0.1:38457
export https_proxy=http://127.0.0.1:38457
之后键入 source /etc/profile

//http || https
git config --global http.proxy 127.0.0.1:38457
git config --global https.proxy 127.0.0.1:38457


git config --global --unset http.proxy
git config --global --unset https.proxy

git config --global --get http.proxy
git config --global --get https.proxy
6.安装anaconda环境
官网
https://docs.anaconda.com/free/anaconda/install/linux/
https://repo.anaconda.com/archive/
安装参考(下载较慢,建议下载到本地以后在传给wsl,速度更快) https://zhuanlan.zhihu.com/p/349345180
sudo apt-get install libgl1-mesa-glx libegl1-mesa libxrandr2 libxrandr2 libxss1 libxcursor1 libxcomposite1 libasound2 libxi6 libxtst6 -y
curl -O https://repo.anaconda.com/archive/Anaconda3-2024.02-1-Linux-x86_64.sh
bash Anaconda3-2024.02-1-Linux-x86_64.sh

(3)回车键,进入注册信息页面
(4)按q跳过阅读,yes
(5)默认安装在用户目录下,直接回车即可安装;若想自定义安装目录,直接输入安装目录,回车即可。
(6)Do you wish the installer to initialize Anaconda3 by running conda init ? 输入 no,回车
配置python和anaconda环境,注意这个版本自带python11
vim ~/.bashrc

# 为了避免与其他服务器用户产生命令冲突,使用自己的英文名+Python替代python
alias condaython="/root/anaconda3/bin/python"
#这里写anaconda的安装路径
export PATH="/root/anaconda3/bin:$PATH"

source ~/.bashrc


#设置清华镜像
conda config --add channels https://mirrors.tuna.tsinghua.edu.cn/anaconda/pkgs/free/
conda config --add channels https://mirrors.tuna.tsinghua.edu.cn/anaconda/pkgs/main/
conda config --add channels https://mirrors.tuna.tsinghua.edu.cn/anaconda/cloud/conda-forge/
conda config --add channels https://mirrors.tuna.tsinghua.edu.cn/anaconda/cloud/bioconda/
#设置bioconda
conda config --add channels bioconda
conda config --add channels conda-forge
#设置搜索时显示通道地址
conda config --set show_channel_urls yes


查找安装包
conda search gcc
查看
conda list


参考链接
https://blog.csdn.net/chenxy_bwave/article/details/119996001

报错
ProxyError: Conda cannot proceed due to an error in your proxy configuration.
Check for typos and other configuration errors in any '.netrc' file in your home directory,
any environment variables ending in '_PROXY', and any other system-wide proxy
configuration settings.
参考
https://blog.csdn.net/weixin_45078861/article/details/123044976
env | grep -i "_PROXY"

unset  https_proxy
unset  http_proxy
7.用anaconda配置ollama开发环境(cmmak,gcc,go,cuda)
1.开发环境
安装gcc cmake go
conda install gcc=12.3.0  -c conda-forge
conda install gxx=12.3.0  -c conda-forge
conda install cmake  -c conda-forge
conda install go -c conda-forge

当我们使用 go get、go install、go mod 等命令时,会自动下载相应的包或依赖包。但由于众所周知的原因,类似于 golang.org/x/... 的包会出现下载失败的情况。
https://www.cnblogs.com/shockerli/p/go-get-golang-org-x-solution.html
我们知道从 Go 1.11 版本开始,官方支持了 go module 包依赖管理工具。
其实还新增了 GOPROXY 环境变量。如果设置了该变量,下载源代码时将会通过这个环境变量设置的代理地址,而不再是以前的直接从代码库下载。非常好
更可喜的是,goproxy.io 这个开源项目帮我们实现好了我们想要的。该项目允许开发者一键构建自己的 GOPROXY 代理服务。同时,也提供了公用的代理服务
使用方式
export GOPROXY=https://goproxy.io
2.配置cuda环境
wsl安装cuda环境, 按照NVIDIA给出的教程,首先需要安装Windows平台上的NVIDIA显卡驱动。
首先win安装cuda环境  查看指令 nvidia-smi
win能看到 那wsl中也能看到 然后安装
https://www.ppmy.cn/news/227349.html?action=onClick
https://zhuanlan.zhihu.com/p/681092042


CUDA Toolkit 安装(CUDA Toolkit Archive | NVIDIA 开发者)(根据自己电脑进行配置)
https://developer.nvidia.com/cuda-toolkit-archive

// gcc失败
wget https://developer.download.nvidia.com/compute/cuda/12.2.2/local_installers/cuda_12.2.2_535.104.05_linux.run
sudo sh cuda_12.2.2_535.104.05_linux.run
//换一种
wget https://developer.download.nvidia.com/compute/cuda/repos/wsl-ubuntu/x86_64/cuda-keyring_1.1-1_all.deb
sudo dpkg -i cuda-keyring_1.1-1_all.deb
sudo apt-get update
sudo apt-get -y install cuda
库的一个集中,不然编译总是报错
cp /usr/local/cuda/lib64/stubs/* /usr/local/cuda/lib64/

vim ~/.bashrc

# CUDA ToolKit
export PATH="/usr/local/cuda/bin/:/home/book/anaconda3/bin:$PATH"
export LD_LIBRARY_PATH=$LD_LIBRARY_PATH:/usr/local/cuda/lib64
export CUDA_LIB_DIR="/usr/local/cuda/lib64/"
source ~/.bashrc


cuDNN Archive | NVIDIA Developer
# CuDNN下载需要登录nvidia官网,注册账号并登录
# 选择 linux类别下Ubuntu对应版本与架构的deb安装包下载即可
sudo dpkg -i cudnn-local-repo-ubuntu2004-8.9.7.29_1.0-1_amd64.deb
# 根据指示拷贝本地cudnn源公钥
sudo cp /var/cudnn-local-repo-ubuntu2004-8.9.7.29/cudnn-local-30472A84-keyring.gpg /usr/share/keyrings/
sudo apt update
sudo apt list libcudnn*    查看库都有啥

sudo apt install libcudnn8-dev libcudnn8-samples
3.ollama编译运行
ollama源码安装说明
https://github.com/ollama/ollama/blob/main/docs/development.md

git clone https://github.com/ollama/ollama.git

DCMAKE_CXX_COMPILER=/pathto/g++
DCMAKE_C_COMPILER=/pathto/gcc /pathto/source

export CGO_CFLAGS="-g"
export OLLAMA_DEBUG=1

export CUDA_LIB_DIR="/usr/local/cuda/lib64/"


ollama cpu编译
OLLAMA_CUSTOM_CPU_DEFS="-DLLAMA_AVX=on -DLLAMA_AVX2=on -DLLAMA_F16C=on -DLLAMA_FMA=on" go generate ./...
ollama gpu编译
go generate ./...

go build .

运行
./ollama serve
./ollama run llama2


http://127.0.0.1:11434/  查看ollama运行状态

export OLLAMA_API_BASE_URL=http://127.0.0.1:11434/api
export WEBUI_SECRET_KEY=TkjGEiQ@5K^j

https://docs.openwebui.com/getting-started/


https://blog.csdn.net/m0_65609016/article/details/134020029
官方说用brew安装环境,经过测试发现行不通,用anaconda还能跑起来
安装过程中pip出错的现象以及处理手法
pip3 install -i https://pypi.tuna.tsinghua.edu.cn/simple requests_mock
pip3 install -i https://pypi.tuna.tsinghua.edu.cn/simple blosc2~=2.0.0
pip3 install -i https://pypi.tuna.tsinghua.edu.cn/simple cython>=0.29.21

pip3 install -i https://pypi.tuna.tsinghua.edu.cn/simple "pyqt5<5.16"
pip3 install -i https://pypi.tuna.tsinghua.edu.cn/simple "pyqtwebengine<5.16"


pip3 install -i https://pypi.tuna.tsinghua.edu.cn/simple "urllib3<1.27,>=1.25.4"
pip3 uninstall pydantic
pip3 install -i https://pypi.tuna.tsinghua.edu.cn/simple "pydantic<2.0"


pip3 install -i https://pypi.tuna.tsinghua.edu.cn/simple clyent==1.2.1
pip3 install -i https://pypi.tuna.tsinghua.edu.cn/simple PyYAML==6.0.1


conda update -c conda-forge "pydantic<2.0"

conda update
conda uninstall pydantic
brew和webui相关(webui最后还是没能跑起来)
另一种策略,暂时不用
sudo apt-get install -y build-essential curl git m4 python-setuptools ruby texinfo libbz2-dev libcurl4-openssl-dev libexpat-dev libncurses-dev zlib1g-dev
apt-get install libgl1-mesa-glx libegl1-mesa libxrandr2 libxrandr2 libxss1 libxcursor1 libxcomposite1 libasound2 libxi6 libxtst6
安装 brew
sudo apt-get install -y build-essential procps curl file git
# 从阿里云下载安装脚本并安装 Homebrew
git clone https://mirrors.aliyun.com/homebrew/install.git brew-install
/bin/bash brew-install/install.sh
rm -rf brew-install

# 也可从 GitHub 获取官方安装脚本安装 Homebrew
/bin/bash -c "$(curl -fsSL https://github.com/Homebrew/install/raw/master/install.sh)"

brew替换源
# 永久替换

# bash 用户
echo 'export HOMEBREW_API_DOMAIN="https://mirrors.aliyun.com/homebrew-bottles/api"' >> ~/.bash_profile
echo 'export HOMEBREW_BREW_GIT_REMOTE="https://mirrors.aliyun.com/homebrew/brew.git"' >> ~/.bash_profile
echo 'export HOMEBREW_CORE_GIT_REMOTE="https://mirrors.aliyun.com/homebrew/homebrew-core.git"' >> ~/.bash_profile
echo 'export HOMEBREW_BOTTLE_DOMAIN="https://mirrors.aliyun.com/homebrew/homebrew-bottles"' >> ~/.bash_profile
source ~/.bash_profile
brew update


brew常用指令
brew search python 查找

brew install node@20 python@3.11 go cmake gcc
brew install node@20 python@3.11 go cmake gcc
brew search pipx

brew link node@20
brew link python3

brew link python@3.11
brew link python

python3 --version

>>> brew install python@3.11
>>> brew unlink python@3.10
>>> brew link node@20

修改gcc软件版本优先级
sudo update-alternatives --install /usr/bin/gcc gcc /home/linuxbrew/.linuxbrew/bin/gcc-13 70
sudo update-alternatives --install /usr/bin/g++ g++ /home/linuxbrew/.linuxbrew/bin/g++-13 70

sudo update-alternatives --install /usr/bin/gcc gcc /home/linuxbrew/.linuxbrew/bin/gcc-13 70
sudo update-alternatives --install /usr/bin/g++ g++ /home/linuxbrew/.linuxbrew/bin/g++-13 70

使用pip3更新时,可能出错
可以尝试删除指定目录下文件
mv /home/linuxbrew/.linuxbrew/Cellar/python@3.12/3.12.2_1/lib/python3.12/EXTERNALLY-MANAGED ~


openwebui源码安装说明
https://docs.openwebui.com/getting-started/

git clone https://github.com/open-webui/open-webui.git
cd open-webui/

# Copying required .env file
cp -RPp .env.example .env

# Building Frontend Using Node
npm i
npm run build

# Serving Frontend with the Backend
cd ./backend
pip3 install -r requirements.txt -U
bash start.sh

可以使用国内的源,速度会更快
pip3 install -r requirements.txt -U -i https://pypi.tuna.tsinghua.edu.cn/simple

开启
https://docs.openwebui.com/getting-started/

docker run -d -p 3000:8080 -e OLLAMA_API_BASE_URL=https://127.0.0.1/api -v open-webui:/app/backend/data --name open-webui --restart always ghcr.io/open-webui/open-webui:main

docker run -d -p 3000:8080 -e OLLAMA_API_BASE_URL=https://example.com/api -v open-webui:/app/backend/data --name open-webui --restart always ghcr.io/open-webui/open-webui:main

docker run -d -p 3000:8080 -e OLLAMA_BASE_URL=https://example.com -v open-webui:/app/backend/data --name open-webui --restart always ghcr.io/open-webui/open-webui:main


一些报错的处理

ERROR: pip's dependency resolver does not currently take into account all the packages that are installed. This behaviour is the source of the following dependency conflicts.
tables 3.8.0 requires blosc2~=2.0.0, which is not installed.
tables 3.8.0 requires cython>=0.29.21, which is not installed.
spyder 5.4.3 requires pyqt5<5.16, which is not installed.
spyder 5.4.3 requires pyqtwebengine<5.16, which is not installed.
conda-repo-cli 1.0.75 requires requests_mock, which is not installed.
botocore 1.29.76 requires urllib3<1.27,>=1.25.4, but you have urllib3 2.2.1 which is incompatible.
anaconda-cloud-auth 0.1.3 requires pydantic<2.0, but you have pydantic 2.6.3 which is incompatible.
conda-repo-cli 1.0.75 requires clyent==1.2.1, but you have clyent 1.2.2 which is incompatible.
conda-repo-cli 1.0.75 requires PyYAML==6.0.1, but you have pyyaml 6.0 which is incompatible.


pip3 install -i https://pypi.tuna.tsinghua.edu.cn/simple requests_mock
pip3 install -i https://pypi.tuna.tsinghua.edu.cn/simple blosc2~=2.0.0
pip3 install -i https://pypi.tuna.tsinghua.edu.cn/simple cython>=0.29.21

pip3 install -i https://pypi.tuna.tsinghua.edu.cn/simple "pyqt5<5.16"
pip3 install -i https://pypi.tuna.tsinghua.edu.cn/simple "pyqtwebengine<5.16"


pip3 install -i https://pypi.tuna.tsinghua.edu.cn/simple "urllib3<1.27,>=1.25.4"
pip3 uninstall pydantic
pip3 install -i https://pypi.tuna.tsinghua.edu.cn/simple "pydantic<2.0"


pip3 install -i https://pypi.tuna.tsinghua.edu.cn/simple clyent==1.2.1
pip3 install -i https://pypi.tuna.tsinghua.edu.cn/simple PyYAML==6.0.1


conda update -c conda-forge "pydantic<2.0"

conda update
conda uninstall pydantic
git clone https://github.com/THUDM/GLM-4-Voice.git
conda install -i https://mirrors.tuna.tsinghua.edu.cn/pypi/web/simple -r requirements.txt
# git 模型下载,请确保已安装 git-lfs
git clone https://hf-mirror.com/THUDM/glm-4-voice-decoder.git
GIT_CLONE_PROTECTION_ACTIVE=false git clone https://hf-mirror.com/THUDM/glm-4-voice-decoder


WslRegisterDistribution failed with error: 0x800701bc

wsl --update
dism.exe /online /enable-feature /featurename:Microsoft-Windows-Subsystem-Linux /all /norestart
dism.exe /online /enable-feature /featurename:VirtualMachinePlatform /all /norestart
wsl --set-default-version 2

 浙公网安备 33010602011771号