
linux从0开始移植lvgl图形库 win运行lvgl lvgl的makefile体系
lvgl遵循 MIT 协议,作者保留著作权,使用者随意修改
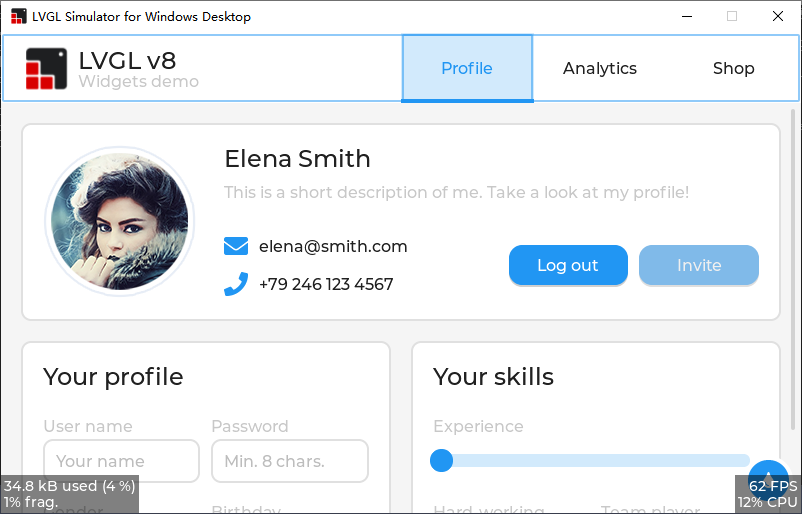
win使用vs2019运行lvgl
git clone https://github.com/lvgl/lv_port_win_visual_studio.git
下载完毕后进入 lv_port_win_visual_studio/LVGL.Simulator/ 文件夹, 其中还有几个文件需要下载
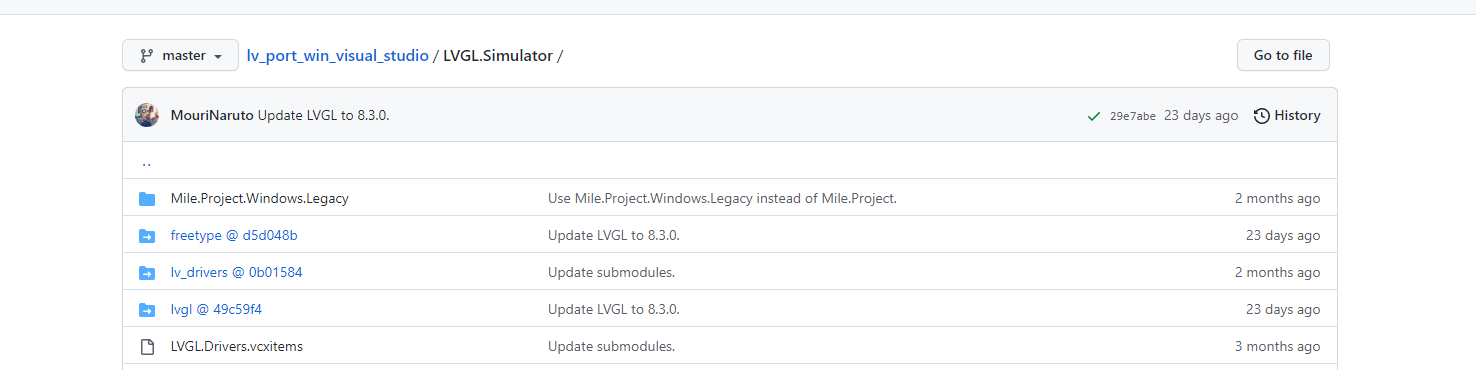
git clone https://github.com/freetype/freetype.git
git clone https://github.com/lvgl/lv_drivers.git
git clone https://github.com/lvgl/lvgl.git
运行选择x86

linux移植,先下载文件,文件下载完毕后注意名字 修改为 lvgl 和 lv_drivers
1 下载lvgl Releases · lvgl/lvgl · GitHub https://github.com/lvgl/lvgl/releases
git clone https://github.com/lvgl/lvgl.git
2 下载lvgl_driver GitHub - lvgl/lv_drivers: TFT and touch pad drivers for LVGL embedded GUI library https://github.com/lvgl/lv_drivers
git clone https://github.com/lvgl/lv_drivers.git
3 根据说明,复制 相关文件
cp ./lvgl/lv_conf_template.h lv_conf.h
cp ./lv_drivers/lv_drv_conf_template.h lv_drv_conf.h
4 创建 main.c 文件,此处借用 韦东山老师的百问网相关资料的 demo 注意修改自己屏幕的大小
#include <unistd.h>
#include <time.h>
#include <sys/time.h>


#include "lvgl/lvgl.h"
#include "lv_drivers/display/fbdev.h"
#include "lv_drivers/indev/evdev.h"


#define SCREEN_WIDTH  1280
#define SCREEN_HEIGHT 800

#define DISP_BUF_SIZE (SCREEN_WIDTH/2 * SCREEN_HEIGHT/2)


//事件demo
#if 1
static void my_event_cb(lv_event_t * e)
{
    lv_obj_t * obj = lv_event_get_target(e);        // 获取触发事件的部件(对象)
    lv_event_code_t code = lv_event_get_code(e);    // 获取当前部件(对象)触发的事件代码
    lv_obj_t * label = (lv_obj_t*)lv_event_get_user_data(e);   // 获取添加事件时传递的用户数据

    switch(code){
        case LV_EVENT_PRESSED:
            lv_label_set_text(label, "LV_EVENT_PRESSED");
            lv_obj_set_style_bg_color(obj, lv_color_hex(0xc43e1c), 0);  // 通过本地样式(私有样式)设置背景色
            printf("LV_EVENT_PRESSED\n");
            break;
        case LV_EVENT_LONG_PRESSED:
            lv_label_set_text(label, "LV_EVENT_LONG_PRESSED");
            lv_obj_set_style_bg_color(obj, lv_color_hex(0x4cbe37), 0);  // 通过本地样式(私有样式)设置背景色
            printf("LV_EVENT_LONG_PRESSED\n");
            break;
        default:
            //printf("NONE\n");
            break;
    }
}

void lv_100ask_demo_course_2_2_6(void)
{
    /* 创建基础部件(对象) */
    lv_obj_t * obj = lv_obj_create(lv_scr_act());

    /* 创建label部件(对象) */
    lv_obj_t * label = lv_label_create(lv_scr_act());
    lv_label_set_text(label, "test");   // 设置label展示的文字
    lv_obj_center(label);               // 将对象与其父对象的中心对齐,这里的父对象是屏幕:lv_scr_act()

    // 为obj1添加事件回调函数,所有的事件类型都能触发该回调函数
    lv_obj_add_event_cb(obj, my_event_cb, LV_EVENT_ALL, label);
}
#endif // 0


int main(void)
{
    /*LittlevGL init*/
    lv_init();

    /*Linux frame buffer device init*/
    fbdev_init();

    /*A small buffer for LittlevGL to draw the screen's content*/
    static lv_color_t buf[DISP_BUF_SIZE];

    /*Initialize a descriptor for the buffer*/
    static lv_disp_draw_buf_t disp_buf;
    lv_disp_draw_buf_init(&disp_buf, buf, NULL, DISP_BUF_SIZE);

    /*Initialize and register a display driver*/
    static lv_disp_drv_t disp_drv;
    lv_disp_drv_init(&disp_drv);
    disp_drv.draw_buf   = &disp_buf;
    disp_drv.flush_cb   = fbdev_flush;
    disp_drv.hor_res    = SCREEN_WIDTH;
    disp_drv.ver_res    = SCREEN_HEIGHT;

    disp_drv.full_refresh = 1;

    /*Rotate */
    int RotateTest = 0;
    if(RotateTest>0){
      disp_drv.sw_rotate = 1;  disp_drv.rotated = LV_DISP_ROT_90;
    }

    lv_disp_drv_register(&disp_drv);

    /* Linux input device init */
    evdev_init();

    /* Initialize and register a display input driver */
    static lv_indev_drv_t indev_drv;
    lv_indev_drv_init(&indev_drv);      /*Basic initialization*/

    indev_drv.type = LV_INDEV_TYPE_POINTER;
    indev_drv.read_cb = evdev_read;
    indev_drv.feedback_cb = NULL;
    lv_indev_t * mouse_indev = lv_indev_drv_register(&indev_drv);

    /*Set a cursor for the mouse*/
    //LV_IMG_DECLARE(mouse_cursor_icon)
    lv_obj_t * cursor_obj = lv_img_create(lv_scr_act()); /*Create an image object for the cursor */
    //lv_img_set_src(cursor_obj, &mouse_cursor_icon);           /*Set the image source*/
    lv_img_set_src(cursor_obj, LV_SYMBOL_OK);
    lv_indev_set_cursor(mouse_indev, cursor_obj);             /*Connect the image  object to the driver*/


    /*Create a Demo*/
    lv_100ask_demo_course_2_2_6();


    /*Handle LitlevGL tasks (tickless mode)*/
    while(1) {
        lv_task_handler();
        usleep(5000);
    }

    return 0;
}


/*Set in lv_conf.h as `LV_TICK_CUSTOM_SYS_TIME_EXPR`*/
uint32_t custom_tick_get(void)
{
    static uint64_t start_ms = 0;
    if(start_ms == 0) {
        struct timeval tv_start;
        gettimeofday(&tv_start, NULL);
        start_ms = (tv_start.tv_sec * 1000000 + tv_start.tv_usec) / 1000;
    }

    struct timeval tv_now;
    gettimeofday(&tv_now, NULL);
    uint64_t now_ms;
    now_ms = (tv_now.tv_sec * 1000000 + tv_now.tv_usec) / 1000;

    uint32_t time_ms = now_ms - start_ms;
    return time_ms;
}
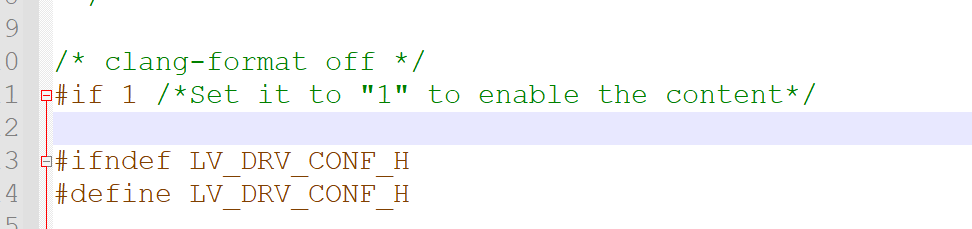
5 修改 lv_conf.h 文件 #if 0 修改为 #if 1 LV_COLOR_DEPTH 注意修改 与自己屏幕配合一致,不然渲染会出错


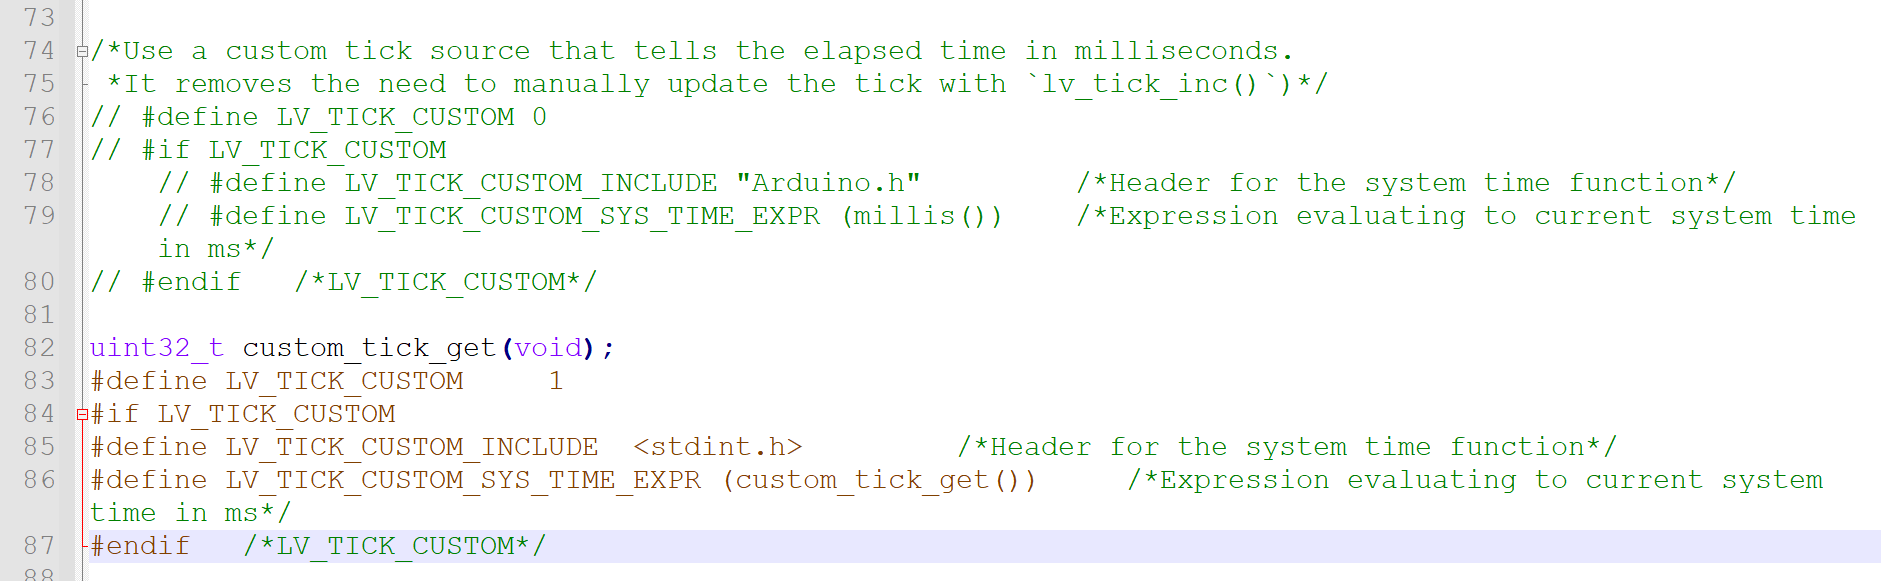
修改默认的定时器任务
uint32_t custom_tick_get(void);
#define LV_TICK_CUSTOM     1
#if LV_TICK_CUSTOM
#define LV_TICK_CUSTOM_INCLUDE  <stdint.h>         /*Header for the system time function*/
#define LV_TICK_CUSTOM_SYS_TIME_EXPR (custom_tick_get())     /*Expression evaluating to current system time in ms*/
#endif   /*LV_TICK_CUSTOM*/
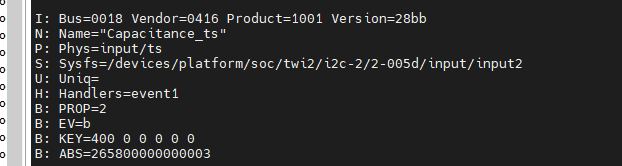
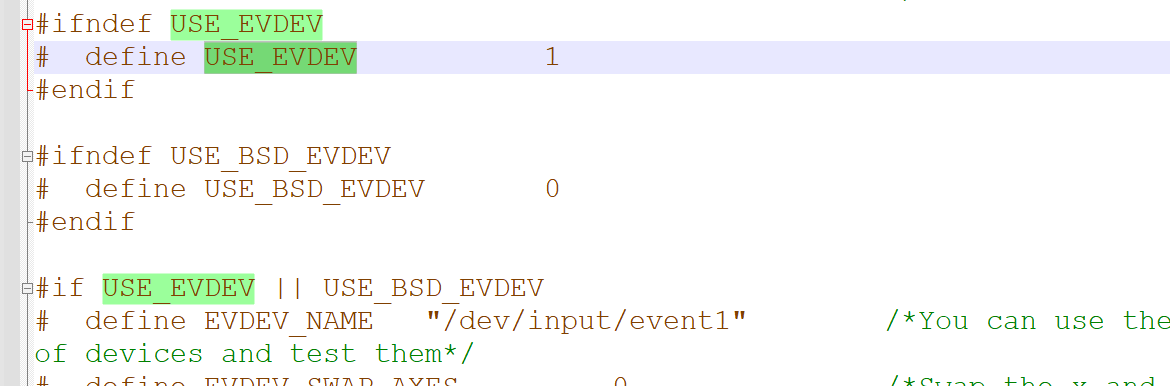
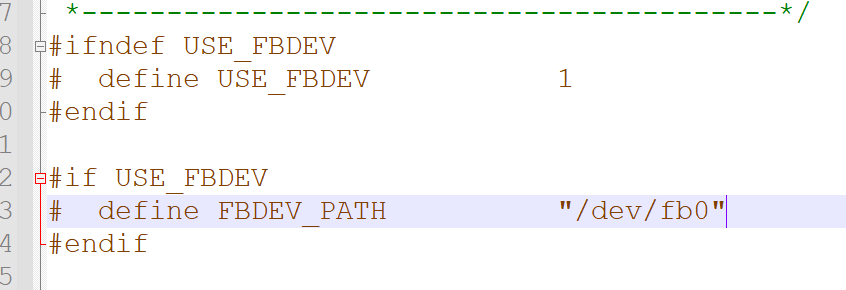
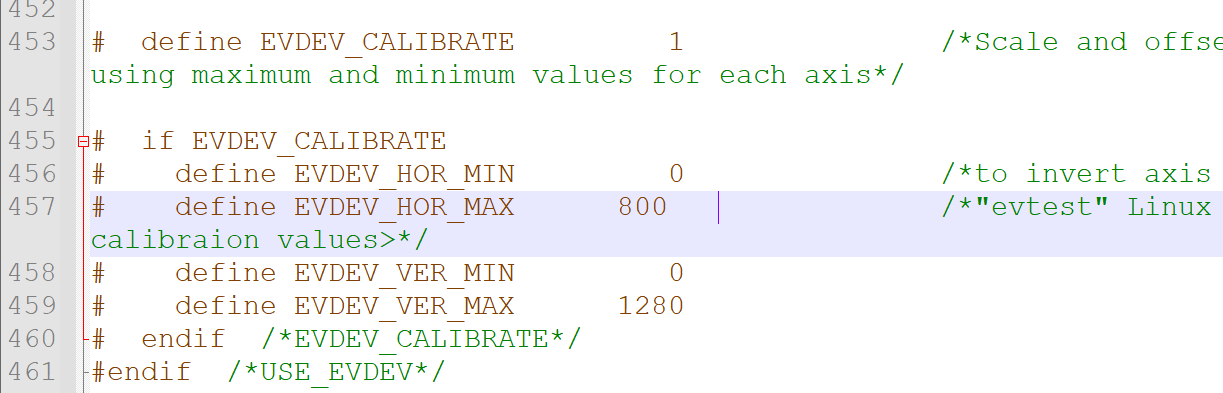
6 修改 lv_drv_conf.h #if 0 修改为 #if 1 修改宏定义 USE_EVDEV 修改为 1 并指定 触摸屏设备 修改 USE_FBDEV 修改为 1 有多块屏幕时,还需要指定 FBDEV_PATH
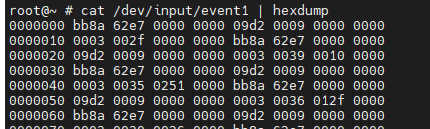
在linux开发板中 cat /proc/bus/input/devices 指令可以获取当前连入设备 使用 cat /dev/input/event1 | hexdump 可以监控事件信息
如果触摸边界不一致,需要纠偏的话,就需要使用宏定义 EVDEV_CALIBRATE
7 制作Makefile 文件 Makefile 注意 CC 修改为自己的编译器
#
# Makefile
#
# ⭐全速编译命令: make clean && make -j$(nproc)
# := 就地解析赋值  = 最后一次赋值  ?= 未赋值时赋值   += 接续赋值
CC := aarch64-linux-gnu-gcc
# CC := gcc
LVGL_DIR_NAME ?= lvgl
LVGL_DIR ?= ${shell pwd}

WARNINGS = -Wall -Wextra \
           -Wshadow -Wundef -Wmaybe-uninitialized -Wmissing-prototypes -Wpointer-arith -Wuninitialized \
           -Wunreachable-code -Wreturn-type -Wmultichar -Wdouble-promotion -Wclobbered -Wdeprecated  \
           -Wempty-body -Wtype-limits -Wsizeof-pointer-memaccess

CFLAGS ?= -O3 -g0 $(WARNINGS) -I$(LVGL_DIR)/$(LVGL_DIR_NAME) -I$(LVGL_DIR) -I.

LDFLAGS ?= -lm


BIN = jclvgldemo
OUTPUT = ./output


#Collect the files to compile
MAINSRC = ./main.c

include $(LVGL_DIR)/lvgl/lvgl.mk
include $(LVGL_DIR)/lv_drivers/lv_drivers.mk

# CSRCS +=$(LVGL_DIR)/mouse_cursor_icon.c

OBJEXT ?= .o

AOBJS = $(ASRCS:.S=$(OBJEXT))
COBJS = $(CSRCS:.c=$(OBJEXT))

MAINOBJ = $(MAINSRC:.c=$(OBJEXT))

SRCS = $(ASRCS) $(CSRCS) $(MAINSRC)
OBJS = $(AOBJS) $(COBJS)

## MAINOBJ -> OBJFILES

## cp demo ~/Xilinx/ZCTC/rootfs/root/
all: default

%.o: %.c
    @$(CC)  $(CFLAGS) -c $< -o $@
    @echo "CC $<"

default: $(AOBJS) $(COBJS) $(MAINOBJ)
    $(CC) -o $(BIN) $(MAINOBJ) $(AOBJS) $(COBJS) $(LDFLAGS)
    @echo finished $(BIN)
    mkdir -p $(OUTPUT) $(LVGL_DIR)/obj $(LVGL_DIR)/bin/
    cp $(BIN) $(OUTPUT)
    mv *.o $(LVGL_DIR)/obj/
    # mv $(BIN) $(LVGL_DIR)/bin/


clean:
    rm -f $(BIN) $(AOBJS) $(COBJS) $(MAINOBJ) $(LVGL_DIR)/bin/* $(LVGL_DIR)/obj/*
8 注意 evdev_read 函数,有必要的话根据自己实际使用情况修改 lv_drivers/indev/evdev.c
//printf("in.type: %d, in.code=%d, in.value=%d\n", in.type, in.code, in.value);

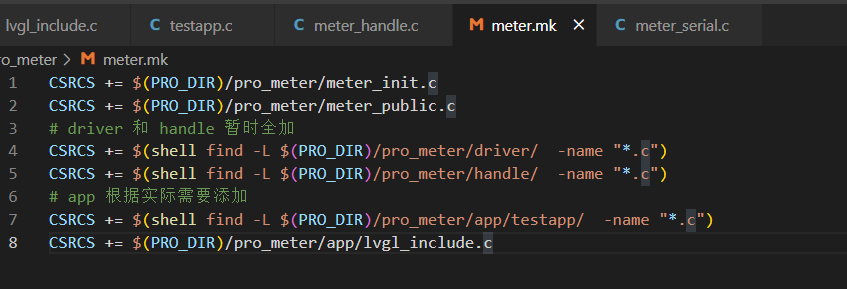
lvgl的makefile体系
lvgl的makefile整体比较简单,其中比较有意思的是包含的 include 其中大多数只包含了一句话大概如下
https://files.cnblogs.com/files/RYSBlog/00-testmakefile.zip
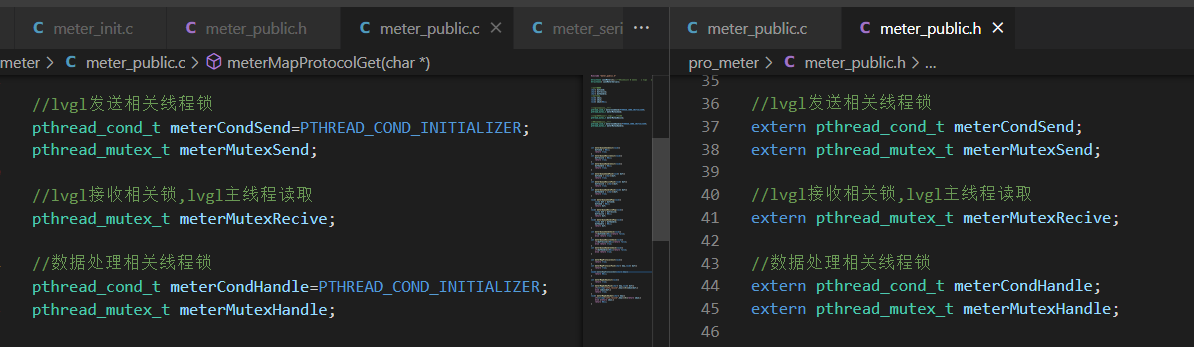
9 注意,c语言全局变量定义在.c文件中,在对应的.h文件中进行声明
//

 浙公网安备 33010602011771号