
qt qml使用踩坑指南
最近要用qt开发一个手机蓝牙app,蓝牙demo已经写好(包含客户端和服务端),过两天整理下发上来.先把qml踩的坑记录下
01 qml布局,,,,最好使用动态布局方式,头尾可以使用固定的大小,中间可以使用比例,或者全部都可以使用比例进行设计,
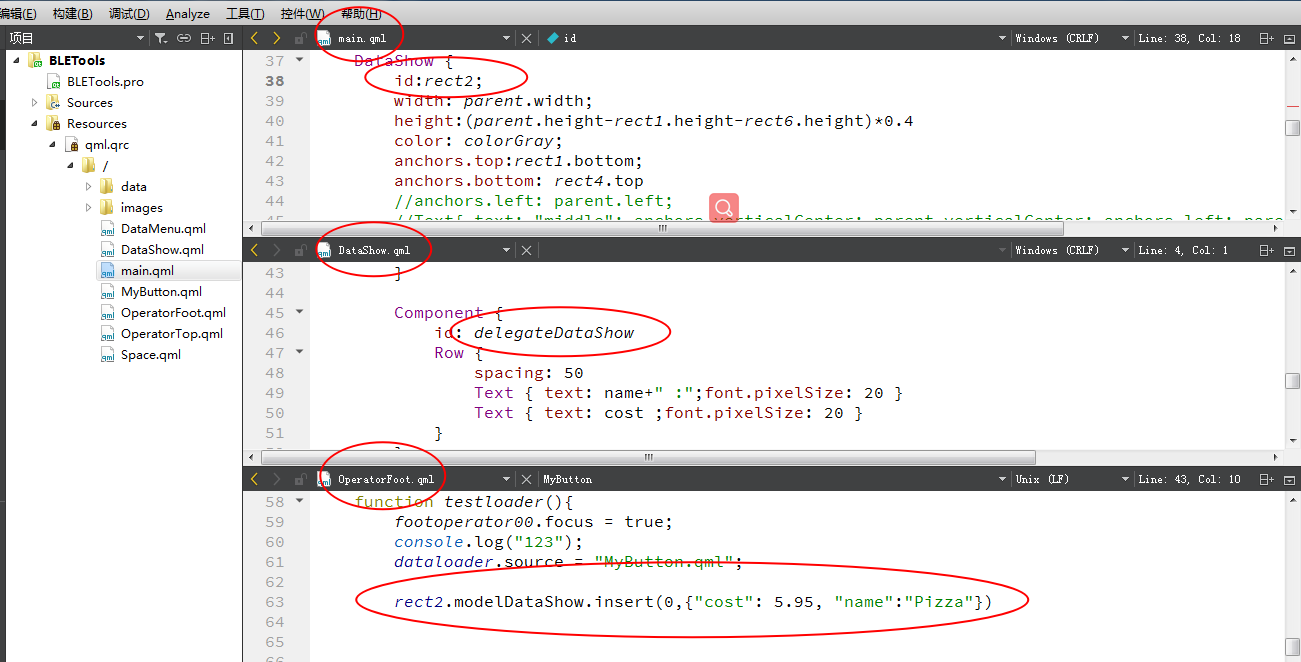
注意一点,anchors貌似不可以使用数据计算的方式,但是width和height可以 eg height:(parent.height-rect1.height-rect6.height)*0.6
02 qml制作动态按钮时候,每个按钮之间最好使用column进行隔离,按钮之间不要使用margin,,不然按钮动态效果会影响其他的按钮.动态按钮的制作如下
import QtQuick 2.12
import QtQuick.Controls 2.12

Button {
    signal buttonClick()

    id: btnmousearea00
    width: 65
    height: 40
    background: Rectangle {
        id: btnmouseareabg0011
        radius: 3
        color: "#0066FF"
    }

    MouseArea {
        anchors.fill: parent
        onPressed: {
            btnmousearea00.width = btnmousearea00.width + 7
            btnmousearea00.height = btnmousearea00.height + 5
            btnmouseareabg0011.color = "#66FF00"
        }

        onReleased: {
            btnmousearea00.width = btnmousearea00.width - 7
            btnmousearea00.height = btnmousearea00.height - 5
            btnmouseareabg0011.color = "#0066FF"

        }

        onClicked: {
            buttonClick()
        }
    }
}
按钮之间的分割如下
import QtQuick 2.12
import QtQuick.Controls 2.12

Rectangle {

    property int btnwidth: 65

    width: parent.width
    //height: 48
    color: "lightgrey"


    Text {
        id: btnmiddle00
        anchors.centerIn: parent
    }


    Column{
        width: parent.width/3
        anchors.centerIn: parent
        MyButton {
            anchors.centerIn: parent

            text: "读取"
    //                icon.name: "home"
    //                icon.color : "transparent"
    //                action: homeAction
            //font.pointSize: 16

            onClicked: console.log("123");
        }
    }

    Column{
        width: parent.width/3
        anchors.verticalCenter: btnmiddle00.verticalCenter
        anchors.right: btnmiddle00.left
        anchors.rightMargin: btnwidth/2
//        anchors.rightMargin: 10 + btnwidth/2
        MyButton {
            anchors.centerIn: parent
            text: "写入"

            //onClicked: console.log()
        }
    }
    Column{
        width: parent.width/3
        anchors.verticalCenter: btnmiddle00.verticalCenter
        anchors.left: btnmiddle00.right
        anchors.leftMargin: btnwidth/2
        MyButton {
            anchors.centerIn: parent
            text: "初始值"
        }
    }
}
03 可以自己定义一些模块之间某些信息可以使用变量传递进去,如下
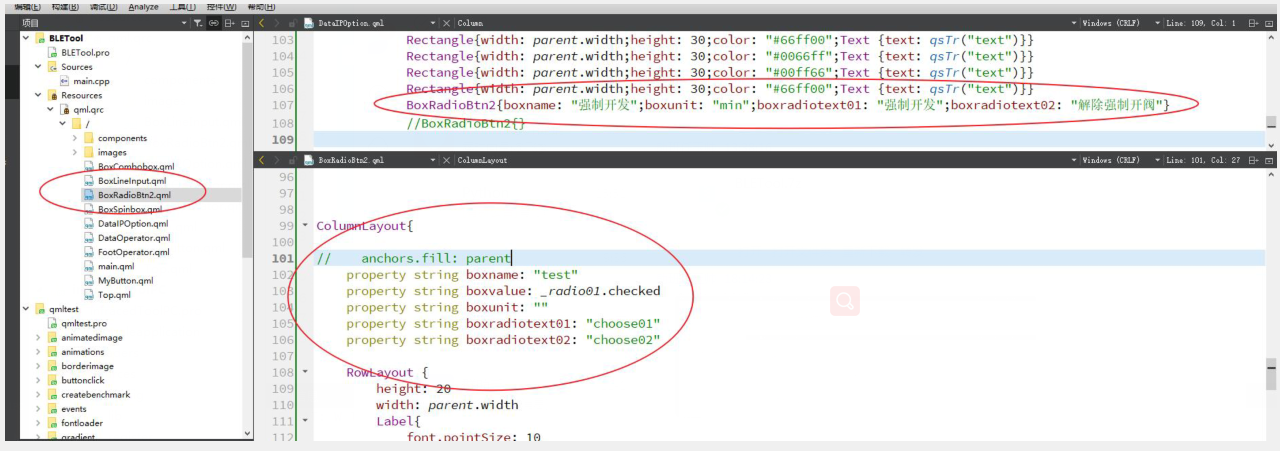
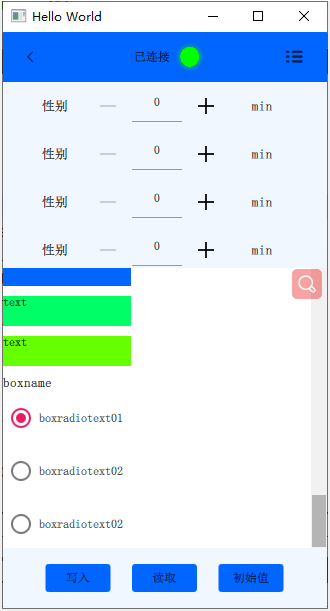
04 一个非常奇葩的bug,气的我都不想记下来,上图的BoxRadoiBtn2有个// anchors.fill:parent
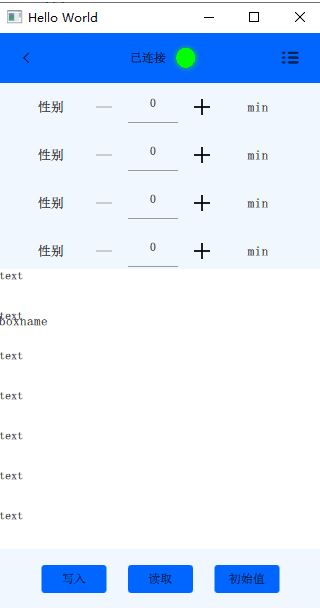
这句话看着没问题,意思是继承父类的全部空间,但是,在scrollview中就有大问题了,正常情况下,我的程序运行时这样的 (左边)
加上这一句之后,就变天了,程序就变成了这样色儿的,这玩意儿给我头疼的,整了,一下午时间就浪费在这破玩意儿上了,反反复复就是一句代码的事儿.
05 使用rectangle做测试的时候,注意父子之间一定要看一看空间关系,rectangle大小最好指定好,,最好能带上文字,因为文字一定程度上可以不受尺寸的约束
06 可以使用rectangle制作一个空格块,用来占位置,颜色使用transparent,属于透明色,宽度的话,我建议用主程序中的id,width这个参数然后乘以一定的百分比,高低1就好
使用时候可以根据需要设置宽度高度颜色,非常合适.我自己制作的如下,其中applicationwindow是主窗体id
import QtQuick 2.0
//透明的颜色,用于占空间,其中宽度可以随意更改,绝对有效,比label更稳定
Rectangle {

    //percentage是全屏宽度百分比
    property int percentage: 10

    width: percentage/100* applicationWindow.width
    height: 10
    color: "transparent"
}
07 如果在非主窗体创建的id想要随意使用,需要根据主窗体id一层一层找下去.=_=|

 浙公网安备 33010602011771号