34-Vue脚手架-组件的自定义事件(使用自定义事件优化Todo-List案例)
组件的自定义事件
1.一种组件间通信的方式,适用于 子组件 ===> 父组件(这里也可以使用 props 传递数据进行实现)
2.使用场景:A是父组件,B是子组件,B想给A传数据,那么就要在A中给B绑定自定义事件(事件的回调在A中)
3.绑定自定义事件:
1)第一种方式,在父组件中
<!--通过父组件给子组件绑定一个自定义事件实现:子给父传递数据(第一种写法,使用v-on 或 @)-->
<!--<Student v-on:malingshu="getStudentName"></Student>-->
<Student @malingshu="getStudentName" @demo="m1"></Student>

...

methods:{
    getStudentName(name){
        console.log("APP收到了学生的名字:", name)
        this.msg = name
    }
}
2)第二种方式,在父组件中
<!--通过父组件给子组件绑定一个自定义事件实现:子给父传递数据(第二种写法,使用ref属性)-->
<!--ref 在组件标签上获取的是组件实例对象-->
<!--<Student ref="student"></Student>-->

...

methods:{
    getStudentName(name){
        console.log("APP收到了学生的名字:", name)
        this.msg = name
    }
},
mounted(){
    // 获取方式:this.$refs.xxx
    // this.$refs.student.$on 绑定自定义事件
    this.$refs.student.$on("malingshu", this.getStudentName)

    // this.$refs.student.$once 绑定自定义事件(一次性)
    // this.$refs.student.$once("malingshu", this.getStudentName)
}
3)若想让自定义事件只能触发一次,可以使用once修饰符,或$once方法
4.触发自定义事件(触发第3步绑定的 "malingshu" 自定义事件)
this.$emit("malingshu", 数据)
<template>
  <div class="student">
    <button @click="sendStudentName">点击把学生名字传给APP</button>
  </div>
</template>

<script>
  export default{
    // eslint-disable-next-line vue/multi-word-component-names
    name:"School",

    methods:{

      sendStudentName(){
        // 触发Student组件实例vc上的malingshu事件,传递一个this.name参数
        this.$emit("malingshu",this.name)

        // 触发Student组件实例vc上的demo事件
        this.$emit("demo")
      }
    }
  }
</script>
5.解绑自定义事件(解绑第3步绑定的 "malingshu" 自定义事件)
this.$off("malingshu")
<template>
  <div class="student">
    <button @click="sendStudentName">点击把学生名字传给APP</button>

    <button @click="unbind">解绑事件</button>
    <button @click="death">销毁当前Student组件的实例(vc)</button>
  </div>
</template>

<script>
  export default{
    // eslint-disable-next-line vue/multi-word-component-names
    name:"School",

    methods:{

      sendStudentName(){
        // 触发Student组件实例vc上的malingshu事件,传递一个this.name参数
        this.$emit("malingshu",this.name)

        // 触发Student组件实例vc上的demo事件
        this.$emit("demo")
      },

      unbind(){
        // 解绑一个自定义事件
        this.$off("malingshu")

        // 解绑多个自定义事件
        this.$off(["malingshu","demo"])

        // 解绑所有的自定义事件
        this.$off()
      },
      death(){
        // 销毁了当前Student组件的实例
        // 这里需要注意,销毁后所有Student实例的自定义事件全都不奏效
        this.$destroy()
      },
    }
  }
</script>
6.组件上也可以绑定原生DOM事件,需要使用native修饰符
通俗点讲,就是在父组件中给子组件绑定一个原生的事件,就将子组件变成了普通的HTML标签,不加'. native'事件是无法触 发的。
7.注意:通过 this.$refs.xxx.$on("malingshu", 回调) 绑定自定义事件时,回调要么配置在 methods中,要么用箭头函数,否则 this 指向会出问题
使用自定义事件的小案例
src/components/School.vue(使用 props 实现)
<template>
  <div class="school">
    <h2>学校名称:{{name}}</h2>
    <h2>学校地址:{{address}}</h2>
    <button @click="sendSchoolName">点击把学校名字传给APP</button>
  </div>
</template>

<script>
  export default{
    // eslint-disable-next-line vue/multi-word-component-names
    name:"School",
    props:["getSchoolName"],
    data(){
      return{
        name:"马铃薯的博客园",
        address:"河北省邯郸市"
      }
    },
    methods:{
      sendSchoolName(){
        this.getSchoolName(this.name)
      }
    }
  }
</script>

<style scoped>
  .school{
    background-color: skyblue;
    padding: 5px;
  }
</style>
src/components/Student.vue(触发自定义事件 和 解绑自定义事件)
<template>
  <div class="student">
    <h2>学生姓名:{{name}}</h2>
    <h2>学生性别:{{sex}}</h2>
    <h2>当前求和为:{{number}}</h2>
    <button @click="add">点击number++</button>
    <button @click="sendStudentName">点击把学生名字传给APP</button>
    <button @click="unbind">解绑事件</button>
    <button @click="death">销毁当前Student组件的实例(vc)</button>
  </div>
</template>

<script>
  export default{
    // eslint-disable-next-line vue/multi-word-component-names
    name:"School",
    data(){
      return{
        name:"马铃薯",
        sex:"男",
        number:0
      }
    },
    methods:{
      add(){
        console.log("add回调被调用了")
        this.number++
      },
      sendStudentName(){
        // 触发Student组件实例vc上的malingshu事件,传递一个this.name参数
        this.$emit("malingshu",this.name)

        // 触发Student组件实例vc上的demo事件
        this.$emit("demo")
      },
      unbind(){
        // 解绑一个自定义事件
        this.$off("malingshu")

        // 解绑多个自定义事件
        this.$off(["malingshu","demo"])

        // 解绑所有的自定义事件
        this.$off()
      },
      death(){
        // 销毁了当前Student组件的实例
        // 这里需要注意,销毁后所有Student实例的自定义事件全都不奏效
        this.$destroy()
      },

    }
  }
</script>

<style scoped>
  .student{
    background-color: pink;
    padding: 5px;
    margin-top: 30px;
  }
</style>
src/App.vue(绑定自定义事件 malingshu )
<template>
  <div class="app">
    <h1>{{msg}}</h1>
    <!--通过父组件给子组件传递函数类型的props实现:子给父传递数据-->
    <School :getSchoolName="getSchoolName"></School>

    <!--通过父组件给子组件绑定一个自定义事件实现:子给父传递数据(第一种写法,使用v-on 或 @)-->
    <!--<Student v-on:malingshu="getStudentName"></Student>-->
    <Student @malingshu="getStudentName" @demo="m1"></Student>

    <!--通过父组件给子组件绑定一个自定义事件实现:子给父传递数据(第二种写法,使用ref属性)-->
    <!--ref 在组件标签上获取的是组件实例对象-->
    <!--<Student ref="student"></Student>-->
  </div>
</template>

<script>
  import Student from "@/components/Student.vue";
  import School from "@/components/School.vue"

  export default{
    name:"App",
    data(){
      return{
        msg:"你好啊"
      }
    },
    components:{
      Student:Student,
      School:School
    },
    methods:{
      getSchoolName(name){
        console.log("APP收到了学校的名字:", name)
        this.msg = name
      },
      getStudentName(name){
        console.log("APP收到了学生的名字:", name)
        this.msg = name
      },
      m1(){
        console.log("demo事件被触发了")
      }
    },
    // mounted(){
    //   // 获取方式:this.$refs.xxx
    //   // this.$refs.student.$on 绑定自定义事件
    //   this.$refs.student.$on("malingshu", this.getStudentName)
    //
    //   // this.$refs.student.$once 绑定自定义事件(一次性)
    //   // this.$refs.student.$once("malingshu", this.getStudentName)
    // }
  }
</script>

<style>
 .app{
   background-color: gray;
   padding: 5px;
 }
</style>
src/main.js
import Vue from "vue"
import App from "./App.vue"

// 阻止 vue 在启动时生成生产提示
Vue.config.productionTip = false

new Vue({
    el:"#app",
    render:h => h(App)
})
使用自定义事件优化Todo-List案例(将使用 props 传递数据进行实现 子组件 ===> 父组件,改为使用自定义事件实现)
src/components/UserHeader.vue(触发自定义事件 addTodo)
<template>
  <div class="todo-header">
    <input
        type="text"
        placeholder="请输入你的任务名称,按回车键确认"
        v-model="title"
        @keyup.enter="add"
    />
  </div>
</template>

<script>

// ID 生成器库
import { nanoid } from "nanoid";

export default {
  name: "UserHeader",
  data() {
    return {
      title: "",
    };
  },

  // 接收来自App的addTodo方法
  // props: ["addTodo"],  // 注意,这里不需要通过 props 传递数据,因此也就不需要 props 在子组件接收数据了

  methods: {
    add() {
      // 校验数据
      if (!this.title.trim()) return alert("输入不能为空");
      // 将用户的输入包装成一个对象
      const todoObj = { id: nanoid(), title: this.title, done: false };
      console.log(todoObj)

      // 调用来自App的addTodo方法,通知App组件去添加一个对象
      // this.addTodo(todoObj);

      // 触发UserHeader组件实例vc上的自定义事件addTodo,传递一个todoObj对象
      this.$emit("addTodo", todoObj)

      // 清空输入
      this.title = "";
    },
  },
};
</script>

<style scoped>
/*header*/
.todo-header input {
  width: 560px;
  height: 28px;
  font-size: 14px;
  border: 1px solid #ccc;
  border-radius: 4px;
  padding: 4px 7px;
}

.todo-header input:focus {
  outline: none;
  border-color: rgba(82, 168, 236, 0.8);
  box-shadow: inset 0 1px 1px rgba(0, 0, 0, 0.075),
  0 0 8px rgba(82, 168, 236, 0.6);
}
</style>
src/components/UserList.vue(无变动)
<template>
  <ul class="todo-main">
    <!--根据todos数据,进行遍历-->
    <UserItem
        v-for="todoObj in todos"
        :key="todoObj.id"
        :todo="todoObj"
        :checkTodo="checkTodo"
        :deleteTodo="deleteTodo"
    ></UserItem>
  </ul>
</template>

<script>
import UserItem from "./UserItem.vue";
export default {
  name: "UserList",
  components: {
    UserItem,
  },

  // 接收来自App的数据
  props: ["todos", "checkTodo",'deleteTodo'],
};
</script>

<style scoped>
/*main*/
.todo-main {
  margin-left: 0px;
  border: 1px solid #ddd;
  border-radius: 2px;
  padding: 0px;
}

.todo-empty {
  height: 40px;
  line-height: 40px;
  border: 1px solid #ddd;
  border-radius: 2px;
  padding-left: 5px;
  margin-top: 10px;
}
</style>
src/components/UserItem.vue(无变动)
<template>
  <li>
    <label>
      <input type="checkbox" :checked="todo.done" @change="handleCheck(todo.id)"/>
      <!--如下代码也能实现功能,但不推荐,违反修改props的原则-->
      <!--<input type="checkbox" v-model="todo.done" @change="handleCheck(todo.id)"/>-->
      <span>{{todo.title}}</span>
    </label>
    <button class="btn btn-danger" @click="handleDelete(todo.id)">删除</button>
  </li>
</template>

<script>
export default {
  name: "UserItem",
  //声明接收对象
  props: ["todo", "checkTodo", "deleteTodo"],

  // mounted() {
  //   console.log(this.todo)
  // }

  methods: {
    //勾选or取消勾选
    handleCheck(id) {
      console.log("勾选或取消勾选,id:",id)
      this.checkTodo(id);
    },
    //删除
    handleDelete(id) {
      if (confirm("确定删除吗")) {
        console.log("删除,id:",id)
        this.deleteTodo(id);
      }
    },
  },
};
</script>

<style scoped>
  /*item*/
  li {
    list-style: none;
    height: 36px;
    line-height: 36px;
    padding: 0 5px;
    border-bottom: 1px solid #ddd;
  }

  li label {
    float: left;
    cursor: pointer;
  }

  li label li input {
    vertical-align: middle;
    margin-right: 6px;
    position: relative;
    top: -1px;
  }

  li button {
    float: right;
    display: none;
    margin-top: 3px;
  }

  li:before {
    content: initial;
  }

  li:last-child {
    border-bottom: none;
  }

  li:hover {
    background-color: #ddd;
  }

  li:hover button {
    display: block;
  }
</style>
src/components/UserFooter.vue(触发自定义事件 checkAllTodo 和 clearAllTodo)
<template>
  <!-- v-show="total" 当total为0时,返回false,页面不显示,当total为非0时,返回true,页面显示-->
  <div class="todo-footer" v-show="total">
    <label>
      <!--<input type="checkbox" :checked="isAll" @change="checkAll" />-->
      <!--为什么可以用v-model,这是因为绑定的是计算属性isAll,没有修改props的值-->
      <input type="checkbox" v-model="isAll"/>
    </label>
    <span>
      <span>已完成{{ doneTotal }}</span> / 全部{{ total }}
    </span>
    <button class="btn btn-danger" @click="clearAll">清除已完成任务</button>
  </div>

</template>

<script>

// import { computed } from "vue";

export default {
  name: "UserFooter",

  // props: ["todos", "checkAllTodo", "clearAllTodo"],
  // 注意,这里不需要通过 props 传递"checkAllTodo", "clearAllTodo"数据,因此也就不需要 props 在子组件接收数据了
  props: ["todos"],

  methods: {
    // checkAll(e) {
    //   console.log("@checkAll",e.target.checked)
    //   this.checkAllTodo(e.target.checked);
    // },
    clearAll() {
      // this.clearAllTodo();
      // 触发UserFooter组件实例vc上的自定义事件clearAllTodo
      this.$emit("checkAllTodo")
    },
  },
  computed: {
    total() {
      return this.todos.length;
    },
    doneTotal() {
      // 1.遍历列表的方法
      // let i = 0
      // this.todos.forEach((todo)=>{
      //   if(todo.done === true) i++
      // });
      // return i

      // 2.reduce()方法,对数组中的每个元素按序执行一个提供的 reducer 函数,将其结果汇总为单个返回值
      //   const x = this.todos.reduce((pre, current) => {
      //     console.log("@",pre)
      //     return pre + (current.done ? 1 : 0);
      //   }, 0);
      //   return x;

      return this.todos.reduce(
          (pre, current) => pre + (current.done ? 1 : 0),
          0
      );
    },

    // isAll() {
    //   // 判断已完成 / 全部 前面的复选框够不够,取决于已完成的个数是否等于全部的个数
    //   return this.doneTotal === this.total && this.total > 0;
    // },

    // 计算属性 isAll 的完整写法
    isAll:{
      get(){
        console.log("@isAll 的 get",this.doneTotal === this.total && this.total > 0)
        return this.doneTotal === this.total && this.total > 0;
      },
      set(value){
        console.log("@isAll 的 set",value)
        // this.checkAllTodo(value)
        // 触发UserFooter组件实例vc上的自定义事件checkAllTodo,传递一个value数据
        this.$emit("checkAllTodo", value)
      }
    }
  },
};
</script>

<style scoped>
  /*footer*/
  .todo-footer {
    height: 40px;
    line-height: 40px;
    padding-left: 6px;
    margin-top: 5px;
  }

  .todo-footer label {
    display: inline-block;
    margin-right: 20px;
    cursor: pointer;
  }

  .todo-footer label input {
    position: relative;
    top: -1px;
    vertical-align: middle;
    margin-right: 5px;
  }

  .todo-footer button {
    float: right;
    margin-top: 5px;
  }
</style>
src/App.vue
将使用 props 传递数据进行实现 子组件 ===> 父组件的函数,使用自定义事件实现(绑定自定义事件 addTodo、checkAllTodo 和 clearAllTodo )
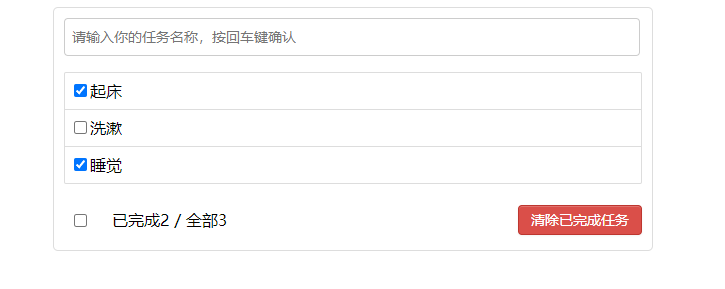
<template>
  <div id="root">
    <div class="todo-container">
      <div class="todo-wrap">
        <!--动态绑定函数,在父组件定义一个函数,子组件调用该函数,父组件就可以收到子组件传过来的参数 :addTodo="addTodo"-->
        <!--<UserHeader :addTodo="addTodo"></UserHeader>-->
        <!--使用自定义事件优化,通过父组件给子组件绑定一个自定义事件实现:子给父传递数据(第一种写法,使用v-on 或 @)-->
        <UserHeader @addTodo="addTodo"></UserHeader>

        <UserList
            :todos="todos"
            :checkTodo="checkTodo"
            :deleteTodo="deleteTodo"
        ></UserList>

        <!--<UserFooter :todos="todos" :checkAllTodo="checkAllTodo" :clearAllTodo="clearAllTodo"></UserFooter>-->
        <!--使用自定义事件优化,通过父组件给子组件绑定一个自定义事件实现:子给父传递数据(第一种写法,使用v-on 或 @)-->
        <!--这里注意,:todos="todos" 动态绑定的是一个数组数据,而不是 子组件 ===> 父组件 所用的函数-->
        <UserFooter :todos="todos" @checkAllTodo="checkAllTodo" @clearAllTodo="clearAllTodo"></UserFooter>

      </div>
    </div>
  </div>
</template>

<script>
import UserHeader from "./components/UserHeader.vue";
import UserList from "./components/UserList.vue";
import UserFooter from "./components/UserFooter.vue";

export default {
  name: "App",
  components: {
    UserHeader,
    UserList,
    UserFooter,
  },
  data() {
    return {
      todos: [
        { id: "001", title: "起床", done: true },
        { id: "002", title: "洗漱", done: false },
        { id: "003", title: "睡觉", done: true },
      ],
    };
  },
  methods: {
    // 添加一个todo
    addTodo(todoObj) {
      console.log("我是APP组件,我收到了数据:",todoObj)
      // unshift() 在数组头部添加元素
      this.todos.unshift(todoObj);
    },
    // 勾选or取消勾选一个todo
    checkTodo(id) {
      // forEach() 方法用于调用数组的每个元素,并将元素传递给回调函数
      this.todos.forEach((todo) => {
        // 将tudo的done属性进行取反
        if (todo.id === id) todo.done = !todo.done;
      });
    },
    // 删除一个
    deleteTodo(id) {
      // 数组.filter() 实现数组的过滤,创建一个新数组, 其包含通过所提供函数实现的测试的所有元素
      // 过滤出,todo.id 不是 id 的数据
      this.todos = this.todos.filter((todo) => todo.id !== id);
    },
    // 全选or全不选
    checkAllTodo(done) {
      // forEach() 方法用于调用数组的每个元素,并将元素传递给回调函数
      this.todos.forEach((todo) => {
        todo.done = done;
      });
    },
    //清除所有已经完成的任务
    clearAllTodo() {
     if(confirm("确认删除所有已完成的任务吗")){
       // 数组.filter() 实现数组的过滤,创建一个新数组, 其包含通过所提供函数实现的测试的所有元素
       // 过滤出,todo.done 还没完成 的数据
       // this.todos = this.todos.filter((todo) => todo.done == false);
       this.todos = this.todos.filter((todo) => !todo.done);
     }
    },
  },
};
</script>

<style>
/*base*/
body {
  background: #fff;
}

.btn {
  display: inline-block;
  padding: 4px 12px;
  margin-bottom: 0;
  font-size: 14px;
  line-height: 20px;
  text-align: center;
  vertical-align: middle;
  cursor: pointer;
  box-shadow: inset 0 1px 0 rgba(255, 255, 255, 0.2),
  0 1px 2px rgba(0, 0, 0, 0.05);
  border-radius: 4px;
}

.btn-danger {
  color: #fff;
  background-color: #da4f49;
  border: 1px solid #bd362f;
}

.btn-danger:hover {
  color: #fff;
  background-color: #bd362f;
}

.btn:focus {
  outline: none;
}

.todo-container {
  width: 600px;
  margin: 0 auto;
}
.todo-container .todo-wrap {
  padding: 10px;
  border: 1px solid #ddd;
  border-radius: 5px;
}
</style>

 浙公网安备 33010602011771号