windows平台vs2022编译boost小记
前言
- Boost 版本: boost_1_70_0
- 编译器选择: MSVC 14.41(对应 VS2022)
- 主要参考文章: https://blog.csdn.net/ljjjjjjjjjjj/article/details/122312270
详细步骤
1. 确认 MSVC 编译器版本与路径
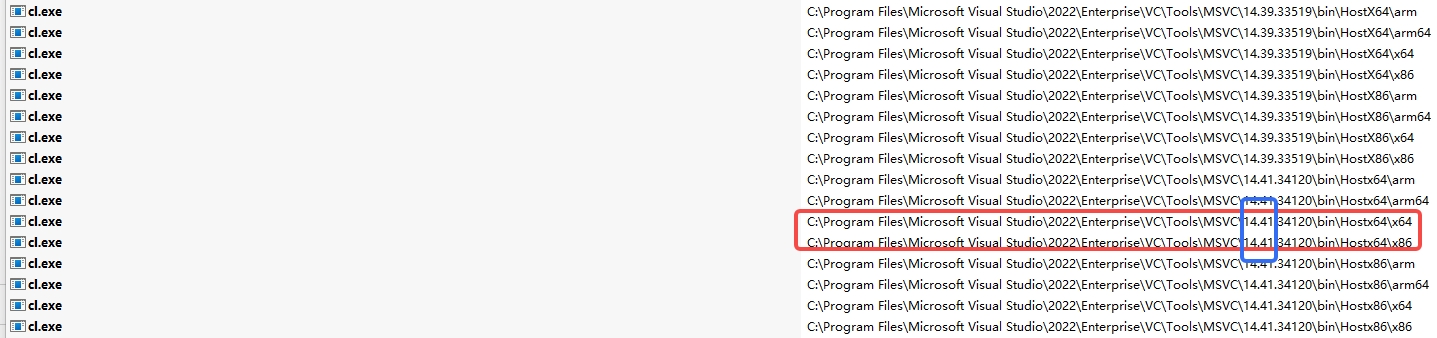
使用 Everything 搜索 cl.exe,在搜索结果中可以同时获取 编译器版本 和 cl.exe 完整路径。
如图所示,我使用的编译器版本为 14.41.34120,对应 MSVC 14.41。
2. 运行 bootstrap.bat
进入 Boost 源码根目录,双击运行 bootstrap.bat。

3. 配置 project-config.jam
运行 bootstrap.bat 后,根目录会生成 project-config.jam 文件。
在其中添加第一步获取的 MSVC 版本 与 cl.exe 完整路径,保存配置。

4. 启动 VS2022 编译环境
从开始菜单打开 VS2022 的开发人员命令提示符(根据目标平台选择 x86 或 x64 版本),并切换到 Boost 源码根目录。

5. 执行编译命令
在命令行中输入以下对应平台的编译指令。编译过程较为耗时,请耐心等待完成。
# x86 平台编译
b2 stage --toolset=msvc-14.41 --without-graph --without-graph_parallel --without-python --stagedir="E:\WorkSpace\Local\boost\boost_1_70_0\boost_1_70_0\out" link=static runtime-link=static threading=multi address-model=32 debug release

# x64 平台编译
b2 stage --toolset=msvc-14.41 --without-graph --without-graph_parallel --without-python --stagedir="E:\WorkSpace\Local\boost\boost_1_70_0\boost_1_70_0\out" link=static runtime-link=static threading=multi address-model=64 debug release

注意:
- 需将
--toolset=后的版本号替换为您实际的 MSVC 编译器版本。--stagedir=后应改为您希望输出库文件的目录路径。address-model=后根据目标平台填写32(x86)或64(x64)。
6. 获取编译后的库文件
编译完成后,在指定的输出目录(本例为 out)中会生成 lib 文件夹,内含所有编译好的 Boost 静态库文件。

7. 整合头文件与库文件
Boost 的头文件位于源码根目录下的 boost 文件夹中。
将头文件目录与编译好的库文件目录一起配置到您的工程中,即可开始使用 Boost 库。

本文为博主总结文章,欢迎转载,请注明出处。

 浙公网安备 33010602011771号