
给控件添加阴影效果SystemDropShadowChrome
引入命名空间
xmlns:theme="clr-namespace:Microsoft.Windows.Themes;assembly=PresentationFramework.Aero2"
给控件添加引用,这个性能比较好。
例如给Combobox下拉框添加引用效果
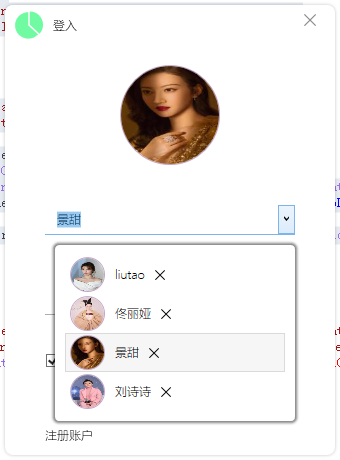
<--! 其他代码-->
  <Popup x:Name="PART_Popup" AllowsTransparency="true" Grid.ColumnSpan="2" IsOpen="{Binding IsDropDownOpen, RelativeSource={RelativeSource TemplatedParent}}" Placement="Bottom" PopupAnimation="{DynamicResource {x:Static SystemParameters.ComboBoxPopupAnimationKey}}">
                <theme:SystemDropShadowChrome x:Name="shadow"
                                              Color="Transparent"
                                              RenderTransformOrigin ="5,5"
                                              CornerRadius="4"
                                              MinWidth="{Binding ActualWidth, ElementName=templateRoot}"
                                              MaxHeight="{TemplateBinding MaxDropDownHeight}">
<--!      Margin="10,10,0,0" 这个是重点,显示左边和上边的阴影,默认左下角就有阴影-->
                    <Border x:Name="dropDownBorder"
                            Margin="10,10,0,0"
                             CornerRadius="4"
                            Padding="10"
                            Background="{DynamicResource {x:Static SystemColors.WindowBrushKey}}"
                            BorderBrush="{DynamicResource {x:Static SystemColors.WindowFrameBrushKey}}"  >

                        <ScrollViewer x:Name="DropDownScrollViewer">
                            <Grid x:Name="grid" RenderOptions.ClearTypeHint="Enabled">
                                <Canvas x:Name="canvas" HorizontalAlignment="Left" Height="0" VerticalAlignment="Top" Width="0">
                                    <Rectangle x:Name="opaqueRect" Fill="{Binding Background, ElementName=dropDownBorder}" Height="{Binding ActualHeight, ElementName=dropDownBorder}" Width="{Binding ActualWidth, ElementName=dropDownBorder}"/>
                                </Canvas>
                                <ItemsPresenter x:Name="ItemsPresenter" KeyboardNavigation.DirectionalNavigation="Contained" SnapsToDevicePixels="{TemplateBinding SnapsToDevicePixels}"/>
                            </Grid>
                        </ScrollViewer>
                    </Border>
                </theme:SystemDropShadowChrome>
            </Popup>
<--! 其他代码-->
效果如下:
阴影样式二
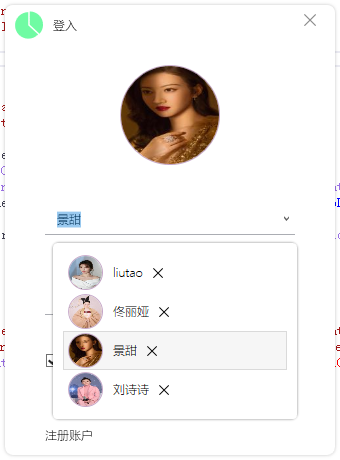
Margin="8,8,-2,-2" 这个是重点 控制阴影,显示左边和上边的阴影,调整左下角的阴影。
<--! 其他代码-->
  <Popup x:Name="PART_Popup" AllowsTransparency="true" Grid.ColumnSpan="2" IsOpen="{Binding IsDropDownOpen, RelativeSource={RelativeSource TemplatedParent}}" Placement="Bottom" PopupAnimation="{DynamicResource {x:Static SystemParameters.ComboBoxPopupAnimationKey}}">
                <theme:SystemDropShadowChrome x:Name="shadow"
                                              Color="Transparent"
                                              RenderTransformOrigin ="5,5"
                                              CornerRadius="4"
                                              MinWidth="{Binding ActualWidth, ElementName=templateRoot}"
                                              MaxHeight="{TemplateBinding MaxDropDownHeight}">
<--!       Margin="8,8,-2,-2" 这个是重点 控制阴影,显示左边和上边的阴影,调整左下角的阴影-->
                    <Border x:Name="dropDownBorder"
                              Margin="8,8,-2,-2"
                             CornerRadius="4"
                            Padding="10"
                            Background="{DynamicResource {x:Static SystemColors.WindowBrushKey}}"
                            BorderBrush="{DynamicResource {x:Static SystemColors.WindowFrameBrushKey}}"  >

                        <ScrollViewer x:Name="DropDownScrollViewer">
                            <Grid x:Name="grid" RenderOptions.ClearTypeHint="Enabled">
                                <Canvas x:Name="canvas" HorizontalAlignment="Left" Height="0" VerticalAlignment="Top" Width="0">
                                    <Rectangle x:Name="opaqueRect" Fill="{Binding Background, ElementName=dropDownBorder}" Height="{Binding ActualHeight, ElementName=dropDownBorder}" Width="{Binding ActualWidth, ElementName=dropDownBorder}"/>
                                </Canvas>
                                <ItemsPresenter x:Name="ItemsPresenter" KeyboardNavigation.DirectionalNavigation="Contained" SnapsToDevicePixels="{TemplateBinding SnapsToDevicePixels}"/>
                            </Grid>
                        </ScrollViewer>
                    </Border>
                </theme:SystemDropShadowChrome>
            </Popup>
<--! 其他代码-->

 浙公网安备 33010602011771号