
(五)自定义按钮模板和设置触发器
一:自定义按钮模板
自定义按模板有两种方式:第一种直接在按钮的双标签内自定义
第二种是在样式文件中定义引用样式模板
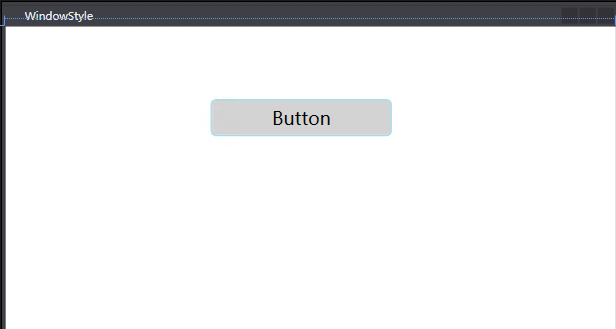
第一种:直接在按钮的双标签内自定义:

<Window x:Class="WpfTest.WindowStyle"
        xmlns="http://schemas.microsoft.com/winfx/2006/xaml/presentation"
        xmlns:x="http://schemas.microsoft.com/winfx/2006/xaml"
        xmlns:d="http://schemas.microsoft.com/expression/blend/2008"
        xmlns:mc="http://schemas.openxmlformats.org/markup-compatibility/2006"
        xmlns:local="clr-namespace:WpfTest"
        mc:Ignorable="d"
        Title="WindowStyle" Height="450" Width="800">

    <Grid>
        <Button Content="Button" Background="LightGray"  HorizontalAlignment="Left" Margin="289,80,0,0" VerticalAlignment="Top" Width="200">

            <!--定义Button模板,内部属性重写Button控件的样式,原有的失效-->
            <Button.Template>
                <!--模板属性里面可以包含其他控件或者布局,比如Grid,StackPanel,Border(带圆角),含有数据源的控件还可以自定义DataTemplate-->
                <ControlTemplate TargetType="Button">
                    <!--BorderBrush边框颜色,BorderThickness边框宽度,CornerRadius圆角,如果想使用原来的属性则可以绑定原有属性,比背景颜色-->
                    <Border Background="{TemplateBinding Background}" BorderBrush="LightBlue" BorderThickness="2" CornerRadius="5" Height="41">
                        <!--如果想获取原有Button的内容,可以使用ContentPresenter标签-->
                        <ContentPresenter HorizontalAlignment="Center" VerticalAlignment="Center"/>
                        <!--如果不想使用则可以使用TextBlock:<TextBlock  Text="1234"/>标签,这个标签也可以绑定Content-->


                    </Border>
                </ControlTemplate>
            </Button.Template>
        </Button>

    </Grid>
</Window>
效果图:
但是此时按钮失去了鼠标焦点等事件,所以我们要给按钮添加触发器,触发器是ControlTemplate的属性
<Window x:Class="WpfTest.WindowStyle"
        xmlns="http://schemas.microsoft.com/winfx/2006/xaml/presentation"
        xmlns:x="http://schemas.microsoft.com/winfx/2006/xaml"
        xmlns:d="http://schemas.microsoft.com/expression/blend/2008"
        xmlns:mc="http://schemas.openxmlformats.org/markup-compatibility/2006"
        xmlns:local="clr-namespace:WpfTest"
        mc:Ignorable="d"
        Title="WindowStyle" Height="365.074" Width="680.882">

    <Grid>
        <Button Content="Button" Background="LightGray"  HorizontalAlignment="Left" Margin="226,80,0,0" VerticalAlignment="Top" Width="200">

            <!--定义Button模板,内部属性重写Button控件的样式,原有的失效-->
            <Button.Template>
                <!--模板属性里面可以包含其他控件或者布局,比如Grid,StackPanel,Border(带圆角),含有数据源的控件还可以自定义DataTemplate-->
                <ControlTemplate TargetType="Button">
                    <!--BorderBrush边框颜色,BorderThickness边框宽度,CornerRadius圆角,如果想使用原来的属性则可以绑定原有属性,比背景颜色-->
                    <Border x:Name="Border" Background="{TemplateBinding Background}" BorderBrush="LightBlue" BorderThickness="2" CornerRadius="5" Height="41">
                        <!--如果想获取原有Button的内容,可以使用ContentPresenter标签-->
                        <ContentPresenter HorizontalAlignment="Center" VerticalAlignment="Center"/>
                        <!--如果不想使用则可以使用TextBlock:<TextBlock  Text="1234"/>标签,这个标签也可以绑定Content-->
                    </Border>

                    <!--触发器是ControlTemplate标签的一个属性,标签内可以写多个触发事件-->
                    <ControlTemplate.Triggers>
                        <!--第一个触发器,当鼠标移动到按钮时发生-->
                        <Trigger Property="IsMouseOver" Value="True">
                            <!--触发器动作,TargetName作用的目标对象(控件的Name,必须先命名),Property目标对象属性,Value目标对象属性的值-->
                            <Setter TargetName="Border" Property="Background" Value="Azure"/>
                        </Trigger>

                        <!--第二个触发器,当鼠标点击到按钮时发生-->
                        <Trigger Property="IsPressed" Value="True">
                            <!--触发器动作,TargetName作用的目标对象(控件的Name,必须先命名),Property目标对象属性,Value目标对象属性的值-->
                            <Setter TargetName="Border" Property="Background" Value="Green"/>
                        </Trigger>
                    </ControlTemplate.Triggers>
                </ControlTemplate>
            </Button.Template>
        </Button>

    </Grid>
</Window>
效果:
鼠标放上:
鼠标点击:
第二种:在样式内自定义:


【推荐】国内首个AI IDE,深度理解中文开发场景,立即下载体验Trae
【推荐】编程新体验,更懂你的AI,立即体验豆包MarsCode编程助手
【推荐】抖音旗下AI助手豆包,你的智能百科全书,全免费不限次数
【推荐】轻量又高性能的 SSH 工具 IShell:AI 加持,快人一步
· TypeScript + Deepseek 打造卜卦网站:技术与玄学的结合
· 阿里巴巴 QwQ-32B真的超越了 DeepSeek R-1吗?
· 如何调用 DeepSeek 的自然语言处理 API 接口并集成到在线客服系统
· 【译】Visual Studio 中新的强大生产力特性
· 2025年我用 Compose 写了一个 Todo App