扭曲滤镜——Displacement Maps的使用方法
首先看看这本篇文章:http://blog.sina.com.cn/s/blog_4bfac6ef0100yr3p.html
要点:DisplacementMapFilter需要有一个灰度图像(也可以是RBG或RGBA图像中的一个颜色或alpha通道,这个通道本身是一个8位的绘图图像)作为置换映射图,
并基于这个映射图的像素对另外一个图像进行扭曲。映射图像中比中性灰亮的像素,目标图像中对应位置的像素向左上角移动。较暗的像素向右下角移动
在下面的例子中,我加载了一张新的图像,以便于轻松看到置换效果。我用drawing API绘制了一个圆形,并将这个图形渲染到背景为黑色的BitmapData对象中(不用担心——下一章才会讲到这一点)。然后应用模糊滤镜模糊图像,这样我们可以得到黑色到白色过渡之间的颜色,几乎包括所有的中性灰色。将处理后的这个图像作为置换图像,然后在加载进来的”多彩棋盘”图像上应用DisplacementMapFilter滤镜,结果可以看到非常明显的扭曲,如图2-41所示:
接下来,我们看看它的应用:
This is the technique that will wrap your art around objects and (seemingly) magically make it hug every contour.
I also have a variation of this tutorial here where I wrap text around a photo. 
Step 1
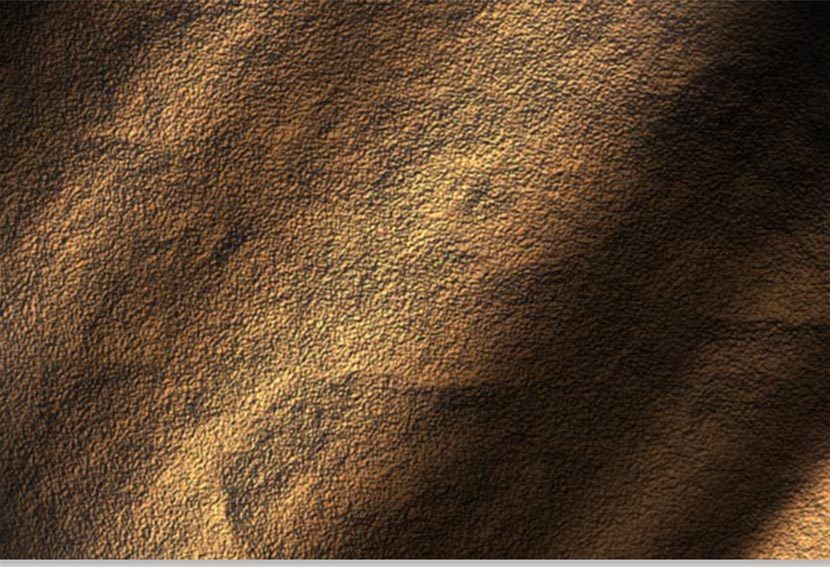
Begin with a texture, you must be in RGB mode. I have another tutorial under textures that shows you how to create this rock surface. You can also just download it if you wish.
Step 2
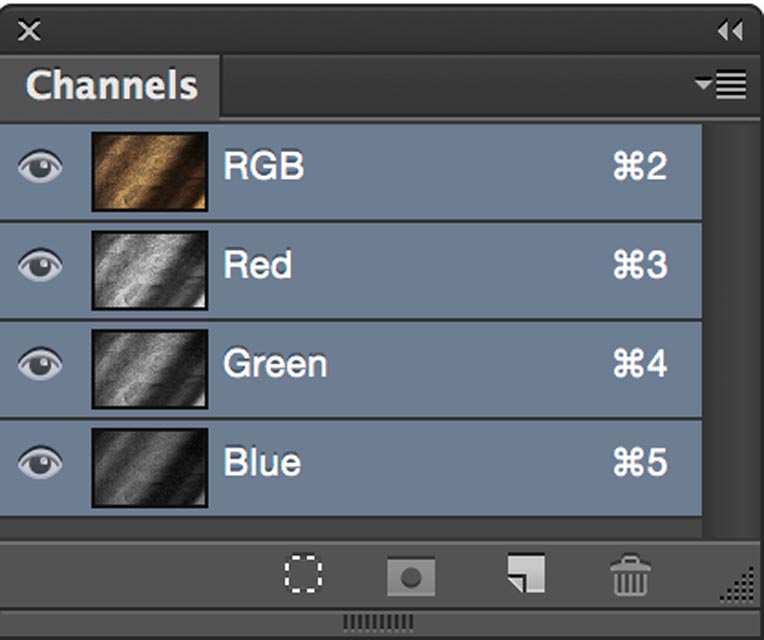
Click on the Channels palette and click on each channel until you find the one with the most contrast (dark to light). In this case it is the Red channel.
Step 3
We need to make a new document out of the channel.
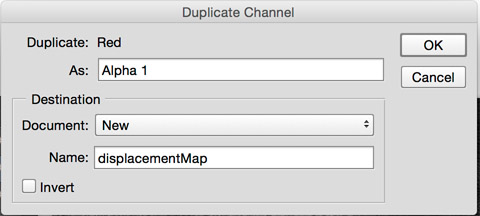
Either right click/Control+click on the channel area of the channels palette, or click on the top right arrow to open the drop down menu. Choose “duplicate channel.”
Under destination>document, choose new.
Click ok
Step 4
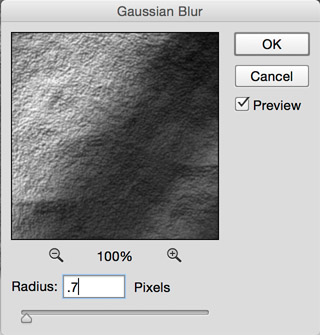
You will now have a new document. This will become our displacement map. Apply a 0.7 Gaussian blur (Filter>blur>Gaussian blur) to lower the sharp detail a bit. This will make for a smoother image in the end.
Step 5
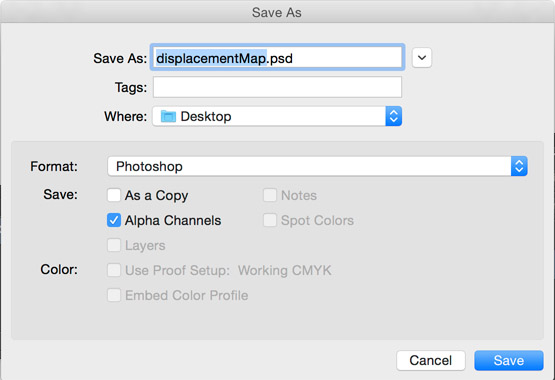
Save the document as a .psd, I called it displacementMap.psd, any name will work, just remember it and the location. I put mine on the desktop.
We have now created our displacement map for use later on.
Step 6
On our original document, click on the “RGB” to restore the default channel display.
Step 7
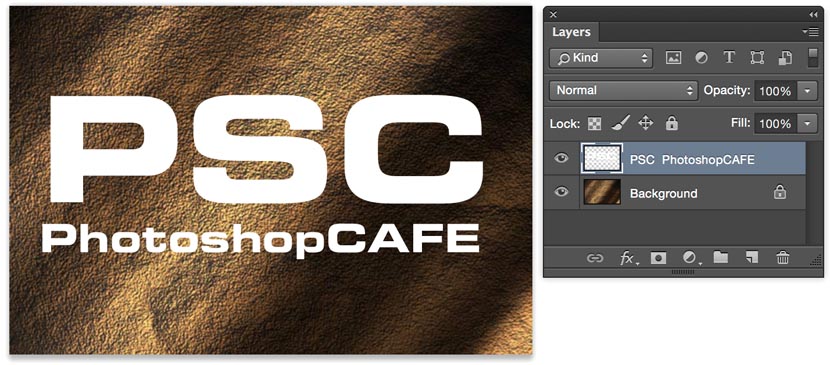
Open the layers panel and add your artwork or text on a new layer. This is the content that you want to warp. Make sure you have everything you want to warp on one layer. If you have text, rasterize it now. (Right click on the layer palette next to the name and choose “rasterize layer” from the pop up menu.
Step 8
Now lets apply the displacement map…
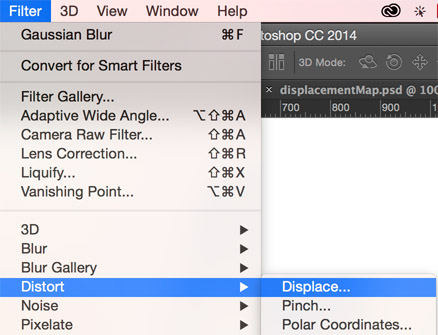
Filter>Distort>Displace
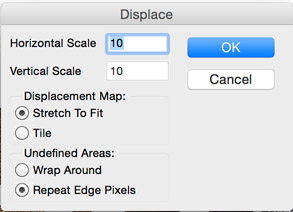
Step 9
Use the settings shown here when the Displace palette opens.
Click ok
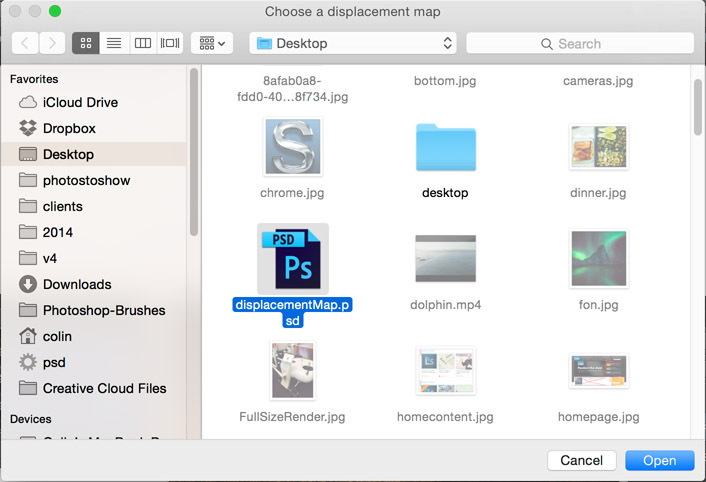
Step 10
You will now see a browser asking you to choose a displacement map. Navigate to the desktop and load the image we created at the beginning of this tutorial.
Click open
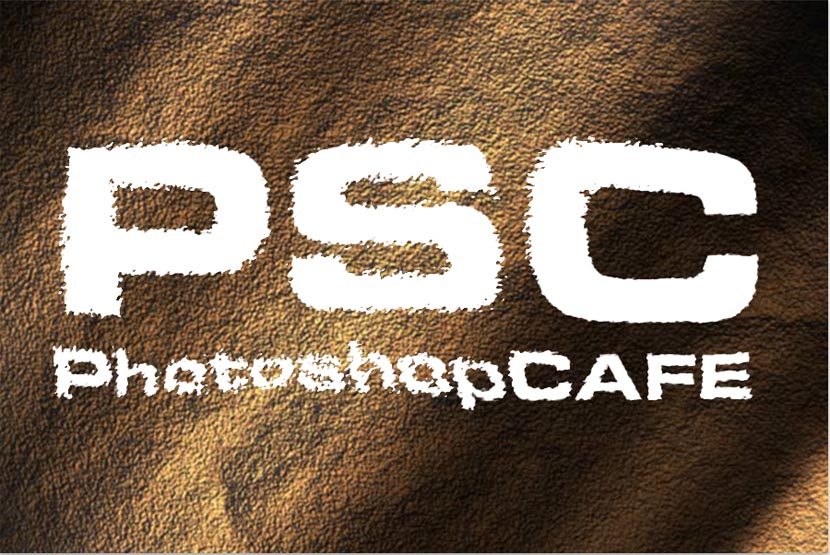
Step 11
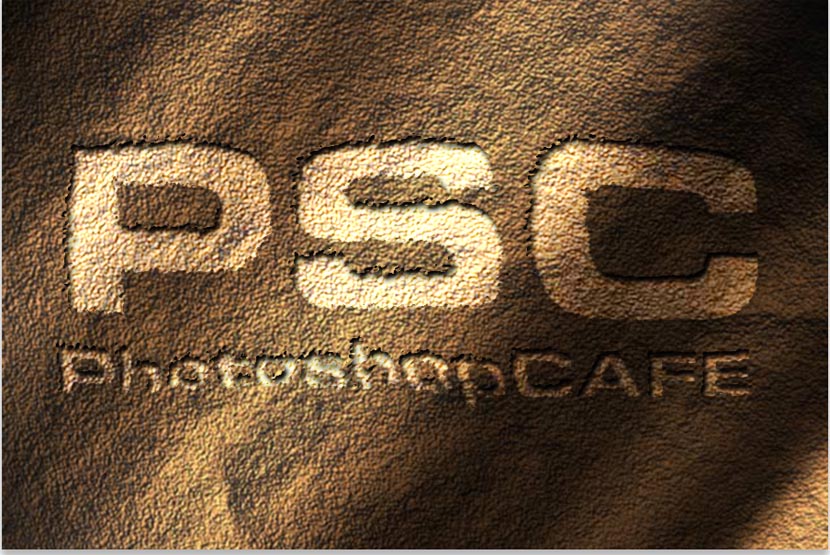
You will now see your artwork distort to hug the texture of the rock.
Lets jazz it up a bit.
Step 12
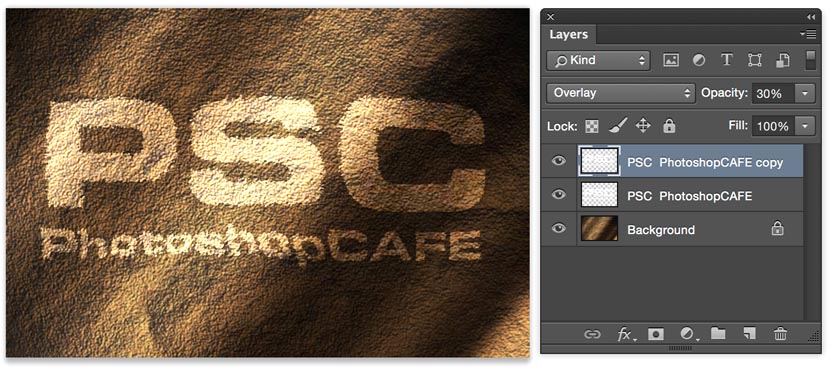
Choose Overlay mode to add some realistic blending.
Duplicate the distorted layer to add a bit more strength to the effect. I dropped the opacity of the top layer to 30 to tone it down a bit.
Here is the result on the blending mode.
See how the color blends in with the texture.
Step 13
Here is exactly the same image but with a variation. I added an inner shadow layer style to the top layer
I hope you had fun with this tutorial and learned a lot.



 浙公网安备 33010602011771号