文件操作,重点,日常使用!!!
文件操作
对文件操作流程
- 打开文件,得到文件句柄并赋值给一个变量
- 通过句柄对文件进行操作
- 关闭文件
打开文件的模式有:
- r,只读模式(默认)。
- w,只写模式。【不可读;不存在则创建;存在则删除内容;】
- a,追加模式。【可读; 不存在则创建;存在则只追加内容;】
"+" 表示可以同时读写某个文件
- r+,可读写文件。【可读;可写;可追加】
- w+,写读
- a+,同a
"U"表示在读取时,可以将 \r \n \r\n自动转换成 \n (与 r 或 r+ 模式同使用)
- rU
- r+U
"b"表示处理二进制文件(如:FTP发送上传ISO镜像文件,linux可忽略,windows处理二进制文件时需标注)
- rb
- wb
- ab
基础
data =open('yesterday','r',encoding='utf-8') #文件句柄 读
data =open('yesterday','w',encoding='utf-8') #文件句柄 写    会覆盖原来的文件,慎用!!!!
data =open('yesterday','a',encoding='utf-8') #文件句柄 添加
data =open('yesterday','r+',encoding='utf-8') #文件句柄 读写   有用,在最后一行写
data =open('yesterday','w+',encoding='utf-8') #文件句柄 写读   没用,会覆盖内容
data =open('yesterday','a+',encoding='utf-8') #文件句柄 追加读    没卵用
data =open('yesterday','wb') #文件句柄 二进制文件
data.write('hellow binary\n'.encode()) #不加encode()报错,需要转化二进制
data.close()
实例1
移动光标
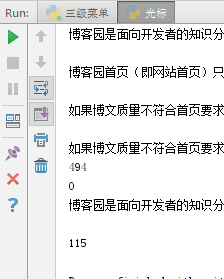
f=open('yesterday','r',encoding='utf-8')
print(f.readline())
print(f.readline())
print(f.readline())
print(f.readline())
print(f.tell())   #显示目前光标位置
print(f.seek(0))  #回到起点
print(f.readline())
print(f.tell())   #显示光标当前位置

实例2
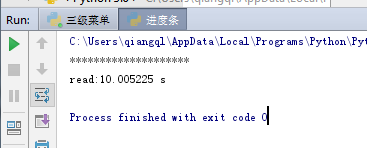
fulsh用法,进度条
import  sys
import time

count = 0
star= time.clock()  #程序起始时间

for i in range(20):
    if count <9:
        sys.stdout.write('*') #stdout 标准显示
        sys.stdout.flush()   #flush 立即执行
        time.sleep(0.5)
        count+1

    count+1

end =time.clock()  #结束
print("\nread:%f s"%(end-star)) #打印程序运行时间  这是我自己百度查的!!!!稳!

with语句
为了避免打开文件后忘记关闭,可以通过管理上下文,即:
with open(‘log’,‘r’,encoding='utf-8) as f: #f=open('log','r',encoding='utf-8')
如此方式,当with代码块执行完毕时,内部会自动关闭并释放文件资源。
在Python 2.7 后,with又支持同时对多个文件的上下文进行管理,即:
with open(‘log’,‘r’,encoding='utf-8) as f,open(‘log2’,‘r’,encoding='utf-8)as f_new:
#f=open('log','r',encoding='utf-8')
#f_newopen('log2','r',encoding='utf-8')
为了更清晰也最好这么写


 浙公网安备 33010602011771号