Angular23 loading组件、路由配置、子路由配置、路由懒加载配置
1 需求
由于Angular是单页面的应用,所以在进行数据刷新是进行的局部刷新;在进行数据刷新时从浏览器发出请求到后台响应数据是有时间延迟的,所以在这段时间就需要进行遮罩处理来提示用户系统正在请求数据。
2 loading组件简介
loading组件就是专门负责遮罩处理的,可以自定一个loading组件,也可以使用别人创建号的loading模块;loading组件生效后的效果如下:

3 编程步骤
3.1 创建一个angular项目
技巧01:版本必须是angular4及以上
3.2 创建一个组件
3.3 创建一个user模块
技巧01:在user模块中创建多个组件
3.4 路由配置
技巧01:每个模块单独设置路由配置文件
技巧02:利用路由实现模块懒加载
3.4.1 子模块路由配置文件
技巧01:子模块配置类中需要使用 forCild

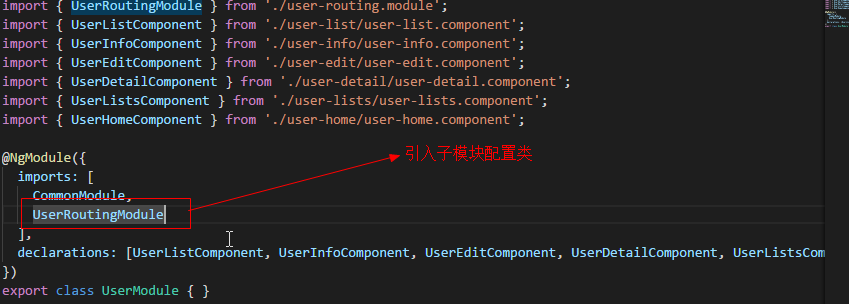
技巧02:子模块的配置文件配置好后需要在子模块中引入配置文件,直接引入配置模块中的那个类就行啦


import { NgModule } from '@angular/core';
import { Routes, RouterModule } from '@angular/router';
import { UserListComponent } from './user-list/user-list.component';
import { UserHomeComponent } from './user-home/user-home.component';
import { UserInfoComponent } from './user-info/user-info.component';

const routes: Routes = [
  {
    path:'',
    component:UserHomeComponent,
    children: [
        {
            path:'',
            redirectTo:'userList',
            pathMatch:'full'
        },
        {
            path:'userList',
            component:UserListComponent
        },
        {
            path:'userInfo',
            component:UserInfoComponent
        }
    ]
}
];

@NgModule({
  imports: [RouterModule.forChild(routes)],
  exports: [RouterModule]
})
export class UserRoutingModule { }

import { NgModule } from '@angular/core';
import { CommonModule } from '@angular/common';

import { UserRoutingModule } from './user-routing.module';
import { UserListComponent } from './user-list/user-list.component';
import { UserInfoComponent } from './user-info/user-info.component';
import { UserEditComponent } from './user-edit/user-edit.component';
import { UserDetailComponent } from './user-detail/user-detail.component';
import { UserListsComponent } from './user-lists/user-lists.component';
import { UserHomeComponent } from './user-home/user-home.component';

@NgModule({
  imports: [
    CommonModule,
    UserRoutingModule
  ],
  declarations: [UserListComponent, UserInfoComponent, UserEditComponent, UserDetailComponent, UserListsComponent, UserHomeComponent]
})
export class UserModule { }
3.4.2 根模块路由配置
技巧01:根模块的路由配置文件中需要用 forRoot

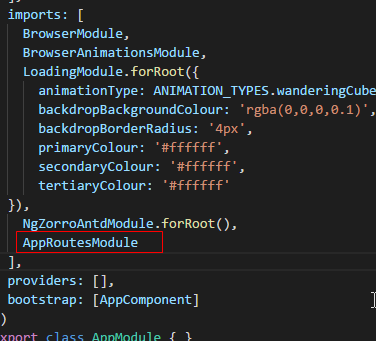
技巧02:需要在根模块中引入根路由配置类


import { LoginComponent } from "./login/login.component";
import { NgModule } from "@angular/core";
import { RouterModule } from "@angular/router";


export const routes = [
    {
        path:'',
        redirectTo:'login',
        pathMatch:'full'
    },
    {
        path: 'login',
        component: LoginComponent
    },
    {
        path:'user',
        loadChildren:'./user/user.module#UserModule'
    },
    {
        path:'**',
        component: LoginComponent
    }
]

@NgModule({
    imports: [RouterModule.forRoot(routes)],
    exports: [RouterModule]
  })
  export class AppRoutesModule { }

import { BrowserModule } from '@angular/platform-browser';
import { NgModule } from '@angular/core';

import { NgZorroAntdModule } from 'ng-zorro-antd';
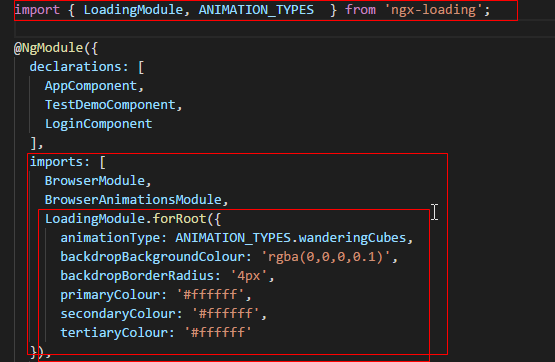
import { LoadingModule, ANIMATION_TYPES  } from 'ngx-loading';

import { AppComponent } from './app.component';
import { TestDemoComponent } from './test-demo/test-demo.component';
import { BrowserAnimationsModule } from "@angular/platform-browser/animations";
import { LoginComponent } from './login/login.component';
import { RouterModule } from '@angular/router';
import { AppRoutesModule } from './app.routes.module';


@NgModule({
  declarations: [
    AppComponent,
    TestDemoComponent,
    LoginComponent
  ],
  imports: [
    BrowserModule,
    BrowserAnimationsModule,
    LoadingModule.forRoot({
      animationType: ANIMATION_TYPES.wanderingCubes,
      backdropBackgroundColour: 'rgba(0,0,0,0.1)',
      backdropBorderRadius: '4px',
      primaryColour: '#ffffff',
      secondaryColour: '#ffffff',
      tertiaryColour: '#ffffff'
  }),
    NgZorroAntdModule.forRoot(),
    AppRoutesModule
  ],
  providers: [],
  bootstrap: [AppComponent]
})
export class AppModule { }
3.5 集成loading模块
3.5.1 下载相关依赖
npm install --save ngx-loading
3.5.2 在模块级别引入
技巧01:loading模块需要共享,所以需要在共享模块或者跟模块进行引入

3.5.3 在组件级别使用loading组件
3.5.3.1 html编写


<div class="my-container">
  <ngx-loading [show]="loading" [config]="config"></ngx-loading>
  <h2>
    这是登录页面
  </h2>
  <hr />

  <label for="username">用户名</label>
  <input type="text" id="username" name="username" />
  <br />
  <label for="password">用户密码</label>
  <input type="password" id="password" name="password" />
  <button (click)="on_login_click()">登陆</button>

</div>
3.5.3.2 ts编写
技巧01:点击登陆按钮后,开启遮罩;之后间隔5秒后交替开启遮罩

import { Component, OnInit } from '@angular/core';
import { ANIMATION_TYPES } from 'ngx-loading';

@Component({
  selector: 'login',
  templateUrl: './login.component.html',
  styleUrls: ['./login.component.css']
})
export class LoginComponent implements OnInit {
  loading: boolean = false;
  config: object = {};

  private timer;

  constructor() {

  }

  ngOnInit() {
    this.config = {

      animationType: ANIMATION_TYPES.rectangleBounce,
      backdropBorderRadius: '0px',
      // backdropBackgroundColour: '#9f9ec8',
      fullScreenBackdrop: true,
      primaryColour: 'skyblue',
      secondaryColour: 'red'
    }
  }

  on_login_click() {
    this.loading = true;
    this.timer = setInterval(
      () => {
        this.loading = !this.loading;
      },
      5000
    );
    alert("登陆");
  }

  ngOnDestroy() {
    if (this.timer) {
      alert('清除');
      clearInterval(this.timer);
    }
  }

}
3.6 loading模块源代码
3.7 本博文源代码


