SpringSecurity01 SpringSecurity环境搭建
版本说明:
JDK -> java version "1.8.0_101"
MAVEN -> Apache Maven 3.5.0
IDEA -> 2017.2.5
SpringBoot -> 1.5.9.RELEASE
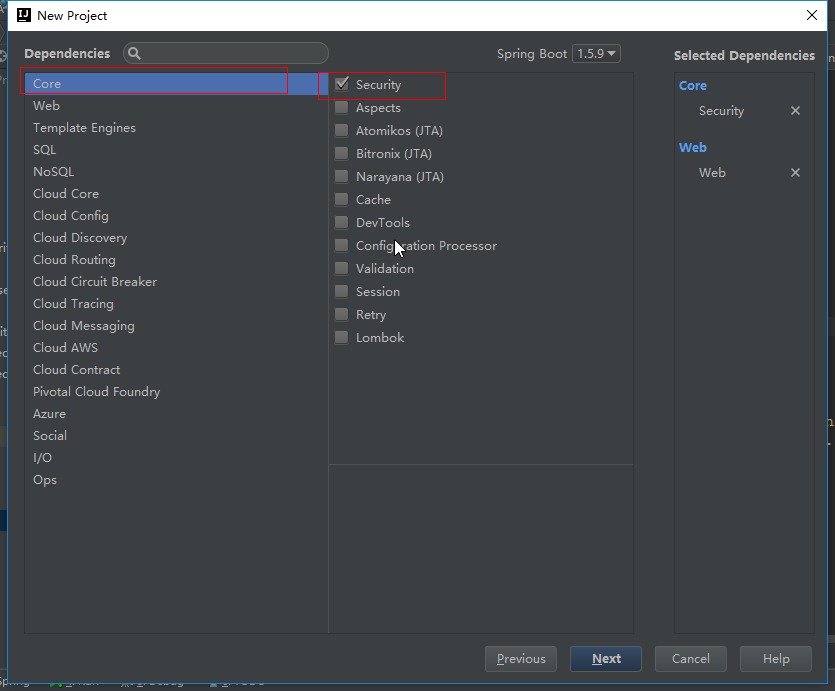
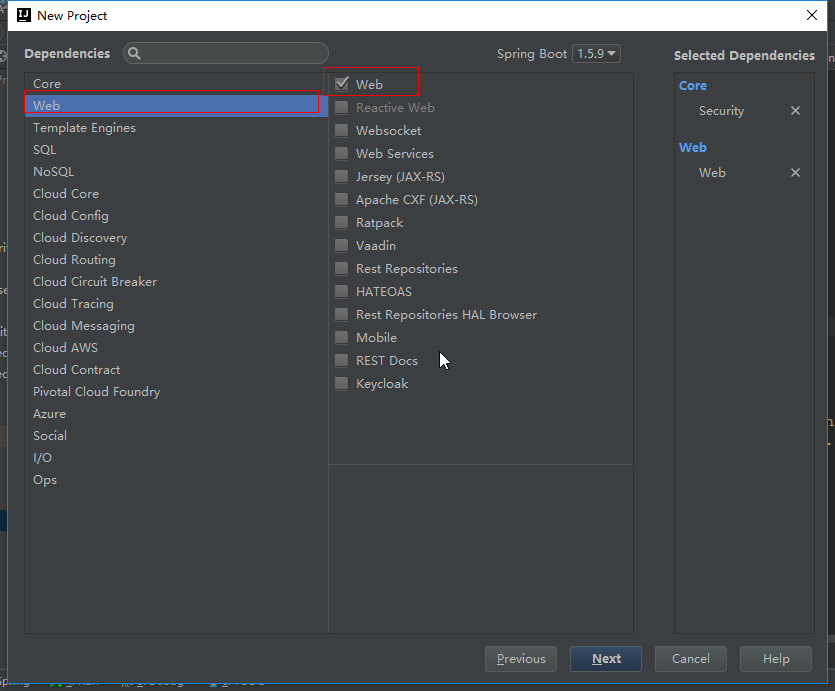
1 创建一个springBoot项目
导入 springSecurity 和 web 相关jar包

<?xml version="1.0" encoding="UTF-8"?>
<project xmlns="http://maven.apache.org/POM/4.0.0" xmlns:xsi="http://www.w3.org/2001/XMLSchema-instance"
    xsi:schemaLocation="http://maven.apache.org/POM/4.0.0 http://maven.apache.org/xsd/maven-4.0.0.xsd">
    <modelVersion>4.0.0</modelVersion>

    <groupId>cn.xiangxu</groupId>
    <artifactId>spring_security_system</artifactId>
    <version>0.0.1-SNAPSHOT</version>
    <packaging>war</packaging>

    <name>spring_security_system</name>
    <description>Demo project for Spring Security</description>

    <parent>
        <groupId>org.springframework.boot</groupId>
        <artifactId>spring-boot-starter-parent</artifactId>
        <version>1.5.9.RELEASE</version>
        <relativePath/> <!-- lookup parent from repository -->
    </parent>

    <properties>
        <project.build.sourceEncoding>UTF-8</project.build.sourceEncoding>
        <project.reporting.outputEncoding>UTF-8</project.reporting.outputEncoding>
        <java.version>1.8</java.version>
    </properties>

    <dependencies>
        <dependency>
            <groupId>org.springframework.boot</groupId>
            <artifactId>spring-boot-starter-security</artifactId>
        </dependency>
        <dependency>
            <groupId>org.springframework.boot</groupId>
            <artifactId>spring-boot-starter-web</artifactId>
        </dependency>

        <!--<dependency>-->
            <!--<groupId>org.springframework.boot</groupId>-->
            <!--<artifactId>spring-boot-starter-tomcat</artifactId>-->
            <!--<scope>provided</scope>-->
        <!--</dependency>-->

        <dependency>
            <groupId>org.projectlombok</groupId>
            <artifactId>lombok</artifactId>
        </dependency>

        <dependency>
            <groupId>org.springframework.boot</groupId>
            <artifactId>spring-boot-starter-test</artifactId>
            <scope>test</scope>
        </dependency>
        <dependency>
            <groupId>org.springframework.security</groupId>
            <artifactId>spring-security-test</artifactId>
            <scope>test</scope>
        </dependency>
    </dependencies>

    <build>
        <plugins>
            <plugin>
                <groupId>org.springframework.boot</groupId>
                <artifactId>spring-boot-maven-plugin</artifactId>
            </plugin>
        </plugins>
    </build>


</project>
技巧:去除Tomcat相关jar包的依赖,因为我们的是springboot项目会自动继承Tomcat


2 在启动类上添加@RestController注解并在启动类中编写一些用于测试的方法

package cn.xiangxu.spring_security_system;

import org.springframework.boot.SpringApplication;
import org.springframework.boot.autoconfigure.SpringBootApplication;
import org.springframework.security.access.prepost.PreAuthorize;
import org.springframework.security.config.annotation.method.configuration.EnableGlobalMethodSecurity;
import org.springframework.web.bind.annotation.GetMapping;
import org.springframework.web.bind.annotation.RestController;

@SpringBootApplication
@RestController
//@EnableGlobalMethodSecurity(prePostEnabled = true) // 开启@PreAuthorize注解
public class SpringSecuritySystemApplication {

    public static void main(String[] args) {
        SpringApplication.run(SpringSecuritySystemApplication.class, args);
    }

    @GetMapping(value = "/")
    public String home() {
        return "Welcome to study springSecurity.";
    }

    @GetMapping(value = "/hello")
    public String hello() {
        return "hello boy";
    }

//    @PreAuthorize("hasRole('ROLE_ADMIN')") // 设定权限校验:只用ADMIN角色才能调用该接口
    @GetMapping("/roleAuth")
    public String role() {
        return "admin role";
    }
}
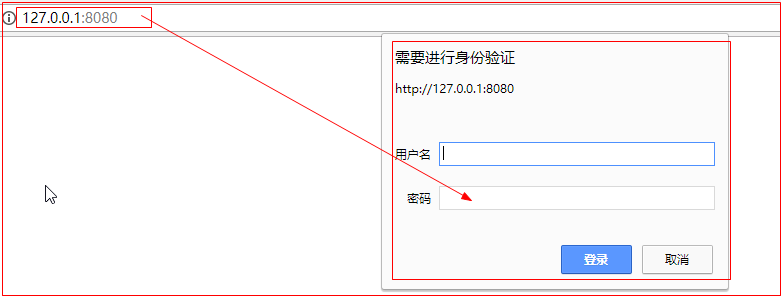
3 启动项目后访问在启动类中写好的接口
技巧01:如果导入了springSecurity相关的jar包后,springboot项目就会进行自动配置;因为启动类上的@SpringBootApplication注解包含了自动配置注解,所以我们启动项目后就默认开启了权限验证,在控制台上会打印出随记产生的密码,默认的登录名时user

技巧02:在访问接口时会自动弹出一个登录窗口,登录名是user,密码就是控制台打印出的密码

技巧03:如果输入用户名和密码后成功访问到响应的接口,而且再次访问其他的接口时不需要重新进行登录就表明SpringSecurity环境搭建完毕


