nexus3下搭建私有docker镜像
知识准备
阅读本文需要先了解docker下安装nexus3
先确认nexus3容器创建的脚本是这样的,其中8086端口是本文要使用的作为docker私有库的端口
docker run --name nexus3 --restart=always -p 8085:8081 -p 8086:8086 -v ~/docker/nexus/data:/nexus-data --privileged=true -d sonatype/nexus3
下面是正文部分
nexus默认只有maven和nuget的镜像,但是他本身支持各种私有镜像,如linux软件包镜像:apt、yum,还有语言库镜像如:npm、conada、pypi、go,当然也包括docker的镜像,创建docker镜像的操作是这样的
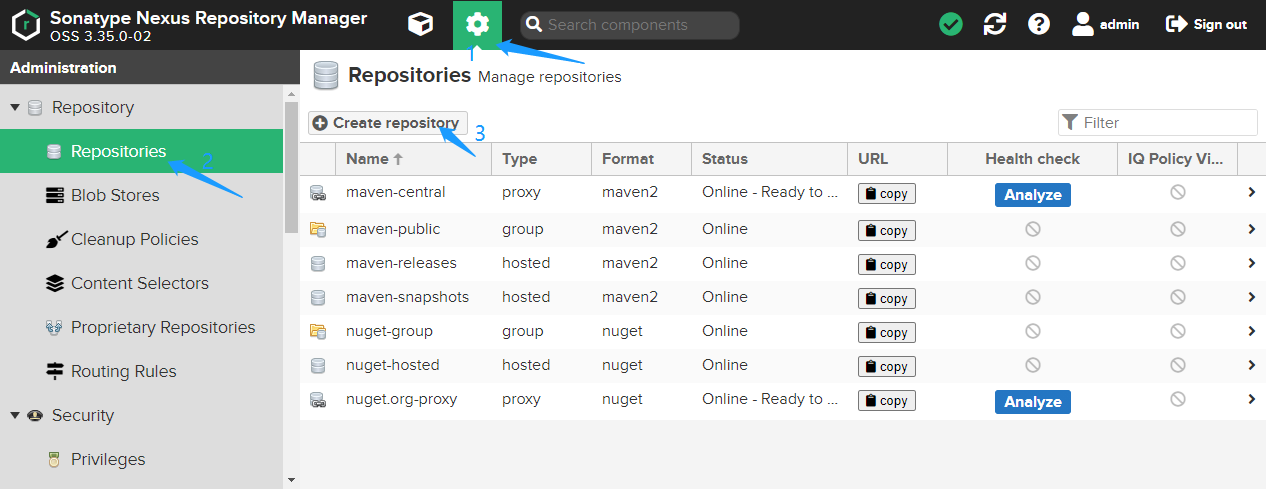
镜像类型有点多,仔细观察
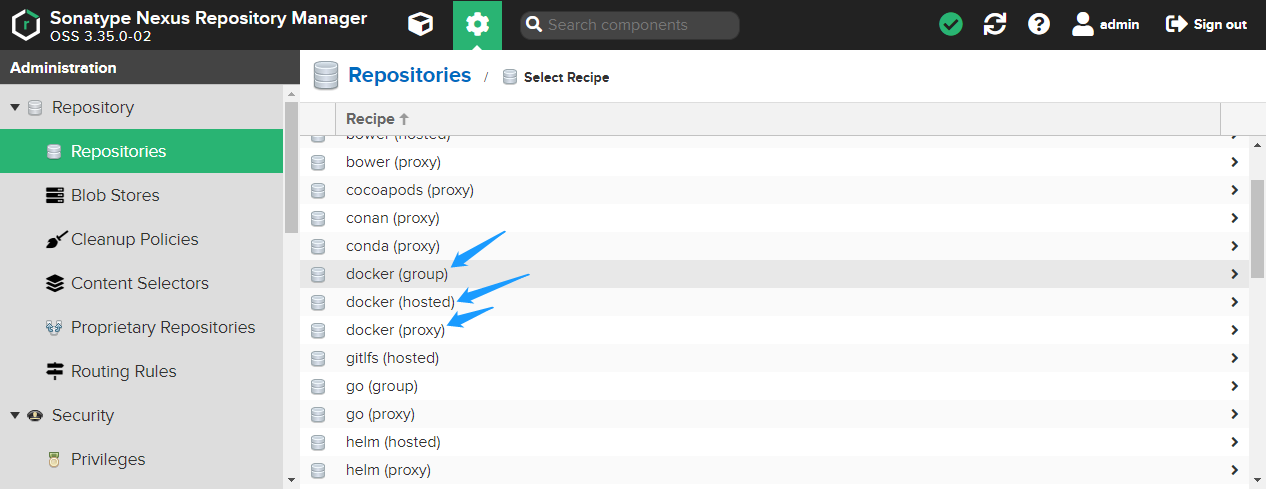
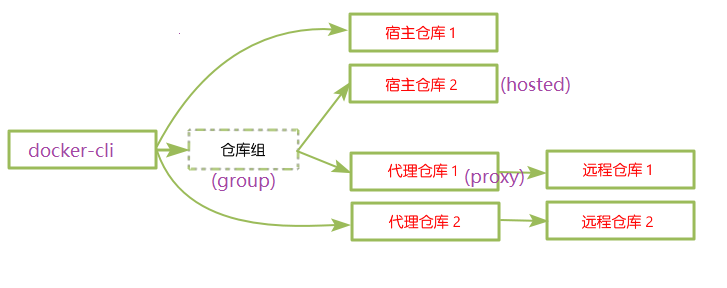
可以发现docker的镜像类型有三个:group、host、proxy,他们的关系
proxy:官方源的镜像代理
host:自己创建的一些源,一般是私有的不公开的,本文主要创建的就是host类型的私有镜像
group:对这些镜像进行分组
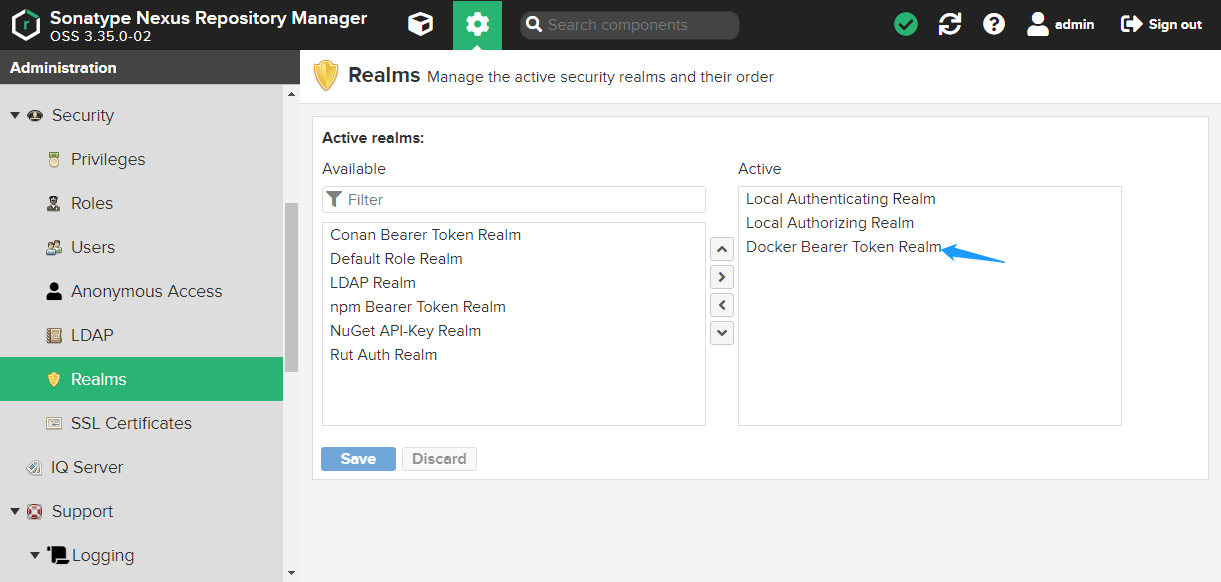
在创建docker库之前,需要做一个授权的设置,否则无法创建仓库
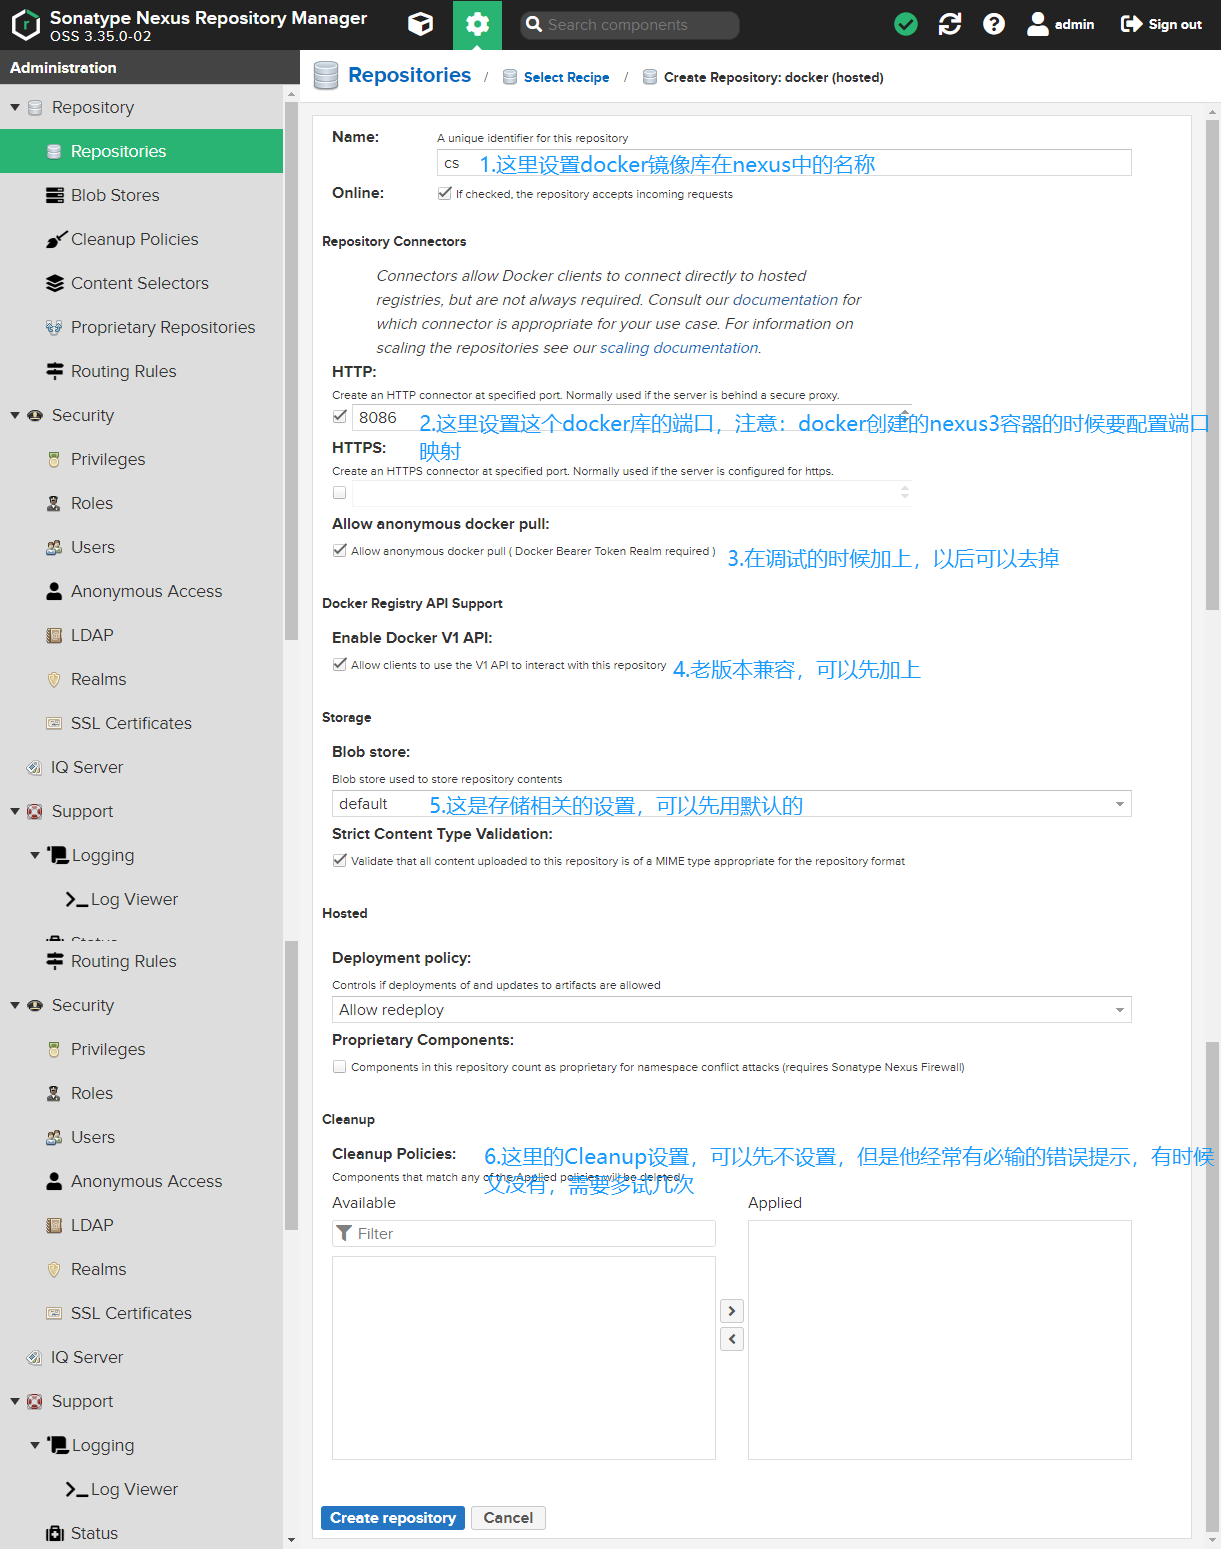
下面就开始创建docker的仓库了,本文选择的是host类型,下面是录入的表单界面
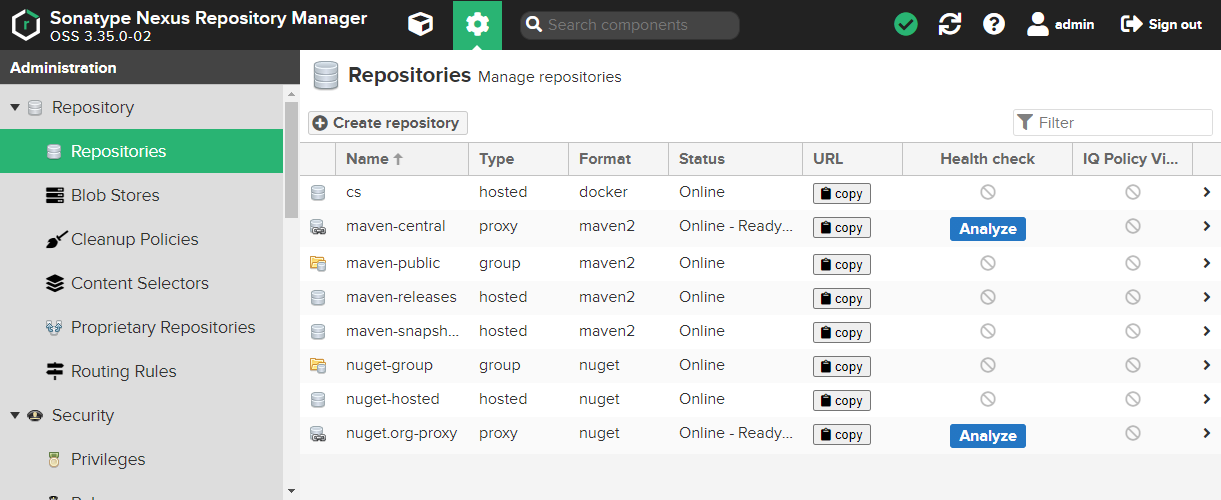
创建完查看仓库列表,多了刚才见的cs仓库
仓库创建完以后,就可以使用一个测试的docker镜像来执行docker push了
说明:
- 因为我的nexus3也是通过docker容器创建的,容器所在的机器上的IP地址是172.17.0.1,那么172.17.0.1:8086就是nexus3下私有docker镜像的地址
- 我现在已经自己做了一个镜像:172.17.0.1:8086/app:v1.0.1 说明:要通过docker tag 把172.17.0.1:8086作为镜像名称的前缀
要先通过docker login登录,但是会有一个错误
docker login -u admin 172.17.0.1:8086
Password:
Error response from daemon: Get https://172.17.0.1:8086/v2/: http: server gave HTTP response to HTTPS client
解决这个错误需要如下处理
|
1.打开:vi /etc/docker/daemon.json |
再重新登录就可以成功了
docker login -u admin 172.17.0.1:8086
Password:
WARNING! Your password will be stored unencrypted in /root/.docker/config.json.
Configure a credential helper to remove this warning. See
https://docs.docker.com/engine/reference/commandline/login/#credentials-store

Login Succeeded
下面执行docker push
docker push 172.17.0.1:8086/app:v1.0.1
The push refers to repository [172.17.0.1:8086/app]
7eab7e4c2e5d: Pushed
0c746c7a2bd6: Pushed
9675b67121e6: Pushed
f1dd685eb59e: Pushed
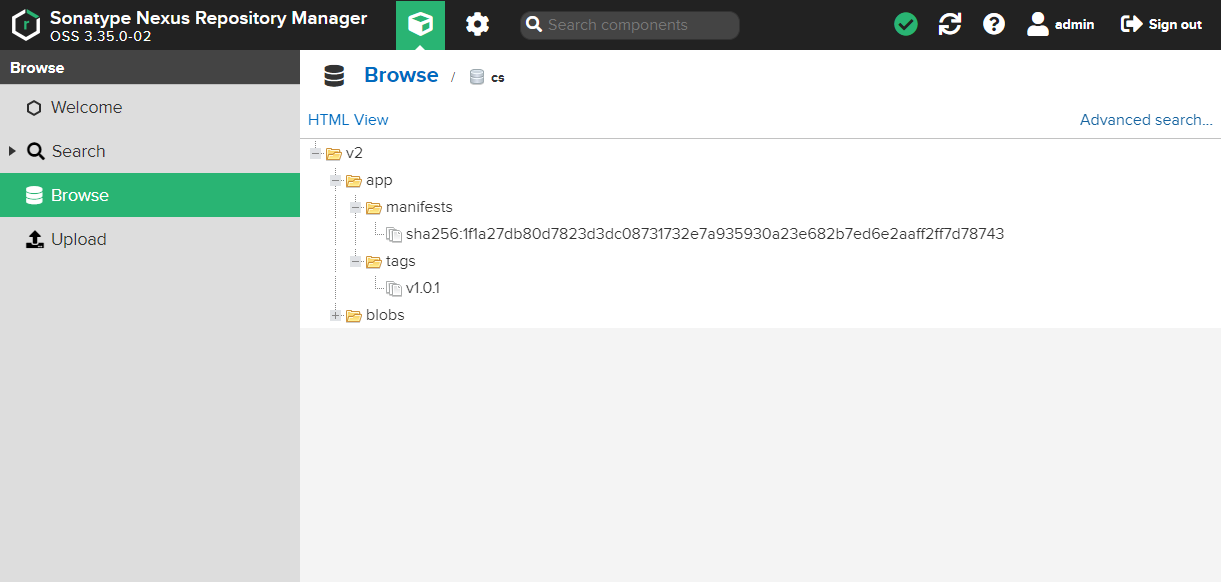
v1.0.1: digest: sha256:1f1a27db80d7823d3dc08731732e7a935930a23e682b7ed6e2aaff2ff7d78743 size: 1153
在nexus3中查看push的镜像
参考资料
1.使用nexus 存储 docker镜像,作为私有的镜像仓库
3.Nexus3最佳实践系列:搭建Docker私有仓库 这篇文章介绍了外网问是nginx的ssl配置
作者 :秋时
本文版权归作者和博客园共有,欢迎转载,但未经作者同意必须保留此段声明,且在文章页面明显位置给出原文连接。

