mock服务简单介绍
工具一:Json Server
简介
json-server是一款小巧的Mock工具,它可以不写一行代码在30秒内创建一套Restful风格的 api。相比较Django,flask来实现Mock要方便很多。
通俗来说,就是模拟服务端接口数据,一般用在前后端分离后,前端人员可以不依赖API开发,而在本地搭建一个JSON服务,自己产生测试数据。
主页地址:https://www.npmjs.com/package/json-server
Github项目地址:https://github.com/typicode/json-server
环境搭建
- 首选需要安装Node.js,
- 国内用户建议配置好:cnpm
安装
校验
安装完成后输入如下命令进行校验:
安装正确会提示如下内容:
入门使用
创建json数据——db.json
在任意一个文件夹下(此处我创建了一个json_action文件夹),进入到该文件夹里面,执行代码:
执行成功后会多出一个db.json文件。
此时我们可以访问 http://localhost:3000 (启动json-server后,点击才有效),看到如下页面: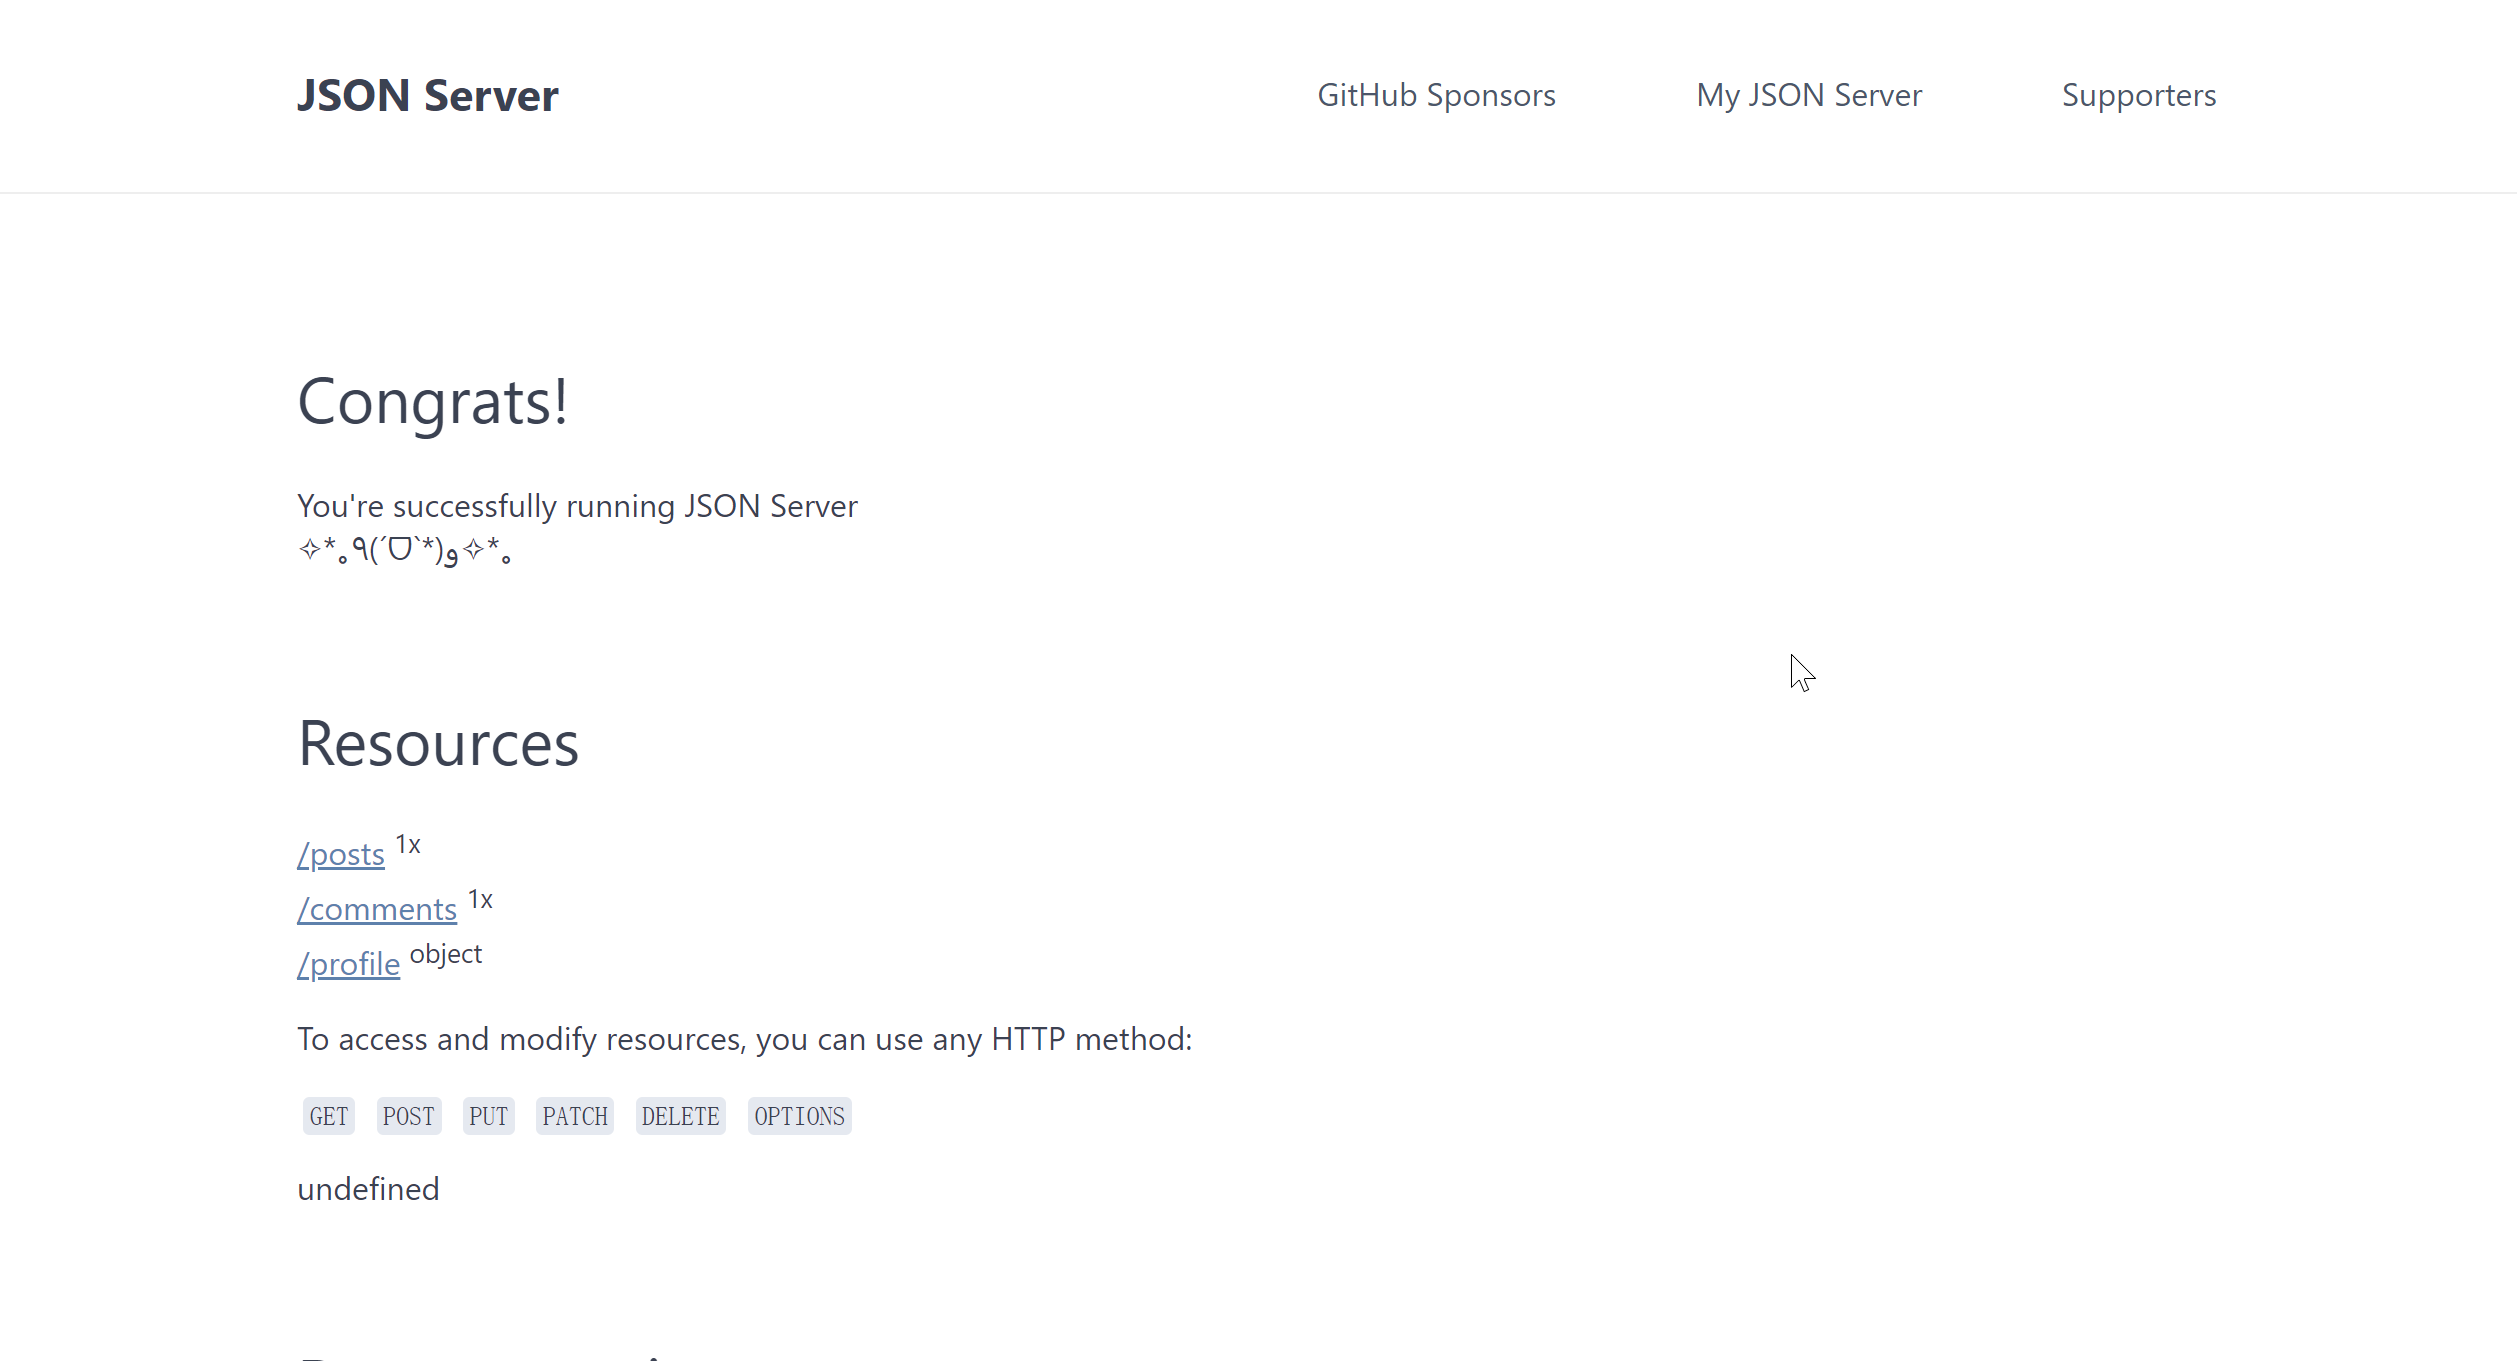
db.json里面自带的数据:
posts /comment /profile 分别是db.json里面的子对象。
修改端口号
json-server 默认是 3000 端口,我们也可以自己指定端口,指令如下:
之后启动服务,只需要执行如下指令就可以了:

接口测试
操作数据
使用下面的db.json 数据
接下来我们就可以GET, POST, PUT, PATCH or DELETE 方法来对数据进行操作。
获取数据
get直接获取
输入http://localhost:3004/posts 可以查看到对应的返回值:
浏览器地址访问就可以看做GET操作,所以不用写任何代码
可以得到所有posts 数据(对象数组)
过滤获取 Filter
根据id获取数据http://localhost:3004/posts/2
可以指定id为1的获取指令还可以用如下指令,注意,此时返回的数据是一个数组。http://localhost:3004/posts?id=2
指定多个条件,用&符号连接:http://localhost:3004/posts?title=json-server2&author=typicode2
指定过滤字段,使用.号可以查询更深层次属性http://localhost:3004/posts?author.name=jack
分页操作
分页采用 _page 来设置页码, _limit 来控制每页显示条数。如果没有指定 _limit ,默认每页显示10条。
排序 Sort
_sort 表示排序字段,_order 表示具体的排序方式,默认是升序:asc降序为:desc。
多字段组合排序
切片
切片与字符串数组切片类似,可以返回指定范围长度的数据内容,起始下标为0
- _start指定纪录起始点,包含起点
- _end指定终点,不包含终点
- _limit指定返回的数量
添加数据
使用POST请求可以增加数据,例如我们在Postman中进行如下配置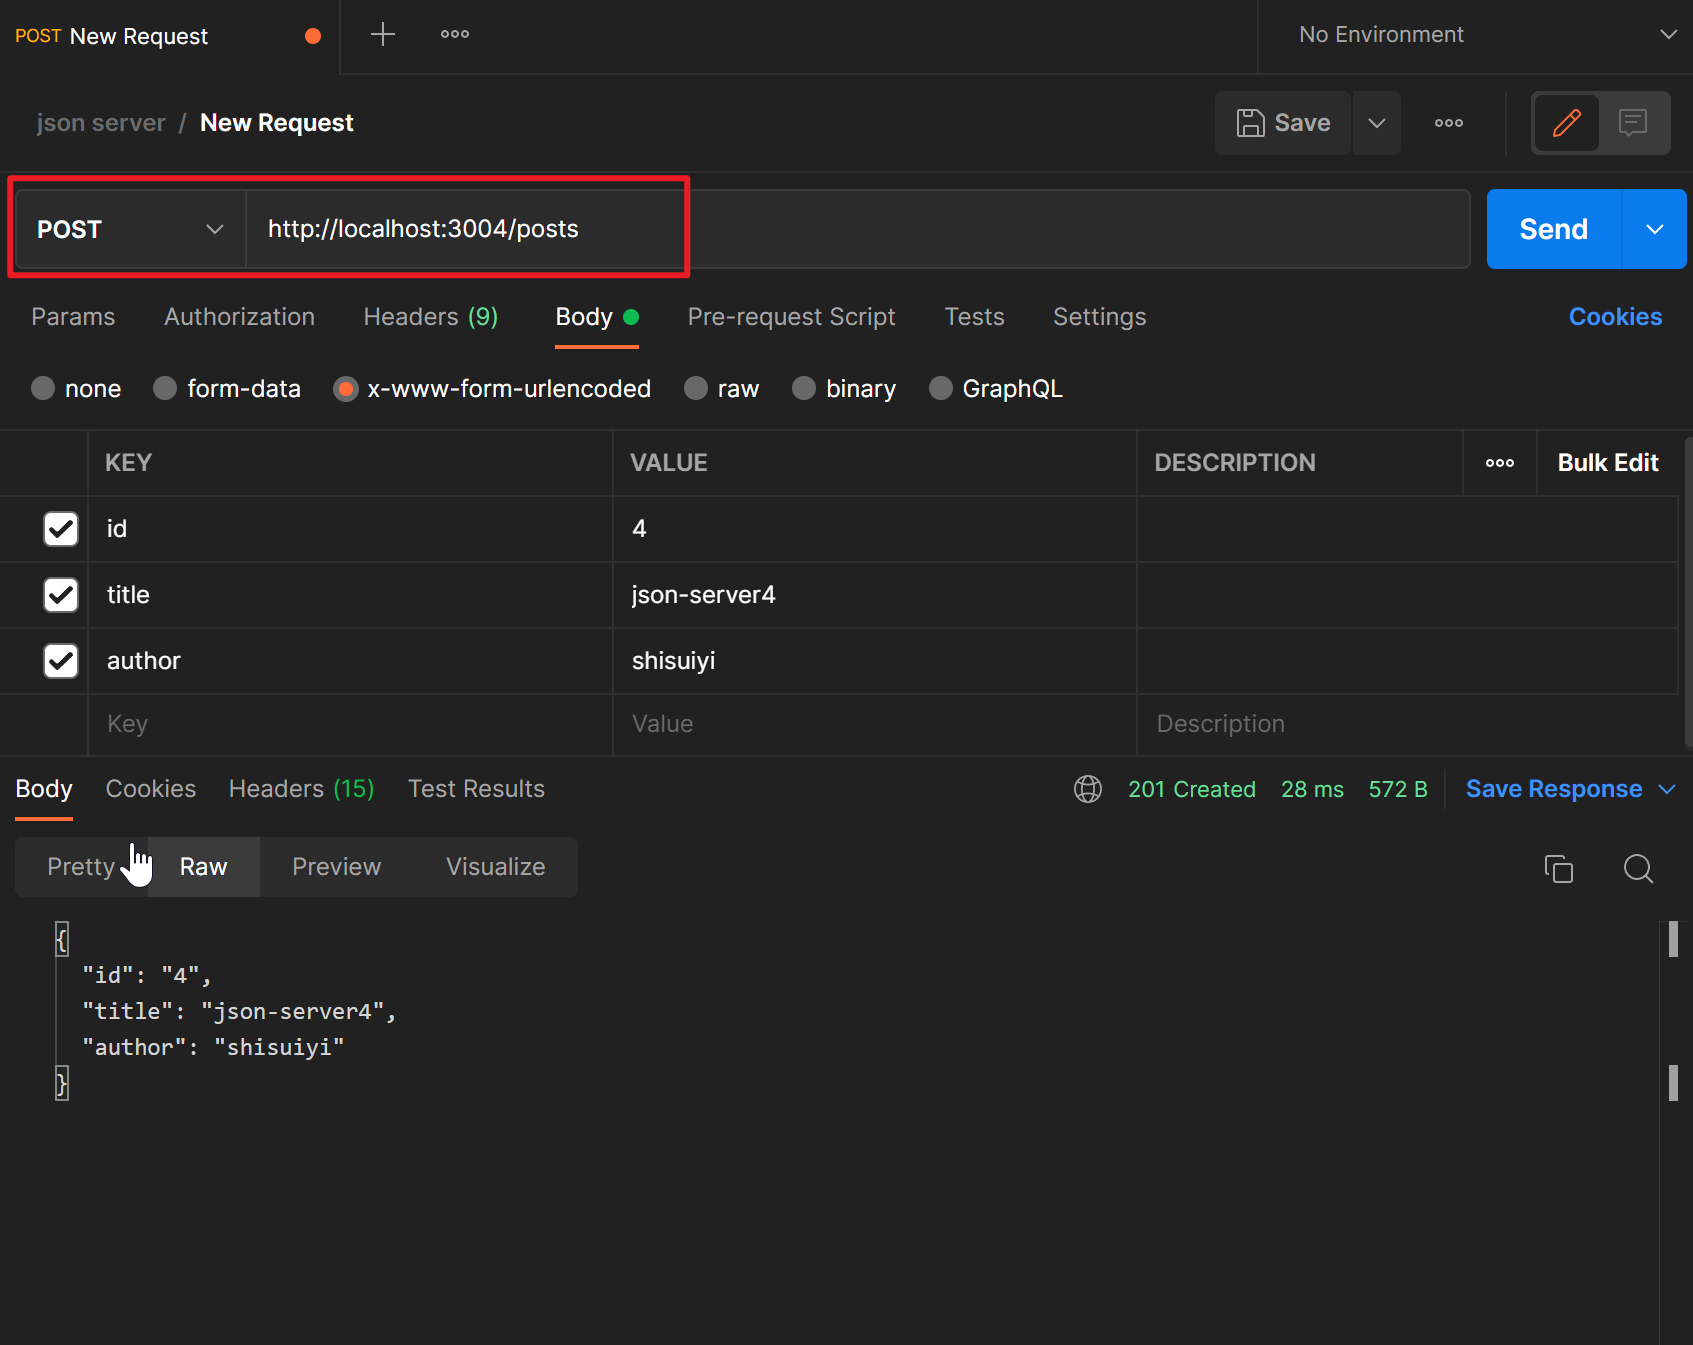
查看一下
或者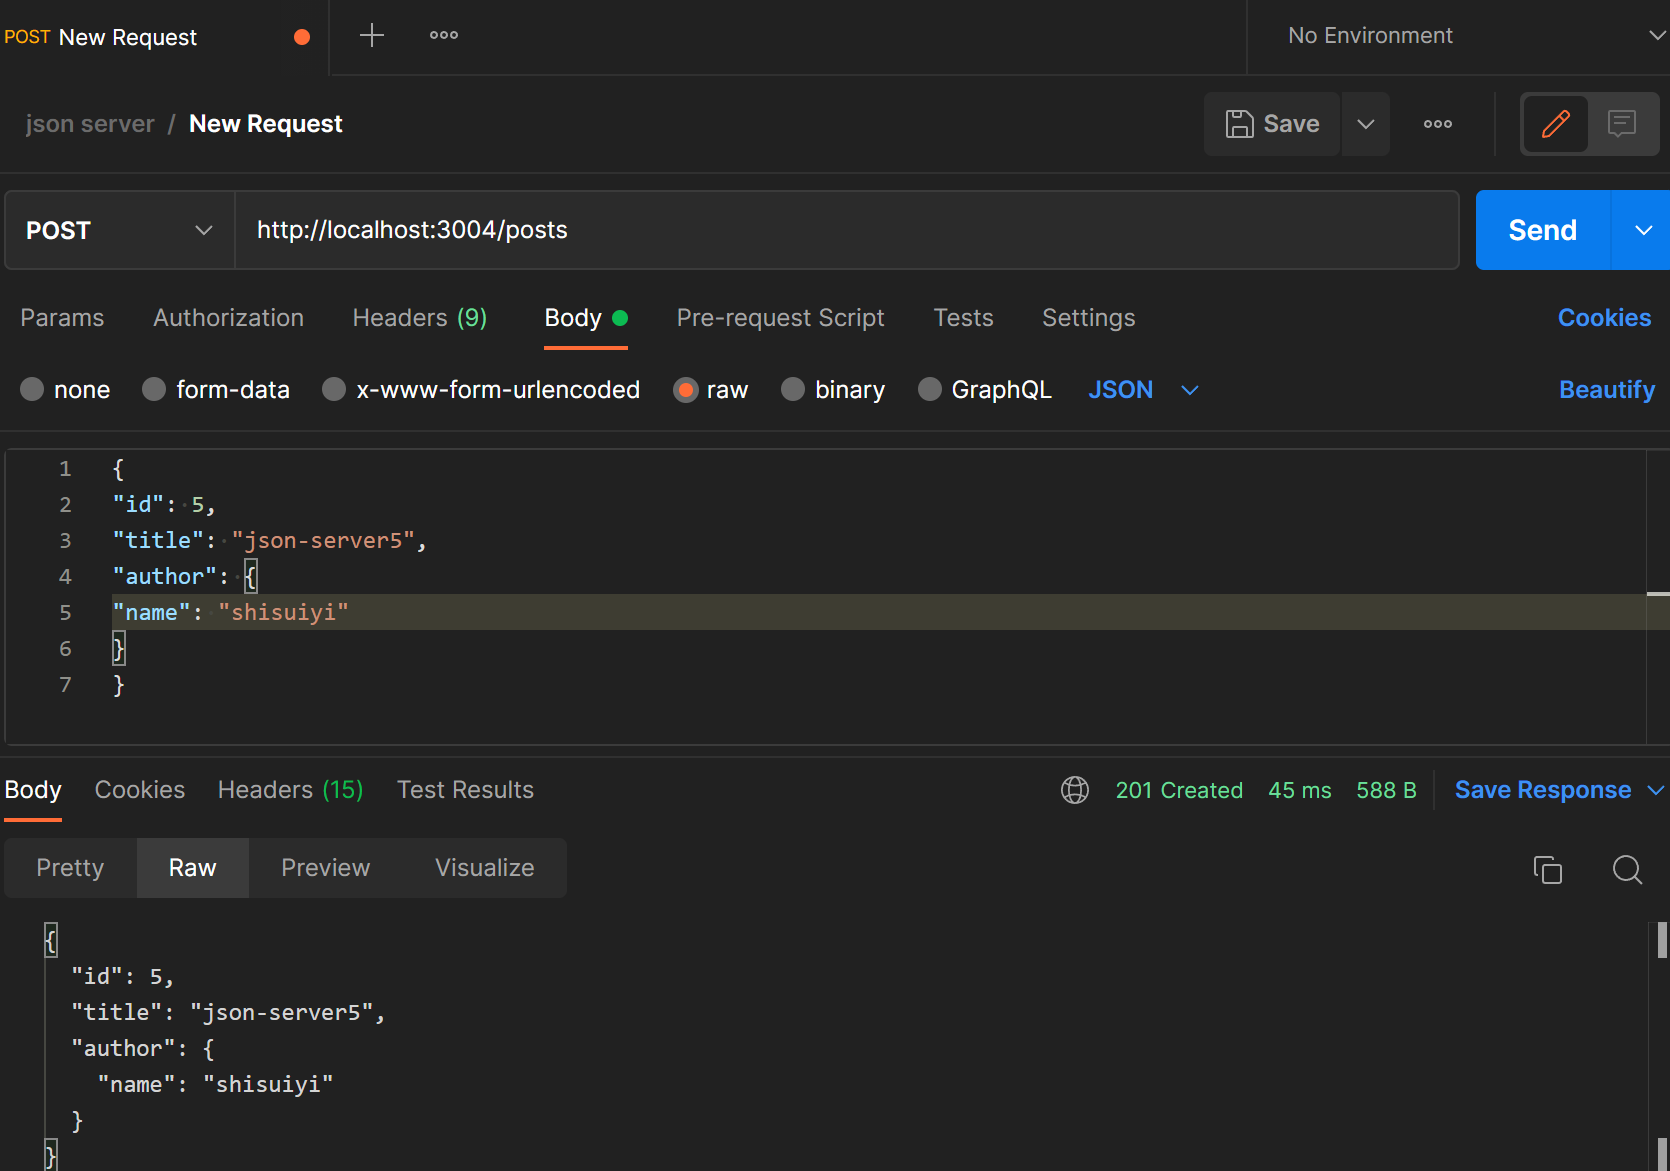
修改数据
使用PATCH或者PUT可以对数据更新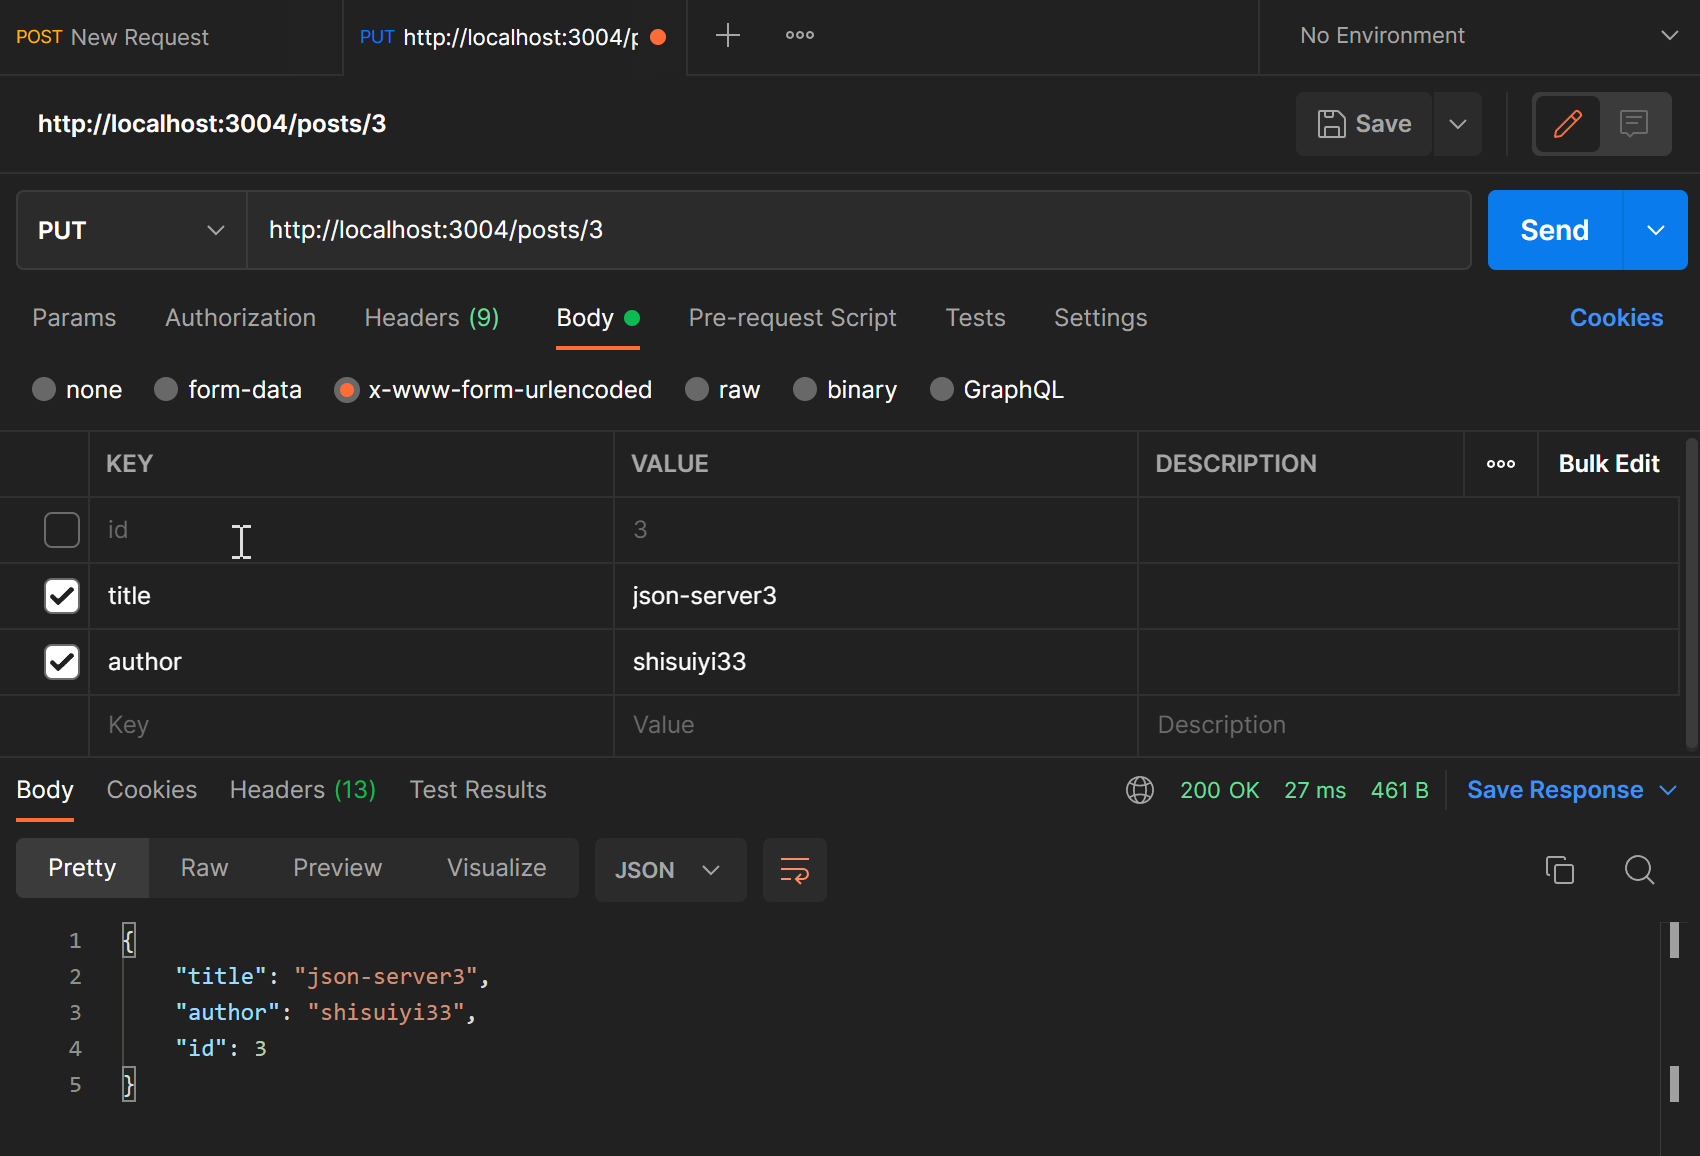
查看一下http://localhost:3004/posts/3
删除
使用DELETE可以删除数据,例如 请求 http://localhost:3004/posts/3 ,则会删除id=3的数据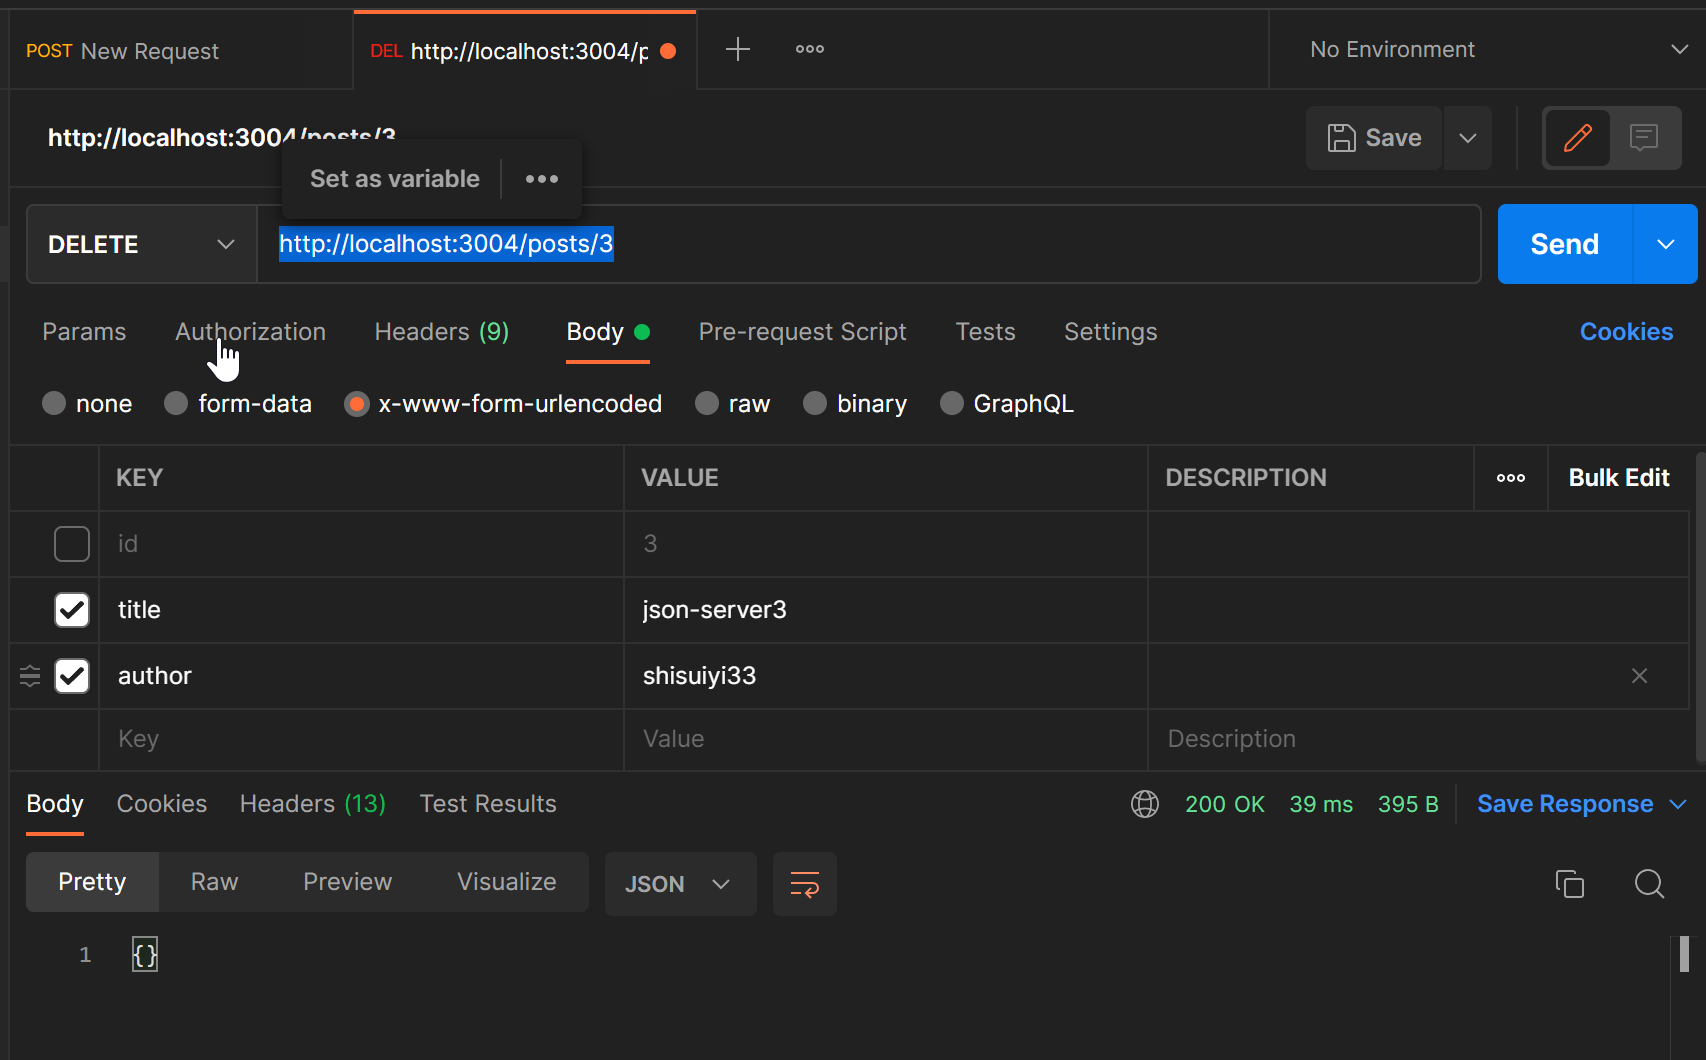
全局搜索
采用 q 来设置搜索内容: http://localhost:3004/posts?q=2
查看db
工具二:Flask
安装第三方模块
通过pip install flask安装(flask是一个轻量级的web开发框架)
验证
在命令行里输入 flask --version查看Flask是否安装成功
flask模块的使用
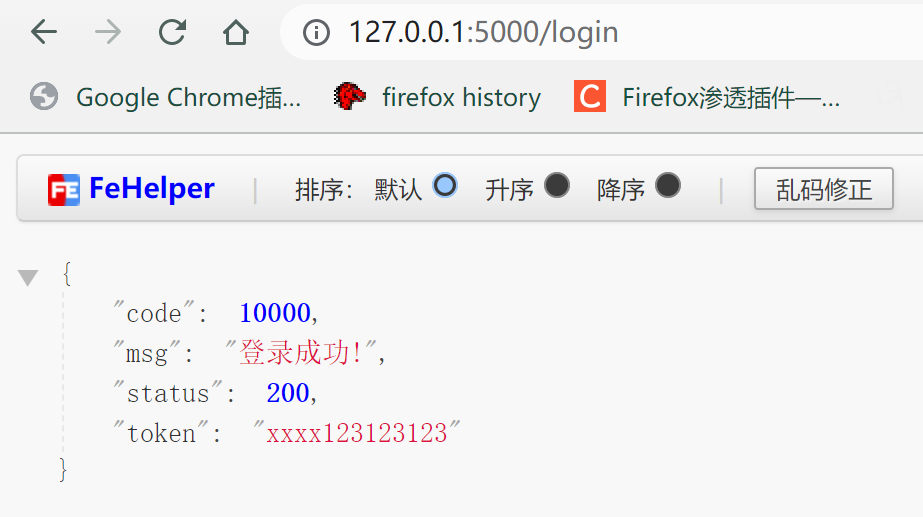
简单的示例
运行后访问 http://127.0.0.1:5000/login
关于flask的详细用法以后再补充
工具三:pook的使用
仓库地址
用于 HTTP 流量模拟和期望的多功能、富有表现力和可破解的实用程序库,在Python中变得容易。深受gock的启发。
基本模拟:示例
使用装饰器:示例
简单unittest集成:示例
简单pytest集成:示例
将上下文管理器用于隔离的 HTTP 流量拦截块:示例
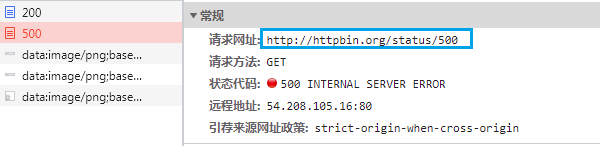
首先试一下直接访问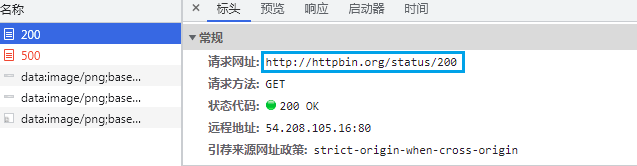
本文来自博客园,作者:测试玩家勇哥,转载请注明原文链接:https://www.cnblogs.com/Nephalem-262667641/p/17326289.html


【推荐】国内首个AI IDE,深度理解中文开发场景,立即下载体验Trae
【推荐】编程新体验,更懂你的AI,立即体验豆包MarsCode编程助手
【推荐】抖音旗下AI助手豆包,你的智能百科全书,全免费不限次数
【推荐】轻量又高性能的 SSH 工具 IShell:AI 加持,快人一步