1-Redis5 - 安装
版本选择
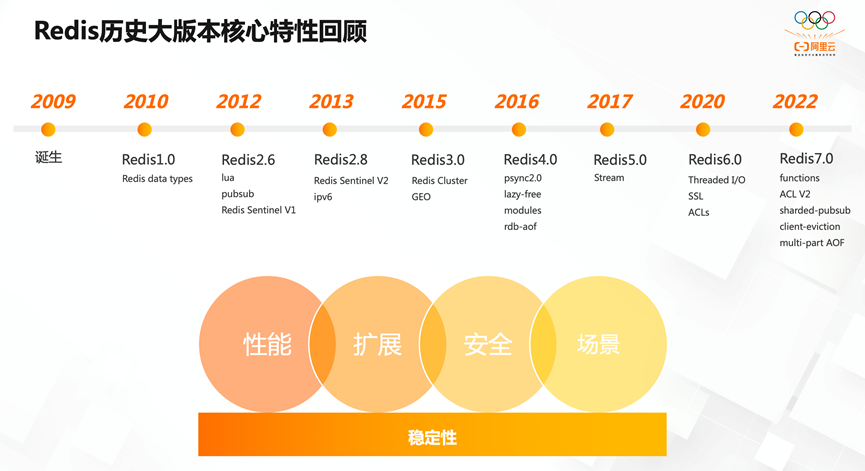
2.x		非常老
3.x		主流,开始支持redis-cluster
4.x		过渡版本,支持混合持久化
5.x		稳定版,增加了流处理类型
6.x
7.x
Redis5.0.7 for centos7.9
redis所有版本都可以从这里找到:https://download.redis.io/releases/
下载安装
1. 关闭防火墙和下载依赖
# 查看防火墙状态
systemctl status firewalld.service
# 关闭防火墙
systemctl stop firewalld.service
# 禁止开机启动防火墙
systemctl disable firewalld.service
# 启动防火墙
systemctl start firewalld.service
# 防火墙随系统开启启动
systemctl enable firewalld.service
# 关闭selinux,提高了系统的安全性,但关闭它可以释放系统资源,提高服务器的性能,避免一些程序的兼容性问题等等
[root@r ~]# sed -i.ori 's#SELINUX=enforcing#SELINUX=disabled#g' /etc/selinux/config

systemctl stop firewalld.service
systemctl disable firewalld.service
systemctl status firewalld.service
sed -i.ori 's#SELINUX=enforcing#SELINUX=disabled#g' /etc/selinux/config
yum update -y
yum -y install gcc automake autoconf libtool make
yum -y install net-tools
yum -y install vim
yum -y install wget
2. 提前规划目录
/data/redis6379/					# 数据存放目录
/opt/redis-5.0.7/					# 安装目录
/opt/								# 下载并解压目录
/opt/redis6379/{conf,logs,pid}   	# 配置目录,日志目录,pid目录
3. 下载安装
所有版本下载链接:https://download.redis.io/releases/
mkdir -p /data/redis6379
cd /opt
# yum -y install wget
wget https://download.redis.io/releases/redis-5.0.7.tar.gz
tar -zxf redis-5.0.7.tar.gz
cd /opt/redis-5.0.7
make && make install
关于编译安装的命令:
# 有一份二进制的软件包,想要安装,一般有以下几个步骤
./configure ....	# 洗菜和切菜,指定安装目录和配置等
make			    # 炒菜,编译安装软件
make install		# 装盘,根据./configure的配置进行实际安装到指定位置
安装完成后,Redis可执行程序会自动添加到/usr/local/bin路径,我们就可以在任何地方的terminal中使用Redis相关命令了。
[root@cs opt]# ll /usr/local/bin/redis*
-rwxr-xr-x. 1 root root 4365728 Aug  1 10:58 /usr/local/bin/redis-benchmark
-rwxr-xr-x. 1 root root 8124120 Aug  1 10:58 /usr/local/bin/redis-check-aof
-rwxr-xr-x. 1 root root 8124120 Aug  1 10:58 /usr/local/bin/redis-check-rdb
-rwxr-xr-x. 1 root root 4806800 Aug  1 10:58 /usr/local/bin/redis-cli
lrwxrwxrwx. 1 root root      12 Aug  1 10:58 /usr/local/bin/redis-sentinel -> redis-server
-rwxr-xr-x. 1 root root 8124120 Aug  1 10:58 /usr/local/bin/redis-server
到这一步,我们就可以在任意路径下,调用redis的相关命令了,如:
[root@cs opt]# redis-server -v
Redis server v=5.0.7 sha=00000000:0 malloc=jemalloc-5.1.0 bits=64 build=a67ef2d8861912e7
4. 编写配置文件
无密码配置:
mkdir -p /opt/redis6379/{conf,logs,pid}
cat >/opt/redis6379/conf/redis6379.conf<<EOF
daemonize yes
# 注意,生产中, 千万不要bind 0.0.0.0,不要将Redis暴露到外网环境,防止被人攻击
bind 127.0.0.1 $(ifconfig ens33|awk 'NR==2{print $2}')
port 6379
pidfile /opt/redis6379/pid/redis6379.pid
logfile /opt/redis6379/logs/redis6379.log
EOF
5. 启动命令
redis-server /opt/redis6379/conf/redis6379.conf

ps -ef|grep redis
6. 客户端连接
无密码的,客户端直接连接就可以操作,并且支持远程连接:
[root@cs opt]# redis-cli
127.0.0.1:6379> ping
PONG
127.0.0.1:6379> quit
[root@cs opt]#
7. 关闭命令
# 结合启动命令测试关闭命令
redis-server /opt/redis6379/conf/redis6379.conf
ps -ef|grep redis

# 方式1
[root@cs opt]# redis-cli
127.0.0.1:6379> SHUTDOWN
not connected> quit
[root@cs opt]#


# 方式2
[root@cs opt]# redis-cli shutdown
[root@cs opt]#

# 方式3
[root@cs opt]# pkill -9 redis
[root@cs opt]#
8. 可选的配置,配置systemd管理Redis
# 先把之前可能运行的Redis停止
# 创建redis用户和组,以及给相关目录权限
# 创建systemctl管理redis的文件
# 就可以通过systemctl管理redis了

redis-cli shutdown

# -u和-g选项表示同时添加具有特定UID和GID的用户
# -M创建一个没有主目录的用户
# -s表示当前创建的当前用户无法用来登录系统
# chown -R redis:redis表示指定目录以及内部的文件所有用户属组归于redis:redis
# groupdel redis
# cat /etc/group |grep redis
groupadd redis -g 1000
# userdel redis
# cat /etc/passwd |grep redis
useradd redis -u 1000 -g 1000 -M -s /sbin/nologin
chown -R redis:redis /opt/redis*
chown -R redis:redis /data/redis*

cat >/usr/lib/systemd/system/redis.service<<EOF
[Unit]
Description=Redis persistent key-value database
After=network.target
After=network-online.target
Wants=network-online.target
[Service]
ExecStart=/usr/local/bin/redis-server /opt/redis6379/conf/redis6379.conf --supervised systemd
ExecStop=/usr/local/bin/redis-cli shutdown
Type=notify
User=redis
Group=redis
RuntimeDirectory=redis
RuntimeDirectoryMode=0755
[Install]
WantedBy=multi-user.target
EOF

systemctl daemon-reload   # 当添加或者修改了某个服务的配置文件,就要执行daemon-reload命令重新加载下
systemctl start redis


# 启动/停止/重启/查看状态/设置redis开机自启
systemctl start/stop/restart/status/enable redis
到此,安装成功了。
优化警告
如果你查看redis的日志,你会发现启动,日志中会出现一些警告,我们可以针对性的优化这些警告。
cat /opt/redis6379/logs/redis6379.log
警告1:maximum open files过低
就是客户端连接数有点小了,改大点就行了
63918:M 01 Aug 2023 11:28:59.700 # You requested maxclients of 10000 requiring at least 10032 max file descriptors.
63918:M 01 Aug 2023 11:28:59.700 # Server can't set maximum open files to 10032 because of OS error: Operation not permitted.
63918:M 01 Aug 2023 11:28:59.700 # Current maximum open files is 4096. maxclients has been reduced to 4064 to compensate for low ulimit. If you need higher maxclients increase 'ulimit -n'.
解决,systemd启动文件添加参数LimitNOFILE:
cat >/usr/lib/systemd/system/redis.service<<EOF
[Unit]
Description=Redis persistent key-value database
After=network.target
After=network-online.target
Wants=network-online.target
[Service]
ExecStart=/usr/local/bin/redis-server /opt/redis6379/conf/redis6379.conf --supervised systemd
ExecStop=/usr/local/bin/redis-cli shutdown
Type=notify
User=redis
Group=redis
RuntimeDirectory=redis
RuntimeDirectoryMode=0755
LimitNOFILE=65536
[Install]
WantedBy=multi-user.target
EOF
警告2:overcommit_memory设置
虚拟内存相关,overcommit_memory 表内存分配策略,可选值:0、1、2
0,表示内核将检查是否有足够的可用内存供应用进程使用;如果有足够的可用内存,内存申请允许;否则,内存申请失败,并把错误返回给应用进程。
1, 表示内核允许分配所有的物理内存,而不管当前的内存状态如何。
2, 表示内核允许分配超过所有物理内存和交换空间总和的内存
63918:M 01 Aug 2023 11:28:59.701 # WARNING overcommit_memory is set to 0! Background save may fail under low memory condition. To fix this issue add 'vm.overcommit_memory = 1' to /etc/sysctl.conf and then reboot or run the command 'sysctl vm.overcommit_memory=1' for this to take effect.,
解决:
# 临时解决
sysctl vm.overcommit_memory=1

# 永久解决 vim /etc/sysctl.conf  追加:
vm.overcommit_memory=1

# 生效配置
sysctl -p
警告3:关闭THP⼤内存⻚
redis建议我们关掉THP,还给出的具体的操作办法,注意必须使用root来操作,否则会失败。
Linux kernel在 2.6.38 的版本中新增了THP的特性,支持大内存页(2MB)分配,默认开启。- 当开启
THP时会降低fork子进程的速度,但是fork操作之后,每个内存页从原来 4KB 变为 2MB,会大幅增加重写期间父进程内存消耗。 - 同时每次写命令引起的复制内存也单位放大了 512 倍,会拖慢写操作的时间,导致大量写操作慢查询,例如:简单的 incr、set 命令也会出现在慢查询中。
63918:M 01 Aug 2023 11:28:59.701 # WARNING you have Transparent Huge Pages (THP) support enabled in your kernel. This will create latency and memory usage issues with Redis. To fix this issue run the command 'echo never > /sys/kernel/mm/transparent_hugepage/enabled' as root, and add it to your /etc/rc.local in order to retain the setting after a reboot. Redis must be restarted after THP is disabled.
解决,必须以root用户执行下面的命令:
# 临时解决
echo never > /sys/kernel/mm/transparent_hugepage/enabled


# 永久解决 vim /etc/rc.local  追加:

echo never > /sys/kernel/mm/transparent_hugepage/enabled
警告4:TCP连接数调整
意思是配置 /proc/sys/net/core/somaxconn的值是128,但redis.conf中配置的是511,但是linux内核会以无提示的方式将其截断为128。在一个高并发的环境下,128是远远不够的,所以我们要改大一些。
63918:M 01 Aug 2023 11:28:59.701 # WARNING: The TCP backlog setting of 511 cannot be enforced because /proc/sys/net/core/somaxconn is set to the lower value of 128.
解决:
# 永久解决 vim /etc/sysctl.conf  追加:
net.core.somaxconn= 4096

# 生效配置
sysctl -p
然后在重启下redis,并观察日志:
# 先清空原有的日志内容
# 然后重启redis
# 观察日志输出
echo "">/opt/redis6379/logs/redis6379.log
cat /opt/redis6379/logs/redis6379.log
systemctl daemon-reload
systemctl stop redis
systemctl status redis
systemctl start redis
systemctl status redis
cat /opt/redis6379/logs/redis6379.log

# 这输出就很干净了啊
[root@cs opt]# cat /opt/redis6379/logs/redis6379.log

79069:C 01 Aug 2023 12:05:05.217 # oO0OoO0OoO0Oo Redis is starting oO0OoO0OoO0Oo
79069:C 01 Aug 2023 12:05:05.217 # Redis version=5.0.7, bits=64, commit=00000000, modified=0, pid=79069, just started
79069:C 01 Aug 2023 12:05:05.217 # Configuration loaded
79069:C 01 Aug 2023 12:05:05.217 * supervised by systemd, will signal readiness
79069:M 01 Aug 2023 12:05:05.218 * Running mode=standalone, port=6379.
79069:M 01 Aug 2023 12:05:05.218 # Server initialized
79069:M 01 Aug 2023 12:05:05.219 * Ready to accept connections
最终这些调整完,最好重启下服务器。然后再启动下redis就好了。
关于密码
如果需要密码,用下面的配置:
mkdir -p /opt/redis6379/{conf,logs,pid}
cat >/opt/redis6379/conf/redis6379.conf<<EOF
daemonize yes
# 注意,生产中, 千万不要bind 0.0.0.0,不要将Redis暴露到外网环境,防止被人攻击,这里为了演示方便才这么做的
bind 0.0.0.0
# requirepass 后面跟空格,空格后面是你要设置的密码
requirepass 1234
port 6379
pidfile /opt/redis6379/pid/redis6379.pid
logfile /opt/redis6379/logs/redis6379.log
EOF
systemctl restart redis
更改了配置文件,别忘了重启Redis。
有密码的,这么连接:
[root@cs opt]# redis-cli    				# 这里默认连接的是6379端口的Redis服务
127.0.0.1:6379> ping
(error) NOAUTH Authentication required.		# 由于我设置了密码,所以,这里提示需要认证,如果你没有设置密码,这里应该返回PONG
来说下认证的两种方式。下面是访问的同时携带密码,连接认证一起做了。
# -a 后面跟你的密码
# -p 后面是6379端口,其实这个-p参数可以不带,不带默认就是访问的6379端口的Redis

[root@cs opt]# redis-cli -a 1234 -p 6379
127.0.0.1:6379> ping
PONG
127.0.0.1:6379>
另一种方式就是,先连接上,然后再认证:
[root@cs opt]# redis-cli						# 连接肯定是没问题,但由于设置了密码,你未通过认证之前,你啥也做不了
127.0.0.1:6379> ping
(error) NOAUTH Authentication required.
127.0.0.1:6379> auth 1234					# 认证,auth命令后面跟你的密码
OK
127.0.0.1:6379> ping						# 认证通过,你想干啥干啥
PONG
127.0.0.1:6379> quit						# 常见的退出客户端命令有: quit/exit/ctrl+c   注意,退出客户端只是表示关闭客户端和服务端的连接,而不是停止服务端,这点要区分开
[root@cs opt]#

 浙公网安备 33010602011771号