ubuntu 管理 python 版本
2024-04-21 https://www.cnblogs.com/NJ-Leon/
项目开发过程中,需要在 python2 和 python3 版本之间进行切换,我们使用 virtualenvwrapper 进行管理。
一、解决 python2.7 安装过程中依赖问题
WSL2 + Ubuntu22.04 LTS,默认已经安装 python3.8
1. 安装 aptitude
sudo apt-get install aptitude
2. 使用 aptitude 安装 python2.7
sudo aptitude install python2.7
Accept this solution? [Y/n/q/?] n
与 apt-get 不同的是,aptitude 在处理依赖问题上更佳一些。
aptitude 在删除一个包时,会同时删除本身所依赖的包。这样,系统中不会残留无用的包,整个系统更为干净。
二、使用 virtualenvwrapper 进行版本管理
1. 安装
sudo apt-get install virtualenvwrapper
2. 初始化环境
source /usr/share/virtualenvwrapper/virtualenvwrapper.sh
3. 设置自动执行
echo "source /usr/share/virtualenvwrapper/virtualenvwrapper.sh" >> ~/.bashrc
4. 添加 python2 和 python3 环境
mkvirtualenv -p /usr/bin/python2 py2
mkvirtualenv -p /usr/bin/python3 py3
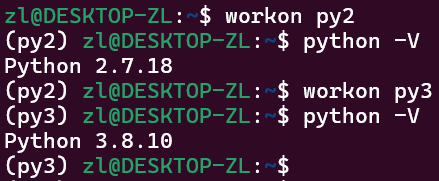
5. 根据需要进行切换
workon py2
workon py3
6. 效果显示